
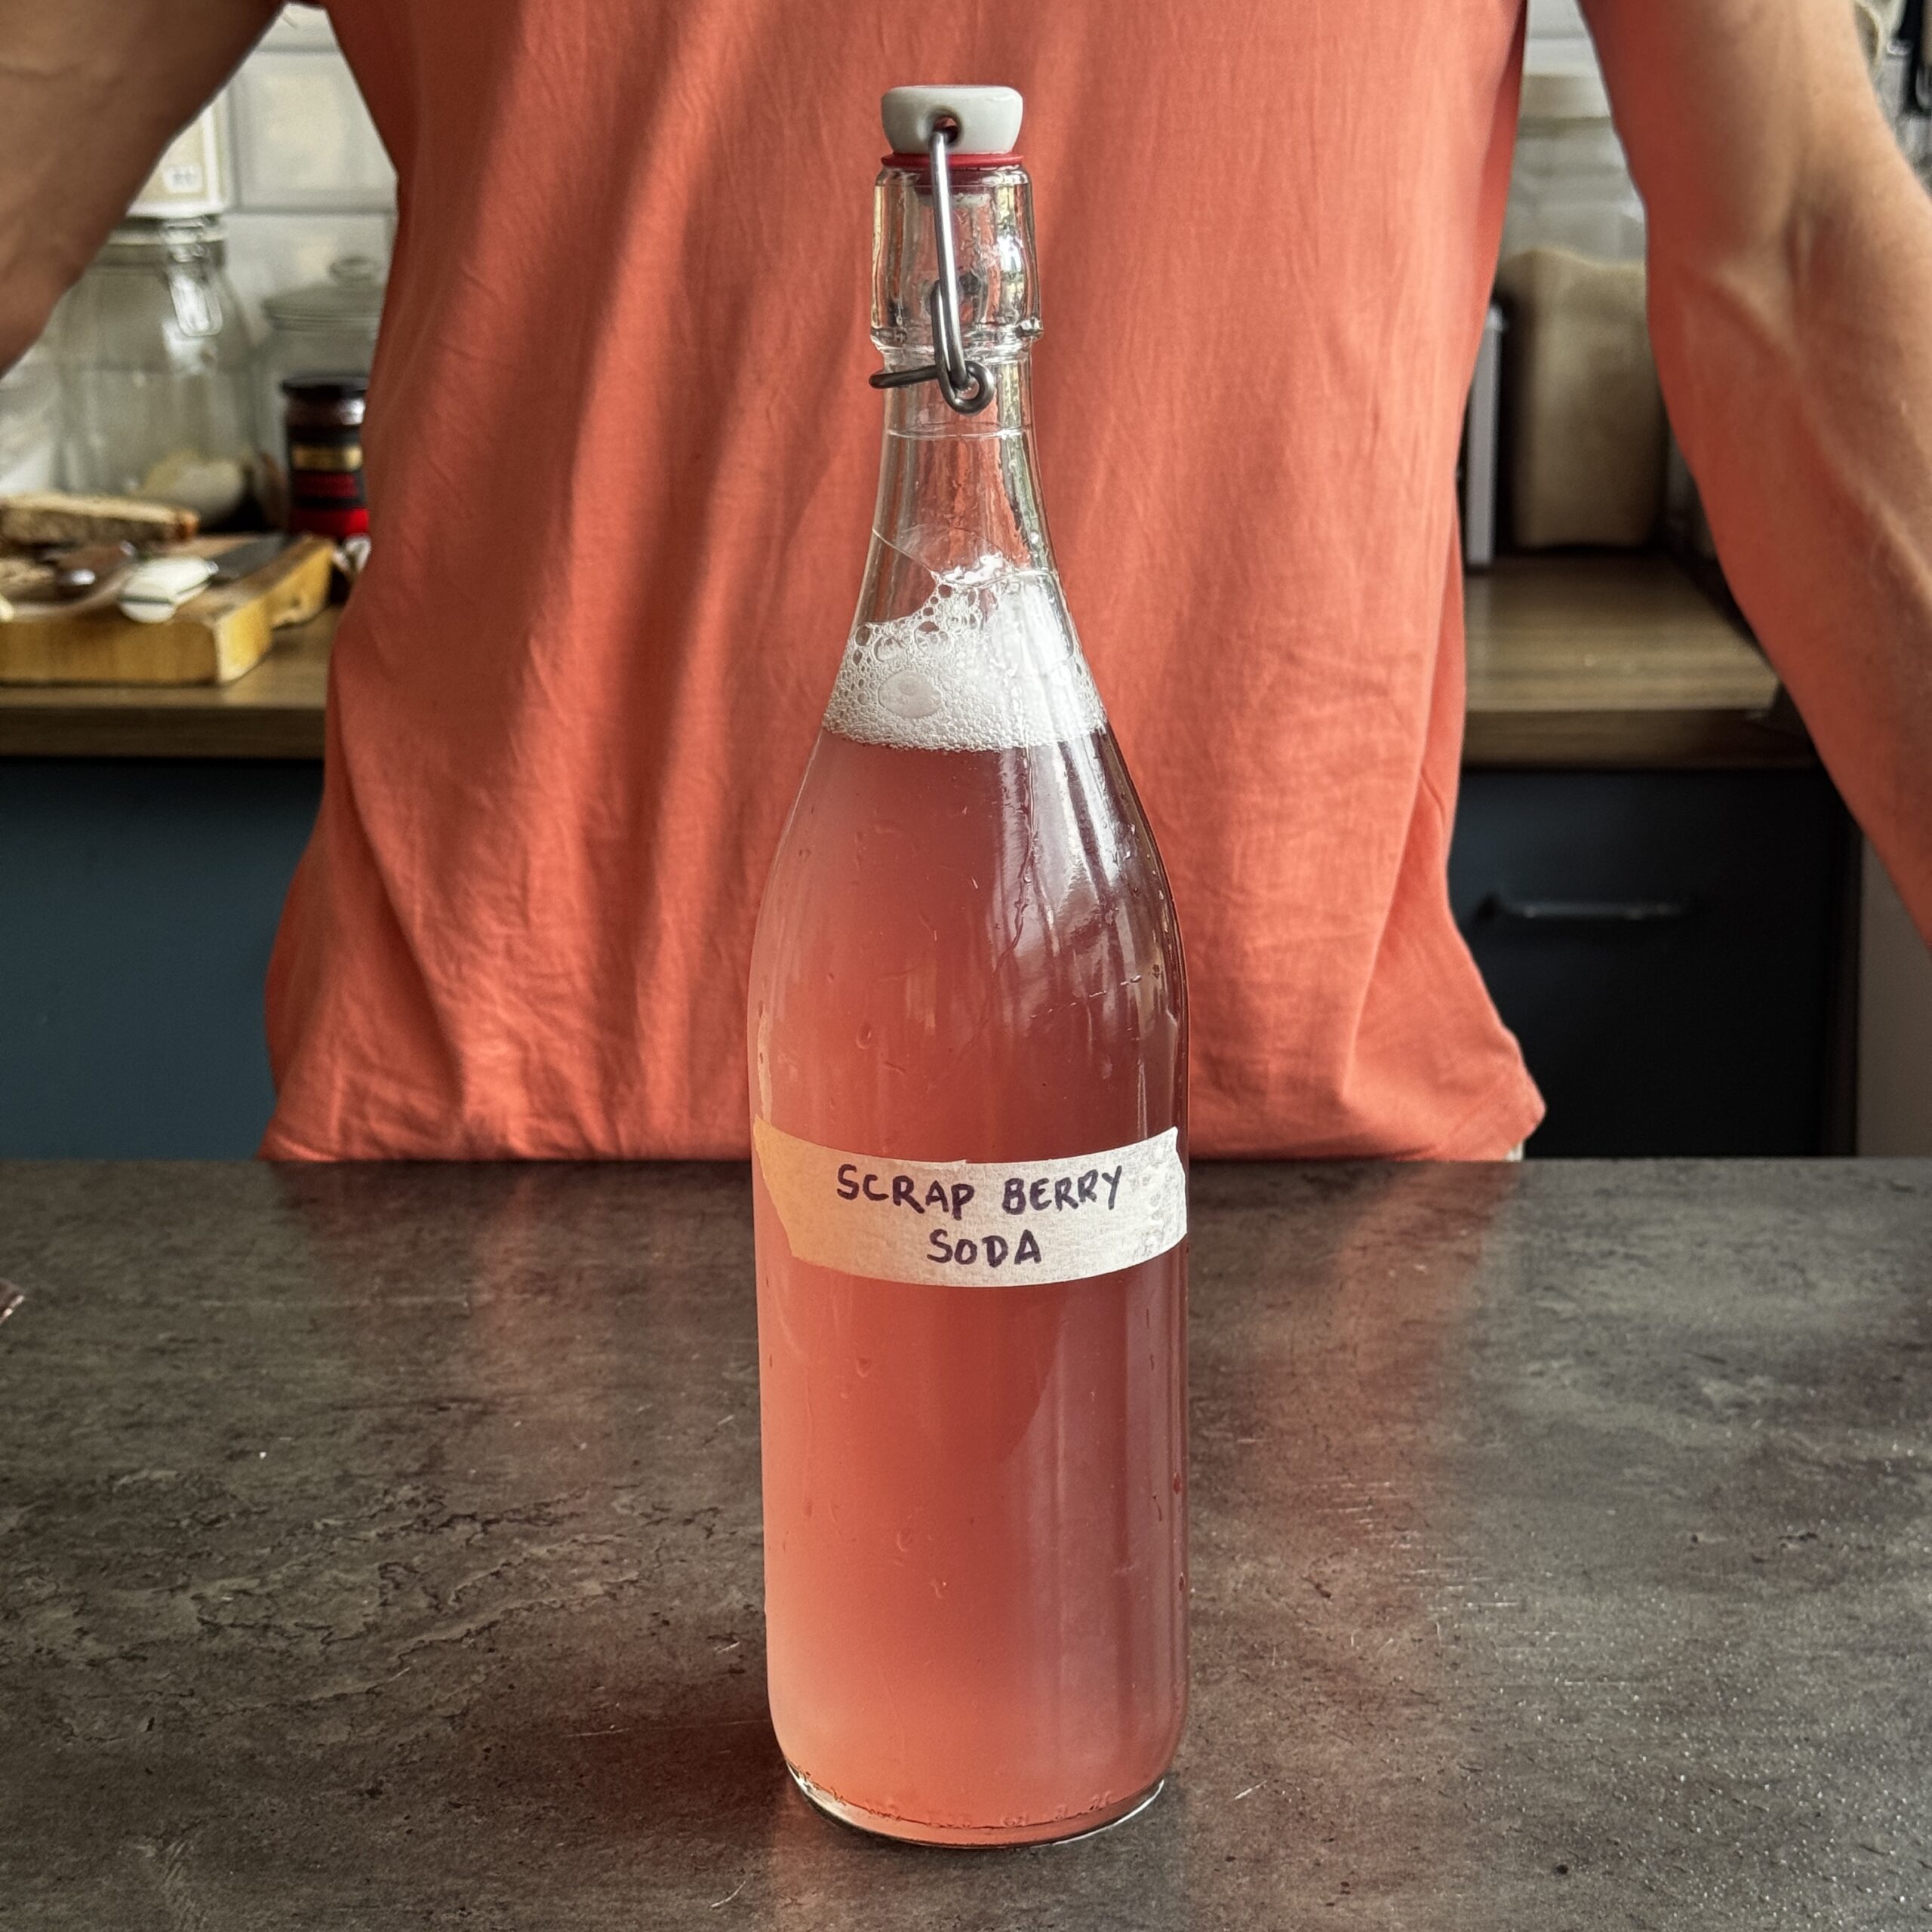
Scrap Berry Soda
Takes 7 days 10 minutes
Serves 6
Ingredients
- 1 punnet blueberries 125g
- Tops from 1x 250g punnet strawberries
- 1 handful redcurrants or berries of choice
- 100 g caster sugar
- 1 Ll water
Instructions
- Save your scraps: After eating your strawberries, keep the leafy tops and any little bits of strawberry flesh attached. Add them to a clean glass jar along with the blueberries and redcurrants.
- Add the sugar and pour over the water. Give everything a good stir to help dissolve the sugar.
- Cover the jar loosely with a clean cloth or lid that isn’t tightly sealed. Leave at room temperature for 2–4 days, stirring once or twice a day.
- You should start to see bubbles forming and the mixture should smell fruity and lightly fermented. The natural wild yeasts present on the organic fruit are what kick-start the fermentation.
- Strain the liquid through a fine sieve, removing all the fruit.
- Pour the fermented berry liquid into a clean, swing top bottle, leaving a little space at the top. Seal and leave at room temperature for another 1–3 days. This second fermentation allows the soda to become naturally fizzy. Make sure to burp each day, meaning just open the lid to release any excessive gas build up and close (this should take approx 1-2 seconds!).
- Once nicely carbonated, and you are happy with the taste, sorry in the fridge to slow the fermentation..
- Serve chilled and enjoy your fizzy, fruity prebiotic soda.
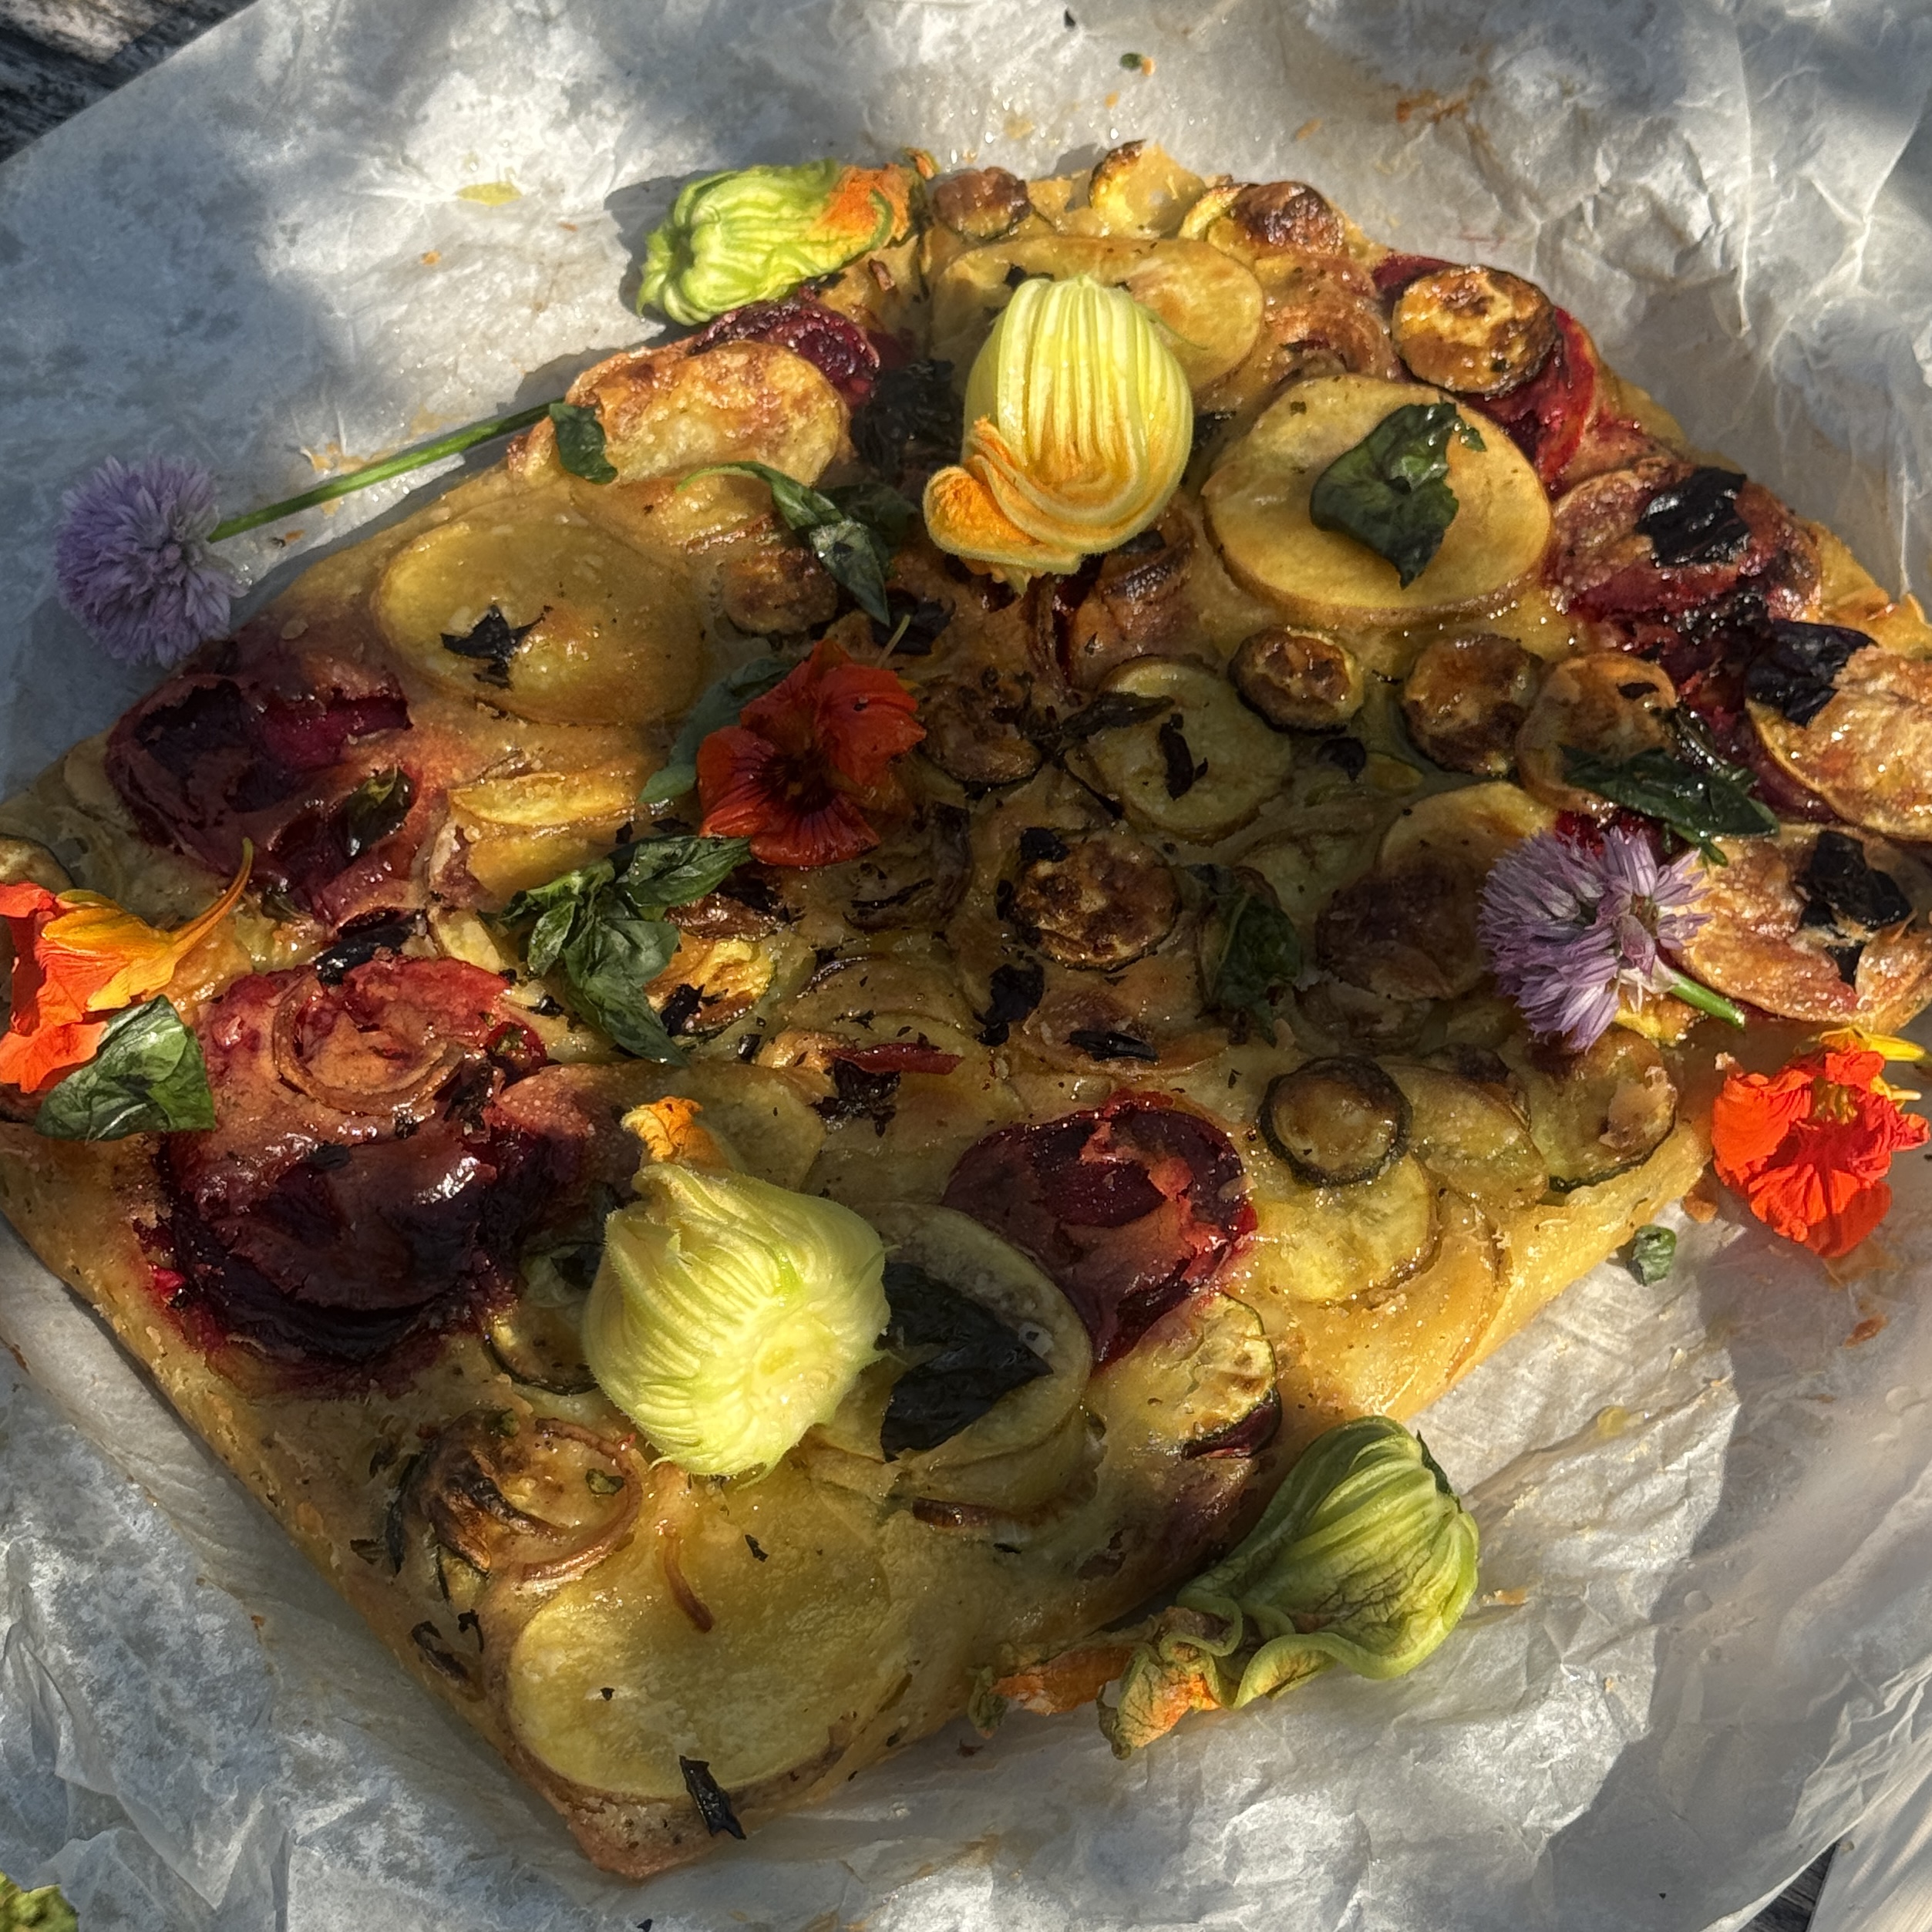
Scarpaccia with Courgettes, Potatoes & Beetroot
Takes 1 hour 10 minutes
Serves 6
Ingredients
For the batter:
- 150 g plain flour 5.3 oz
- 375 ml water 12.7 fl oz
- 3 tbsp olive oil 45ml / 1.5 fl oz
- 1 tsp salt 5g / 0.18 oz
- 1 tsp black pepper 5g / 0.18 oz
For the topping:
- 300 g courgettes zucchini, thinly sliced (10 oz) (approx 2 courgettes)
- 300 g potatoes thinly sliced (10 oz)
- 1 beetroot
- 1 small red onion thinly sliced
- 2 cloves garlic minced (10g / 0.35 oz)
- Handful of fresh basil
- 2 tbsp olive oil 30ml / 1 fl oz
- Salt and pepper to taste
Instructions
Prepare the batter:
- In a large mixing bowl, whisk together 150g (5.3 oz) of plain flour, 375ml (12.7 fl oz) of water, 3 tbsp (45ml) of olive oil, 1 tsp (5g) of salt, and 1 tsp (5g) of black pepper until smooth and lump-free. Let the batter rest while preparing the toppings.
Prepare the vegetables:
- Preheat the oven to 200°C (392°F). Line a baking sheet with parchment paper.
- Thinly slice 300g (10.5 oz) of courgettes (zucchini) and 300g (10.5 oz) of potatoes and 1 beetroot using a mandoline or sharp knife. Thinly slice 1 small red onion and mince 2 cloves of garlic. Add to a bowl along with 1 tbsp of oil and a generous pinch of salt and mix well.
Assemble the Scarpaccia:
- Spread the courgettes, potatoes, beetroot red onion, and minced garlic evenly over the prepared baking sheet. Rip up the fresh basil and sprinkle over the batter.
- Pour the batter evenly over the veg, ensuring everything is well coated.
- Drizzle 1 tbsp (15ml) of olive oil over the batter and season with salt and pepper to taste.
Bake the Scarpaccia:
- Bake in the preheated oven for 60 minutes, or until the edges are crispy and golden brown. The centre should be firm and cooked through. Bake for a little longer if it is still not firm enough in the centre.
- Allow the scarpaccia to cool for a few minutes before slicing and serving.
Serve:
- Serve warm or at room temperature, cut into squares or wedges. Enjoy this delicious and healthy scarpaccia as an appetiser, snack, or light meal.
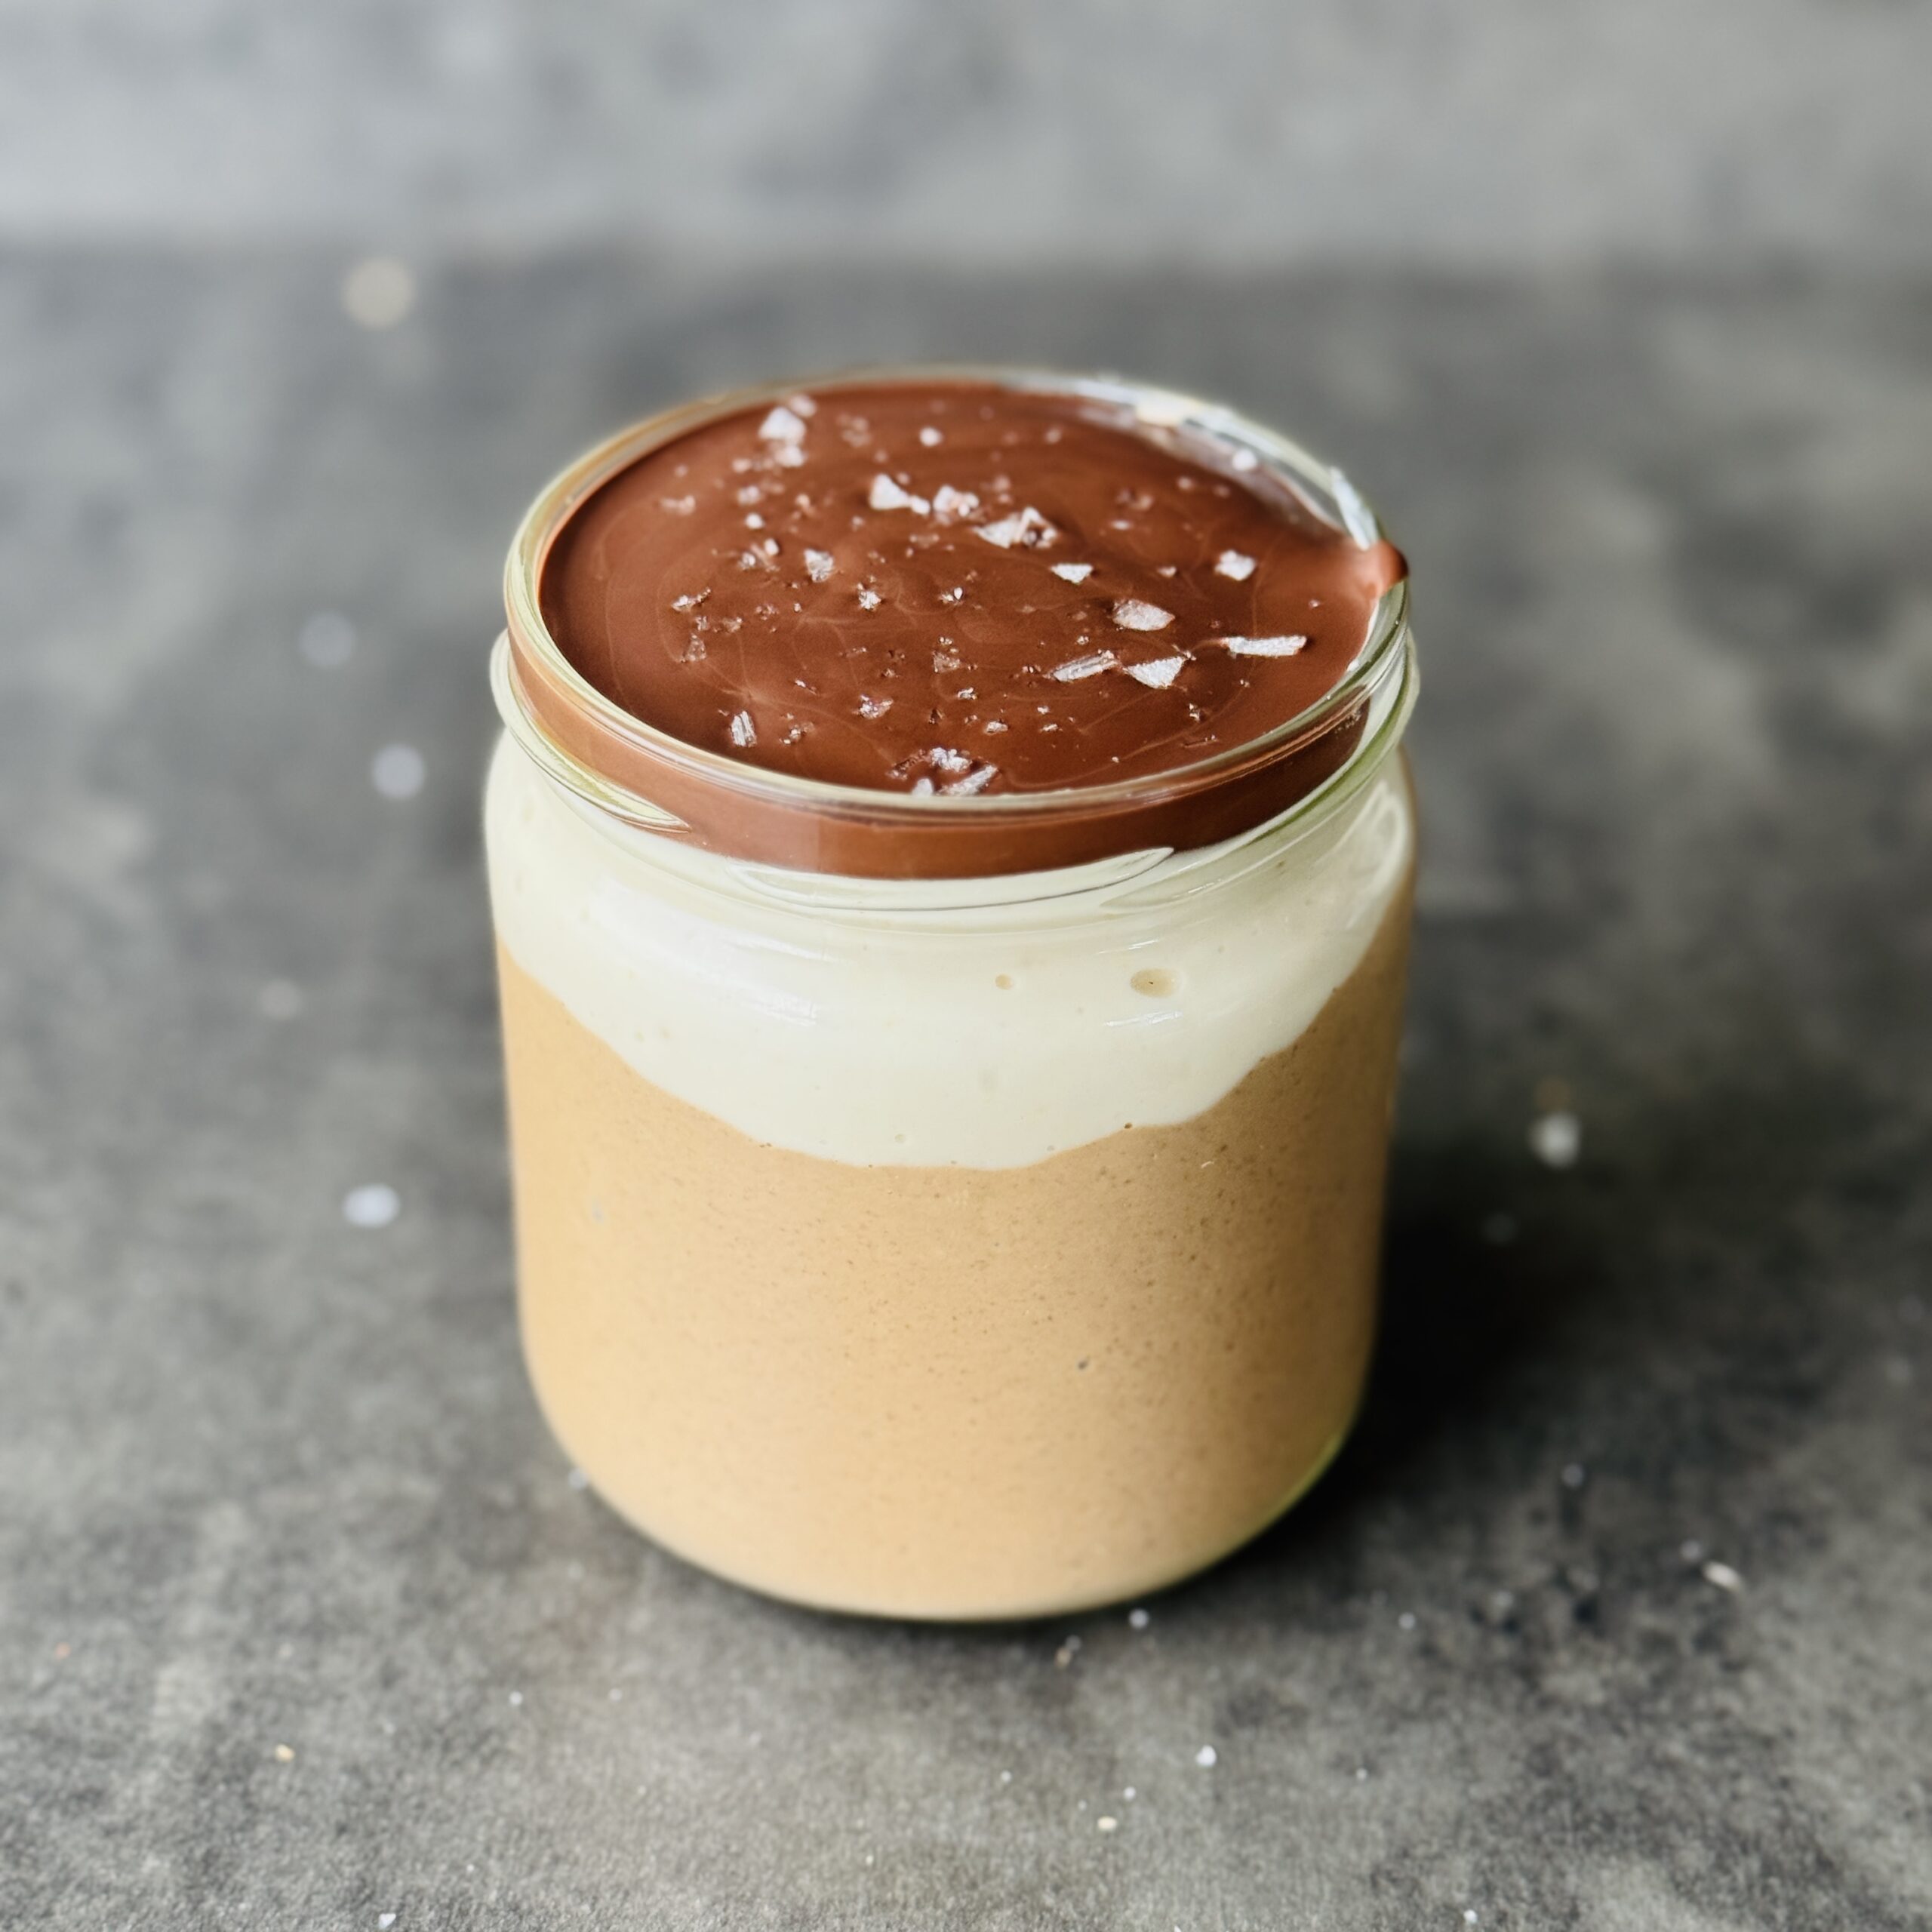
High-Protein Tiramisu Blended Oats
Takes 20 minutes
Serves 4
Ingredients
The Blended Oat & Coffee Base
- 150 g Rolled oats
- 50 g Defatted peanut flour
- 24 g 2 tbsp Chia seeds
- 1 tbsp Cocoa powder
- 200 ml Plant-based milk
- 225 ml Strong black coffee cooled
- 50 ml approx. 3–4 tbsp Maple syrup (to taste)
- 1 tsp Vanilla extract
- Pinch of salt
The High-Protein Cream Layer
- 350 g Plain coconut yogurt
- 40 g Vanilla pea protein powder or unflavored pea protein + an extra splash of maple syrup
- 1 –2 tbsp Plant milk only if needed to smooth out the protein powder
The Crisp Chocolate Shell
- 50 g Dark chocolate 70% or higher
- 1 tsp Coconut oil
Instructions
Blend the oat base
- Process the oats, peanut flour, chia seeds, cocoa, coffee, and milk until smooth. In a high-speed blender, combine the 150g oats, 50g peanut flour, 24g chia seeds, 1 tbsp cocoa powder, 250ml plant milk, 225ml cooled coffee, maple syrup, vanilla extract, and a pinch of salt. Blend on high for 45–60 seconds until completely smooth and pourable, then divide equally among 4 jars or glasses.
Fortify the coconut yogurt
- Whisk the pea protein powder directly into the coconut yogurt until velvety. In a medium bowl, combine the 400g coconut yogurt and 40g pea protein powder. Whisk vigorously until the protein powder is completely integrated and no dry lumps remain. If the mixture becomes too thick or chalky, whisk in 1–2 tablespoons of plant milk until it reaches a smooth, spreadable custard consistency.
Layer the cream
- Spoon the protein-packed vanilla yogurt over the mocha oat base. Gently divide the fortified coconut yogurt mixture among the 4 glasses, smoothing it out with the back of a spoon to create a flat, distinct white layer on top of the blended oats.
Melt the chocolate topping
- Melt the dark chocolate with coconut oil in short microwave bursts. Break the 50g dark chocolate into a small microwave-safe bowl and stir in 1 tsp of coconut oil. Microwave in 20-second intervals, stirring thoroughly between each burst, until the chocolate is completely melted, glossy, and liquid.
Seal and set
- Spread a thin layer of melted chocolate over each jar and chill until firm. Pour the melted chocolate evenly over the yogurt layer in each of the 4 glasses, tilting the jars to ensure the chocolate coats the surface completely to the edges. Place the jars in the fridge for 10 minutes to let the chocolate shell harden into a satisfying snap, or store them overnight for a quick morning breakfast.
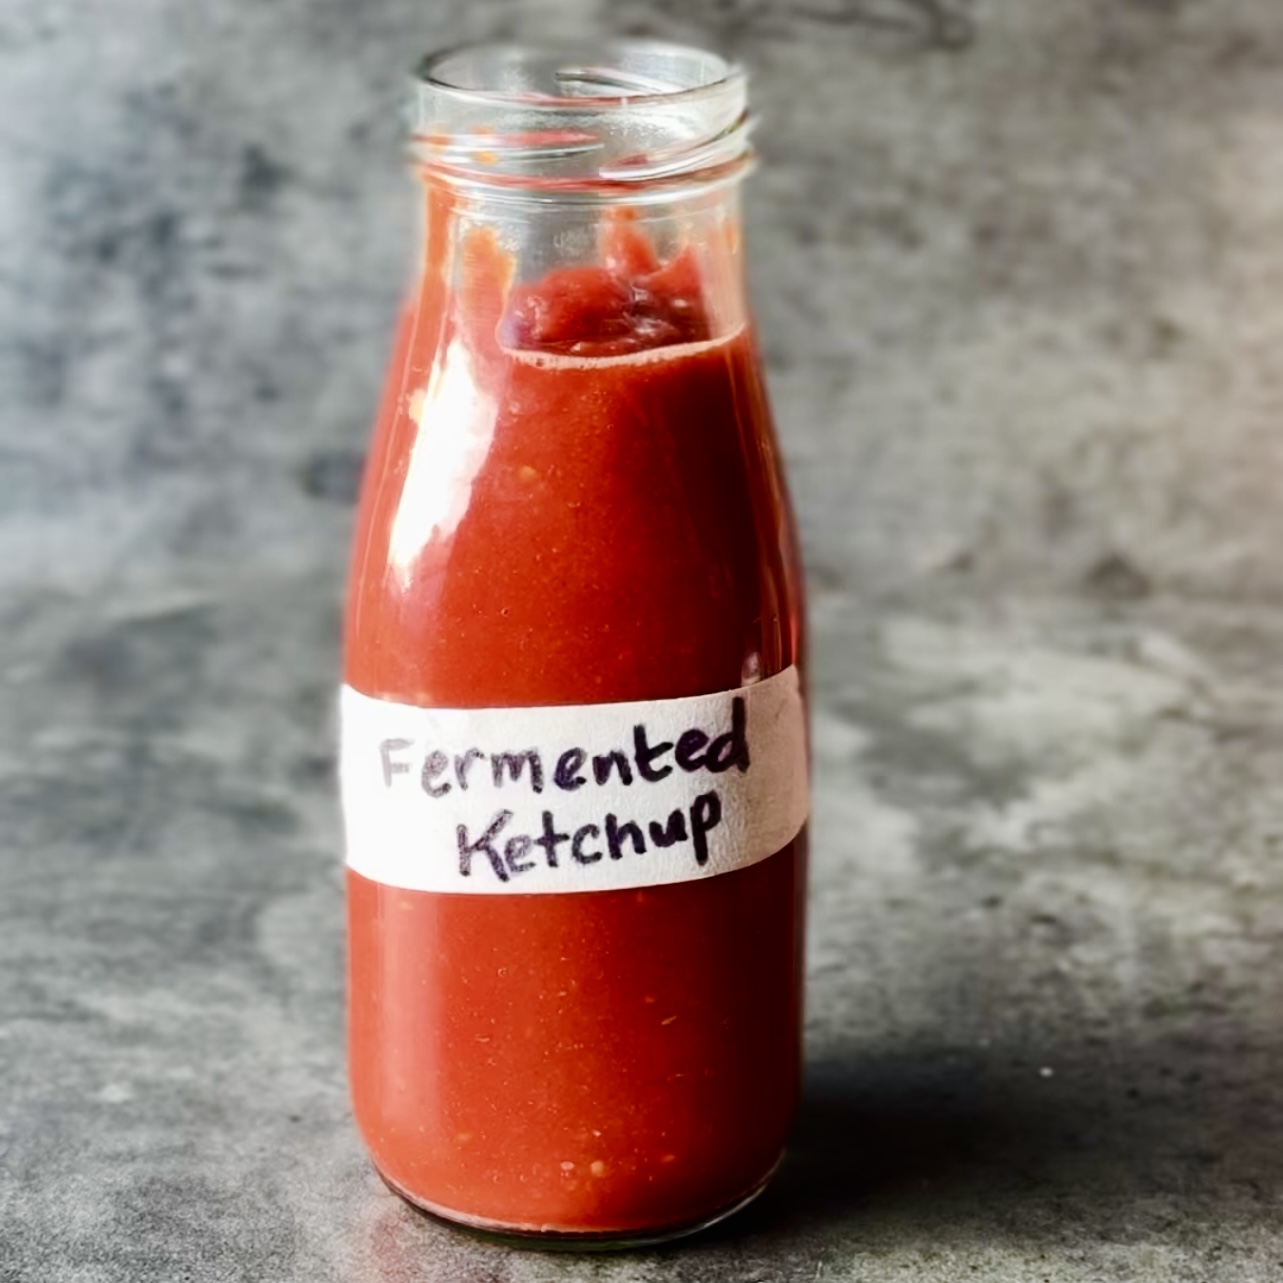
Fermented Tomato Ketchup
Takes 7 days 15 minutes
Serves 12
Ingredients
For fermentation:
- 500 g cherry tomatoes about 3 cups, ripe and organic
- 10 g sea salt or Himalayan salt 2 tsp, non-iodized
- 240 ml water 1 cup
- ½ red onion
- 2-3 garlic cloves
- 10 g fresh ginger 1 thumb sized piece
- 1 sprig fresh thyme optional, for aroma
- 1 green chilli
For ketchup blending:
- 30 –45 ml apple cider vinegar 2–3 tbsp, adjust for taste
- 45 ml maple syrup (1–2 tbsp, adjust sweetness)
- 2.5 tbsp tamari or soy sauce
- 1/2 tsp smoked paprika
- 130 ml tomato puree/ tomato concentrate 8 tbsp approx
Instructions
Prepare the vegan and fermentation jar:
- Cut the cherry tomatoes in half.
- Peel and finely dice the onion, garlic cloves, ginger and green chilli
- Place the tomatoes in a clean glass jar along with the onion, garlic, chilli and thyme,
Make the brine:
- Dissolve the sea salt in filtered water to create a simple brine.
- Pour the brine over the tomatoes and other veg, ensuring they are fully submerged. Use a fermentation weight or a small, clean jar lid to keep the tomatoes submerged under the water
Ferment the tomatoes:
- Cover the jar with a loose-fitting lid or a piece of cloth secured with a rubber band.
- Place the jar in a room at room temperature out of direct sunlight and leave to ferment for 5-7 days (20–25°C / 68–77°F).
- Check daily to ensure the tomatoes remain submerged, and burp the jar (if sealed) to release gas buildup. The tomatoes are ready when they taste tangy, slightly fizzy, and have developed a fermented aroma.
Blend into ketchup:
- Strain the fermented tomatoes, reserving some of the brine.
- Blend the tomatoes with apple cider vinegar, maple syrup, tomato concentrate, tamari/ soy sauce until smooth. Add reserved brine, a tablespoon at a time, to adjust the consistency.
Taste and adjust:
- Taste the ketchup and adjust the seasoning to your liking by adding more sweetener for balance or vinegar for extra tang.
Store and use:
- Transfer the ketchup to a clean jar or bottle. Store in the refrigerator, where it will keep for 4–6 weeks.
Tips
- For smoother ketchup, pass the blended mixture through a fine mesh sieve.
- If you like a spicier ketchup, add a pinch of chili flakes or a fermented chili pepper to the blend.
- Save leftover brine to start another batch of fermented vegetables or use as a savory probiotic shot.

Chocolate Yoghurt Berry Bites
Takes 19 minutes
Serves 8
Ingredients
- 8 ice cubes
- 150 g dark chocolate
- 120 g coconut yoghurt
- 100 g fresh berries such as raspberries, blueberries or strawberries
- Optional: a little maple syrup or vanilla to sweeten the yoghurt
Instructions
Melt the chocolate
- Break the dark chocolate into a bowl and gently melt over a bain-marie or in short bursts in the microwave, stirring until completely smooth.
Create the chocolate cubes
- Place the 8 ice cubes on a wire cooling rack with a baking sheet underneath to catch any excess chocolate. Pour the melted chocolate generously over each ice cube, making sure the chocolate coats the sides and forms a little cube-shaped shell.
Let them set
- Leave the chocolate-covered ice cubes for a few minutes until the chocolate has completely hardened. You can pop them into the fridge to speed this up.
Remove the ice cubes
- Once the chocolate is set, gently lift each chocolate shell from the ice cube. You should be left with little hollow chocolate cube shapes.
Fill them up
- Spoon coconut yoghurt into each chocolate shell and top with fresh berries.
Enjoy!
- Eat straight away while the chocolate is crisp and the yoghurt is creamy.

Crispy Chickpea Salad with Spicy Red Pepper Yoghurt Dressing
Takes
Serves 4
Ingredients
For the crispy chickpeas
- 2 x 400g tins chickpeas drained, rinsed and well dried
- 2 tbsp olive oil
- 1 tsp smoked paprika
- 1 tsp ground cumin
- ½ tsp garlic powder
- ½ tsp sea salt
- ¼ tsp black pepper
For the salad
- 100 g lettuce or baby leaves
- 1 tbsp olive oil
- Juice of ½ lemon
- 1 cucumber diced
- 250 g cherry tomatoes halved
- 30 g flat-leaf parsley roughly chopped
- 1/2 red onion
For the yoghurt dressing
- 200 g natural yoghurt or unsweetened plant-based yoghurt
- 1 tbsp lemon juice
- 1 tbsp extra virgin olive oil
- 1 small garlic clove finely grated
- ½ tsp sea salt
- Freshly ground black pepper
- To finish
- 4 tbsp spicy red pepper pesto
Instructions
- Preheat the oven to 200°C fan (220°C conventional). Pat the chickpeas as dry as possible with a clean tea towel. Toss with the olive oil, smoked paprika, cumin, garlic powder, salt and pepper. Spread onto a baking tray and roast for 25–30 minutes, shaking halfway through, until golden and crispy.
- While the chickpeas cook, place the kale in a large bowl with the olive oil and lemon juice. Massage for 1–2 minutes until softened and darker in colour.
- Add the cucumber, cherry tomatoes, parsley and olives to the kale and toss everything together.
- In a small bowl, whisk together the yoghurt, lemon juice, olive oil, grated garlic, salt and a few twists of black pepper until smooth.
- Spoon most of the yoghurt dressing through the salad and gently toss to coat.
- Transfer to a serving platter, scatter over the crispy chickpeas and finish with generous spoonfuls of spicy red pepper pesto swirled throughout. Serve straight away while the chickpeas are still crisp.
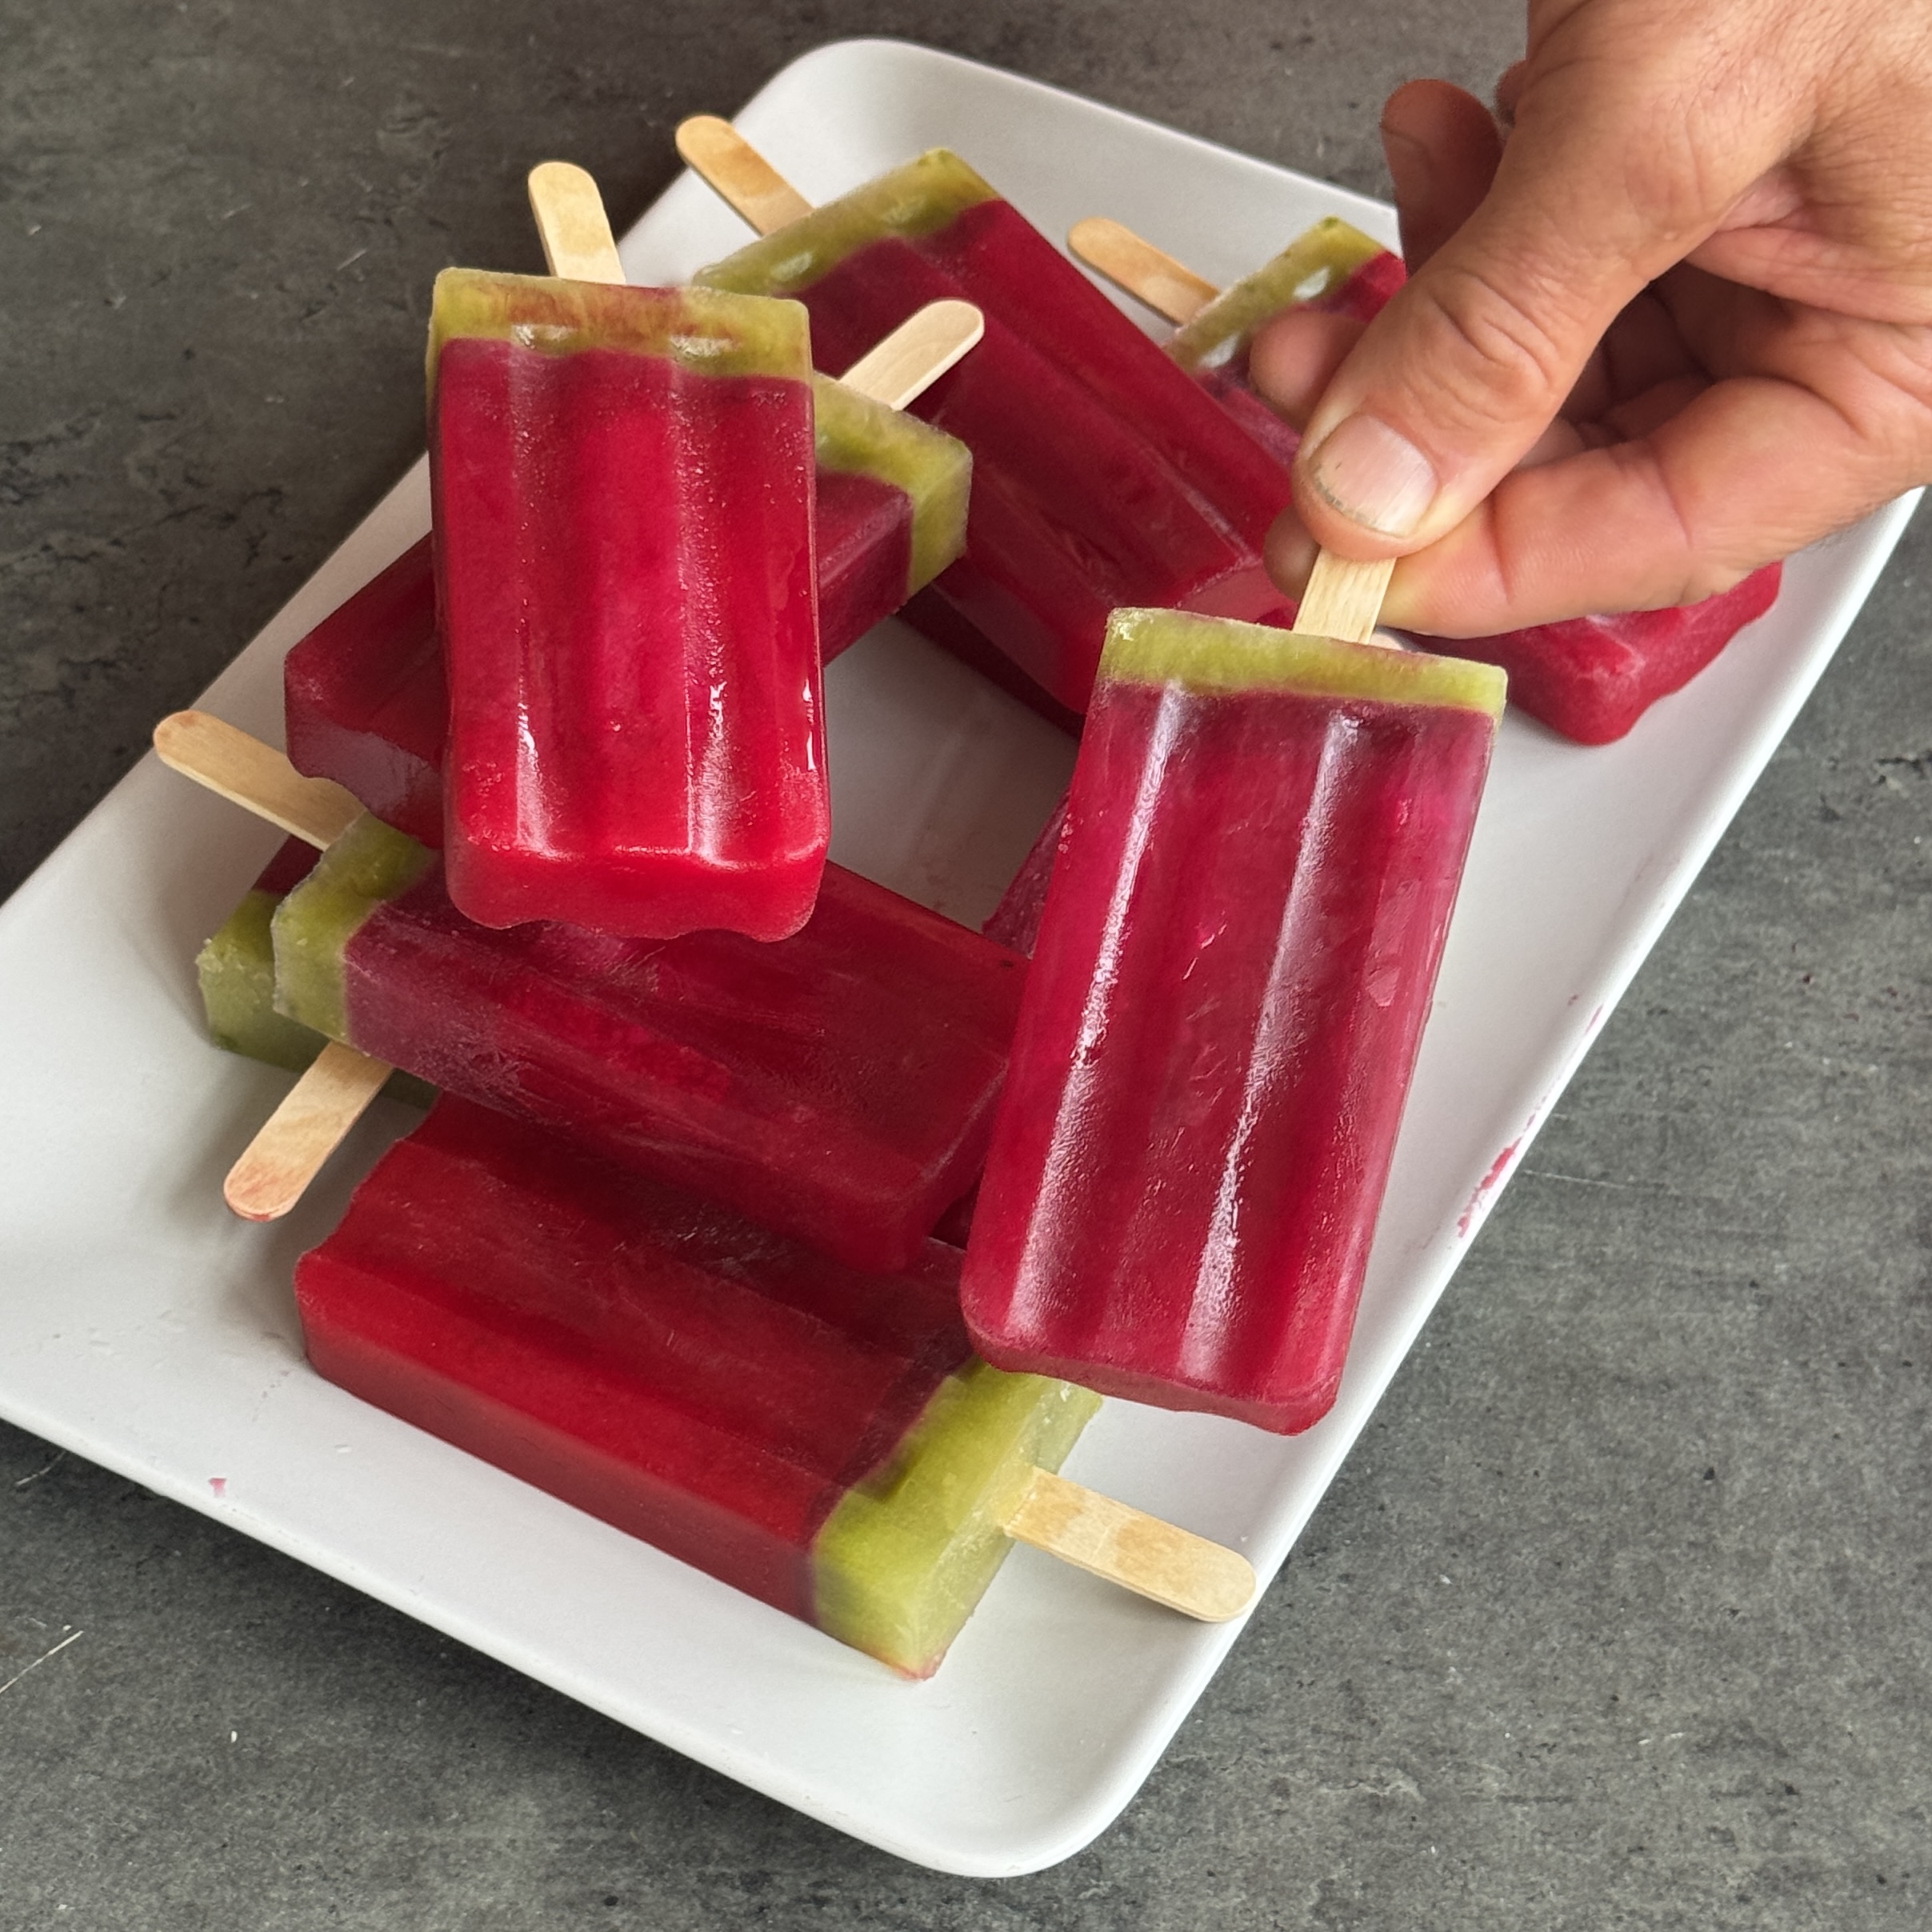
Watermelon Electrolyte Ice Pops
Takes 8 hours 15 minutes
Serves 8
Ingredients
For the watermelon layer
- 600 g watermelon cubed and seeds removed (about 4 cups)
- 250 ml 1 cup coconut water
- 100 g beetroot roughly chopped (about ¾ cup)
- Juice of 2 limes about 60ml / ¼ cup
- Zest of 1 lime optional
- Small pinch of sea salt optional, especially if enjoying after exercise
Optional green juice rind
- 1 cucumber about 200g
- 2 apple about 300g
- 1 handful fresh spinach or local greens about 30g
- ½ lime peeled
- Small piece of fresh ginger about 5g
Instructions
- Start by making the green juice. Add the cucumber, apple, spinach, lime and ginger to a juicer and juice until smooth. You only need about 100ml for the ice pops, so enjoy the rest as a fresh juice.
- Add the watermelon, coconut water, beetroot, lime juice, lime zest (if using) and sea salt to a high-speed blender. Blend until completely smooth.
- Taste and add a little more lime juice if you’d like a brighter flavour.
- Pour the watermelon mixture into ice pop moulds, leaving about 2–3cm at the top.
- Freeze for 1–2 hours, until the surface is firm enough to support the green juice layer.
- Pour a small amount of green juice into the top of each mould to create a thin green rind.
- Insert the sticks and freeze for at least 6–8 hours, or overnight.
- To release, run the moulds under warm water for a few seconds before gently pulling them out.
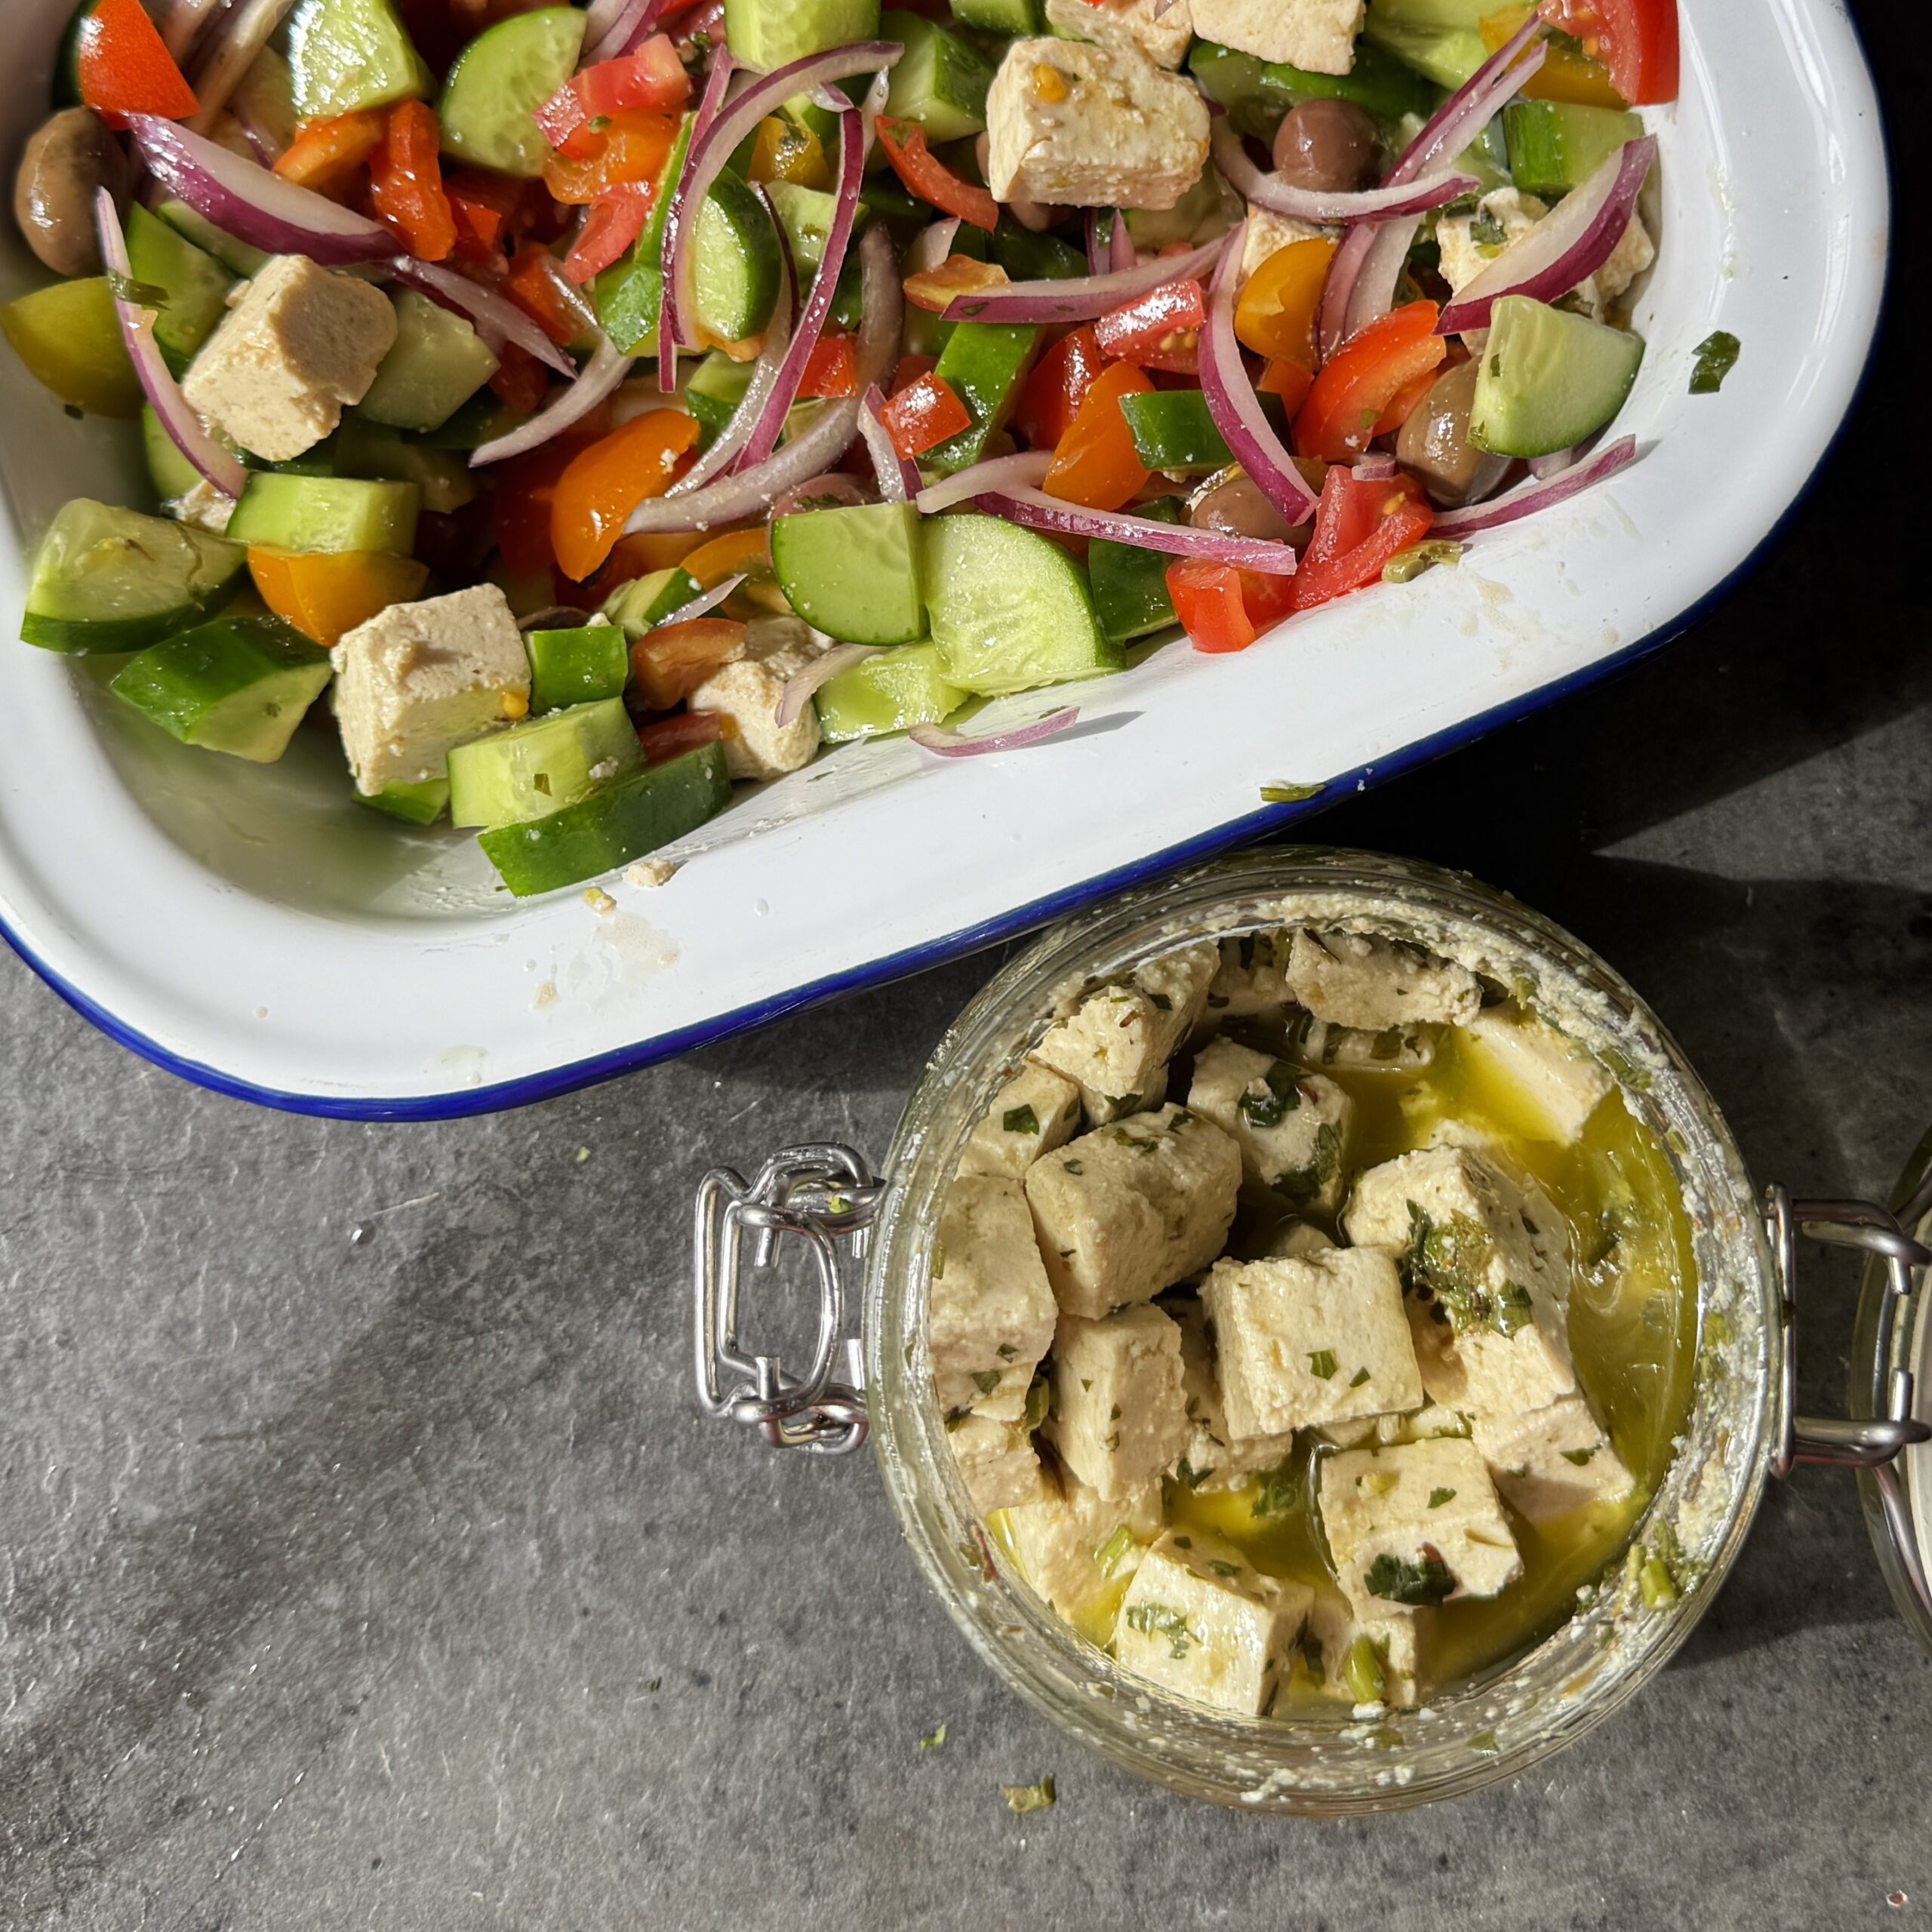
Marinated Tofu Feta
Takes 4 hours 10 minutes
Serves 4
Ingredients
- 200 g 1½ cups diced firm tofu, pressed
- Juice of 1 lemon 3 tbsp
- 30 ml 2 tbsp extra virgin olive oil
- 15 ml 1 tbsp apple cider vinegar or white wine vinegar
- 1 tsp dried oregano/ dried thyme
- ½ tsp garlic powder
- 10 g 2 tbsp nutritional yeast
- 1½ tsp sea salt
- 1 tsp fresh dill finely chopped
Instructions
- Drain the tofu and remove any moisture, slice into cubes that are approx 1cm thick
- In a jar or bowl, whisk together the lemon juice, olive oil, vinegar, oregano, garlic powder, nutritional yeast, salt and fresh dill until well combined.
- Add the tofu cubes and gently toss to coat every piece in the marinade.
- Cover and refrigerate for at least 3–4 hours, or ideally overnight. The longer it marinates, the more flavour it absorbs.
- Give the jar a gentle shake before serving.

Ned’s Healthier ‘Nutella’
Takes 20 minutes
Serves 12
Ingredients
- 200 g 1½ cups raw hazelnuts
- 100 g ⅔ cup dark chocolate (60–70% cocoa), roughly chopped
- 30 g 2 tbsp neutral oil, such as sunflower or rapeseed oil (or melted coconut oil)
- 5 g 1 tsp vanilla extract
- A generous pinch of fine sea salt
Instructions
- Preheat the oven to 180°C fan (200°C conventional). Spread the hazelnuts onto a baking tray and roast for 10 minutes until golden and fragrant.
- While they’re still warm, transfer the hazelnuts to a clean tea towel and rub them together to remove as much of the skins as possible. Don’t worry if a few stubborn bits remain.
- Add the warm hazelnuts and oil to a food processor. Blend for 5–7 minutes, scraping down the sides as needed, until the hazelnuts transform from crumbs to a thick paste and finally into a smooth, runny hazelnut butter.
- Add the vanilla and sea salt and blend to combine.
- Meanwhile, gently melt the dark chocolate in a heatproof bowl over a pan of barely simmering water, or in short bursts in the microwave, stirring until smooth.
- With the food processor running, slowly pour in the melted chocolate and blend for another minute until glossy, silky and completely smooth.
- Transfer to a clean jar and leave uncovered at room temperature for up to 24 hours to thicken and set. Once set, seal with a lid and store at room temperature.
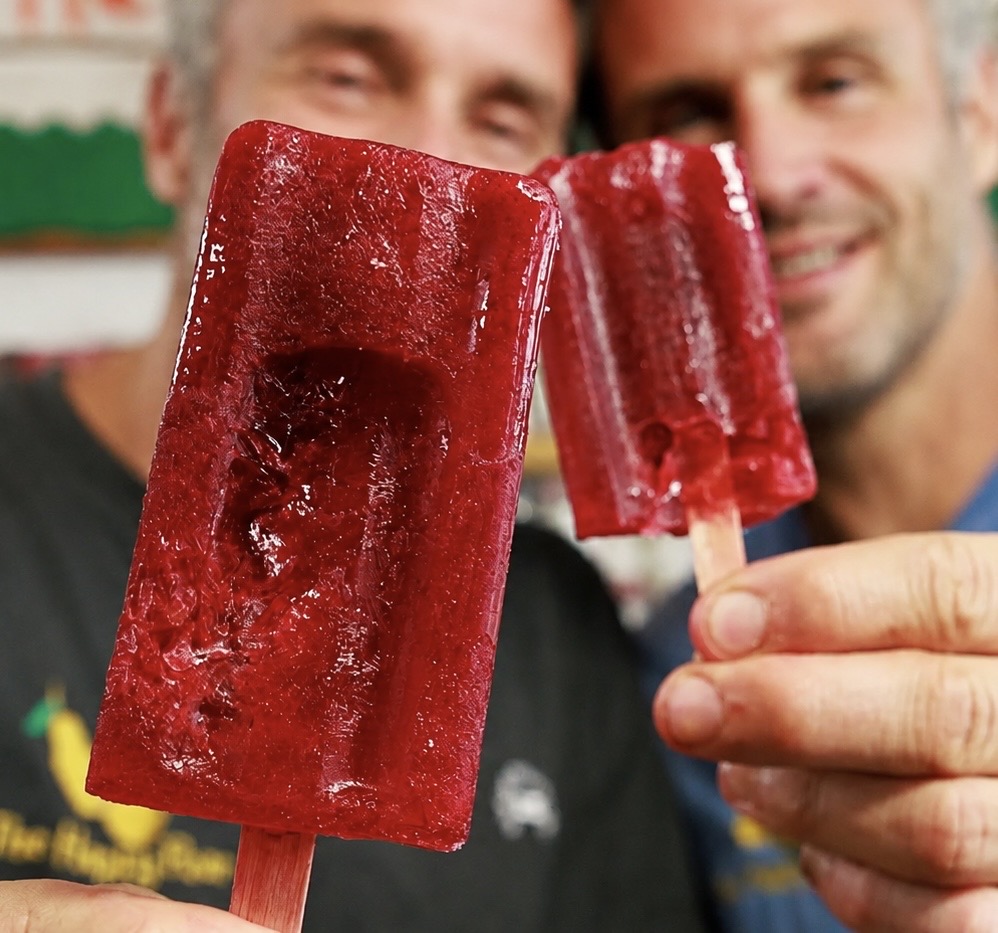
Watermelon Electrolyte Ice Pops
Takes 8 hours 15 minutes
Serves 8
Ingredients
- 600 g watermelon cubed and seeds removed (about 4 cups)
- 250 ml 1 cup coconut water
- 100 g beetroot roughly chopped (about ¾ cup)
- Juice of 2 limes about 60ml / ¼ cup
- Zest of 1 lime optional
- Small pinch of sea salt optional, especially if enjoying after exercise
Instructions
- Start by making the green juice. Add the cucumber, apple, spinach, lime and ginger to a juicer and juice until smooth. You only need about 100ml for the ice pops, so enjoy the rest as a fresh juice.
- Add the watermelon, coconut water, beetroot, lime juice, lime zest (if using) and sea salt to a high-speed blender. Blend until completely smooth.
- Taste and add a little more lime juice if you’d like a brighter flavour.
- Pour the watermelon mixture into ice pop moulds.
- Insert the sticks and freeze for at least 6–8 hours, or overnight.
- To release, run the moulds under warm water for a few seconds before gently pulling them out.

Our delicious hummus topped with our equally delicious sundried tomato pesto makes an excellent addition to any meal or is perfect for a snack with some tortilla chips or carrot sticks.
INGREDIENTS
Hummus (91%) [Chickpeas (44%) (Chickpeas, Water), Rapeseed Oil, Tahini (13%) (SESAME SEEDS), Water, Lemon Juice Concentrate, Garlic, Salt, Cumin, Preservative: Potassium Sorbate, Cayenne], Sundried Tomato Pesto Topping (7%) [Olive Oil, Rapeseed Oil, Water, Sundried Tomatoes (1%) (Sundried Tomatoes, Salt), ALMONDS (NUTS), Basil, Balsamic Vinegar, Garlic, Sea Salt, Cayenne], Rapeseed Oil, Smoked Paprika, Black SESAME SEEDS
ALLERGEN INFORMATION
For allergens, see ingredients highlighted.
Contains Sesame Seeds, Nuts, Almonds
May contain traces of Pecan Nut, Pistachio Nut, Walnut, Hazelnut, Macadamia Nut / Queensland Nut, Cashew Nut, Brazil Nut
Gluten Free
NUTRITIONAL INFORMATION
| per 100g | |
|---|---|
| Energy | 1450kJ / 351 kcal |
| Fat | 31g |
| Of which Saturates | 2.9g |
| Carbohydrates | 8.8g |
| Of which Sugars | 0.9g |
| Fibre | 3.7g |
| Protein | 7.3g |
| Salt | 0.75g |
| Keep refrigerated 0-5℃. Use within 3 days of opening. Use by see lid. |

Summer Flower Soda
Takes 6 days 20 minutes
Serves 8
Ingredients
- 2 litres water 16 cups
- 200 g organic granulated sugar approx. 10% of water weight
- 1 orange sliced into quarters
- 1 lime sliced into quarters
- 20 g fresh ginger chopped (skin on if organic)
- 20 g 1 cup edible summer flowers
Instructions
- Combine all ingredients in a clean fermentation jar: In a large glass jar (2L capacity), add 2 litres water, 200g sugar, and mix well using a whisk until the sugar is completely dissolved.
- Next add the sliced oranges and lemons followed by the 20g chopped ginger, 20g of edible flowers and mix.
- Cover and ferment at room temperature: Cover the jar with a clean cloth or a loose lid and leave at room temperature (18–22°C / 64–72°F) for 3–5 days. Stir once or twice daily to submerge the petals and prevent mould.
- Monitor fermentation: Look for bubbles, cloudiness, and a gently tangy taste — these are signs of active fermentation. Depending on room temperature, this may happen faster or slower.
- Strain and bottle: When the soda is pleasantly floral and slightly fizzy, strain out the solids using a fine sieve or cheesecloth. Pour the liquid into swing-top bottles, leaving about 2cm (0.8 in) headspace.
- Build carbonation: Seal the bottles and leave at room temperature for 1–2 days to naturally carbonate. Burp once daily to release any excess pressure.
- Chill and serve: Refrigerate once carbonation is to your liking. Serve chilled and open bottles with care — the soda will be beautifully fizzy, fragrant, and alive with springtime flavour.
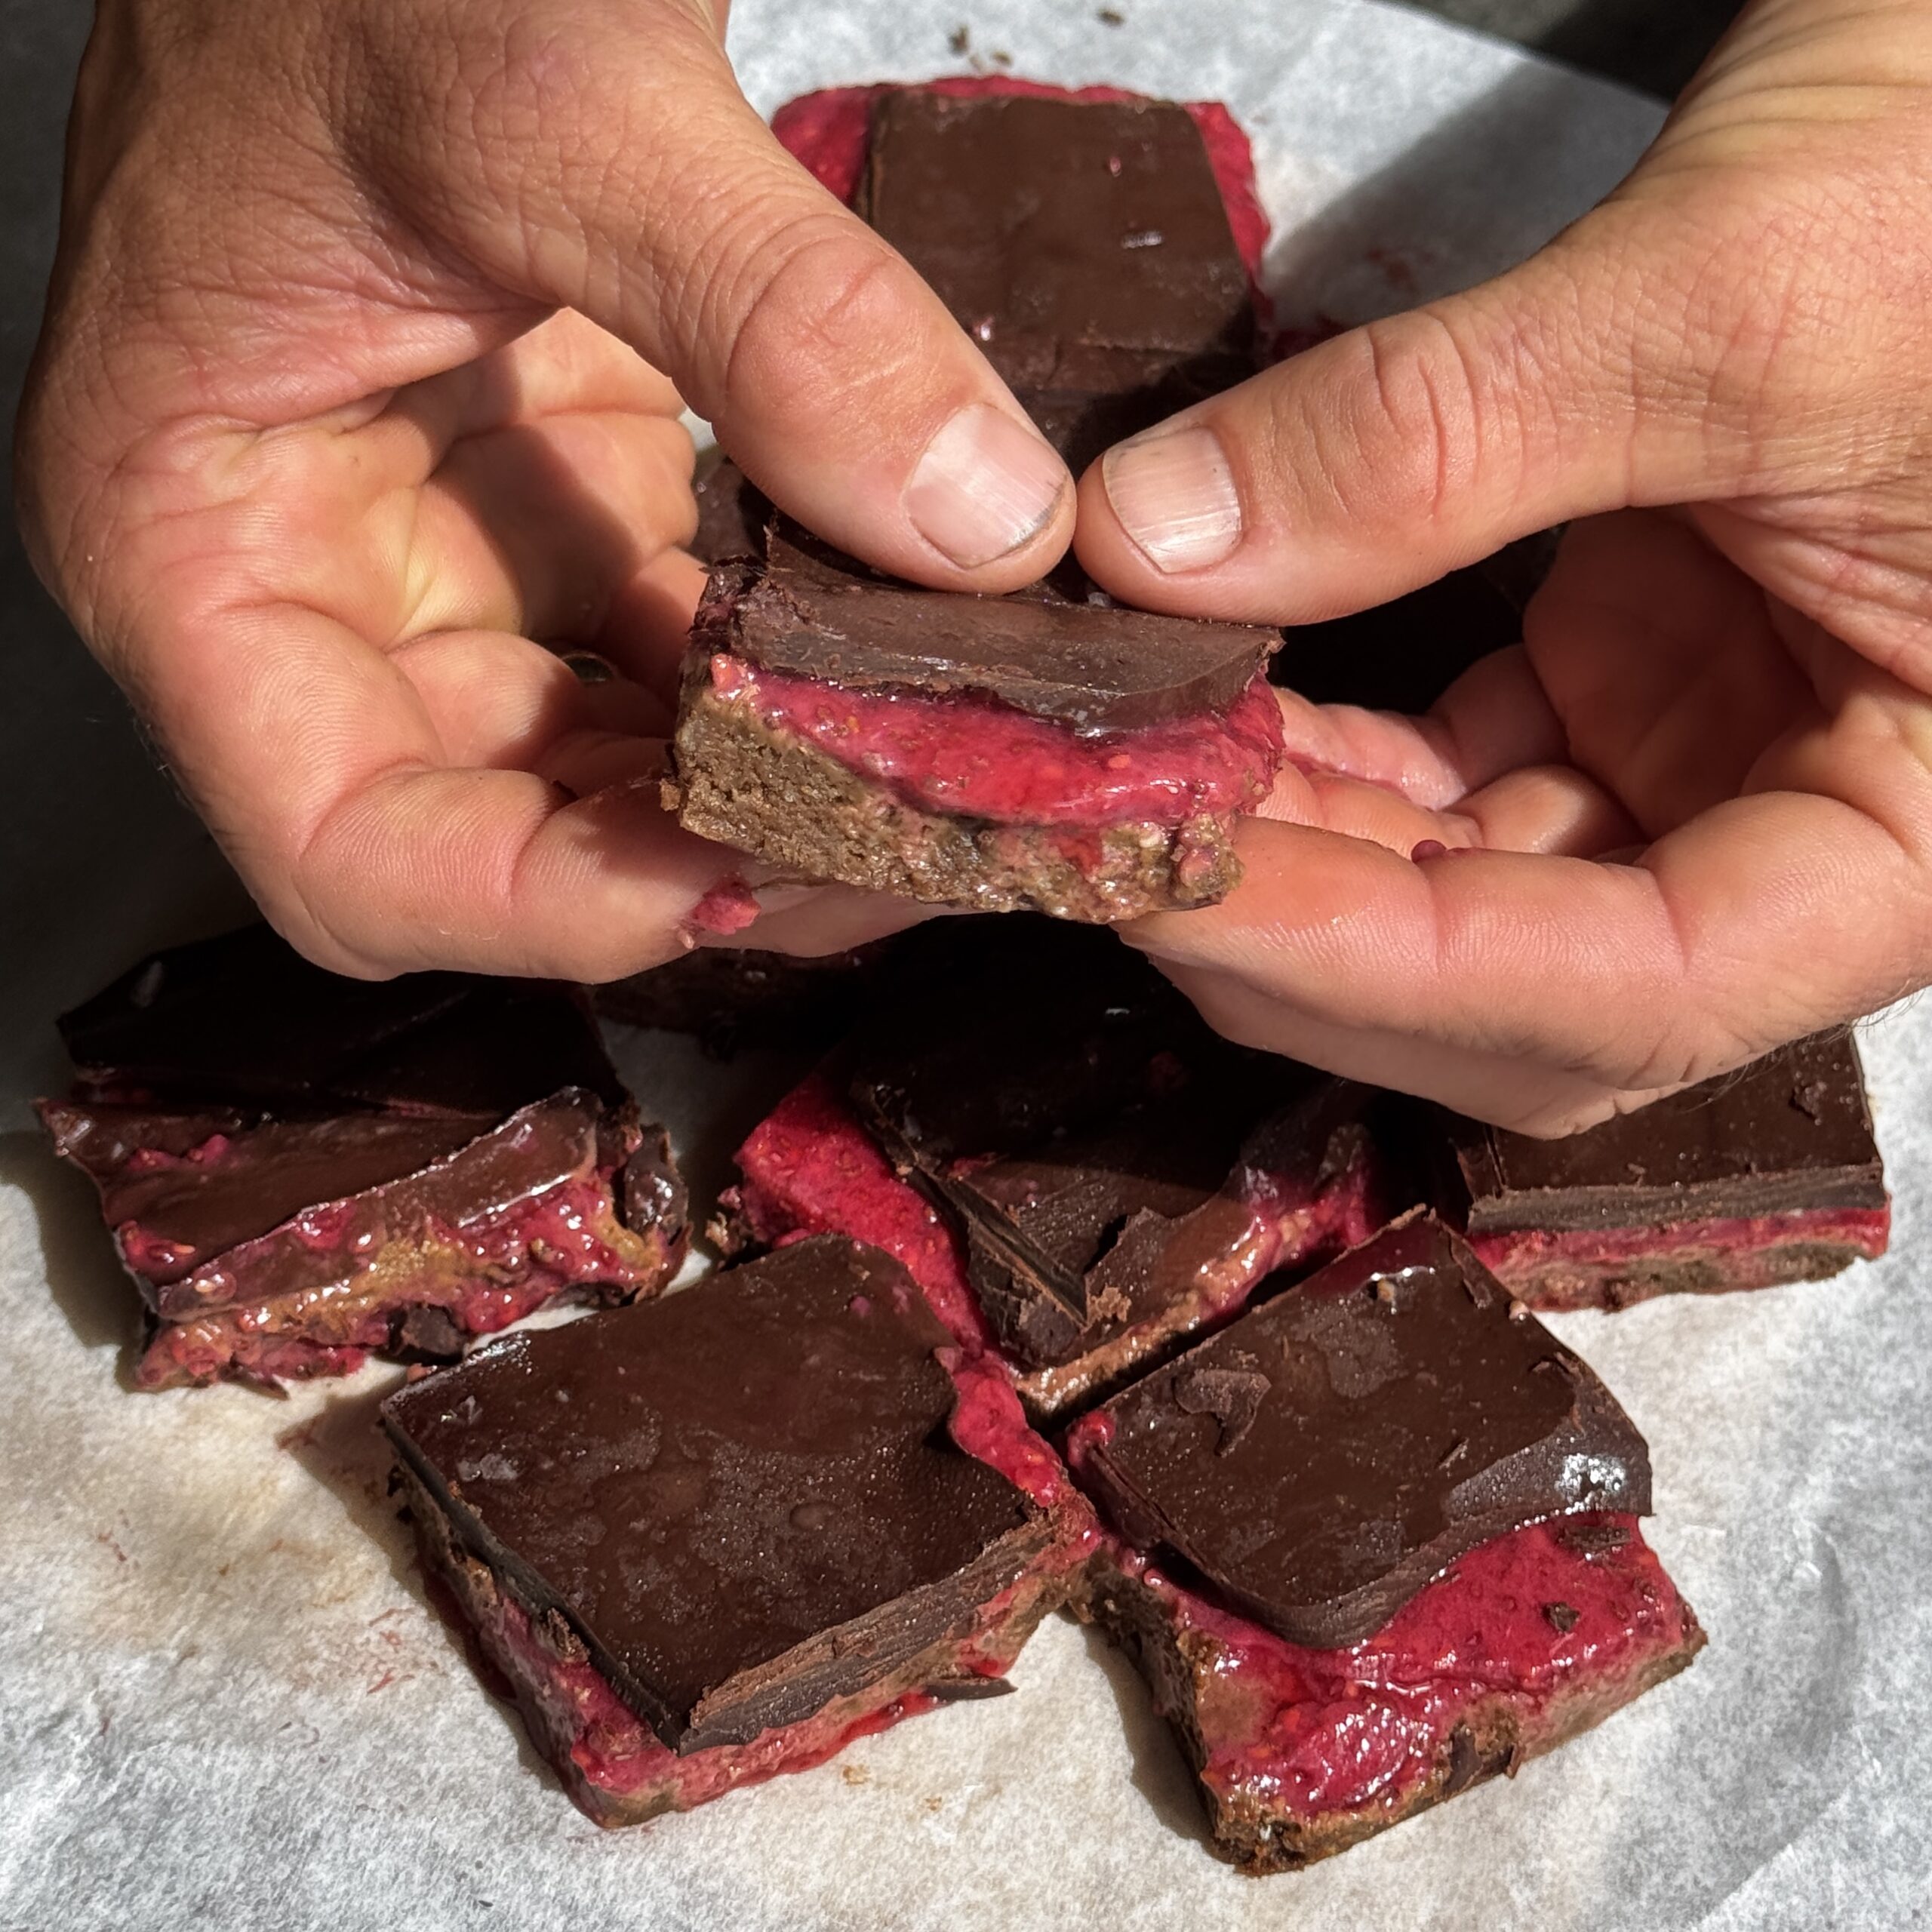
High-Protein No-Bake Raspberry Peanut Brownies
Takes 1 hour 20 minutes
Serves 12
Ingredients
The High-Protein Fudgy Brownie Base
- 75 g cashew nuts or almonds ½ cup
- 200 g pitted dates 1¼ cups, packed
- 50 g defatted peanut protein flour ½ cup
- 50 g protein powder ½ cup
- 4 tbsp smooth natural peanut butter 64g / ¼ cup
- 30 g cocoa or cacao powder ⅓ cup
- 1 tsp vanilla extract
- A pinch of sea salt
- 100 ml reserved date soaking water ⅓–½ cup, added gradually as needed to blend
The Raspberry Chia Layer
- 150 g fresh or frozen raspberries 1 cup
- 20 g chia seeds 2 tbsp
- 1 tbsp maple syrup or more to taste
The Chocolate Glaze
- 150 g dark chocolate about 1 cup, chopped
- 15 g coconut oil 1 tbsp
Instructions
Set the raspberry chia layer
- Do this first so the chia seeds have time to work their magic. In a small bowl, thoroughly mash the 150g of raspberries with a fork. Stir in the 24g of chia seeds and 1 tbsp of maple syrup. Mix well and set it aside for 10–15 minutes. The chia seeds will expand and absorb the raspberry juices, thickening the mix into a spreadable, vibrant jam.
Process the protein brownie base
- Line an 8×8 inch square baking tin with parchment paper, leaving some overhang.
- Soak the dates in hot water for 5 minutes, then drain thoroughly ensuring to keep the soak water.
- In a food processor, add the 75g of cashew nuts or almonds and blend till they reach a smooth powder like consistency. Next add the 200g of dates that were soaked, 50g of peanut protein flour, 50g of protein powder, 4 tbsp of peanut butter, 30g of cocoa powder, vanilla, salt, and add half the date soak water.
- Pulse until the mixture begins to break down. With the motor running, drizzle in your warm water 1 tablespoon at a time. Because protein powders absorb moisture quickly, keep adding water until the mix transforms from a sandy texture into a thick, sticky, cohesive dough dough ball.
Press and layer
- Dump the chocolate protein dough into your lined tin. Add another layer of baking parchment on top and use the back of a spoon to press the dough firmly and evenly into the corners of the tin until it forms a smooth, flat sheet. It should be super smooth and have an almost glossy look to it. Spoon the thickened raspberry chia jam directly over the top, smoothing it into an even layer.
Add the chocolate snap
- Melt the 150g of dark chocolate and 15g of coconut oil together—either using a bain-marie or in short 20-second bursts in the microwave, stirring between each burst until completely liquid and glossy. Pour the glaze gently over the raspberry layer, tilting the tin to ensure it covers the jam completely.
Chill and slice
- Pop the tin into the fridge for at least 1 hour (or the freezer for 30 minutes) until the chocolate glaze has set hard and the layers are firm. Lift the slab out using the parchment paper handles, slice into neat squares using a sharp knife dipped in hot water, and enjoy! Keep them stored in the fridge so they stay perfectly fudgy.
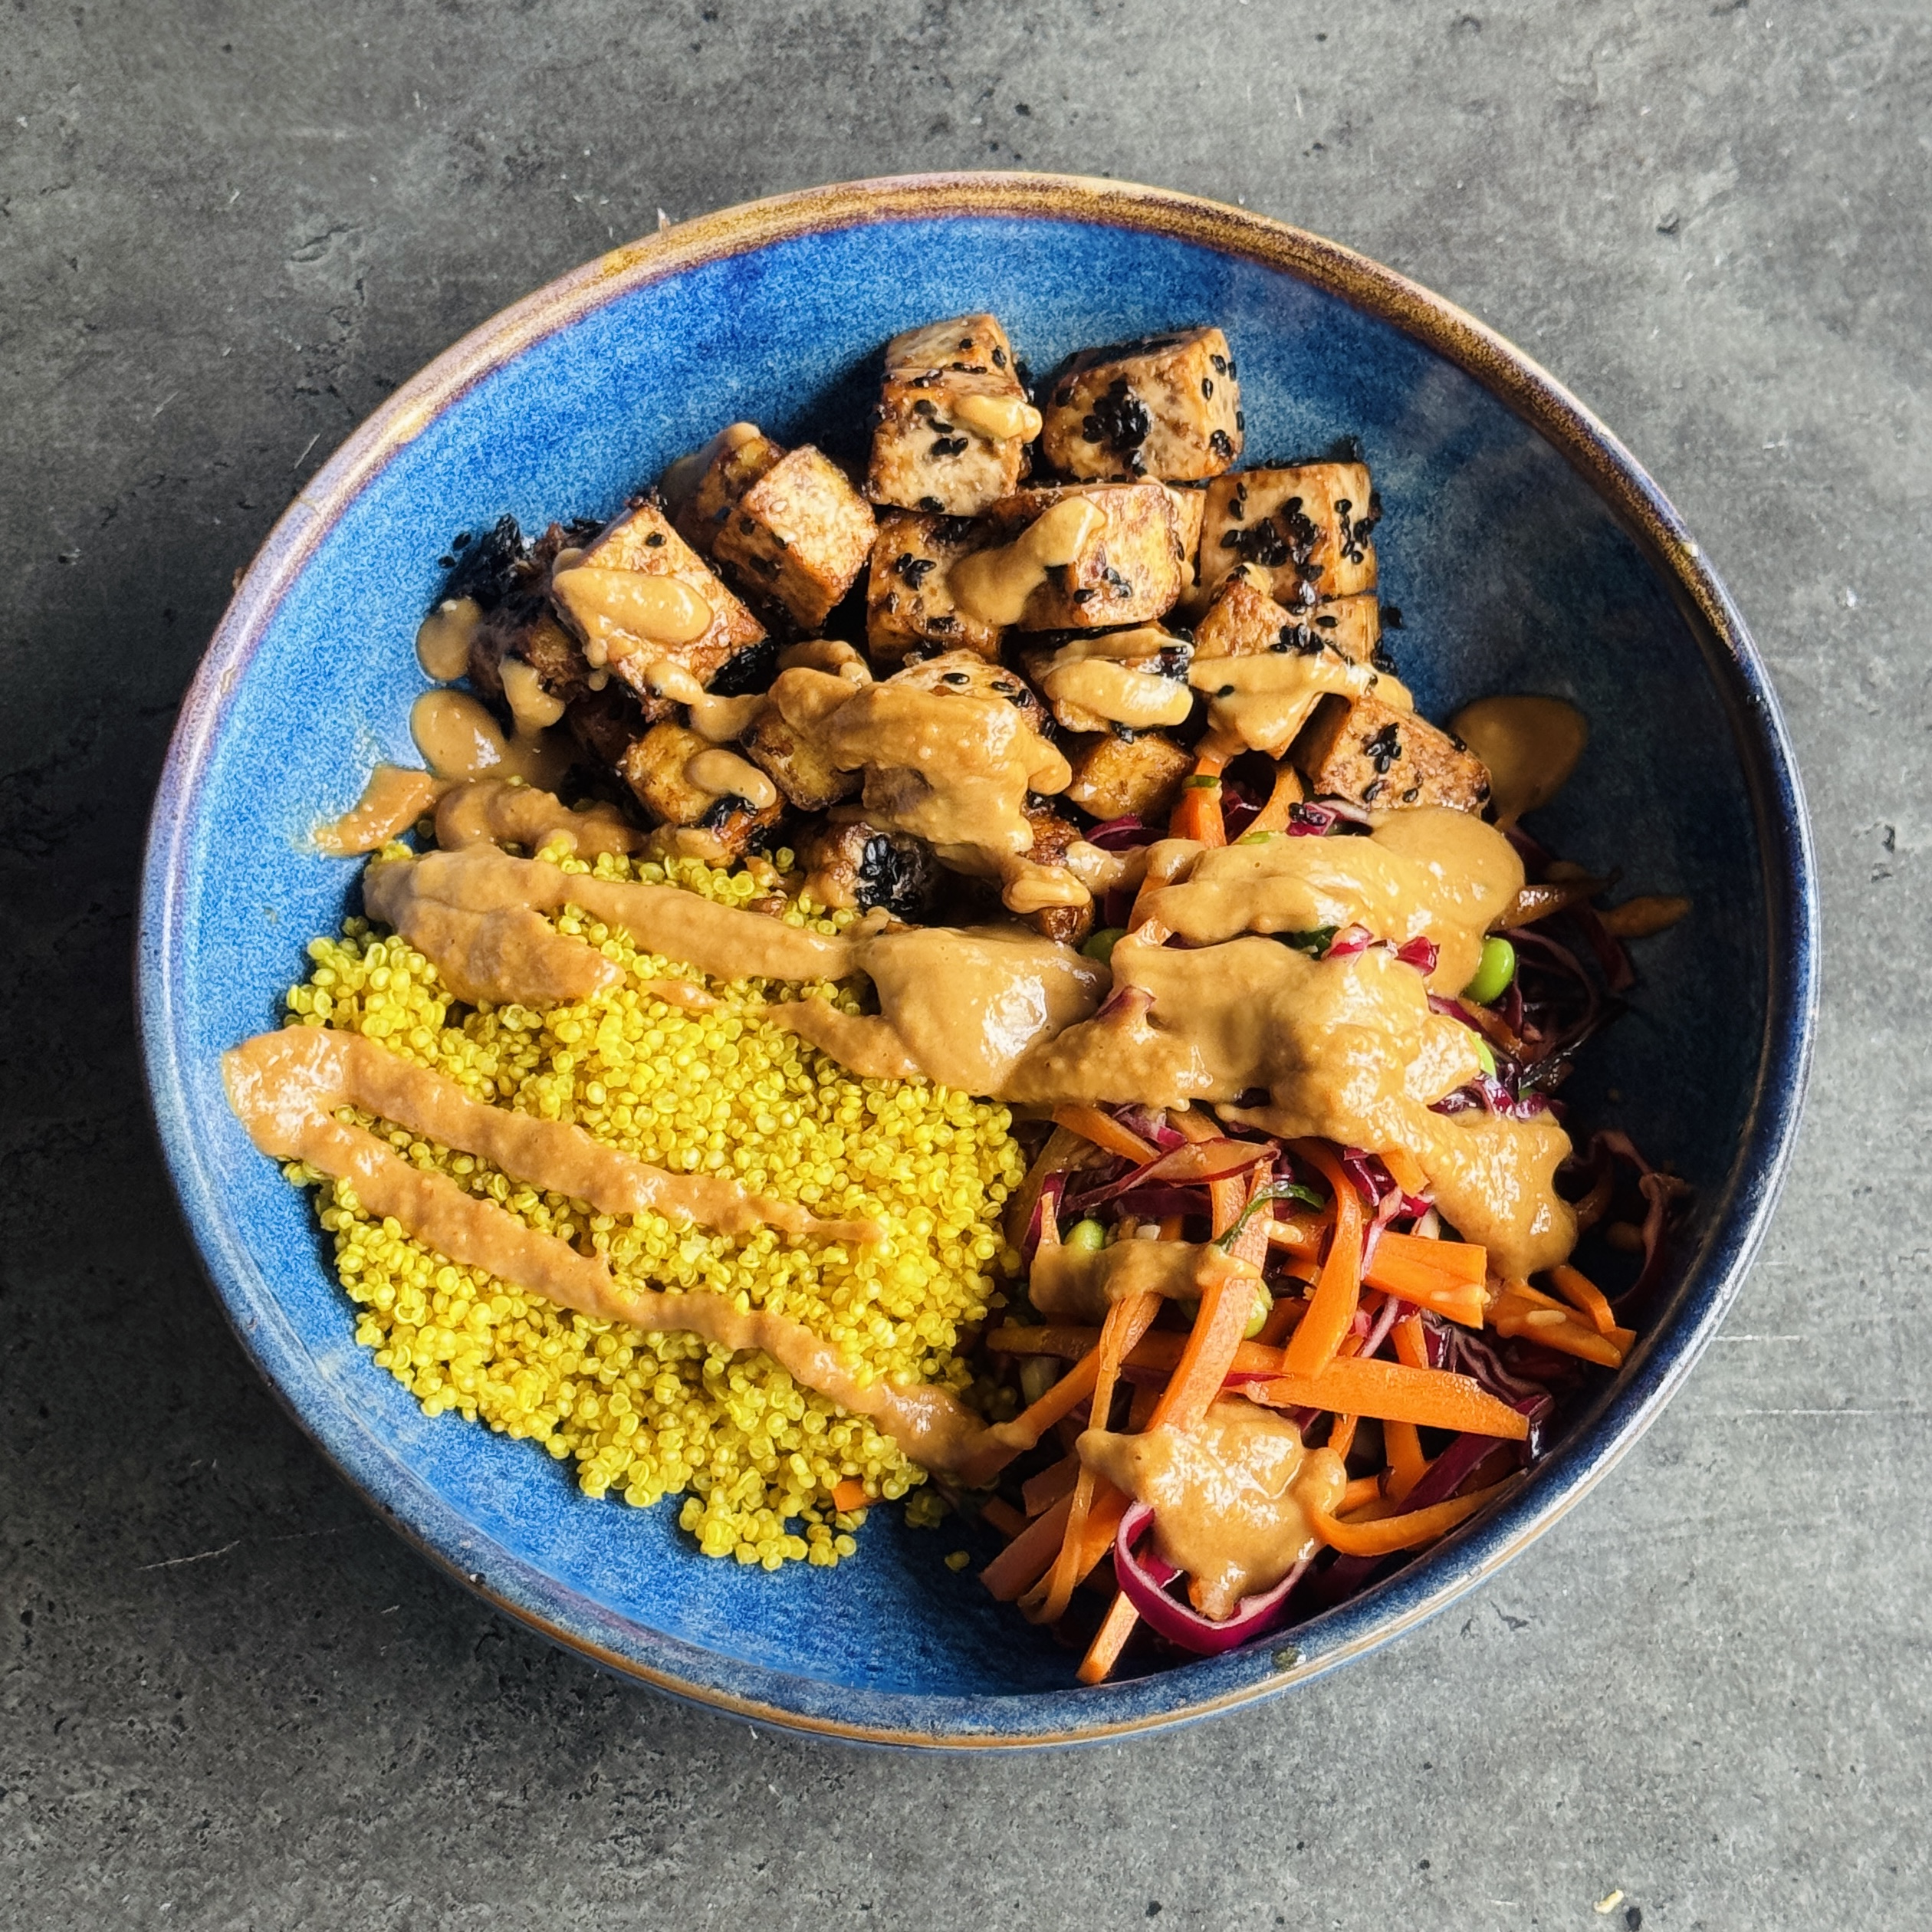
Tofu Power Bowl
Takes 33 minutes
Serves 2
Ingredients
The Crispy Sesame Tofu
- 500 g Ultra-firm or firm block tofu
- 1 tbsp Cornflour cornstarch
- 2 tbsp Black sesame seeds
The Punchy Ginger-Tamari Dressing
- 3 tbsp Tamari or high-quality soy sauce
- 4 tbsp Extra virgin olive oil
- 2 tbsp Pure maple syrup
- 1.5 tbsp Rice vinegar
- 1 small Garlic clove peeled
- 10 g Fresh ginger approx. ½ thumb-sized piece, peeled
The Power Bowl Base & Slaw
- 250 g Pre-cooked quinoa approx. 1 pre-packed pouch
- 1 large Carrot peeled
- 150 g Red cabbage approx. ¼ small head
- 150 g Edamame beans thawed if frozen
- 2 Green onions / scallions
Instructions
Prep the dressing
- Grate the aromatics to release their natural oils. Using a microplane or fine grater, grate the 1 garlic clove and 10g of fresh ginger into a medium bowl. Whisk in the 3 tbsp of tamari, 4 tbsp of olive oil, 2 tbsp of maple syrup, and 1.5 tbsp of rice vinegar. Mix vigorously until the dressing is fully emulsified. Set aside.
Cube and bake the tofu
- Preheat your oven or air fryer to 200°C.
- Cut the 500g of firm tofu into neat 1.5cm cubes. Thoroughly pat them dry with kitchen paper to remove surface water. Place the dry cubes into a bowl.
- The Crunch Coat: First, sprinkle the 1 tbsp of cornflour directly over the dry tofu and toss gently until every cube is lightly and evenly coated in white powder. Next, add the 2 tbsp of black sesame seeds, tossing again so they stick to the cornflour.
- Spread the coated tofu onto a baking tray lined with parchment paper. Bake for 20 minutes (or air-fry for 15 minutes), tossing the cubes once or twice halfway through to ensure an even, deep-golden crunch.
Prepare the fresh slaw
- Julienne your vegetables for a beautiful, uniform texture. Slice the carrot and 150g of red cabbage into thin, elegant matchsticks (julienne). Place them into a large mixing bowl, sprinkle with a pinch of sea salt, and toss—this draws out excess moisture and softens the cabbage slightly. Finely slice the 2 green onions on the bias and add them to the bowl along with the 150g of edamame beans.
Dress and assemble
- Bring all the components together.
- Pour half of your prepared dressing over the crunchy slaw mixture and toss thoroughly. Taste and add a pinch of black pepper if desired.
- Take your hot, crispy baked tofu out of the oven and drizzle it with half of the dressing, tossing quickly so the hot crust absorbs the ginger-tamari flavors.
- Warm your 250g of pre-cooked quinoa according to the packet instructions.
- To serve, divide the warm quinoa and seasoned crispy tofu between two large bowls. Add a generous heap of the dressed edamame slaw next to them, and drizzle any leftover dressing right over the top!
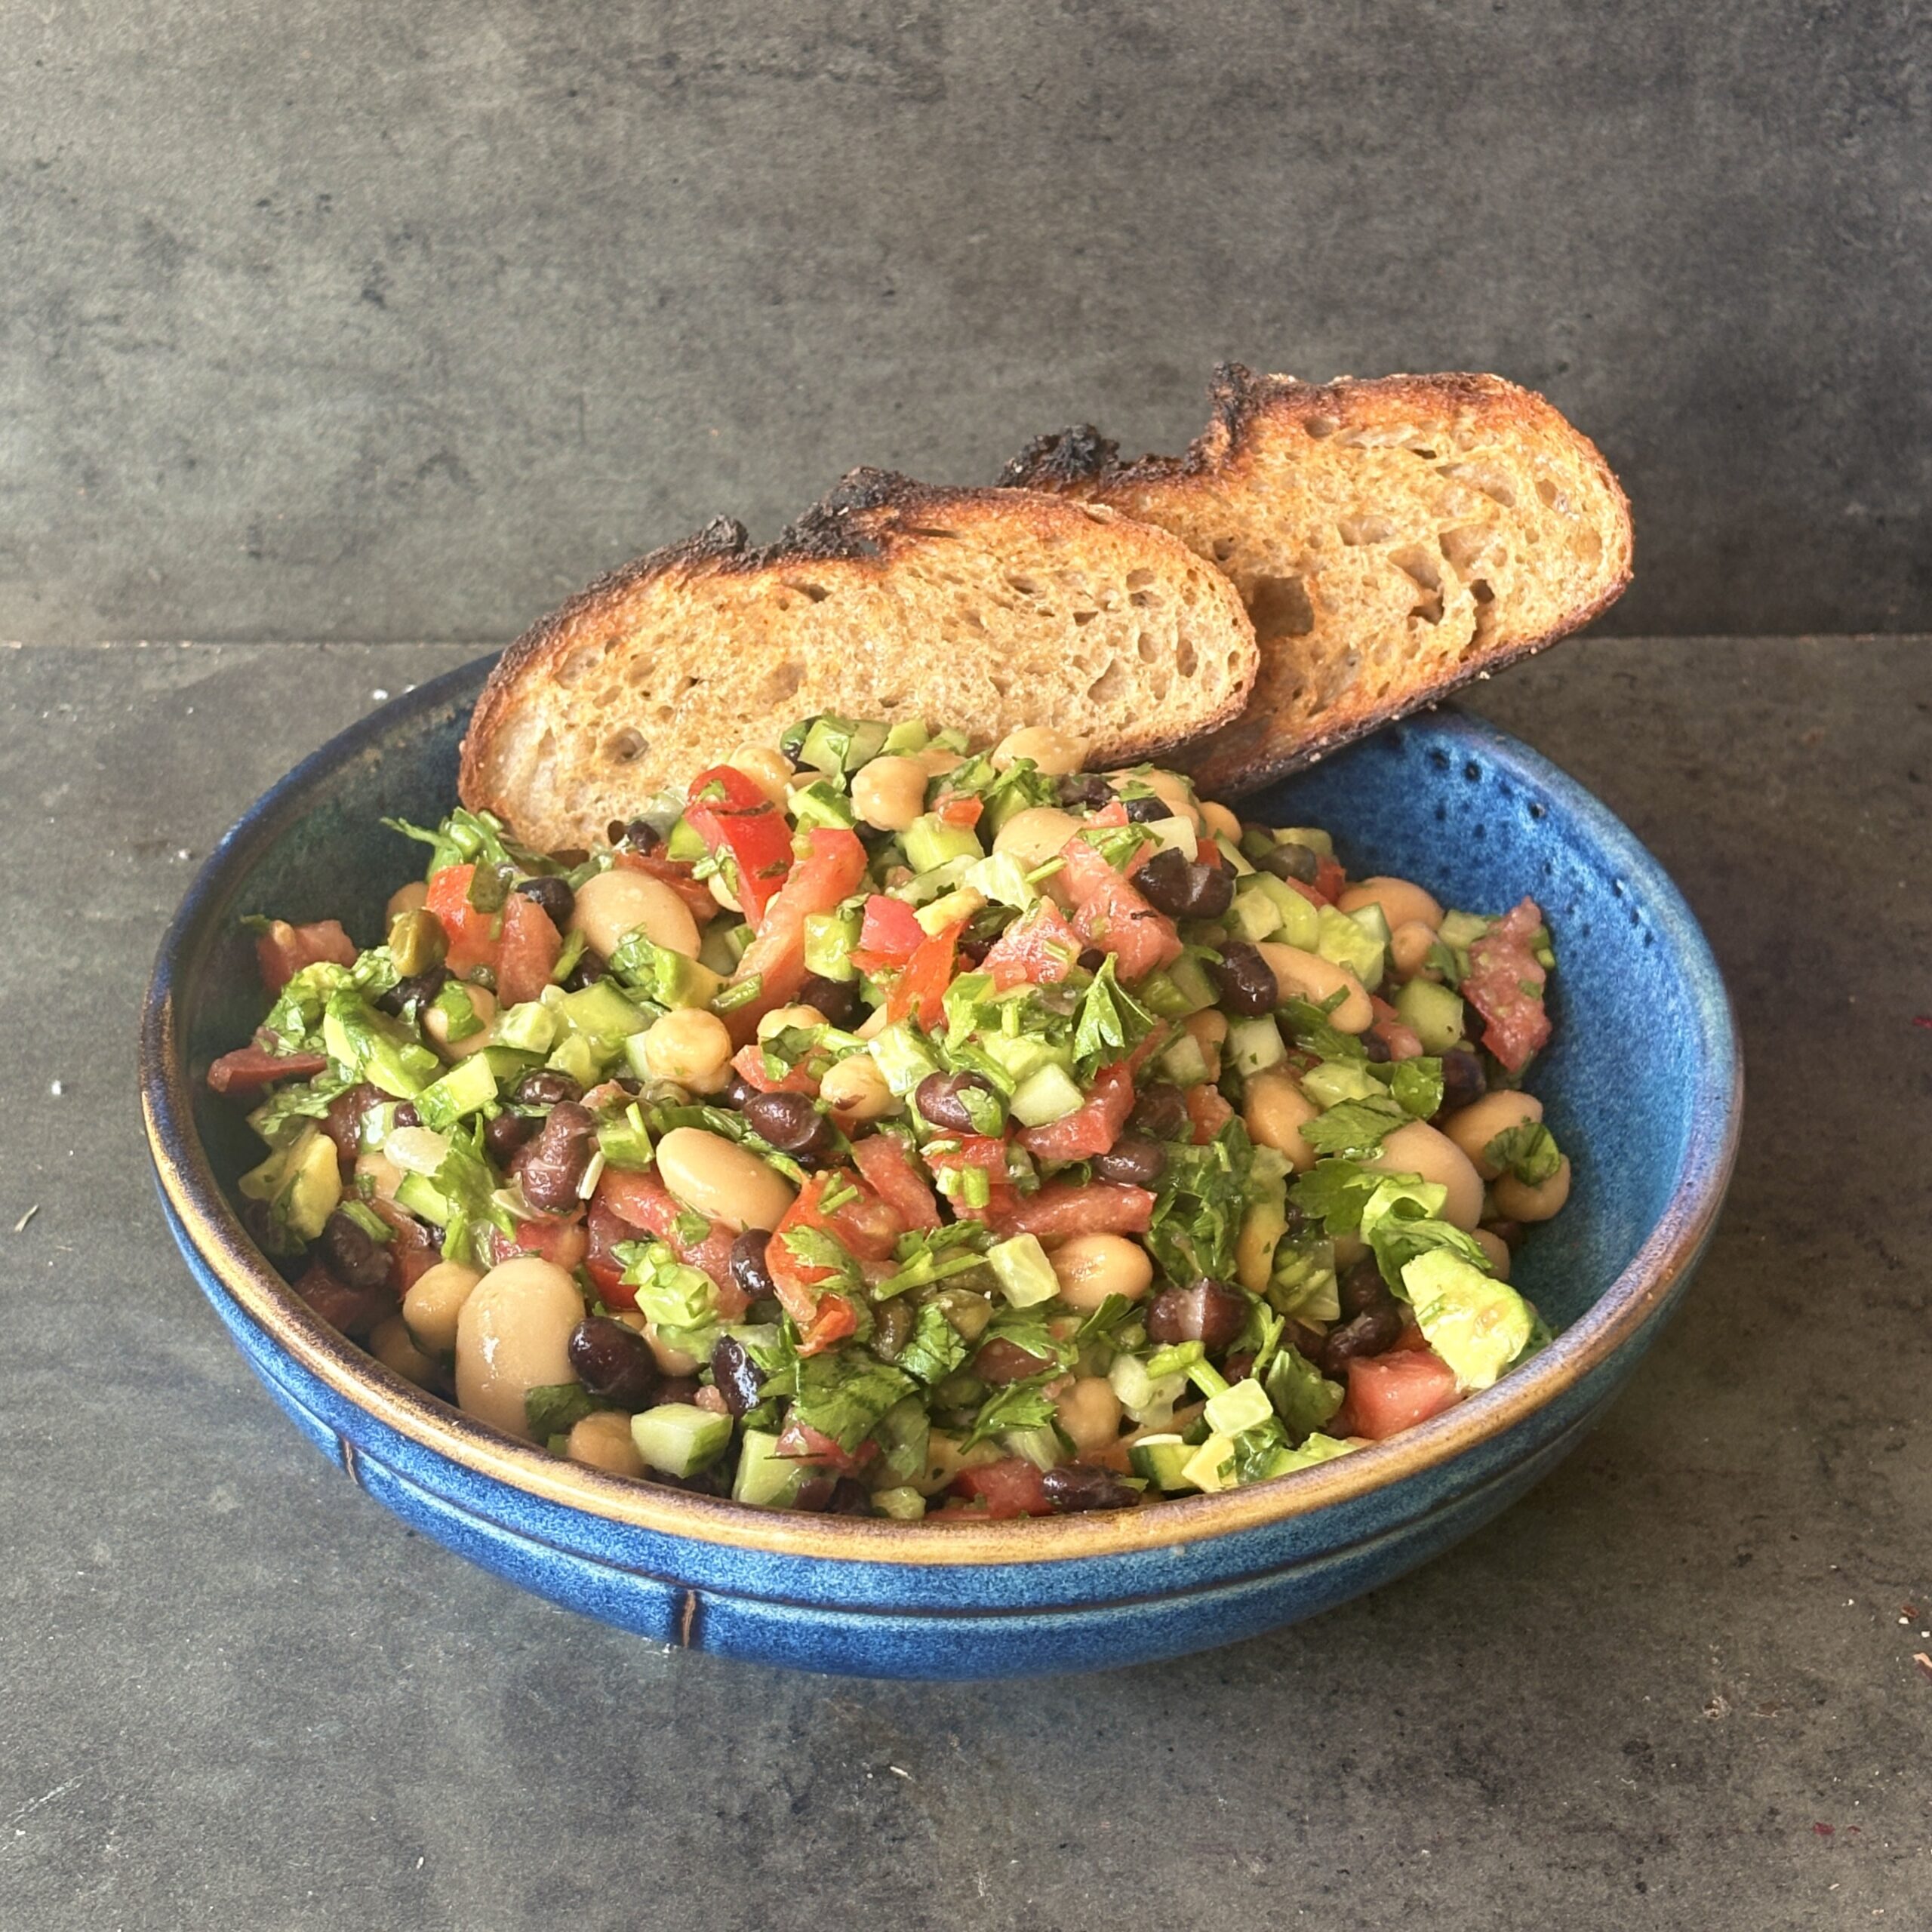
High Protein Bean Salad
Takes 15 minutes
Serves 6
Ingredients
For the salad
- 1 x 400g tin chickpeas drained and rinsed (240g drained weight)
- 1 x 400g tin black beans drained and rinsed (240g drained weight)
- 1 x 400g tin butter beans drained and rinsed (240g drained weight)
- 2 cucumbers approx. 600g, diced
- 4 ripe tomatoes approx. 500g, diced
- 1 ripe avocado diced
- 60 g capers drained (about ⅓ cup)
- 20 g fresh parsley roughly chopped (about 1 cup loosely packed)
- 20 g fresh coriander roughly chopped (about 1 cup loosely packed)
For the lemon vinaigrette
- 60 ml ¼ cup extra virgin olive oil
- 30 ml 2 tbsp fresh lemon juice
- 1 tbsp caper brine
- 1 tsp Dijon mustard
- 1 small garlic clove finely grated
- ½ tsp maple syrup or honey optional
- ½ tsp sea salt
- ¼ tsp freshly ground black pepper
Instructions
- Whisk together the olive oil, lemon juice, caper brine, Dijon mustard, garlic, maple syrup (if using), salt and pepper until well combined.
- Add the chickpeas, black beans, butter beans, cucumber, tomatoes, capers, parsley and coriander to a large bowl. Pour over the dressing and toss until everything is evenly coated.
- Gently fold through the avocado just before serving to keep it intact.
- Taste and adjust with more lemon juice, salt or pepper if needed. Leave to sit for 10 minutes before serving to allow the flavours to develop.
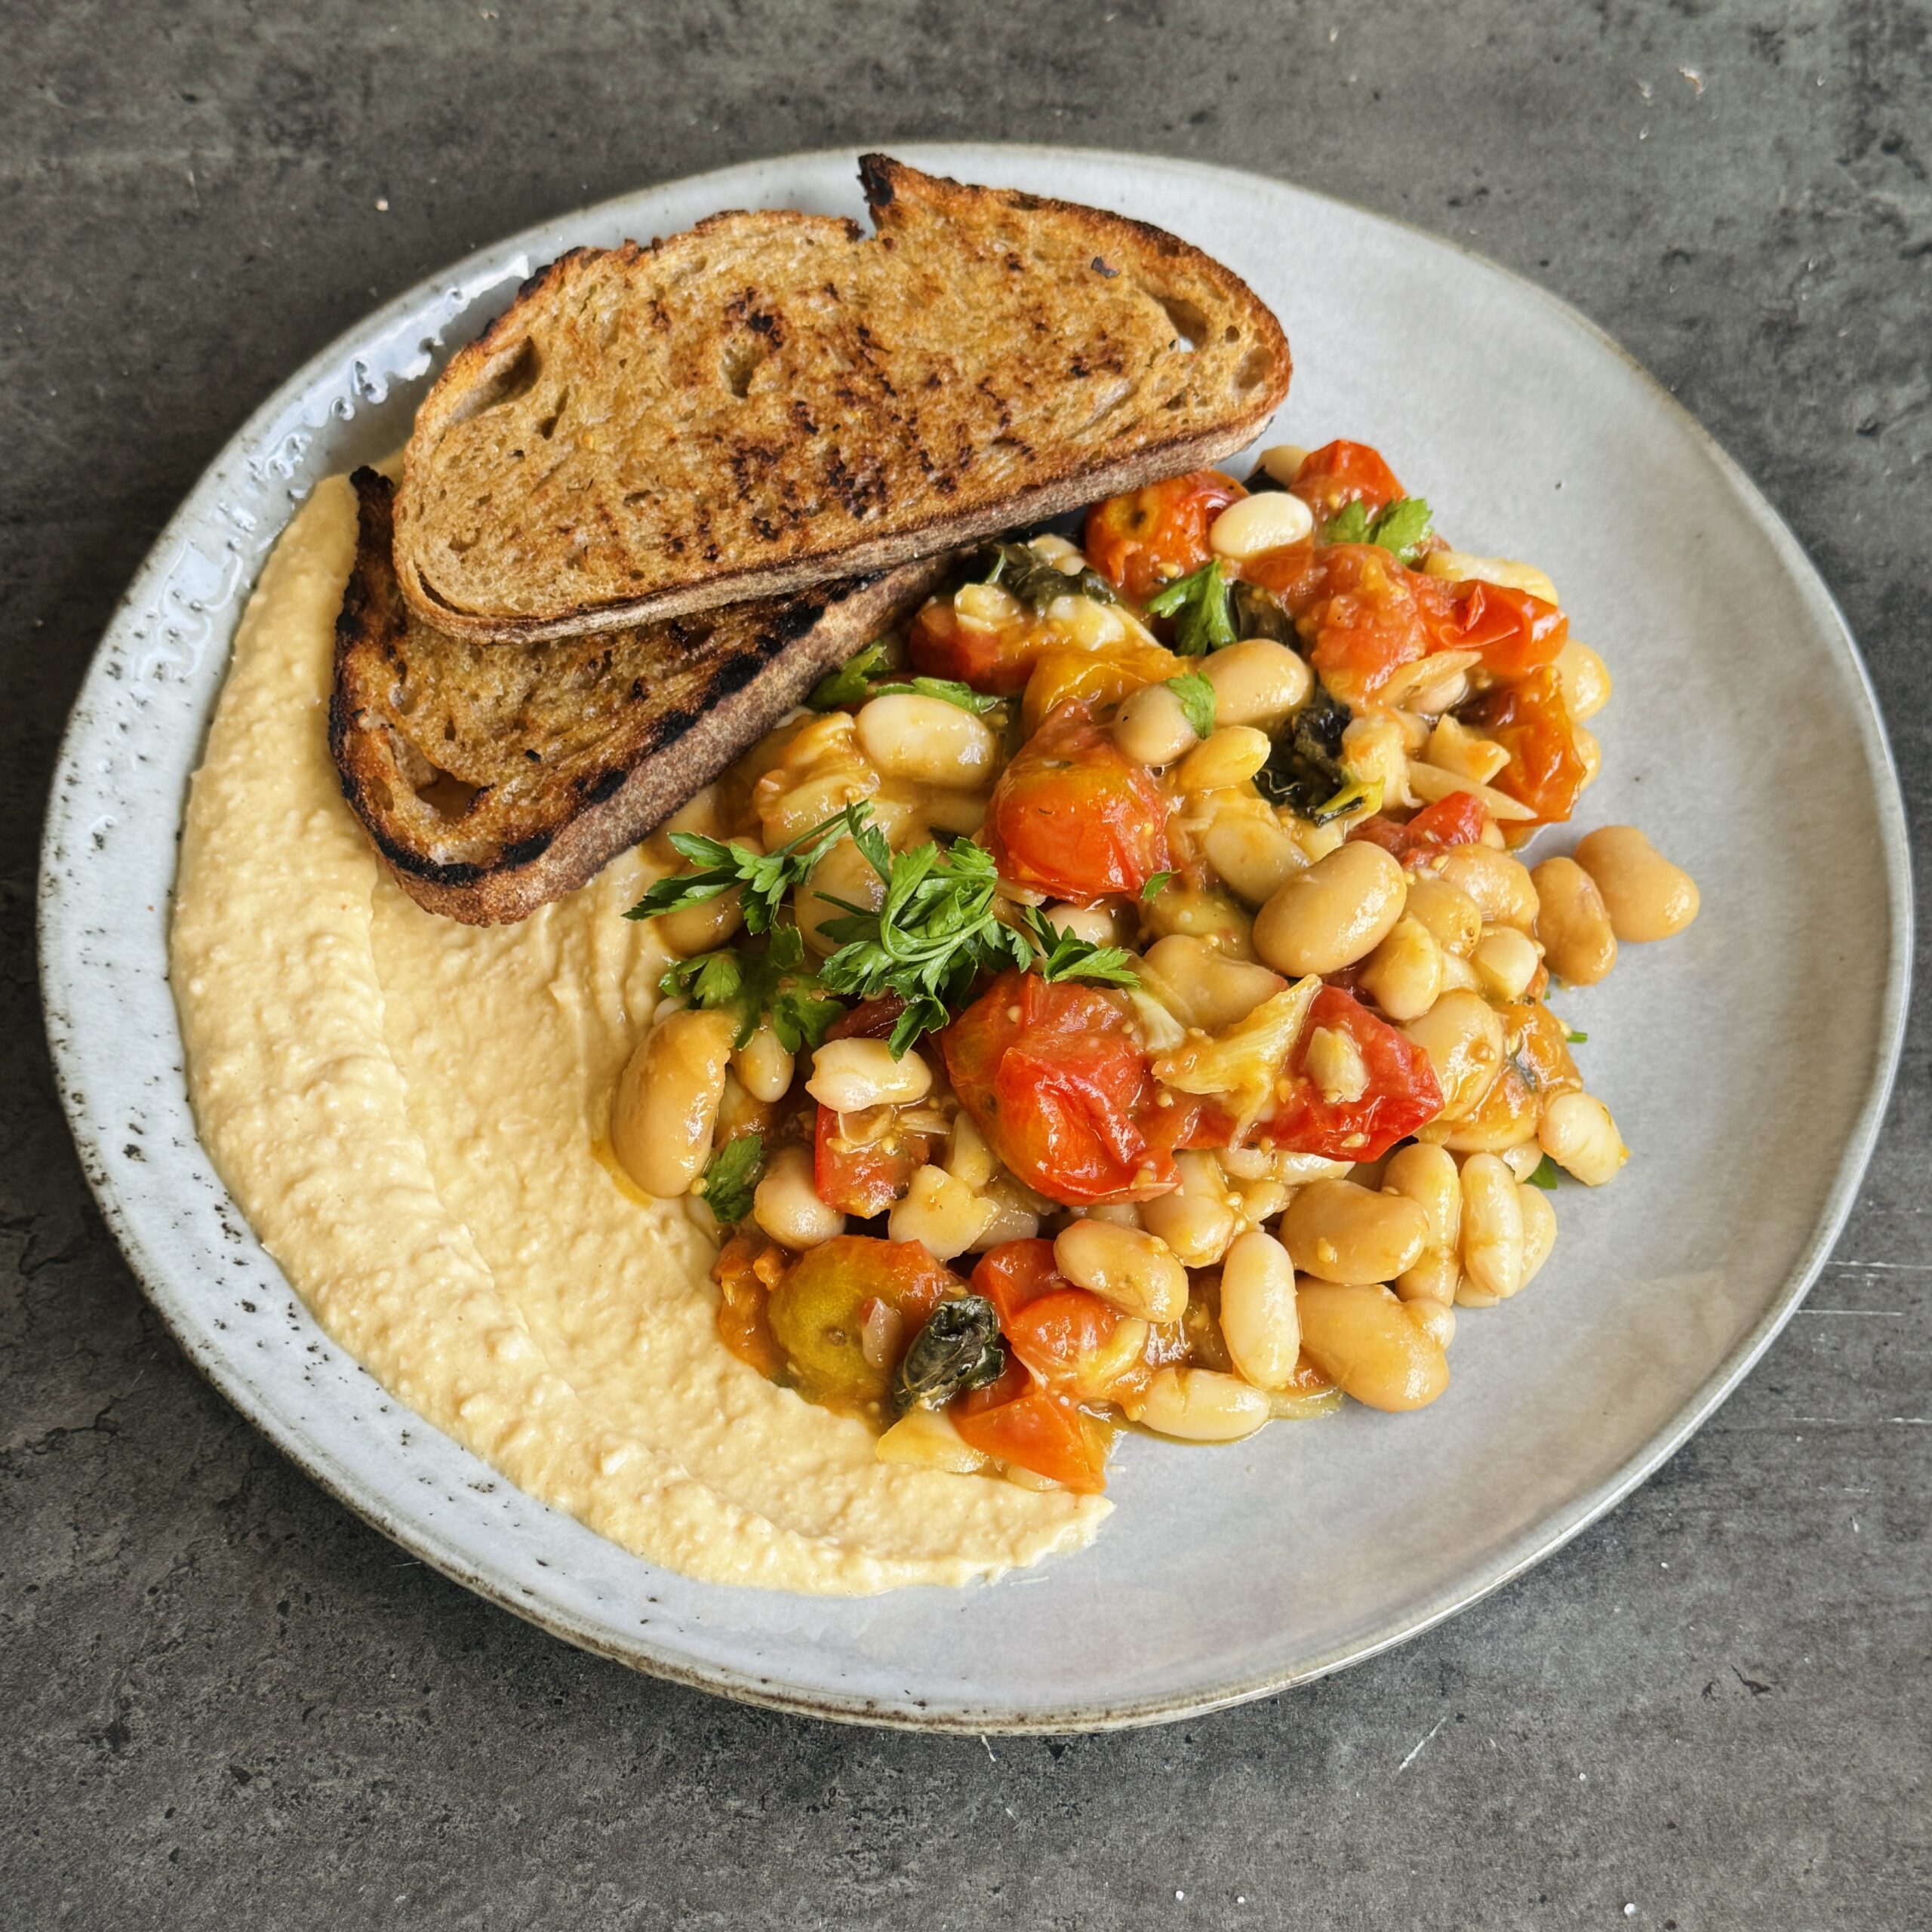
Confit Roasted Tomatoes with Garlic, Basil & Butter Beans
Takes 35 minutes
Serves 2
Ingredients
- 250 g cherry tomatoes about 2 cups
- 60 ml extra virgin olive oil 4 tbsp
- 45 ml balsamic vinegar 3 tbsp
- 1 whole garlic bulb
- 20 g fresh basil about 1 cup loosely packed
- 500 g cooked butter beans drained (about 2 x 400g tins, 300g drained each)
- 2 slices sourdough bread
- 180 g hummus about ¾ cup, such as The Happy Pear Organic Hummus
- Sea salt and freshly ground black pepper
Instructions
- Preheat the oven to 200°C (180°C fan).
- Slice the top off the garlic bulb to expose the cloves. Place the cherry tomatoes into a roasting dish with the olive oil, balsamic vinegar and a generous pinch of salt. Tear in half of the basil leaves and nestle the garlic bulb into the tray, cut-side down.
- Roast for 25 minutes, until the tomatoes have collapsed and become jammy, and the garlic is soft enough to squeeze easily from its skins.
- Meanwhile, toast the sourdough until crisp and golden.
- Remove the tray from the oven and leave to cool for a couple of minutes. Squeeze the roasted garlic cloves into the tomatoes and mash lightly with a fork to create a rustic sauce.
- Stir in the drained butter beans and the remaining torn basil. Mix gently until the beans are coated and warmed through. Taste and season with salt and black pepper as needed.
- Spread the hummus across two plates, spoon over the warm tomato and bean mixture, and serve with the toasted sourdough for scooping up every last bit.

Frozen Banana, Peanut Butter & Dark Chocolate Bark
Takes 2 hours 9 minutes
Serves
Ingredients
- 3 medium ripe bananas approx. 360g peeled
- 200 g natural peanut butter ¾ cup
- 100 g frozen raspberries ¾ cup
- 50 g shelled roasted pistachios roughly chopped (⅓ cup)
- 200 g dark chocolate 70% cocoa or higher, roughly chopped
Instructions
- Line a small baking tray or chopping board with baking paper.
- Peel the bananas and slice each one in half lengthways. Arrange them side by side on the baking paper.
- Place another sheet of baking paper on top and gently press down with the base of another baking tray or a chopping board until the bananas form one even layer, about 1cm thick.
- Spread the peanut butter evenly over the flattened bananas.
- Scatter over half of the frozen raspberries and half of the chopped pistachios, pressing them gently into the peanut butter.
- Melt the dark chocolate in a heatproof bowl over a pan of simmering water (or in the microwave in 20-second bursts), stirring until smooth.
- Pour the melted chocolate over the peanut butter layer and spread it evenly to cover.
- Sprinkle over the remaining raspberries and pistachios while the chocolate is still melted.
- Transfer to the freezer for 2–3 hours, or until completely firm.
- Remove from the freezer and leave for 2–3 minutes before cutting or breaking into 12 pieces. Store in an airtight container in the freezer for up to 1 month.
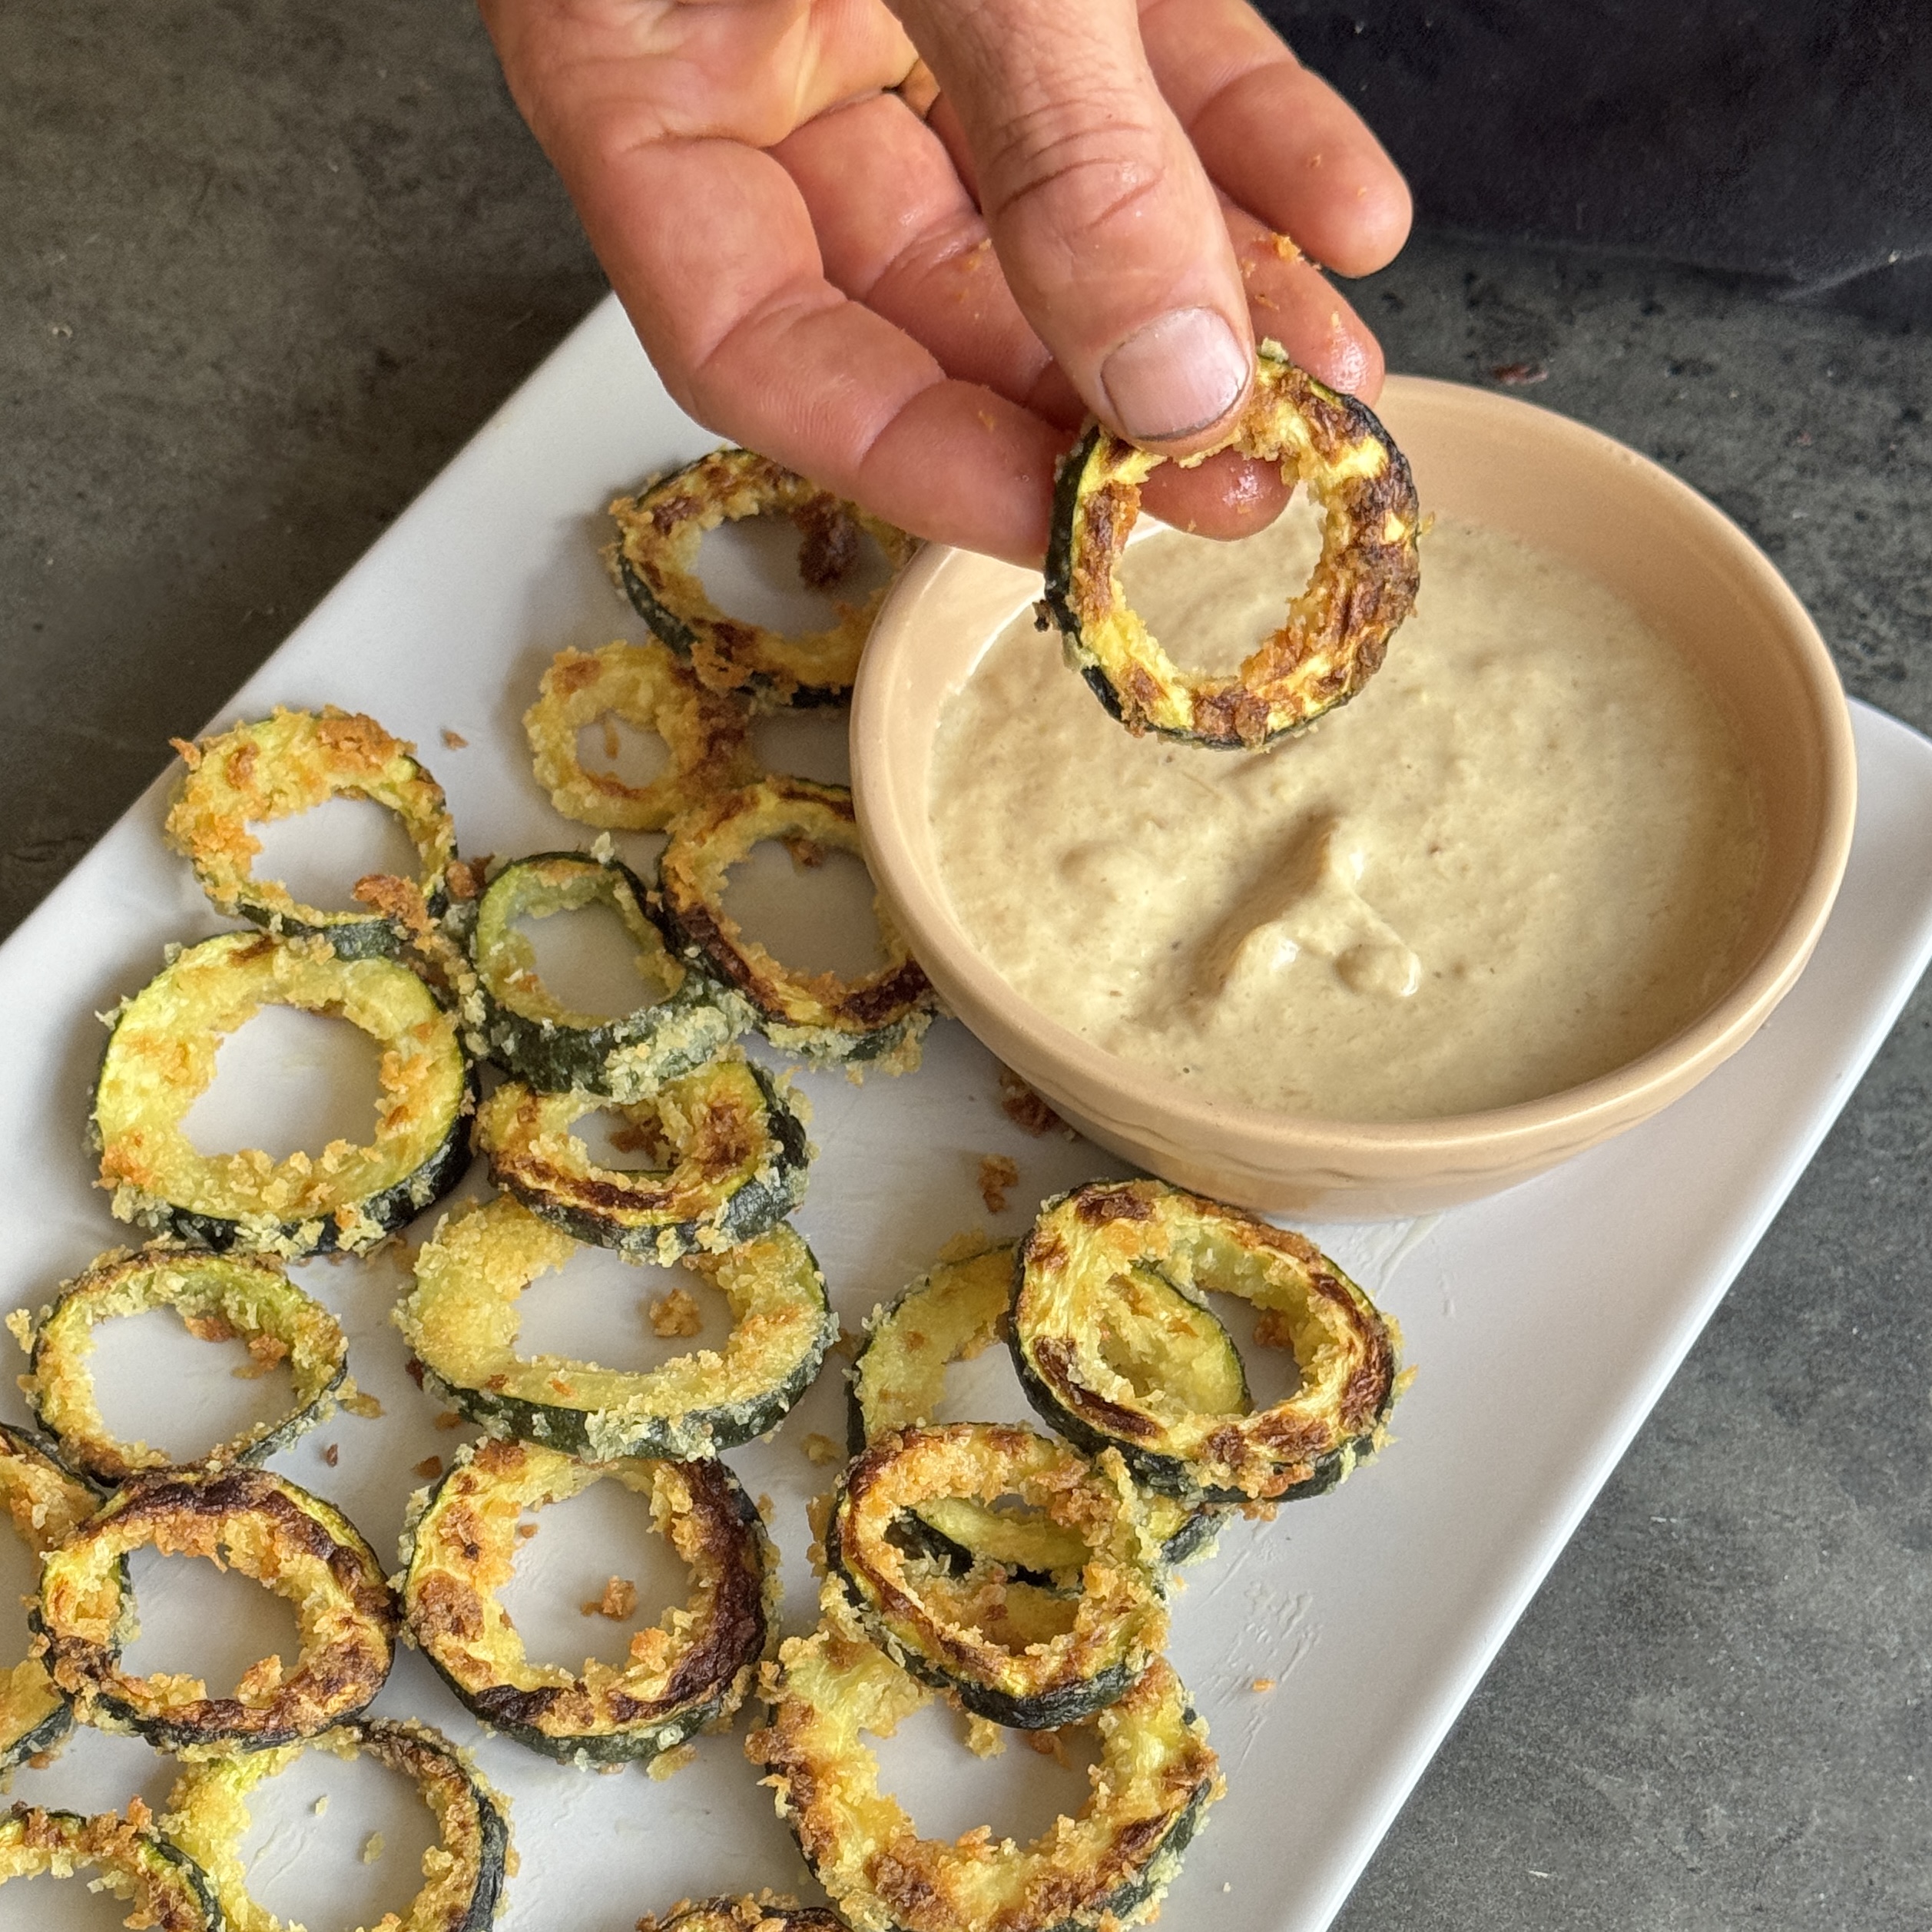
Courgette Rings with Zero Waste Sauce
Takes 30 minutes
Serves 2
Ingredients
- 1 large Courgette approx. 250g
- 50 g Panko breadcrumbs Panko gives a much louder crunch than standard breadcrumbs
- 30 g parmesan – we used a plant based version
- 1 tbsp Cornstarch
- 3 tbsp olive oil
- Pinch salt
The High-Protein Zero-Waste Sauce
- Sautéed courgette centers
- 150 g yoghurt of choice
- 1 tbsp Tamari / soy sauce
- 1 tbsp Tahini
- 1 tsp dried garlic powder
- Juice of ½ Lemon
- Pinch salt
Instructions
- Slice the courgette into rounds approximately 1cm thick. Using the top of a bottle or a small round cutter, remove the centre of each slice to create rings. Set the centres aside for the sauce.
- In a large bowl, add the courgette, a generous pinch of salt and 2 tbsp of olive oil and mix well. Next grate in the parmesan, followed by the corn flour and bread crumbs. Mix together until each courgette round is nicely coated.
- Arrange the coated rings in a single layer in the air fryer basket. Air fry at 220°C for 10 minutes, turn them halfway through and bake again for 6-8 mins until golden and crisp on the outside..
- While the courgette rings are cooking, heat a little oil in a frying pan over medium heat. Add the reserved courgette centres and cook for 4–5 minutes until softened and lightly golden.
- Transfer the cooked courgette centres to a blender along with the yoghurt, tahini, tamari, garlic and lemon juice. Blend until smooth and creamy. Taste and adjust the seasoning if needed.
- Serve the crispy courgette rings warm with the zero-waste sauce for dipping.
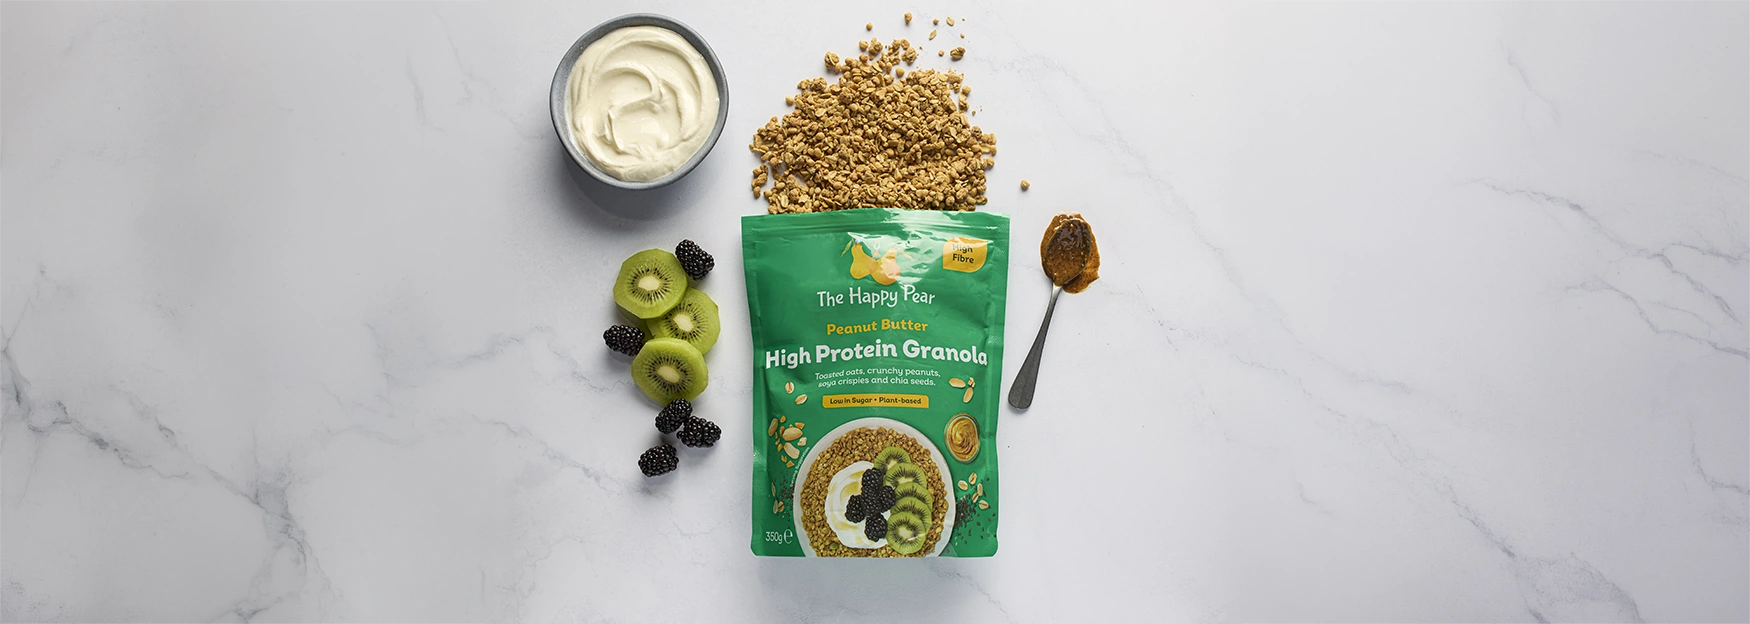
High protein granola
This granola is high in protein and fibre and low in sugar. Protein contributes to the maintenance of normal bones.
We love ours topped with fresh fruit, our favourite yoghurt and a drizzle of maple syrup. We hope you’ll enjoy it!
INGREDIENTS
OATS (41%), PEANUT Butter (12.5%), PEANUTS (12%), Chicory Root Fibre, Soy Protein Crisp (10%) [SOYA Protein Isolate, Tapioca Starch, Salt], PEANUT Flour, Olive Oil, Chia Seeds (Salvia hispanica) (2%), Natural Flavouring, Salt
ALLERGEN INFORMATION
For allergens, including Cereals containing Gluten, see highlighted ingredients.
Contains Peanuts, Oats, Soya
May also contain traces of Milk, Nuts, Cereals containing Gluten
Contains Chicory Root Fibre – excessive consumption may cause laxative effects. Made in an environment that handles some non-vegan materials.
Free from artificial colours, flavours and preservatives
Warning: Extra care has been taken to remove shell, although some may remain. Please remember small children can choke on nuts.
NUTRITIONAL INFORMATION
| Typical | per 100g |
|---|---|
| Energy | 2005kJ | 480kcal |
| Fat | 24g |
| Of which: | |
| Saturates | 3.5g |
| Carbohydrate | 35g |
| Of which: | |
| Sugars | 3g |
| Fibre | 10g |
| Protein | 26g |
| Salt | 0.47g |
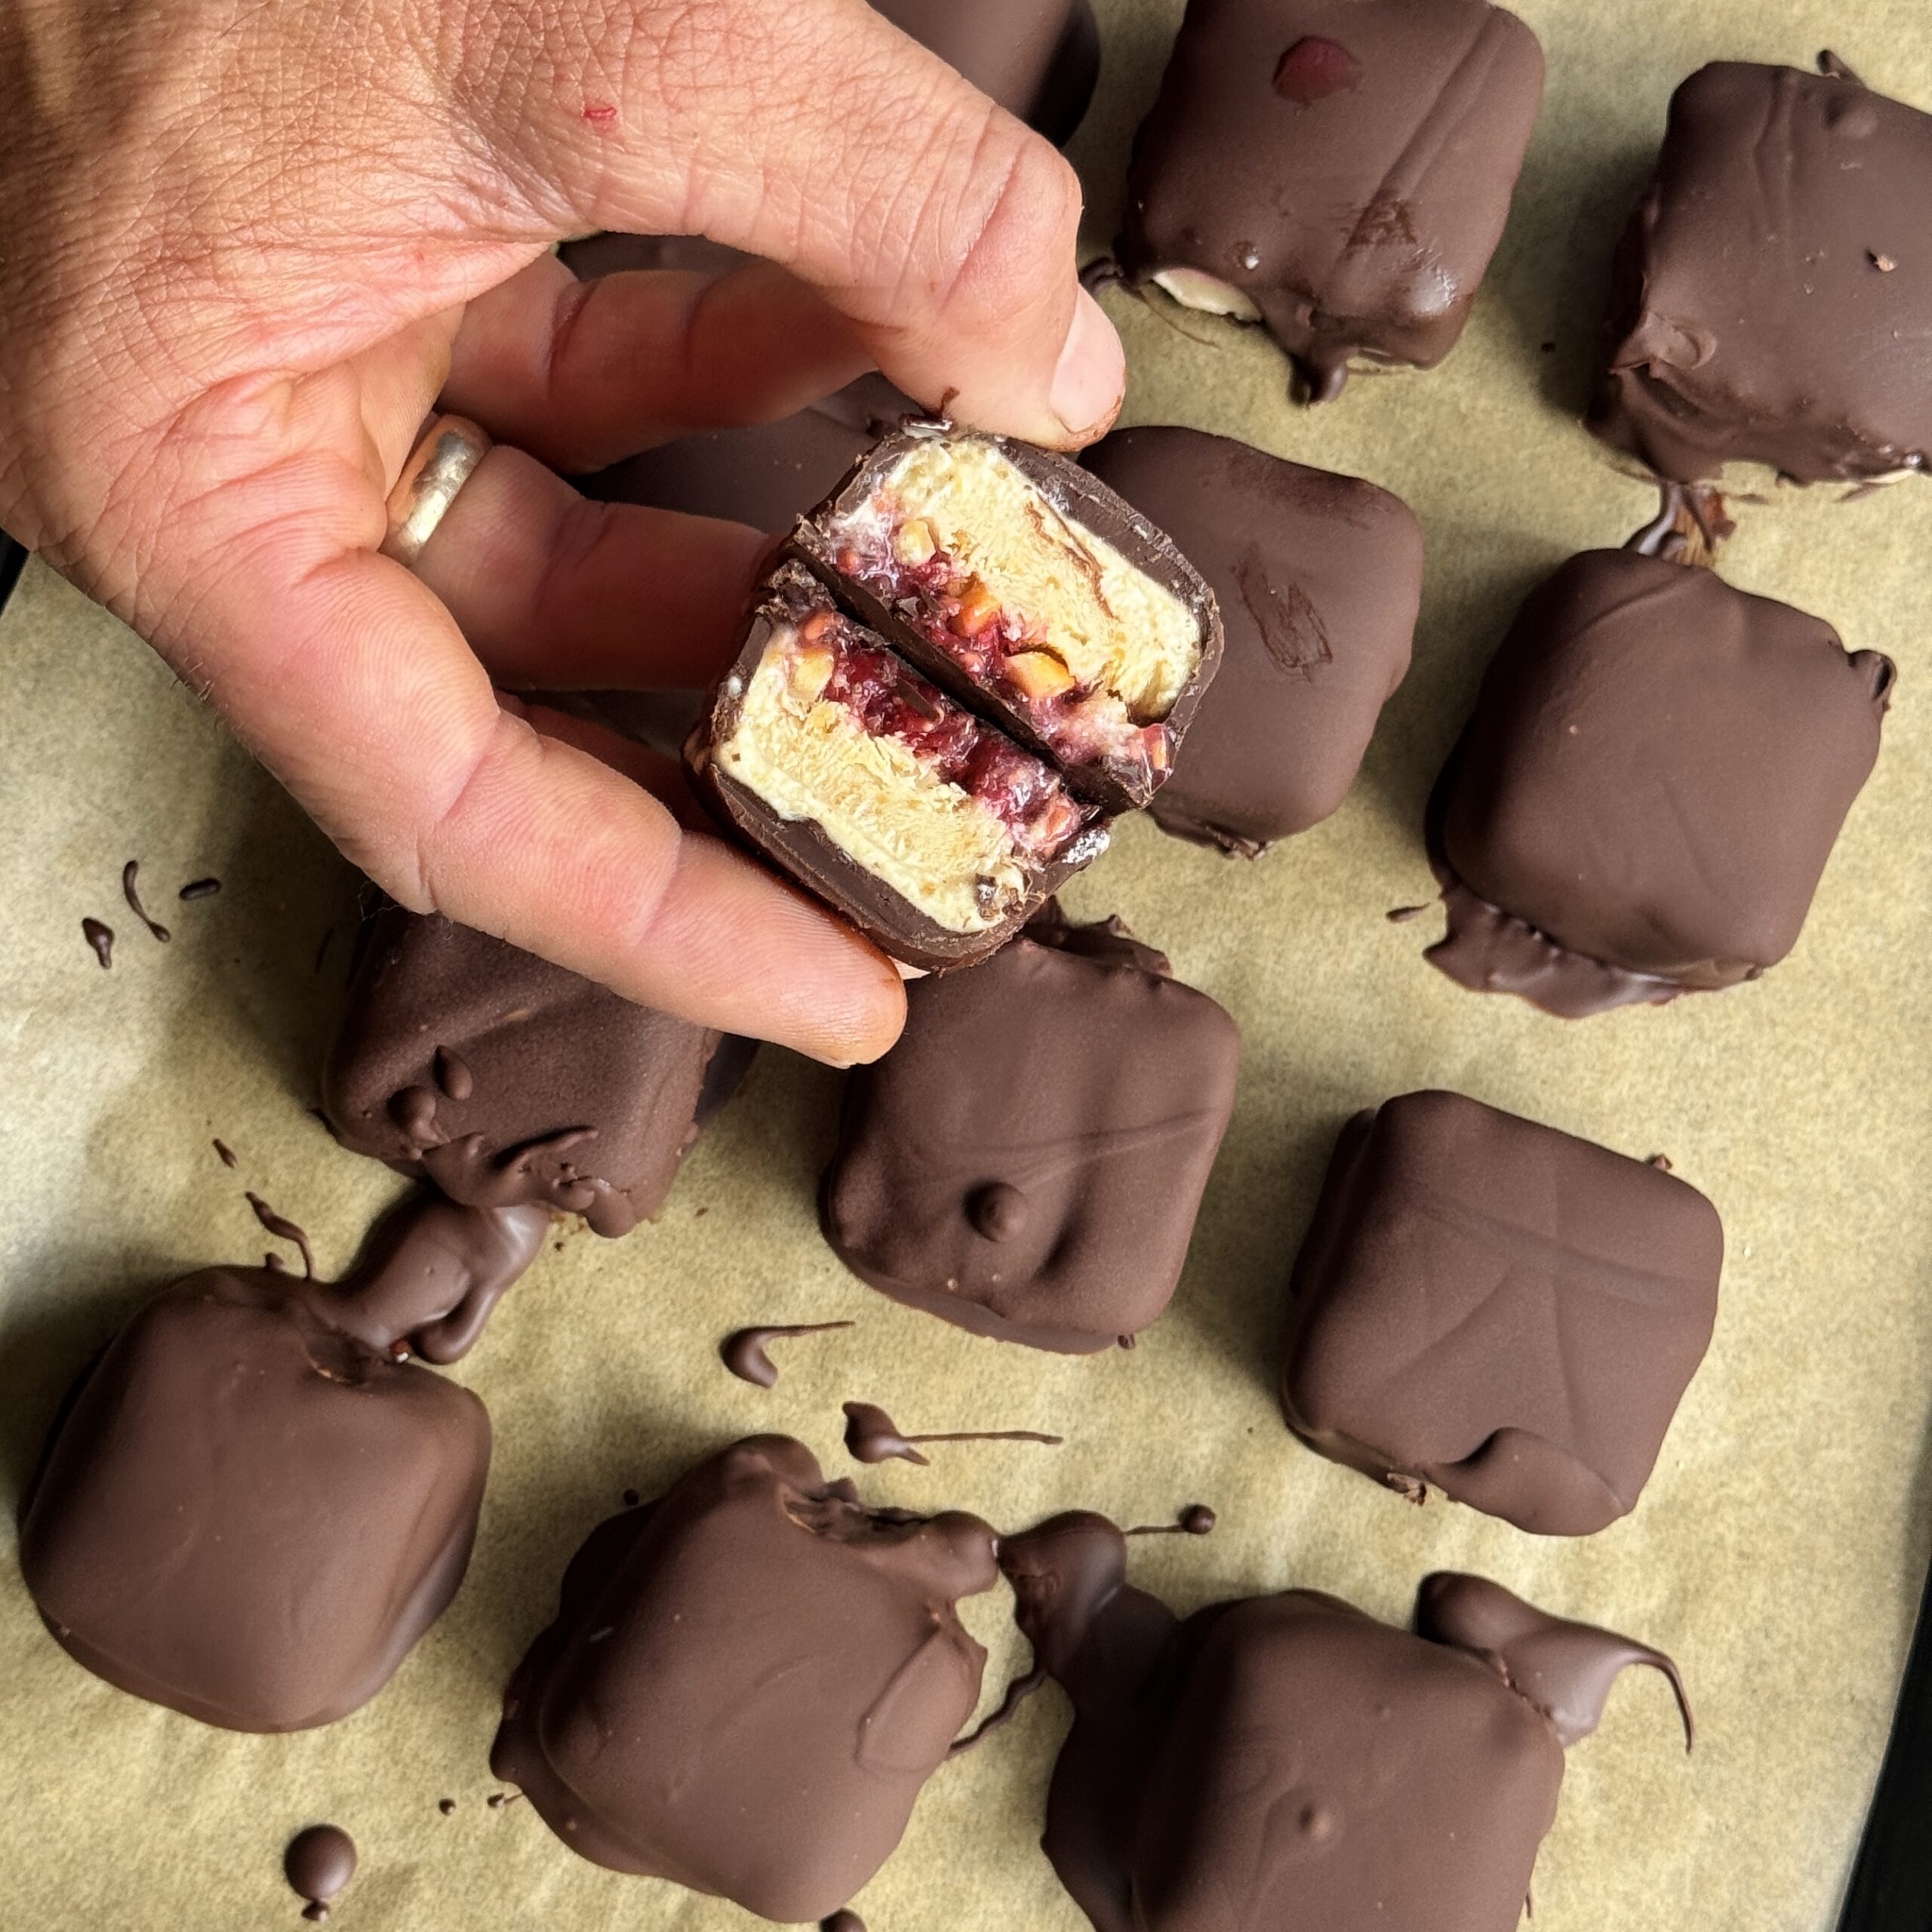
PB&J Frozen Yoghurt Bites
Takes 2 hours 15 minutes
Serves 12
Ingredients
For the yoghurt layer
- 300 g coconut yoghurt 1¼ cups
- 6 tbsp natural peanut butter
- 4 tbsp maple syrup
- 1 tsp Vanilla essence
- 40 g roasted peanuts roughly chopped (⅓ cup)
For the filling
- 250 g raspberries fresh or frozen
- 3 tbsp chia seeds
- 3 tbsp maple syrup
- For the chocolate coating
- 200 g dark chocolate 1¼ cups chopped
- 1 tsp coconut oil optional, for a smoother coating
Decoration:
- Freeze dried raspberries
- Flakey sea salt
Instructions
Make the yoghurt mixture
- In a bowl, mix together the coconut yoghurt, peanut butter, and maple syrup until smooth and creamy.
Layer the bites
- Spoon a little of the yoghurt mixture into each cavity of an ice cube tray or silicone mould.
- Add a few frozen raspberries and a sprinkle of chopped peanuts.
- Top with the remaining yoghurt mixture, ensuring the raspberries are mostly covered.
- Tap the tray gently on the counter to remove any air pockets.
Freeze
- Place in the freezer for at least 4 hours, or until completely solid.
Prepare the chocolate
- Melt the dark chocolate and coconut oil together in a heatproof bowl set over simmering water, or microwave in short bursts, stirring between each burst.
Coat the bites
- Remove the frozen bites from the mould.
- Using two forks, quickly dip each bite into the melted chocolate, allowing any excess chocolate to drip off.
- Place onto a lined tray or plate.
Set and serve
- The chocolate should harden almost instantly thanks to the frozen centres.
- Enjoy immediately or store in an airtight container in the freezer for up to 1 month.
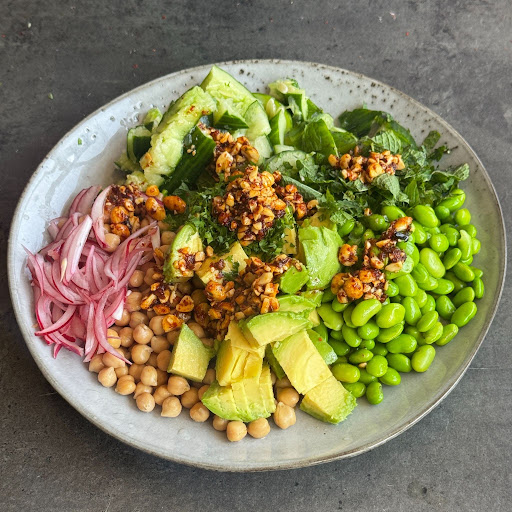
Smashed Cucumber & Peanut Rayu Salad
Takes 20 minutes
Serves 4
Ingredients
For the salad
- 1 large cucumber approx. 350g
- 1 ripe avocado diced
- 200 g 1½ cups cooked edamame beans
- 50 g ⅓ cup pickled red onions
- 1 x 400g tin chickpeas drained and rinsed (240g drained)
- 10 g ¼ cup fresh mint, finely chopped
- 10 g ¼ cup fresh parsley, finely chopped (or herbs of your choice)
- 75 g ⅓ cup Peanut Rayu (recipe below)
For the Peanut Rayu
- 40 g ⅓ cup roasted salted peanuts, roughly chopped
- 3 garlic cloves finely diced
- 50 ml ¼ cup neutral oil (such as rapeseed or sunflower)
- 1 tbsp gochugaru alternatively you can use paprika & chilli powder
- ½ tbsp coconut sugar or soft brown sugar
- ½ tsp salt
- 1 tbsp sesame seeds
- 1 tbsp tamari or soy sauce
Instructions
Make the Peanut Rayu
- Finely dice the garlic and roughly chop the peanuts.
- Add the oil and garlic to a small saucepan and place over a medium heat. Cook for 2–3 minutes until the garlic is lightly golden and crisp. Keep a close eye on it, as garlic can burn quickly and become bitter.
- Meanwhile, combine the gochugaru (or paprika and chilli powder), sugar and salt in a heatproof bowl.
- Carefully pour the hot oil and crispy garlic over the spice mixture and stir well. Add the chopped peanuts, sesame seeds and tamari, then mix until combined. Taste and adjust the seasoning if needed. Leave to cool while you prepare the salad.
Smash the cucumber
- Place the cucumber on a chopping board and gently smash it with a rolling pin until it splits and cracks. This helps release some of the moisture while creating lots of texture for the dressing to cling to.
- Roughly chop into bite-sized pieces.
Prepare the salad
- Drain and rinse the chickpeas and edamame if needed.
- Dice the avocado and finely chop the mint and parsley.
- Add the smashed cucumber, avocado, chickpeas, edamame, pickled onions and herbs to a large serving bowl.
Assemble
- Spoon over the Peanut Rayu and gently toss until everything is well coated.
- Serve immediately as a light lunch, side salad or alongside grilled tofu, tempeh or your favourite barbecue dishes. Any leftover Peanut Rayu will keep in an airtight jar in the fridge for up to 1 week and is delicious drizzled over noodles, rice bowls or roasted vegetables.
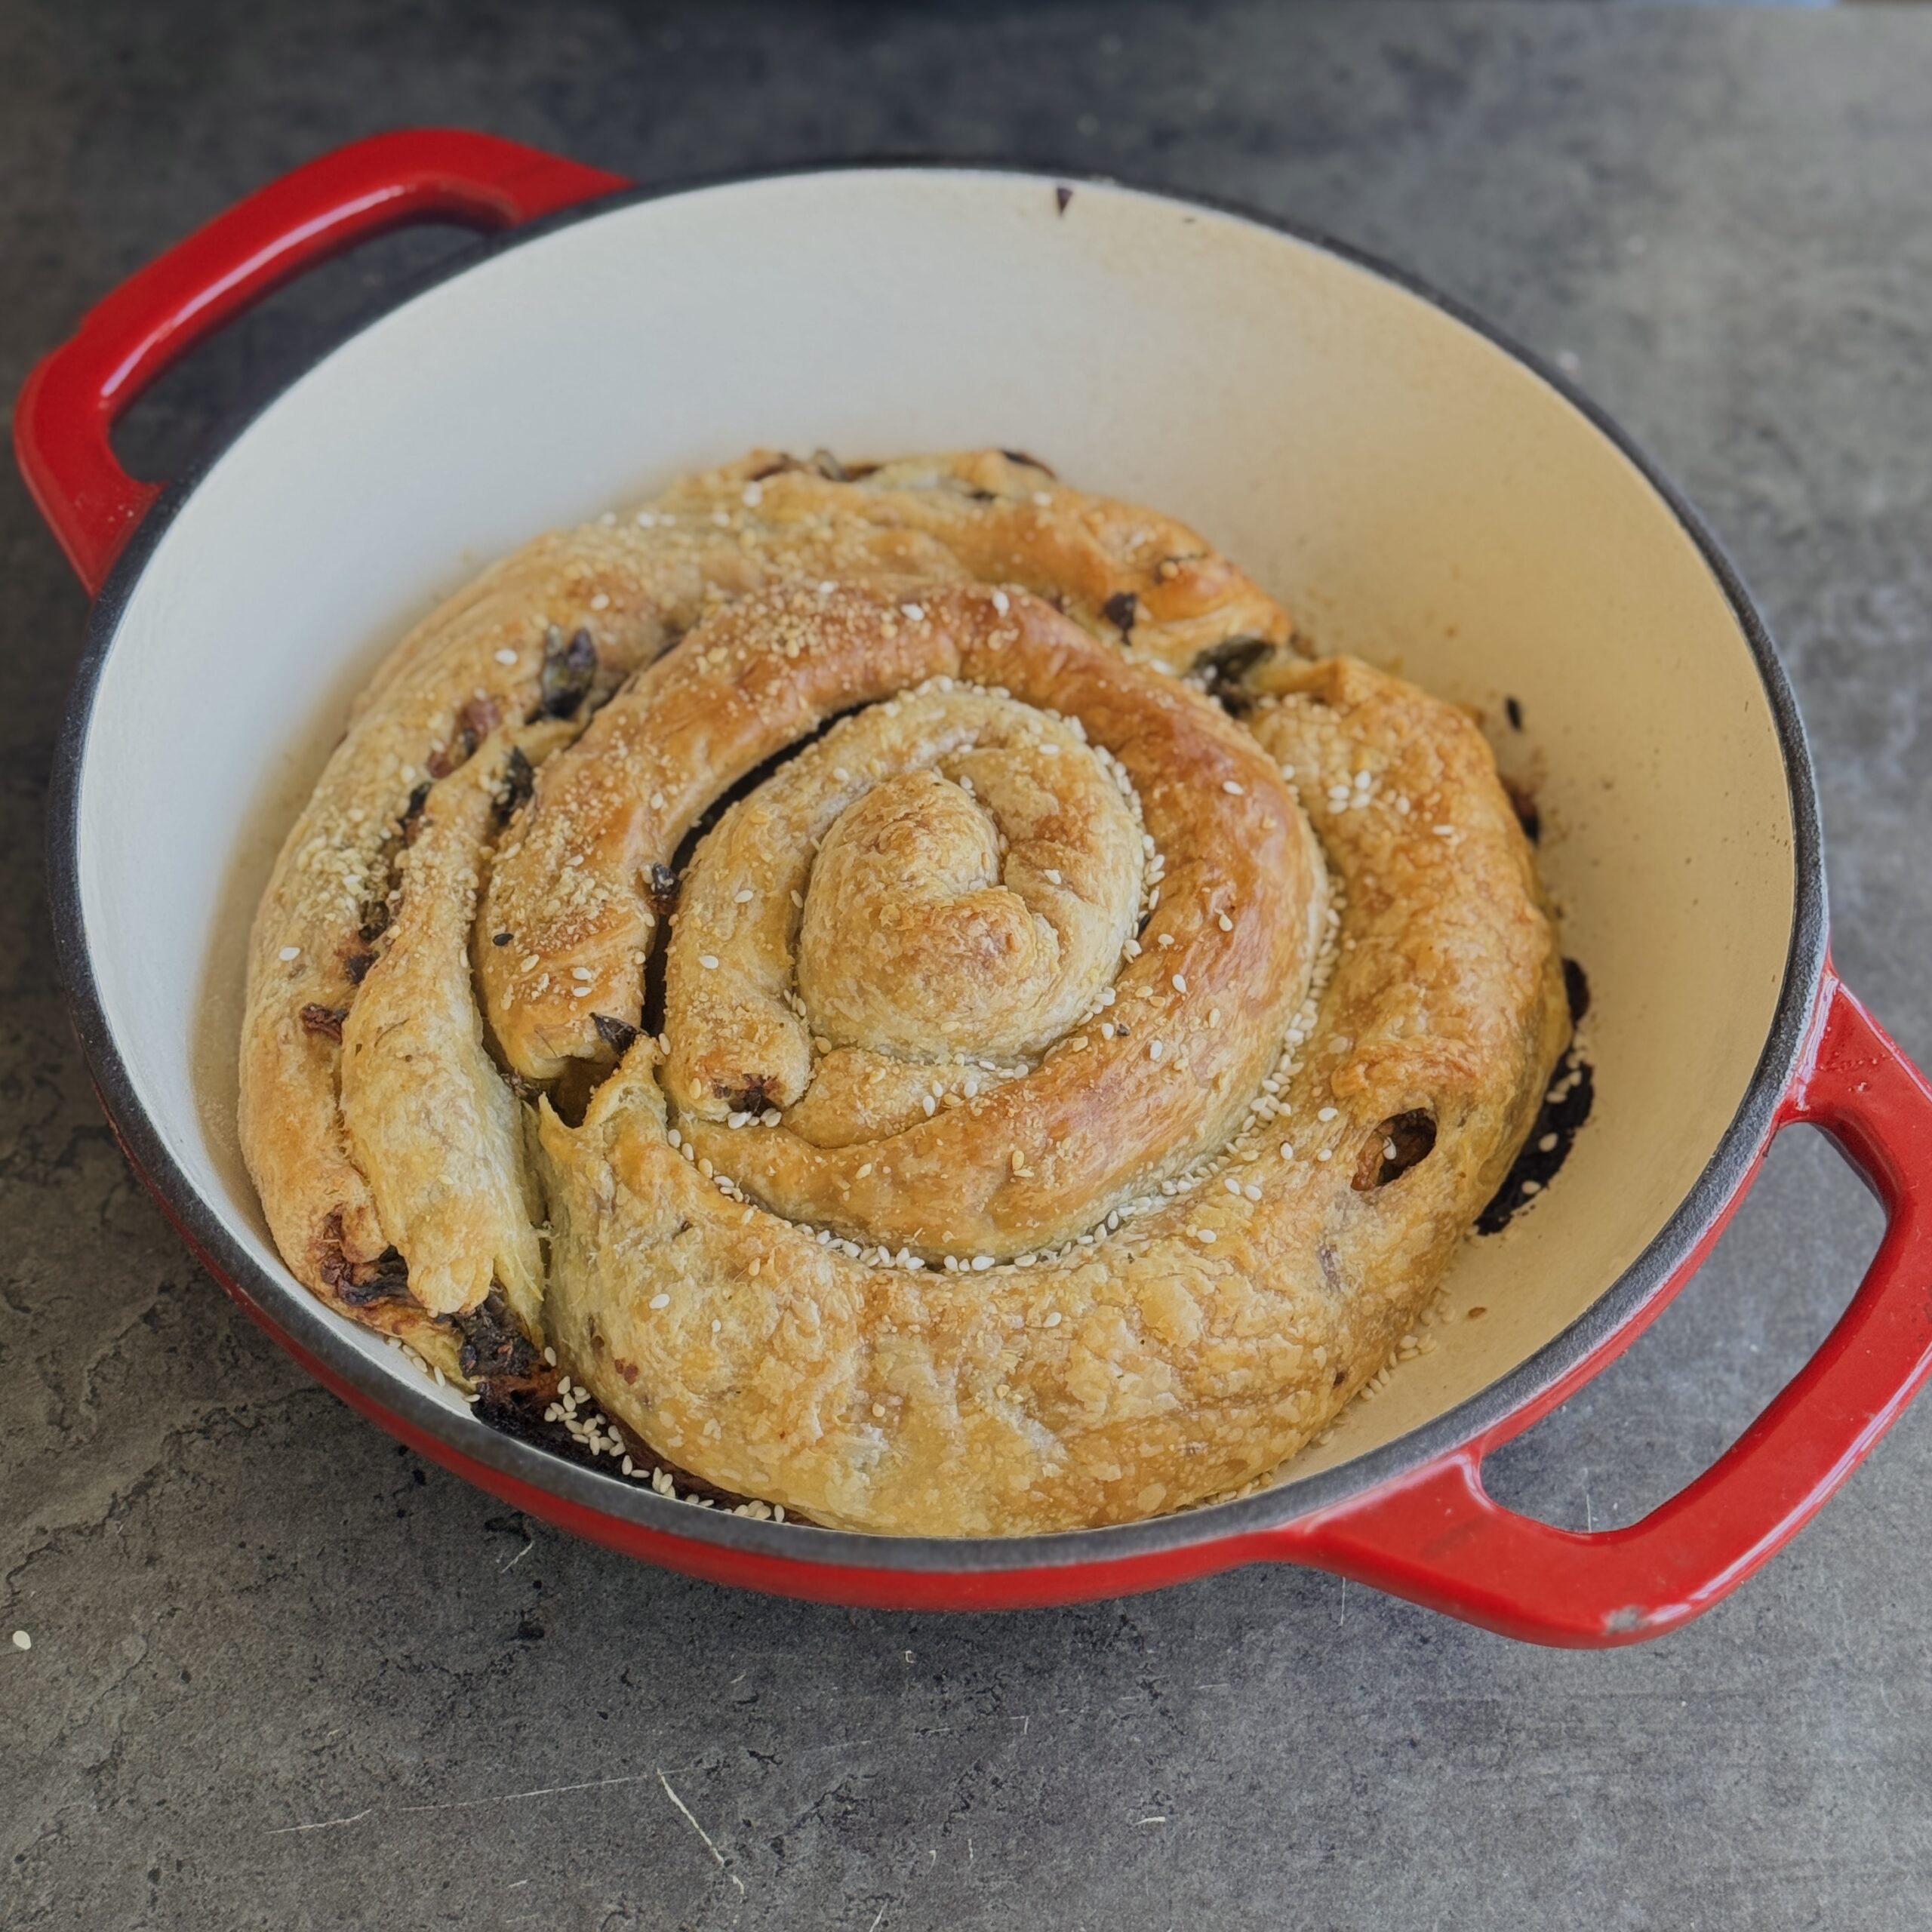
Crispy Spinach & Feta Spanakopita Börek
Takes 50 minutes
Serves 4
Ingredients
- 2 medium white onions approx. 300g, finely diced
- 2 cloves garlic finely chopped
- 200 g mixed greens roughly chopped (about 6 cups)
- 50 g fresh herbs about 1 cup loosely packed, such as dill, mint and parsley, finely chopped
- 200 g plant-based feta crumbled (about 1¼ cups)
- Zest of 1 lemon
- 1 tbsp olive oil plus extra for brushing
- ½ tsp sea salt
- ¼ tsp black pepper
- 1 sheet ready-rolled puff pastry approx. 320g
- 1 tbsp sesame seeds
Instructions
- Preheat the oven to 180°C fan (200°C conventional) and lightly grease a cast-iron skillet or round baking dish.
- Heat the olive oil in a large frying pan over a medium heat. Add the onions and cook for 8–10 minutes until softened and lightly golden.
- Add the garlic and cook for a further minute until fragrant.
- Stir in the mixed greens and cook for 2–3 minutes until wilted. Remove from the heat and allow to cool slightly.
- Add the chopped herbs, crumbled feta and lemon zest. Season with salt and black pepper, then mix well.
- Unroll the puff pastry and cut it in half lengthways to create two long strips.
- Divide the filling evenly between the pastry strips, placing it in a line along the centre of each strip. Fold the pastry over the filling and seal the edges to create two long sausage shapes.
- Starting from the centre of the prepared dish, coil one pastry sausage into a spiral. Continue with the second sausage, wrapping it around the first to create one large spiral.
- Brush the pastry generously with olive oil and sprinkle over the sesame seeds.
- Bake for 30 minutes, or until the pastry is golden brown, crisp and cooked through.
- Leave to cool for 5 minutes before slicing and serving.
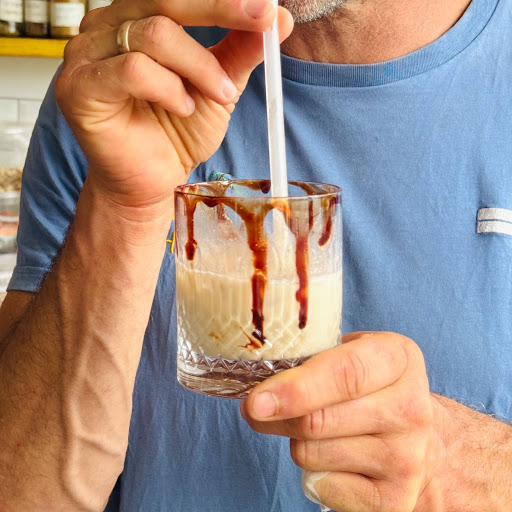
Viral Date Iced Coffee
Takes 3 minutes
Serves 2
Ingredients
- 200 g Medjool dates stones removed (approximately 1 cup packed)
- 300 ml strong freshly brewed coffee 1¼ cups
- 700 ml oat milk 3 cups
- 400 g ice cubes approximately 4 cups
Instructions
Make the Date Coffee Caramel
- Remove the stones from the dates and place the dates in a heatproof bowl or jug.
- Pour the hot freshly brewed coffee over the dates and leave to soak for 3 minutes to soften.
- Transfer the coffee and dates to a blender or food processor and blend until completely smooth and creamy. This may take 1–2 minutes depending on the strength of your blender.
Assemble the Drinks
- Divide the ice between two 400ml glasses.
- Pour the oat milk into each glass, filling them about three-quarters full.
- Divide the date coffee caramel mixture evenly between the glasses.
- Stir well until fully combined and serve immediately.
Tips
- For an extra cold and creamy drink, chill the oat milk before using.
- Any leftover date coffee caramel can be stored in an airtight container in the fridge for up to 3 days and stirred into porridge, smoothies or more iced coffee.
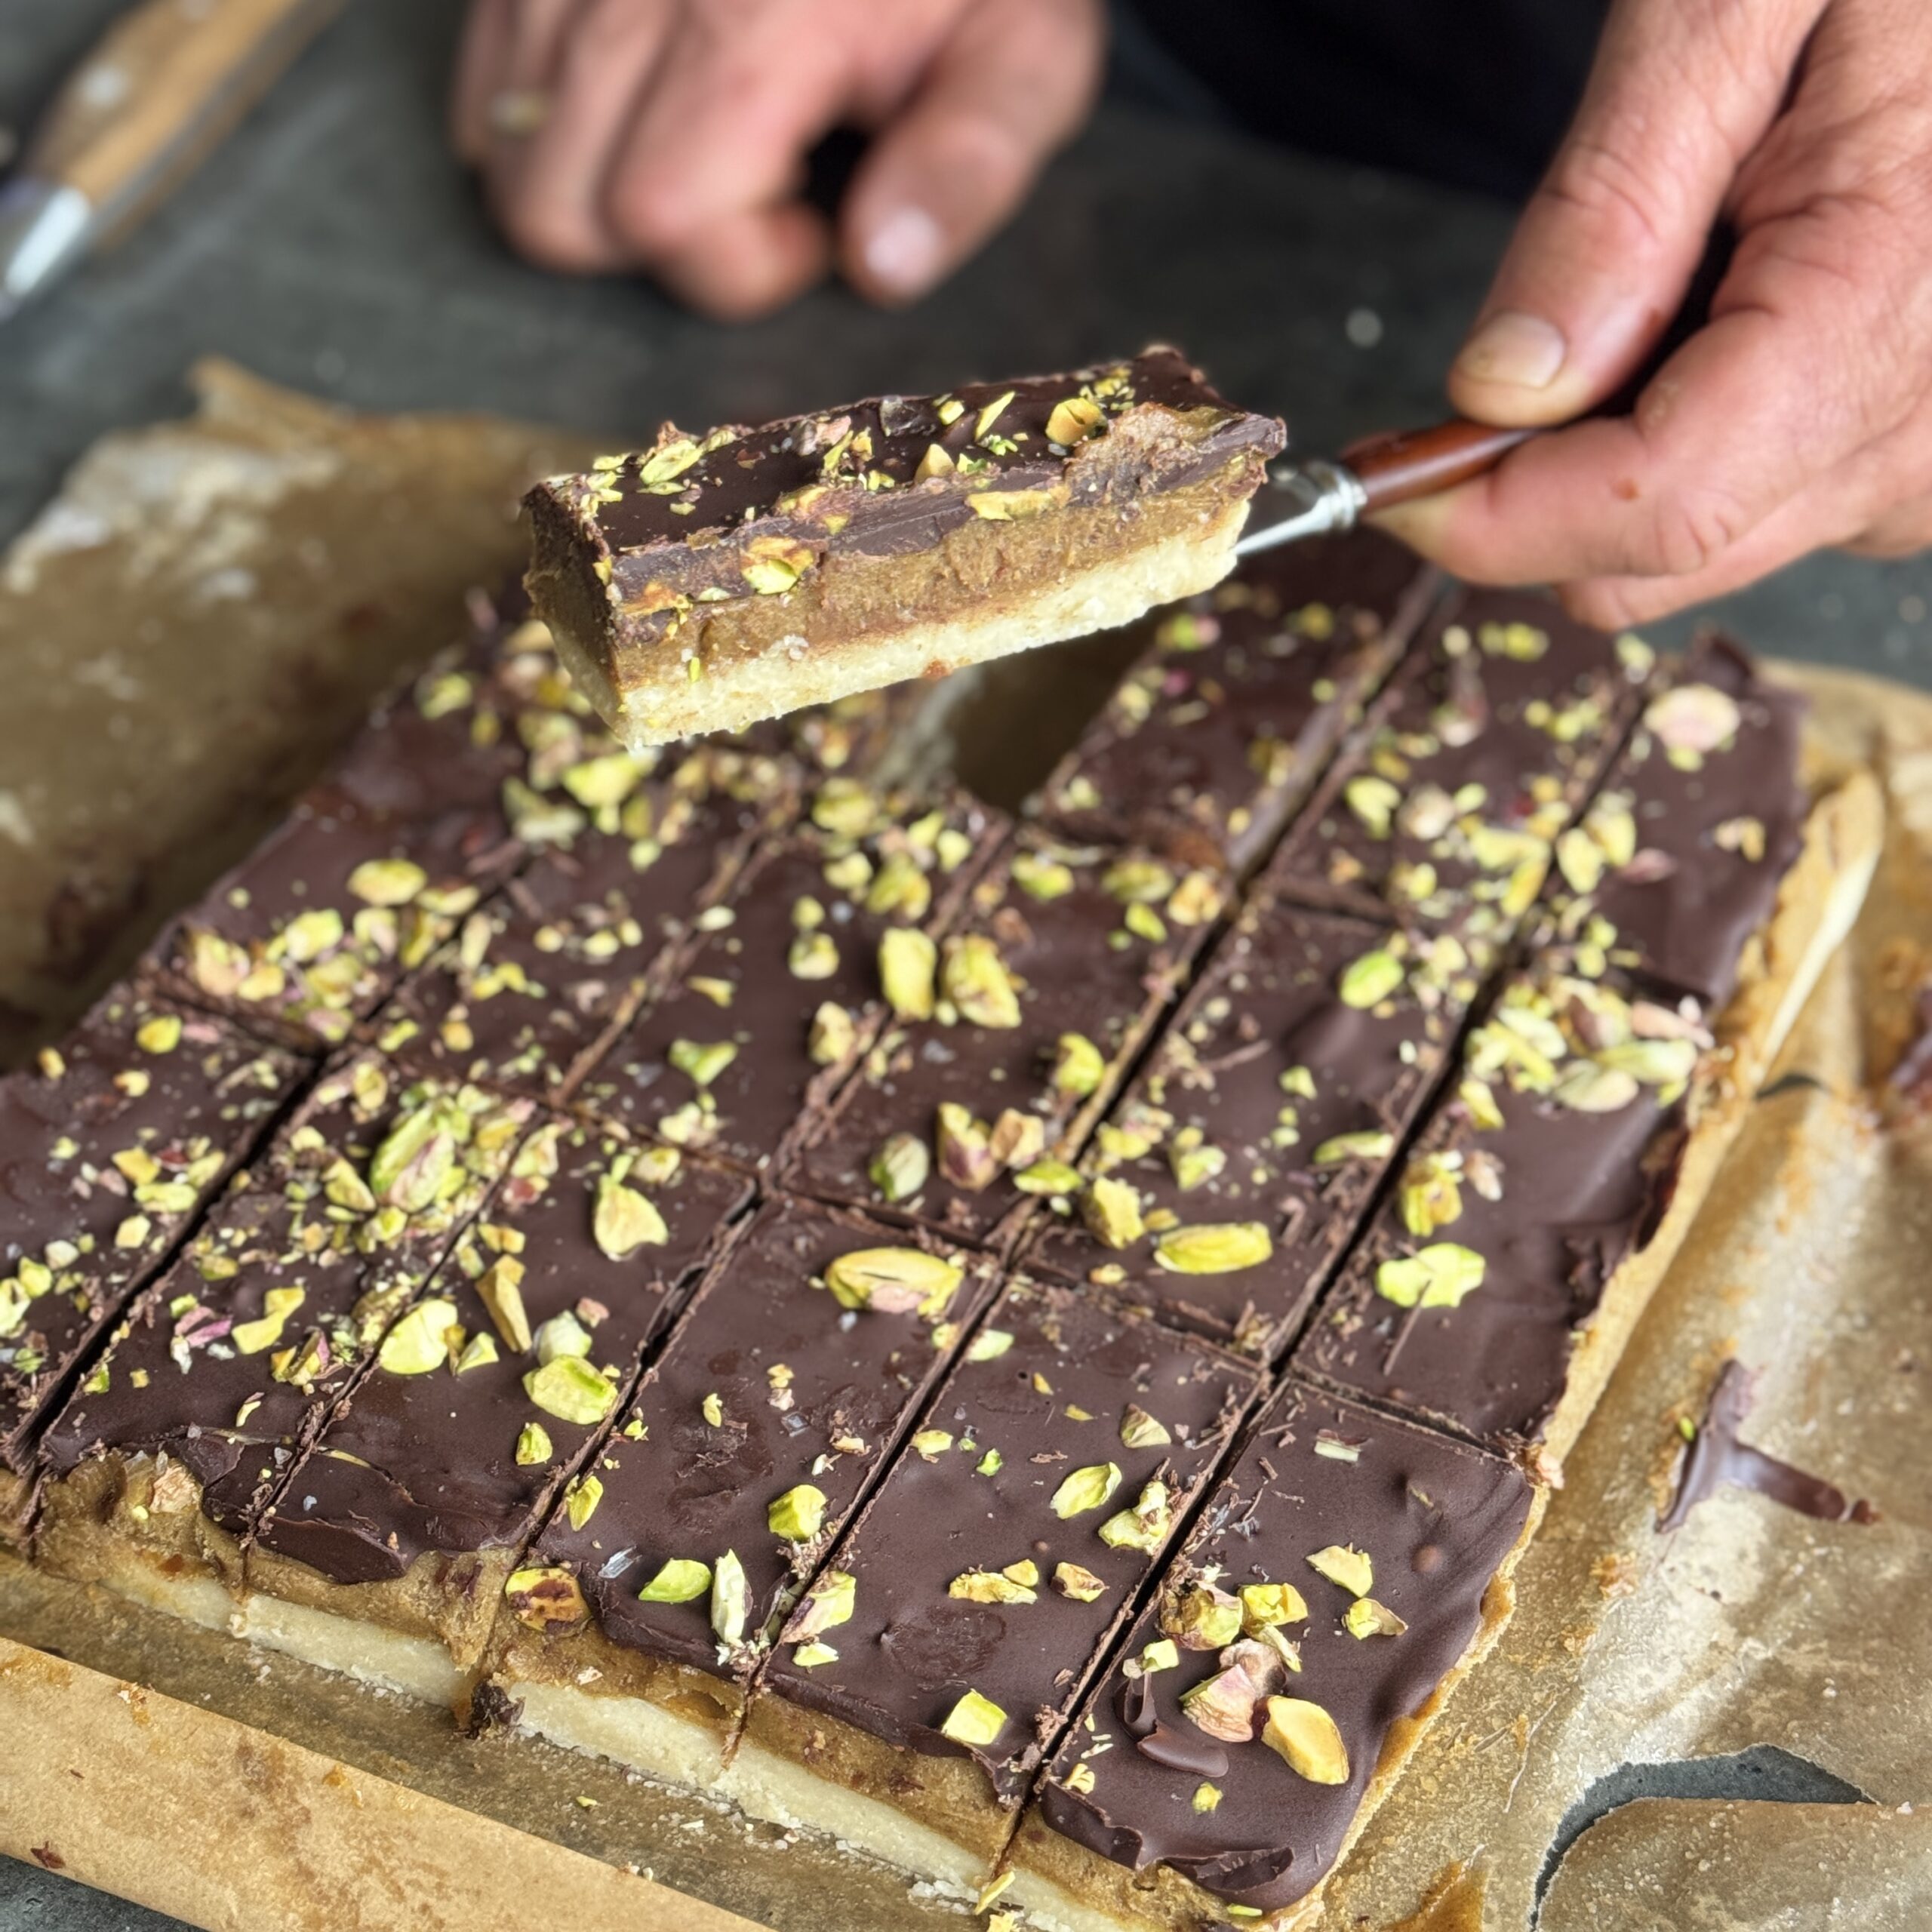
Pistachio Mocha Snickers Bars
Takes 2 hours 20 minutes
Serves 12
Ingredients
Base layer
- 280 g ground almond or almond flour
- 100 g agave syrup maple syrup (or clear date syrup)
- 100 g coconut oil
- Pinch of salt
Caramel Filling
- 300 g pitted dates
- 150 g pistachio butter
- 12 tbsp black coffee
- 4 tbsp coconut oil
- 1 large pinch of salt adjust to taste
- 1 tbsp vanilla extract
- 100 g of shelled pistachio nuts
Chocolate Topping
- 300 g dark chocolate
Instructions
Soak dates and prep the pistachios:
- First step: Soak the pitted dates in hot black coffee to infuse them and to soften the dates.
- Roughly chop the shelled pistachio nuts.
Base Layer
- Line a brownie pan or baking tray (approx. 20cm x 30cm) with parchment paper.
- In a saucepan, melt the coconut oil. In a large bowl, mix the ground almonds with the melted coconut oil and agave syrup or clear date syrup.
- Pour the mixture into the lined baking tray and compact it with a spoon until it is level and compressed.
- Place the tray in the freezer for 20 minutes to set while you prepare the caramel filling and melt the chocolate.
Pistachio Coffee Caramel Layer
- Drain the dates ensuring to keep the soak water.
- In a food processor, add all the pistachio caramel ingredients including the coffee jand blend until smooth and caramel-like. This may take up to 5 minutes, depending on your food processor. Add more coffee if the mixture is too thick to blend smoothly.
- Once the base has set, spread the caramel layer evenly over the base.
- Sprinkle an even layer of chopped pistachio on top so there is a generous coating.
- Return the tray to the freezer to set again while you melt the chocolate.
Chocolate Topping
- Melt the chocolate using a water bath or Bain Marie.
- Remove the tray from the freezer and cut into bar shapes.
- Carefully coat each bar in chocolate so each bar is fully covered.
- Allow the chocolate to cool and set (at room temperature or in the fridge).
- Once fully set, cut into squares of your desired size.
- Serve and enjoy!

Mango Magnums
Takes 4 hours 20 minutes
Serves 8
Ingredients
- 800 g frozen mango chunks
- 3 medium bananas about 300g total
- 250 g dark chocolate 70% cocoa, roughly chopped
- 1 tbsp coconut oil optional, for a thinner chocolate coating
Instructions
- Attach the sorbet attachment to your Nama J2 Juicer.
- Feed the frozen mango and frozen banana through the juicer, alternating between the two fruits, to create a smooth, creamy sorbet.
- Spoon the sorbet into 8 ice lolly moulds or shape into bars on a parchment-lined tray. Insert lolly sticks and freeze for at least 4–6 hours, or until completely firm.
- Melt the dark chocolate in a heatproof bowl over a pan of simmering water (or in short bursts in the microwave). Stir in the coconut oil if using.
- Remove the frozen bars from their moulds and quickly dip each one into the melted chocolate, turning to coat evenly. Allow any excess chocolate to drip off.
- Place the coated bars back onto the parchment-lined tray. The chocolate will begin to set almost immediately thanks to the frozen filling. Return to the freezer for 5–10 minutes to fully harden before serving.

Crispy Ginger-Sesame Quinoa Salad
Takes 25 minutes
Serves 4
Ingredients
The Crispy Quinoa
- 370 g cooked and cooled quinoa approx. 2 cups
- 15 ml toasted sesame oil 1 tbsp
- 15 ml tamari or soy sauce 1 tbsp
- Pinch of garlic powder optional
The Fresh Base
- 1 large cucumber deseeded and sliced into half-moons
- 155 g shelled edamame thawed
- 1 large ripe avocado diced
- 50 g spring onions finely chopped
- 10 g fresh basil torn or chopped
- 20 g toasted sesame seeds
The Ginger-Tahini Dressing
- 30 g tahini
- 30 ml seasoned rice vinegar 2 tbsp
- 15 ml tamari or soy sauce 1 tbsp
- 15 ml toasted sesame oil 1 tbsp
- 20 g maple syrup 1 tbsp
- 15 ml fresh lime juice 1 tbsp
- 1½ tsp grated fresh ginger
- ½ tsp grated garlic
Instructions
Season the quinoa
- Toss the cooked quinoa with the oil and tamari to ensure flavour and even browning. In a bowl, combine the quinoa with the sesame oil and tamari. Mix well so every grain is lightly coated – this helps the grains crisp up individually in the air fryer.
Air-fry until golden
- Air-fry at 200°C for 8–12 minutes, shaking frequently for an even crunch. Line your air fryer basket with parchment paper and spread the quinoa in an even layer. Shake the basket every 3 minutes. Remove once the grains are deep golden and “rattle” when shaken. Leave to cool on a tray to fully crisp up.
Prepare the vegetables
- Slice the cucumber into half-moons (remove the seeds first to prevent sogginess). Chop the spring onions and basil, and prepare the edamame. Dice the avocado just before assembling to prevent browning.
Whisk the dressing
- Combine all dressing ingredients in a small bowl and whisk until smooth and creamy. If the dressing is too thick, add a teaspoon of water at a time until it reaches a pourable consistency.
Assemble and serve
- In a large bowl, toss the cucumber, edamame, spring onions and basil with the dressing. Gently fold in the avocado and crispy quinoa. Finish with toasted sesame seeds and serve immediately to maintain the crunch.
Serving suggestion
- Texture tip: If meal-prepping, store the crispy quinoa separately in a dry container. Add it to the dressed salad just before serving so it stays perfectly crunchy.
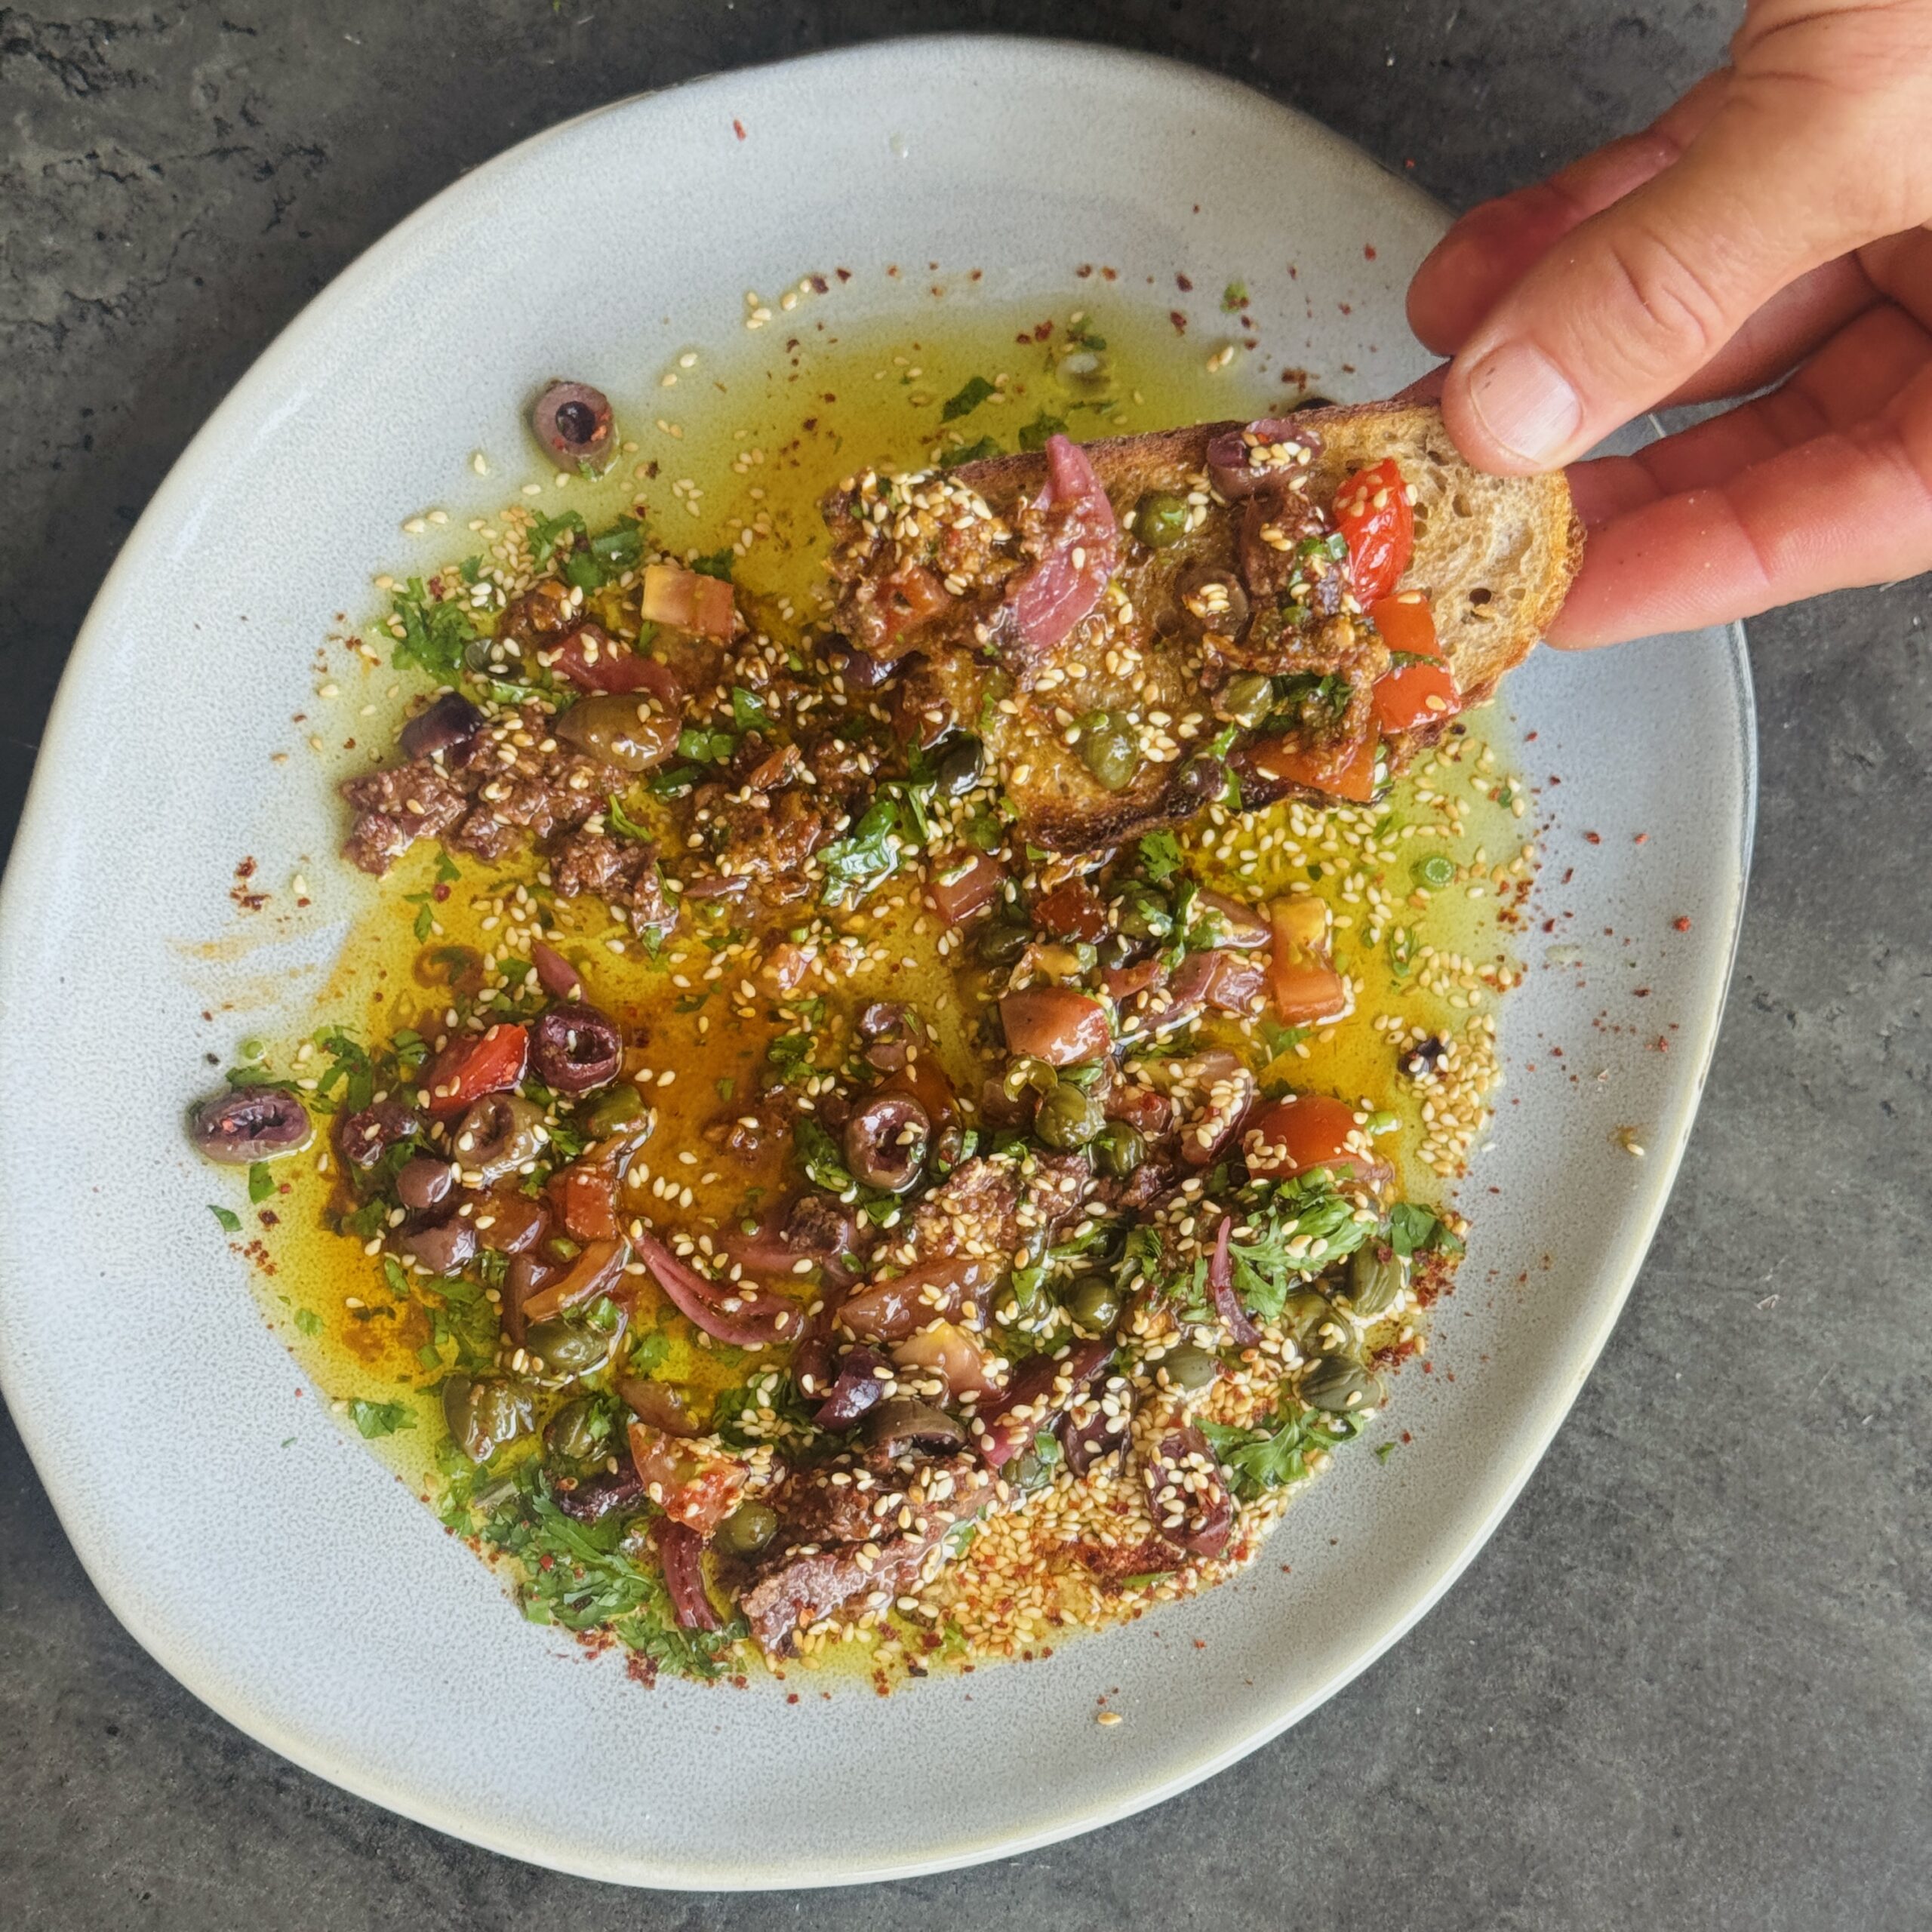
Loaded Olive Oil Dip with Herbs, Pesto, Tapenade & Capers
Takes 12 minutes
Serves 4
Ingredients
- 120 ml ½ cup extra virgin olive oil
- 2 tbsp finely chopped fresh parsley
- 3 tbsp The Happy Pear Black Olive Tapenade
- 3 tbsp The Happy Pear Sundried Tomato Pesto
- 1 large ripe tomato finely diced (or 200g cherry tomatoes, quartered)
- 1 tbsp capers drained and roughly chopped
- 1 tbsp toasted sesame seeds
- ½ tsp chilli flakes or more to taste
- 1 small garlic clove finely grated (optional)
- Zest of ½ lemon
- 1 tsp lemon juice
- A pinch of flaky sea salt
- Freshly ground black pepper
Instructions
- Toast the sesame seeds in a dry pan over medium heat for 2–3 minutes until lightly golden and fragrant. Allow to cool.
- Add the olive oil, parsley, tomatoes, pesto, tapenade, capers, sesame seeds, chilli flakes, garlic (if using), lemon zest and lemon juice to a shallow serving bowl.
- Stir gently to combine. Taste and season with flaky sea salt and plenty of black pepper. You may not need much salt as the tapenade and capers are already quite salty.
- Leave to sit for 10–15 minutes before serving to allow the flavours to mingle.
- Serve with warm sourdough, focaccia, grilled vegetables, or use as a dressing for roasted potatoes or beans.
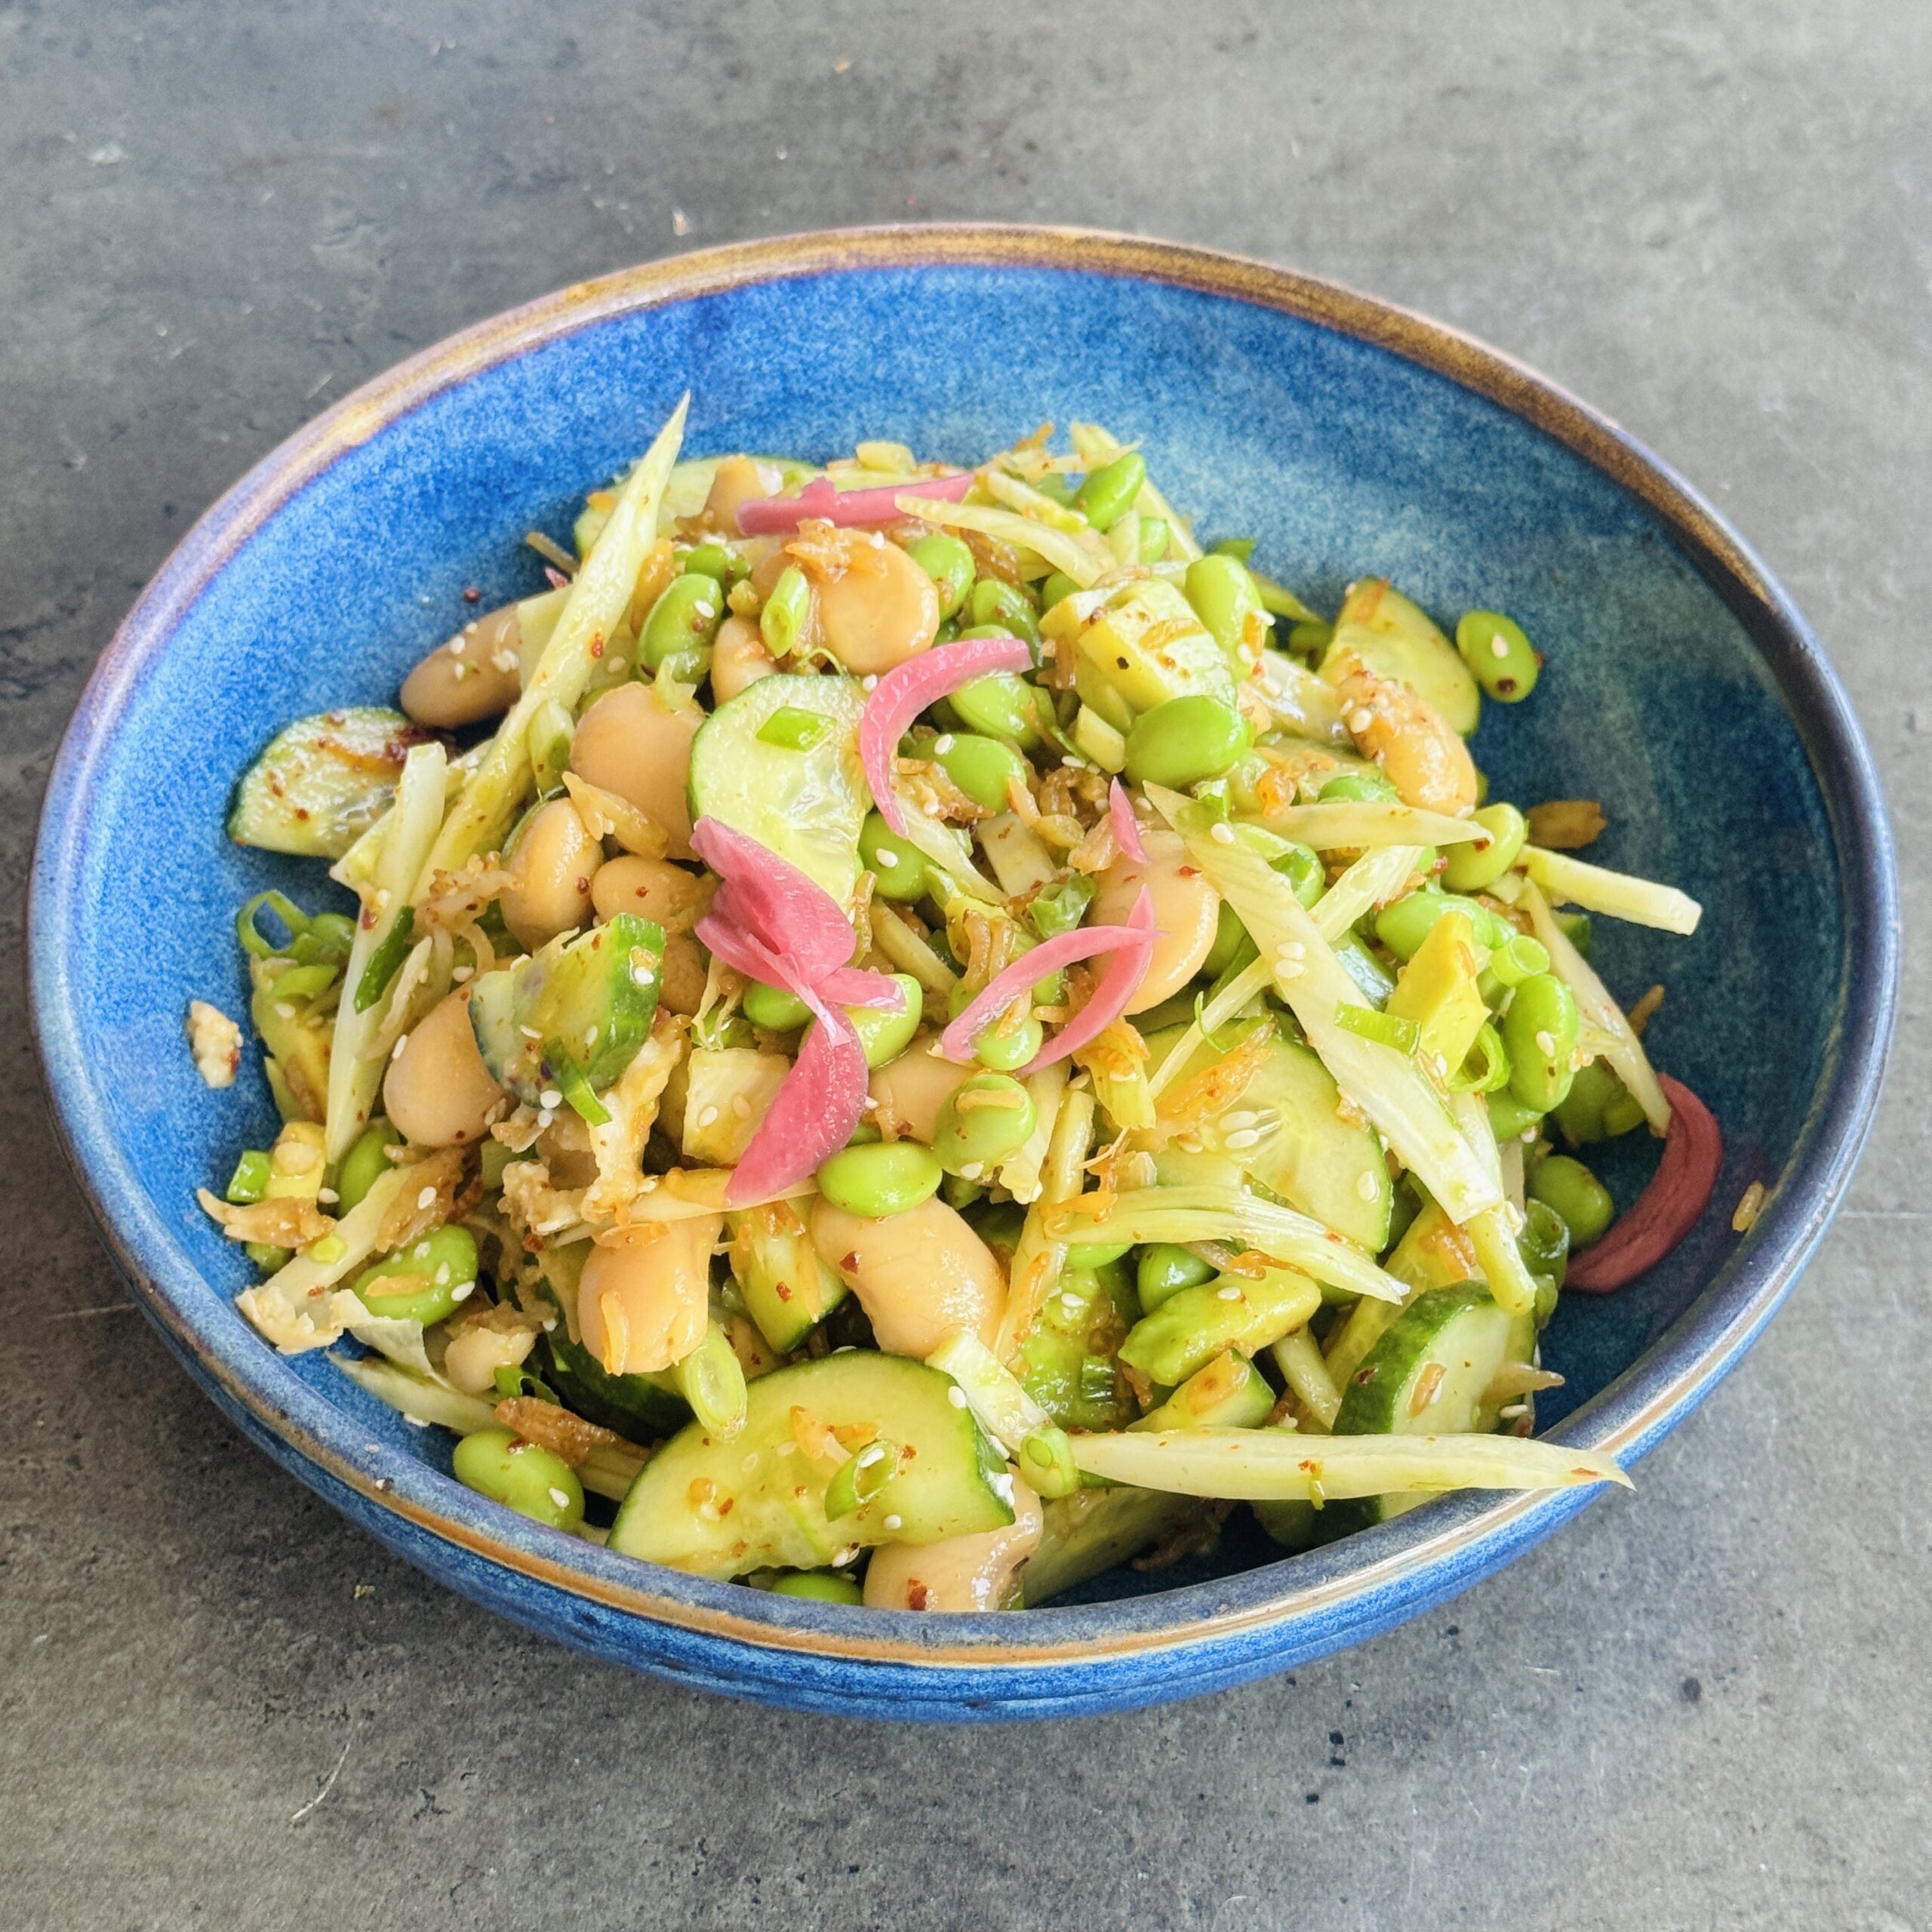
Crispy Rice Salad
Takes 30 minutes
Serves 4
Ingredients
For the Crispy Rice
- 250 g pre-cooked rice approximately 2 cups
- 15 ml sesame oil 1 tbsp
- 15 ml tamari or soy sauce 1 tbsp
- 2 g gochugaru 1 tsp or 1g chilli powder (½ tsp)
For the Salad
- 1 cucumber approximately 300g, diced
- 1 avocado approximately 150g, diced
- 1 x 400g tin butter beans drained and rinsed (240g drained weight)
- 150 g edamame beans 1 cup
- 1 bunch spring onions approximately 80g, finely sliced
- 1 fennel bulb approximately 250g, finely sliced
- 30 g sesame seeds 3 tbsp
For the Vinaigrette Dressing
- 60 ml olive oil 4 tbsp
- 45 ml rice vinegar or vinegar of choice 3 tbsp
- 30 ml maple syrup or syrup of choice 2 tbsp
- Pinch of salt
Instructions
Make the Crispy Rice
- Mix the rice with the sesame oil, tamari and gochugaru until evenly coated. Spread onto a lined air fryer tray or basket in a thin layer. Air fry at 200°C for 14–18 minutes, stirring once or twice during cooking, until golden and crispy around the edges.
Make the Dressing
- Add the olive oil, vinegar, maple syrup and salt to a small bowl or jar. Whisk or shake until well combined. If needed, add a splash of water to loosen the dressing until it is smooth and pourable.
- Taste and adjust if needed. You’re looking for a balance of sweet, salty and tangy flavours.
Assemble the Salad
- In a large serving bowl, combine the cucumber, avocado, butter beans, edamame, spring onions, fennel and sesame seeds.
Finish and Serve
- Add the crispy rice just before serving so it stays crunchy. Drizzle over the dressing and toss gently to combine.
Serve immediately and enjoy.
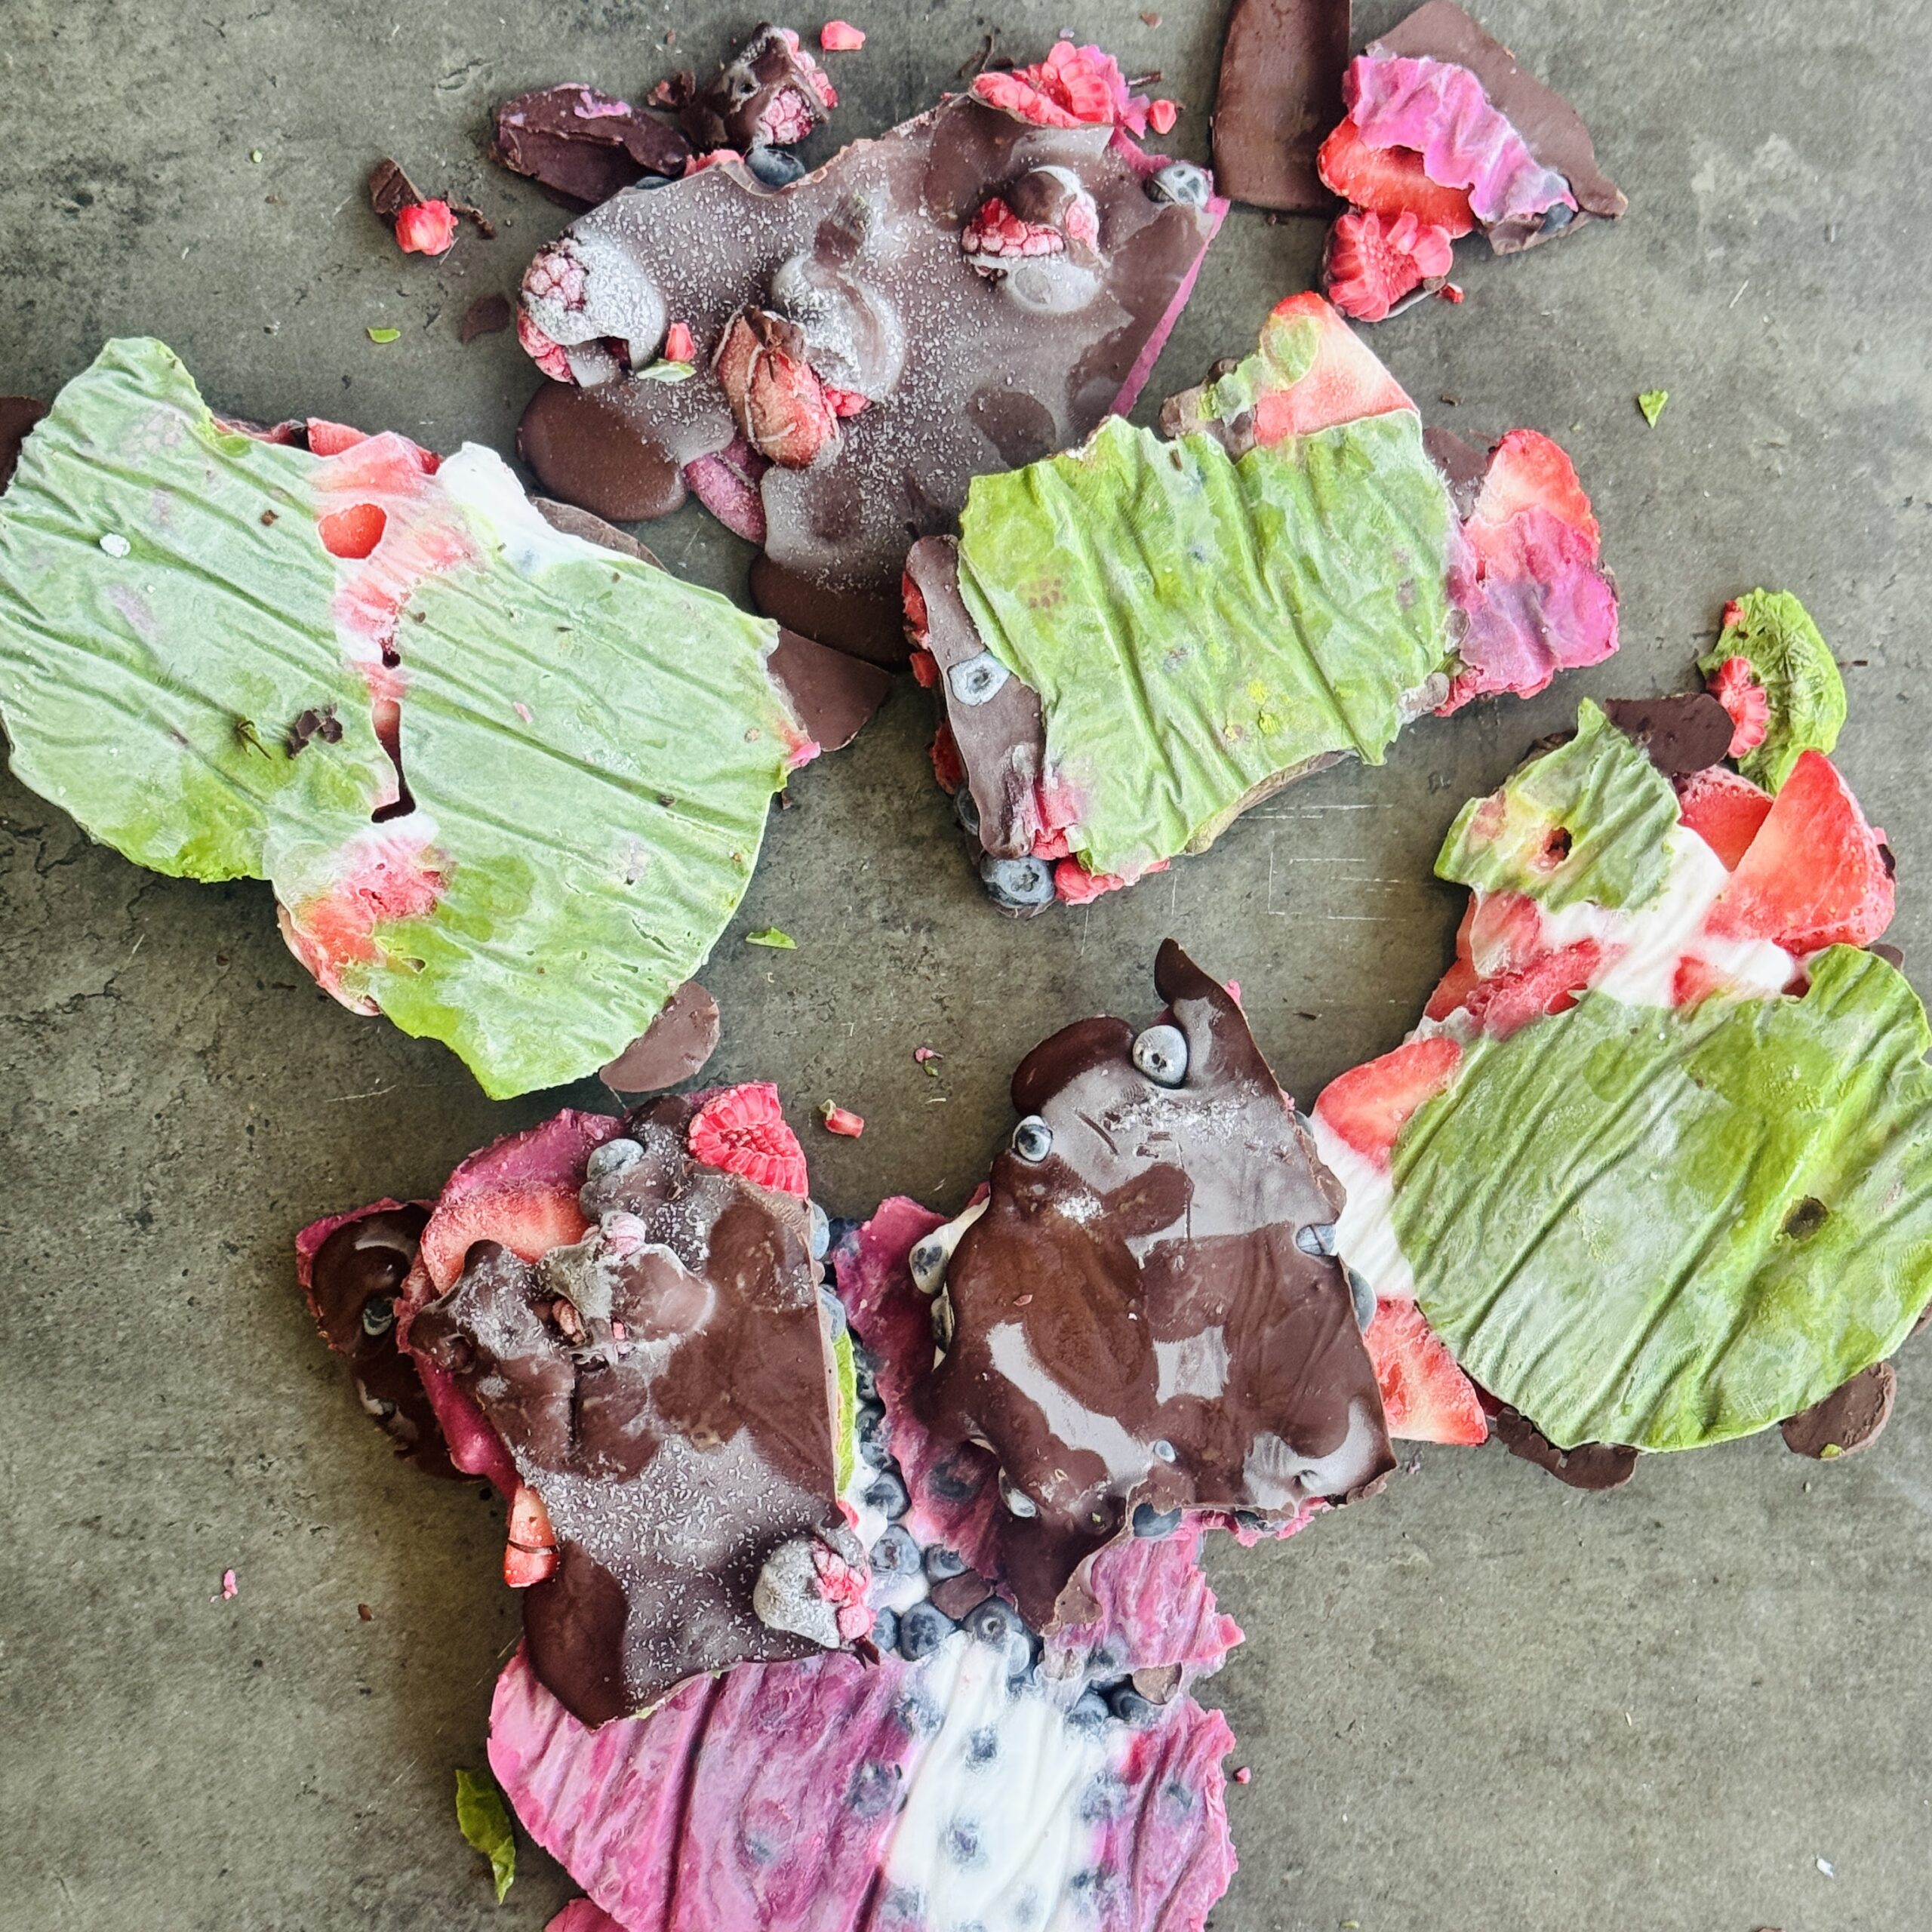
Frozen Yoghurt Chocolate Berry Bark 3 Ways
Takes 2 hours 20 minutes
Serves 12
Ingredients
For the yoghurts
- 350 g plain coconut yoghurt 1½ cups
- 150 g blueberry yoghurt ⅔ cup
- 1 tsp matcha powder
For the fruit
- 300 g blueberries 2 cups
- 400 g strawberries sliced (3 cups)
- 225 g raspberries 2 cups
To finish
- 300 g dark chocolate melted (1¾ cups chopped)
Instructions
- Start by dividing the plain coconut yoghurt between two bowls. Stir the matcha powder into one bowl to create a vibrant green matcha yoghurt, leaving the other bowl plain. Slice the strawberries and line a baking tray or board that will fit into your freezer with baking parchment.
Version 1 – Blueberry & Coconut
- Dollop 3 tablespoons of blueberry yoghurt and 3 tablespoons of plain coconut yoghurt onto the prepared tray and gently swirl them together. Scatter over a generous handful of blueberries and place in the freezer for 15–20 minutes while you melt the chocolate. Pour around 100g of the melted dark chocolate over the top, then return to the freezer for 1–2 hours, or until completely firm.
Version 2 – Matcha, Strawberry & Blueberry
- Dollop 3 tablespoons of matcha yoghurt and 3 tablespoons of plain coconut yoghurt onto the lined tray, gently swirling the two together. Scatter over a handful of sliced strawberries and a handful of blueberries. Freeze for 15–20 minutes before pouring over around 100g of the melted dark chocolate. Return to the freezer until completely set.
Version 3 – Matcha, Blueberry & Raspberry
- Dollop 2 tablespoons of matcha yoghurt and 3 tablespoons of blueberry yoghurt onto the lined tray and gently swirl together. Top with a generous handful each of blueberries and raspberries. Freeze for 15–20 minutes, then pour over the remaining 100g of melted dark chocolate and return to the freezer until fully set.
- Once frozen, snap each bark into rustic pieces and enjoy straight from the freezer.
Storage
- Store in an airtight container in the freezer for up to 1 month.
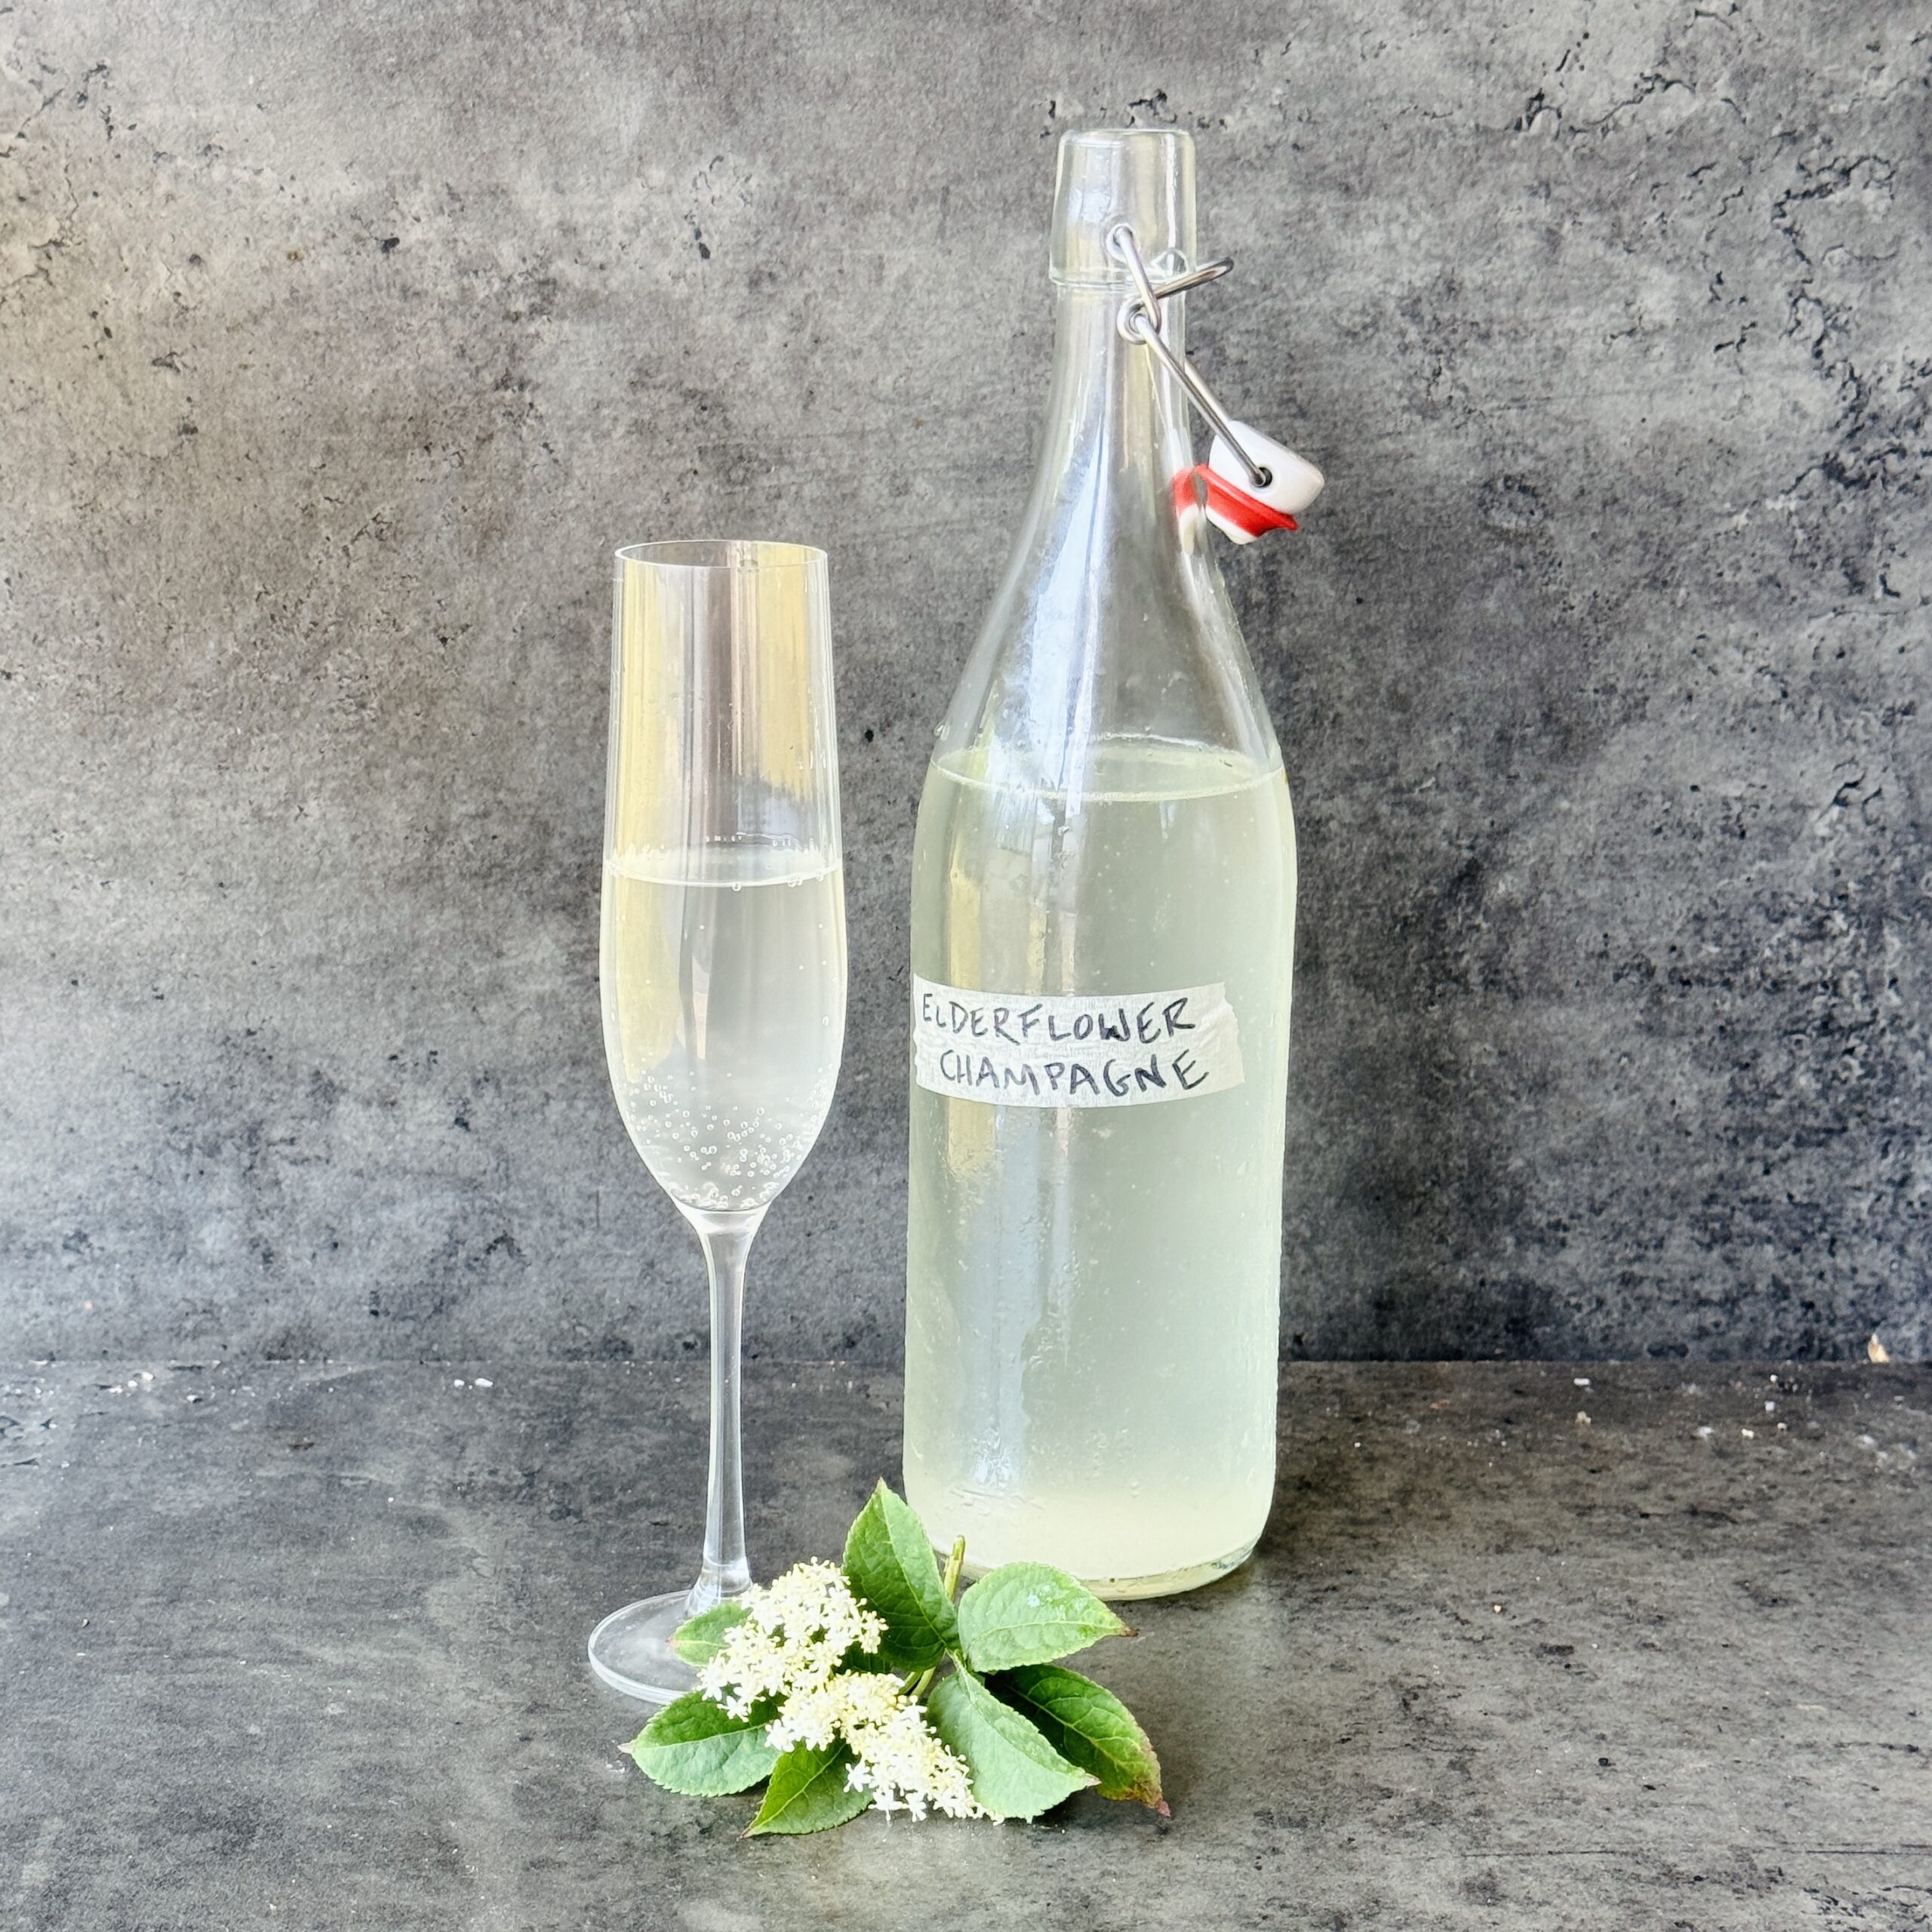
Elderflower Champagne (5L batch)
Takes 21 days
Serves 15
Ingredients
- 7 –8 large fresh elderflower heads
- 500 g white granulated sugar
- 4.4 litres water
- 1 large organic lemon juice + peel
- 1½ tsp apple cider vinegar or white wine vinegar
- 1.25 –1.5g Lalvin EC-1118 champagne yeast about ¼ sachet
Instructions
Phase 1: Floral steep (Days 1–3)
- First, gently snip the elderflower blossoms away from the thicker green stems — keep as much of the delicate flower as possible.
- Make a simple syrup by dissolving the sugar in 1 litre of boiling water. Leave to cool. Pour this into a clean 5-litre bucket or large fermentation jar.
- Top up with the remaining 3.4 litres of cold water, then stir in the lemon juice, lemon peel, vinegar, and elderflowers.
- Cover loosely and leave at room temperature for 48 hours. Give it a gentle stir once a day to keep everything happy and submerged.
Phase 2: Strain & add yeast (Day 3)
- Strain the liquid through a fine sieve or muslin cloth into a clean, sanitised fermentation vessel.
- To activate the yeast, dissolve 1.25g in about 20ml of lukewarm water (35–37°C). Leave for 20 minutes until slightly foamy.
- Pour the yeast into your strained elderflower liquid, fit an airlock or fermentation lid, and you’re off. Alternately you can leave the top open and cover with a tightly fitted muslin to stop insects entering.
Phase 3: Primary fermentation (5–7 days)
- Leave in a cool, dark place and let nature do its thing.
- You’re looking for the bubbles to slow right down — once it’s down to less than one bubble every few minutes, fermentation is complete.
Phase 4: Bottling & priming – developing bubbles!
- Carefully siphon the liquid into a clean bucket or jar, leaving the sediment behind.
- Bottle immediately into strong flip-top bottles or champagne bottles.
- Leave at room temperature for 3 days to 2 weeks to carbonate, ensure to burp or release the gas build up every day. To do this simply open the lid and close. Once you are happy with the degree of bubbles and flavour simple store in the fridge.
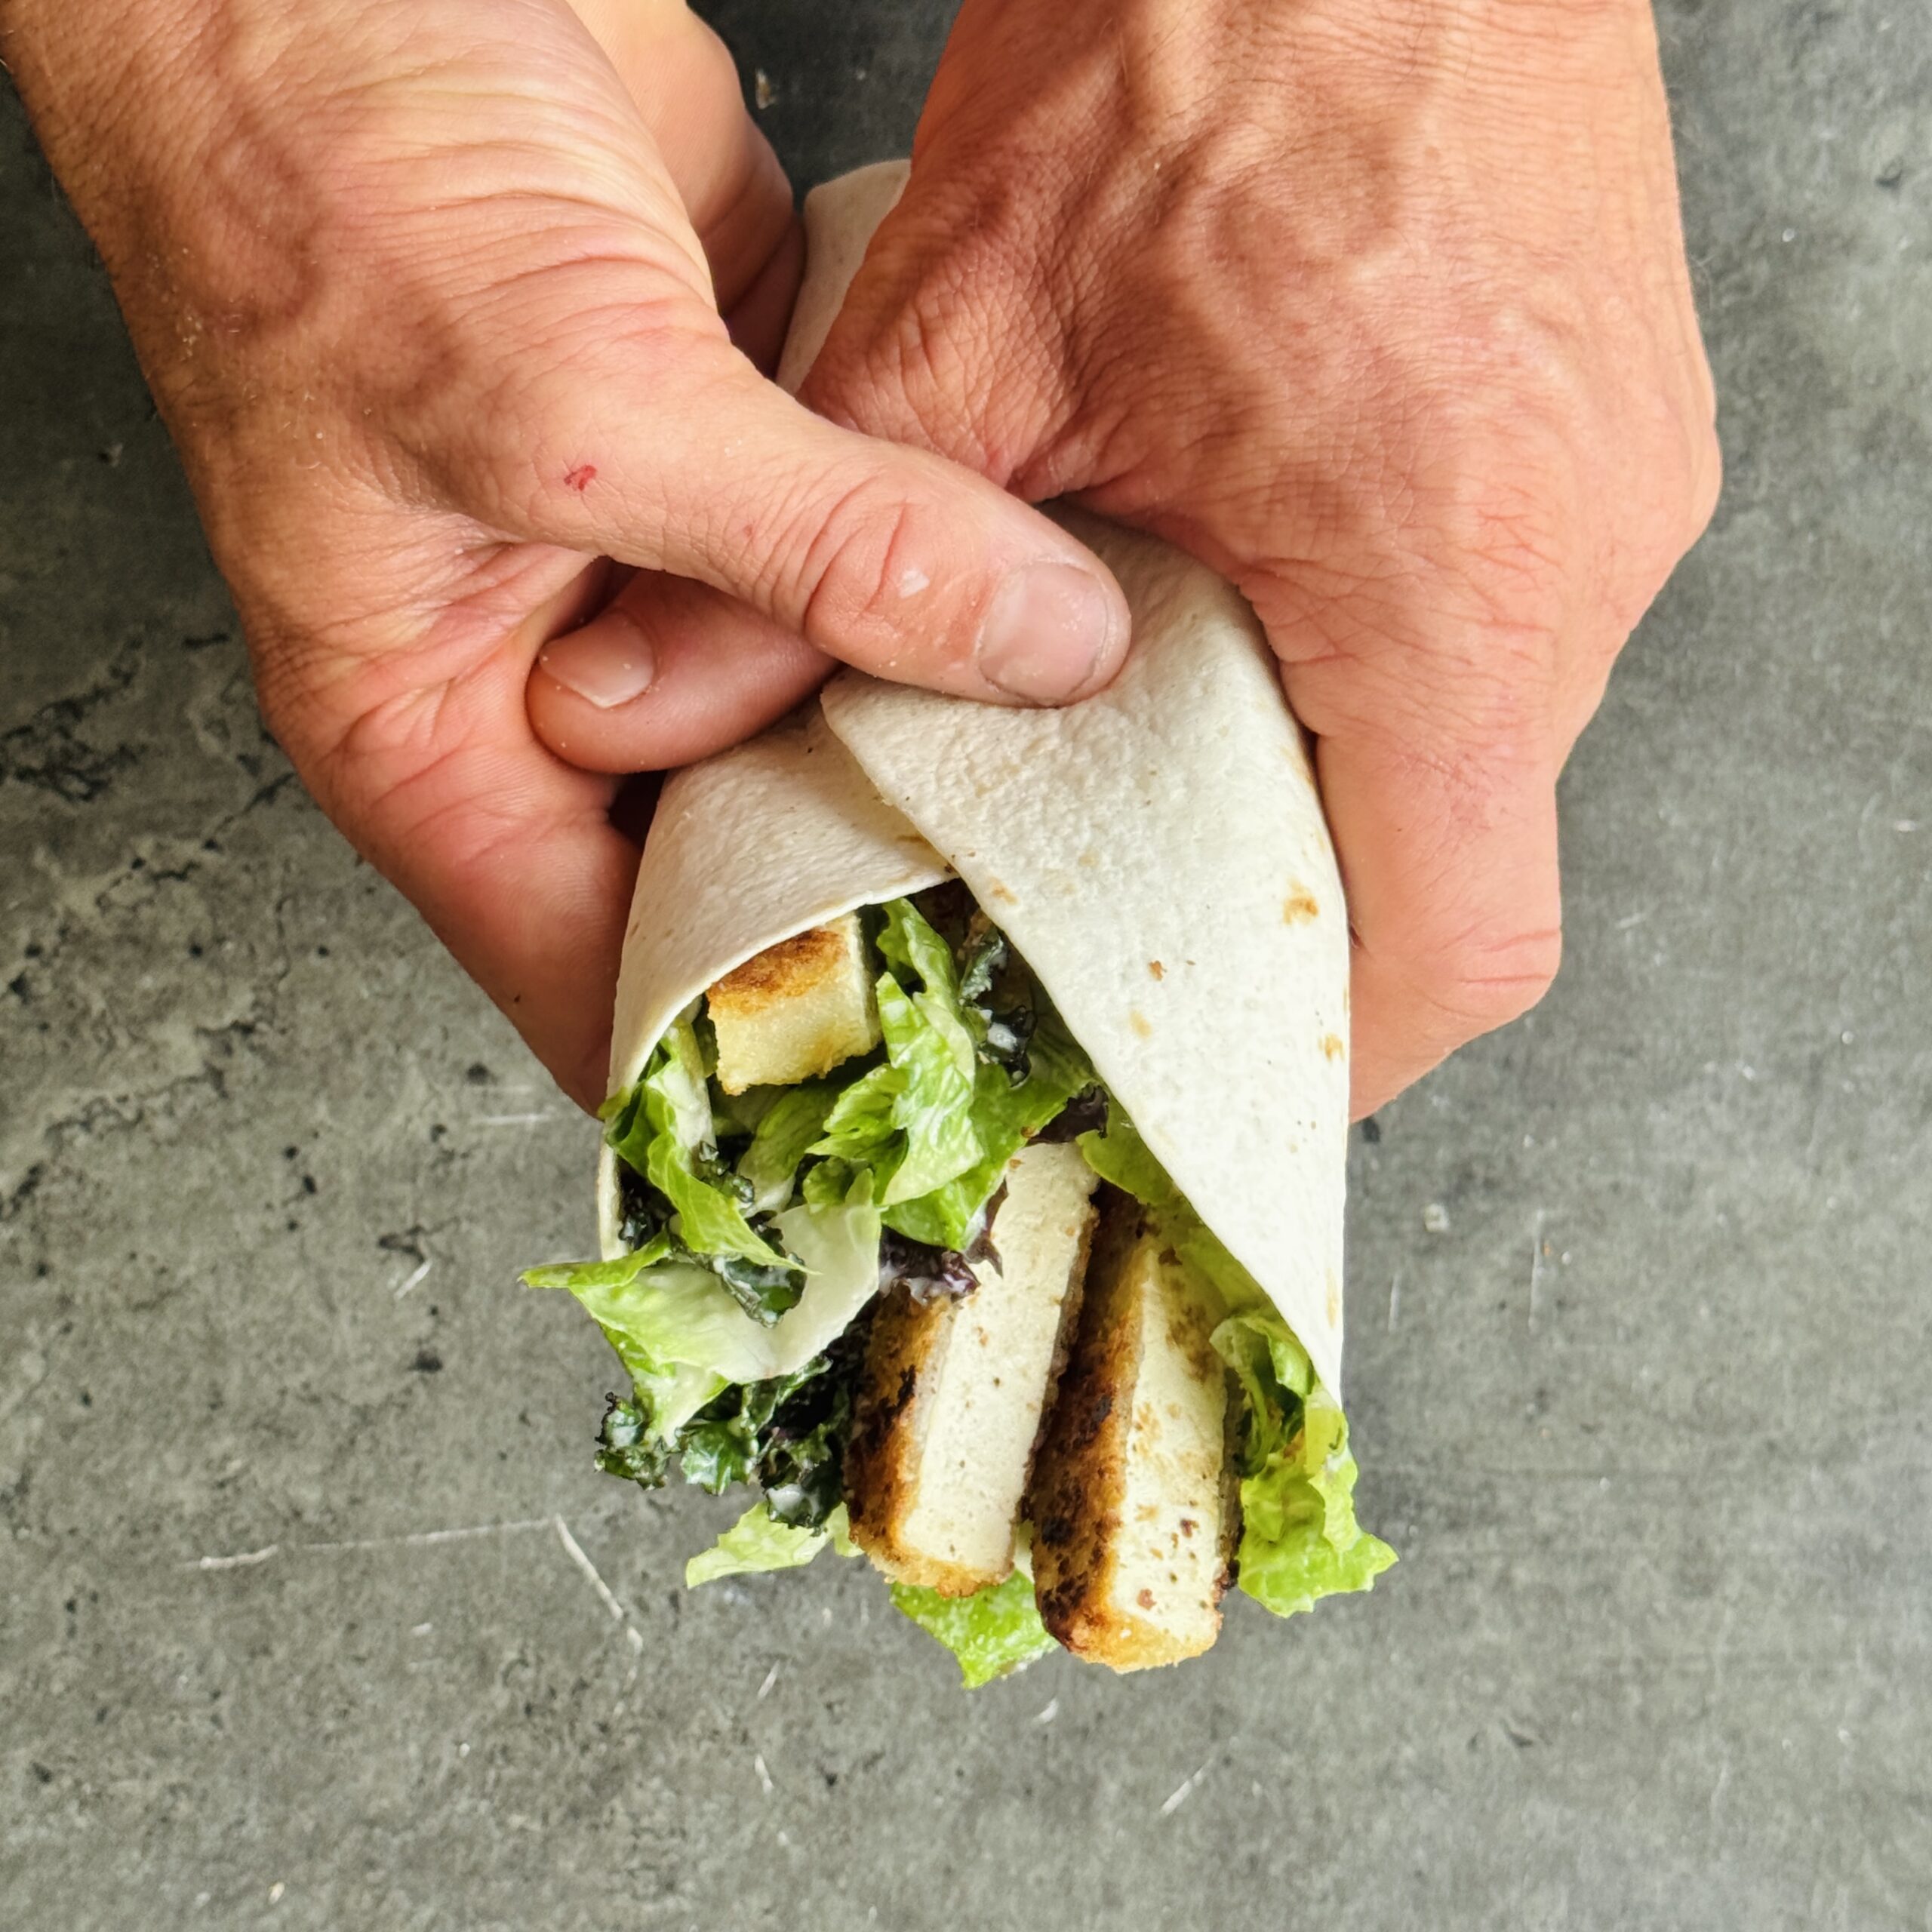
Crispy Tofu Caesar Wrap
Takes 20 minutes
Serves 4
Ingredients
For the Crispy Tofu
- 250 g firm or extra-firm tofu
Batter
- 24 g cornflour 3 tbsp
- ½ tsp garlic powder
- ½ tsp onion powder
- Pinch of fine sea salt
- Freshly ground black pepper
Primer
- 16 g cornflour 2 tbsp
- 45 ml water 3 tbsp
Breadcrumb Layer
- 60 g panko breadcrumbs 2 cups
- 5 g nutritional yeast 1 tbsp or finely grated Parmesan
- Vegetable oil for shallow frying
For the Creamy Caesar Dressing
- 60 g white tahini 4 tbsp
- Juice of 1 lemon approximately 45ml / 3 tbsp
- ½ tsp garlic powder
- 100 ml water
- Salt and black pepper to taste
For the Salad and Assembly
- 4 large flour tortillas or wraps
- 1 head baby gem lettuce shredded
- 100 g kale stalks removed and finely shredded
- 25 g capers drained and patted dry
Instructions
Prepare the Tofu
- Drain the tofu and pat dry with kitchen paper. Slice into 12 fingers, approximately 1.5cm thick.
Prepare the Coating
- In one shallow bowl, mix together the cornflour, garlic powder, onion powder, salt and pepper for the batter.
- In a second bowl, whisk together the cornflour and water until smooth to create the primer.
- In a third bowl, combine the panko breadcrumbs and nutritional yeast or Parmesan for the breadcrumb layer.
Coat and Cook the Tofu
- Dip each tofu finger into the batter, coating evenly and shaking off any excess. Next, dip into the primer, ensuring it is fully coated. Finally, press into the breadcrumb layer until completely covered.
- Heat approximately 1cm of vegetable oil in a large frying pan over a medium-high heat. Once hot, carefully add the tofu and cook for 3–4 minutes on each side until golden brown and crisp.
- Transfer to a wire rack or plate lined with kitchen paper.
Make the Caesar Dressing
- In a bowl, whisk together the tahini, lemon juice and garlic powder. The mixture will thicken at first.
- Gradually add the water a little at a time, whisking continuously until you have a smooth, creamy dressing. Season with salt and black pepper to taste.
Prepare the Salad
- Combine the shredded baby gem and kale in a large bowl.
- Pour over the dressing and toss well, using your hands to gently massage the kale for 30 seconds to soften it slightly. Fold through the capers.
Assemble the Wraps
- Warm the wraps briefly in a dry frying pan or microwave until soft and pliable.
- Divide the dressed salad between the wraps. Slice the crispy tofu diagonally and arrange on top.
- Fold up the bottom of each wrap, tuck in the sides and roll tightly to seal.
- Serve immediately while the tofu is hot and crispy.
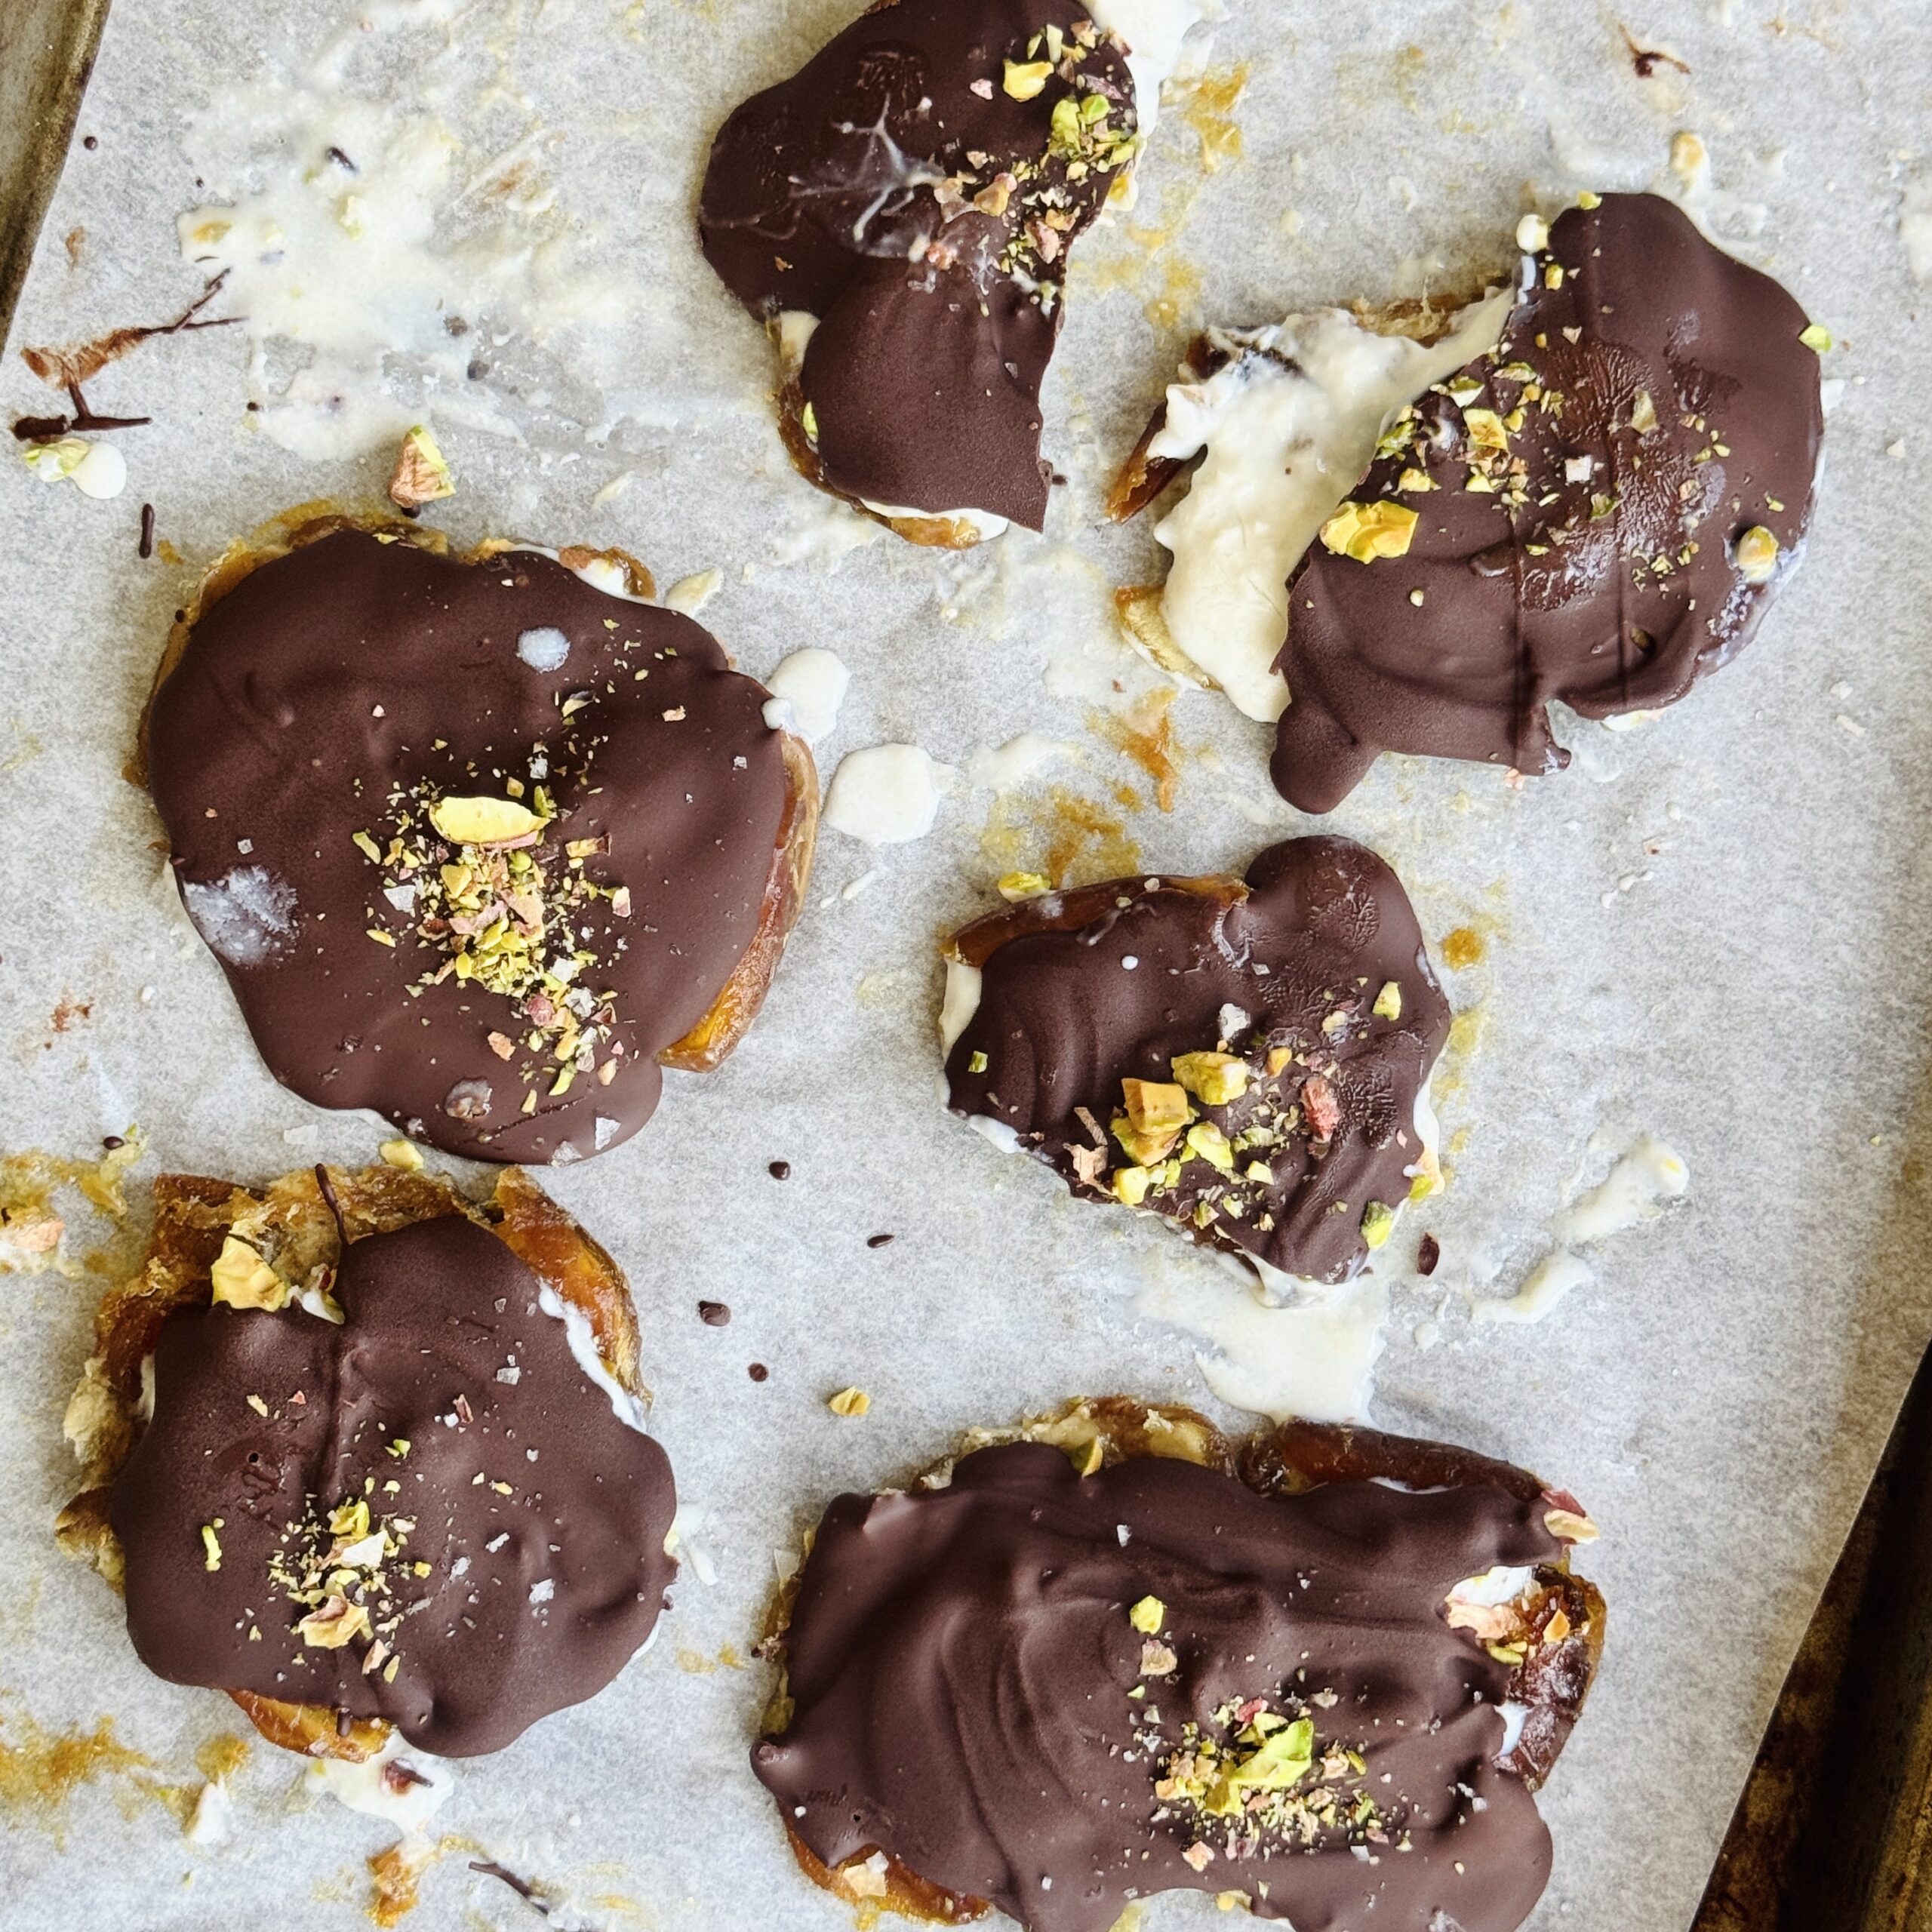
Frozen Yoghurt Chocolate Date Bites
Takes 45 minutes
Serves 12
Ingredients
- 12 Medjool dates approximately 240g
- 200 g plant-based yoghurt ¾ cup
- 30 g chopped pistachios or peanuts ¼ cup
- 150 g dark chocolate 1 cup chopped
- 15 g extra chopped pistachios or peanuts 2 tbsp, optional
- 2 g flaky sea salt ½ tsp
Instructions
Prepare the Date Base
- Line a small baking tray or container with baking parchment.
- Remove the stones from the dates and arrange them close together on the lined tray. Place another sheet of baking parchment on top and use the bottom of a glass to gently press the dates down into an even layer approximately 1cm thick.
- Carefully remove the top sheet of parchment.
Add the Yoghurt Layer
- Spread the plant-based yoghurt evenly over the flattened dates.
- Sprinkle over the chopped pistachios or peanuts.
- Place in the freezer for 20–30 minutes until the yoghurt has firmed up.
Add the Chocolate Topping
- Melt the dark chocolate in a heatproof bowl over a pan of simmering water, or in short bursts in the microwave.
- Remove the tray from the freezer and spoon the melted chocolate evenly over the yoghurt layer.
- Sprinkle with the extra nuts, if using, and finish with a scattering of flaky sea salt.
Freeze and Serve
- Return to the freezer for 10–15 minutes, or until the chocolate has fully set.
- Cut into 12 bite-sized pieces and enjoy straight from the freezer.
- Store in an airtight container in the freezer for up to 1 month.
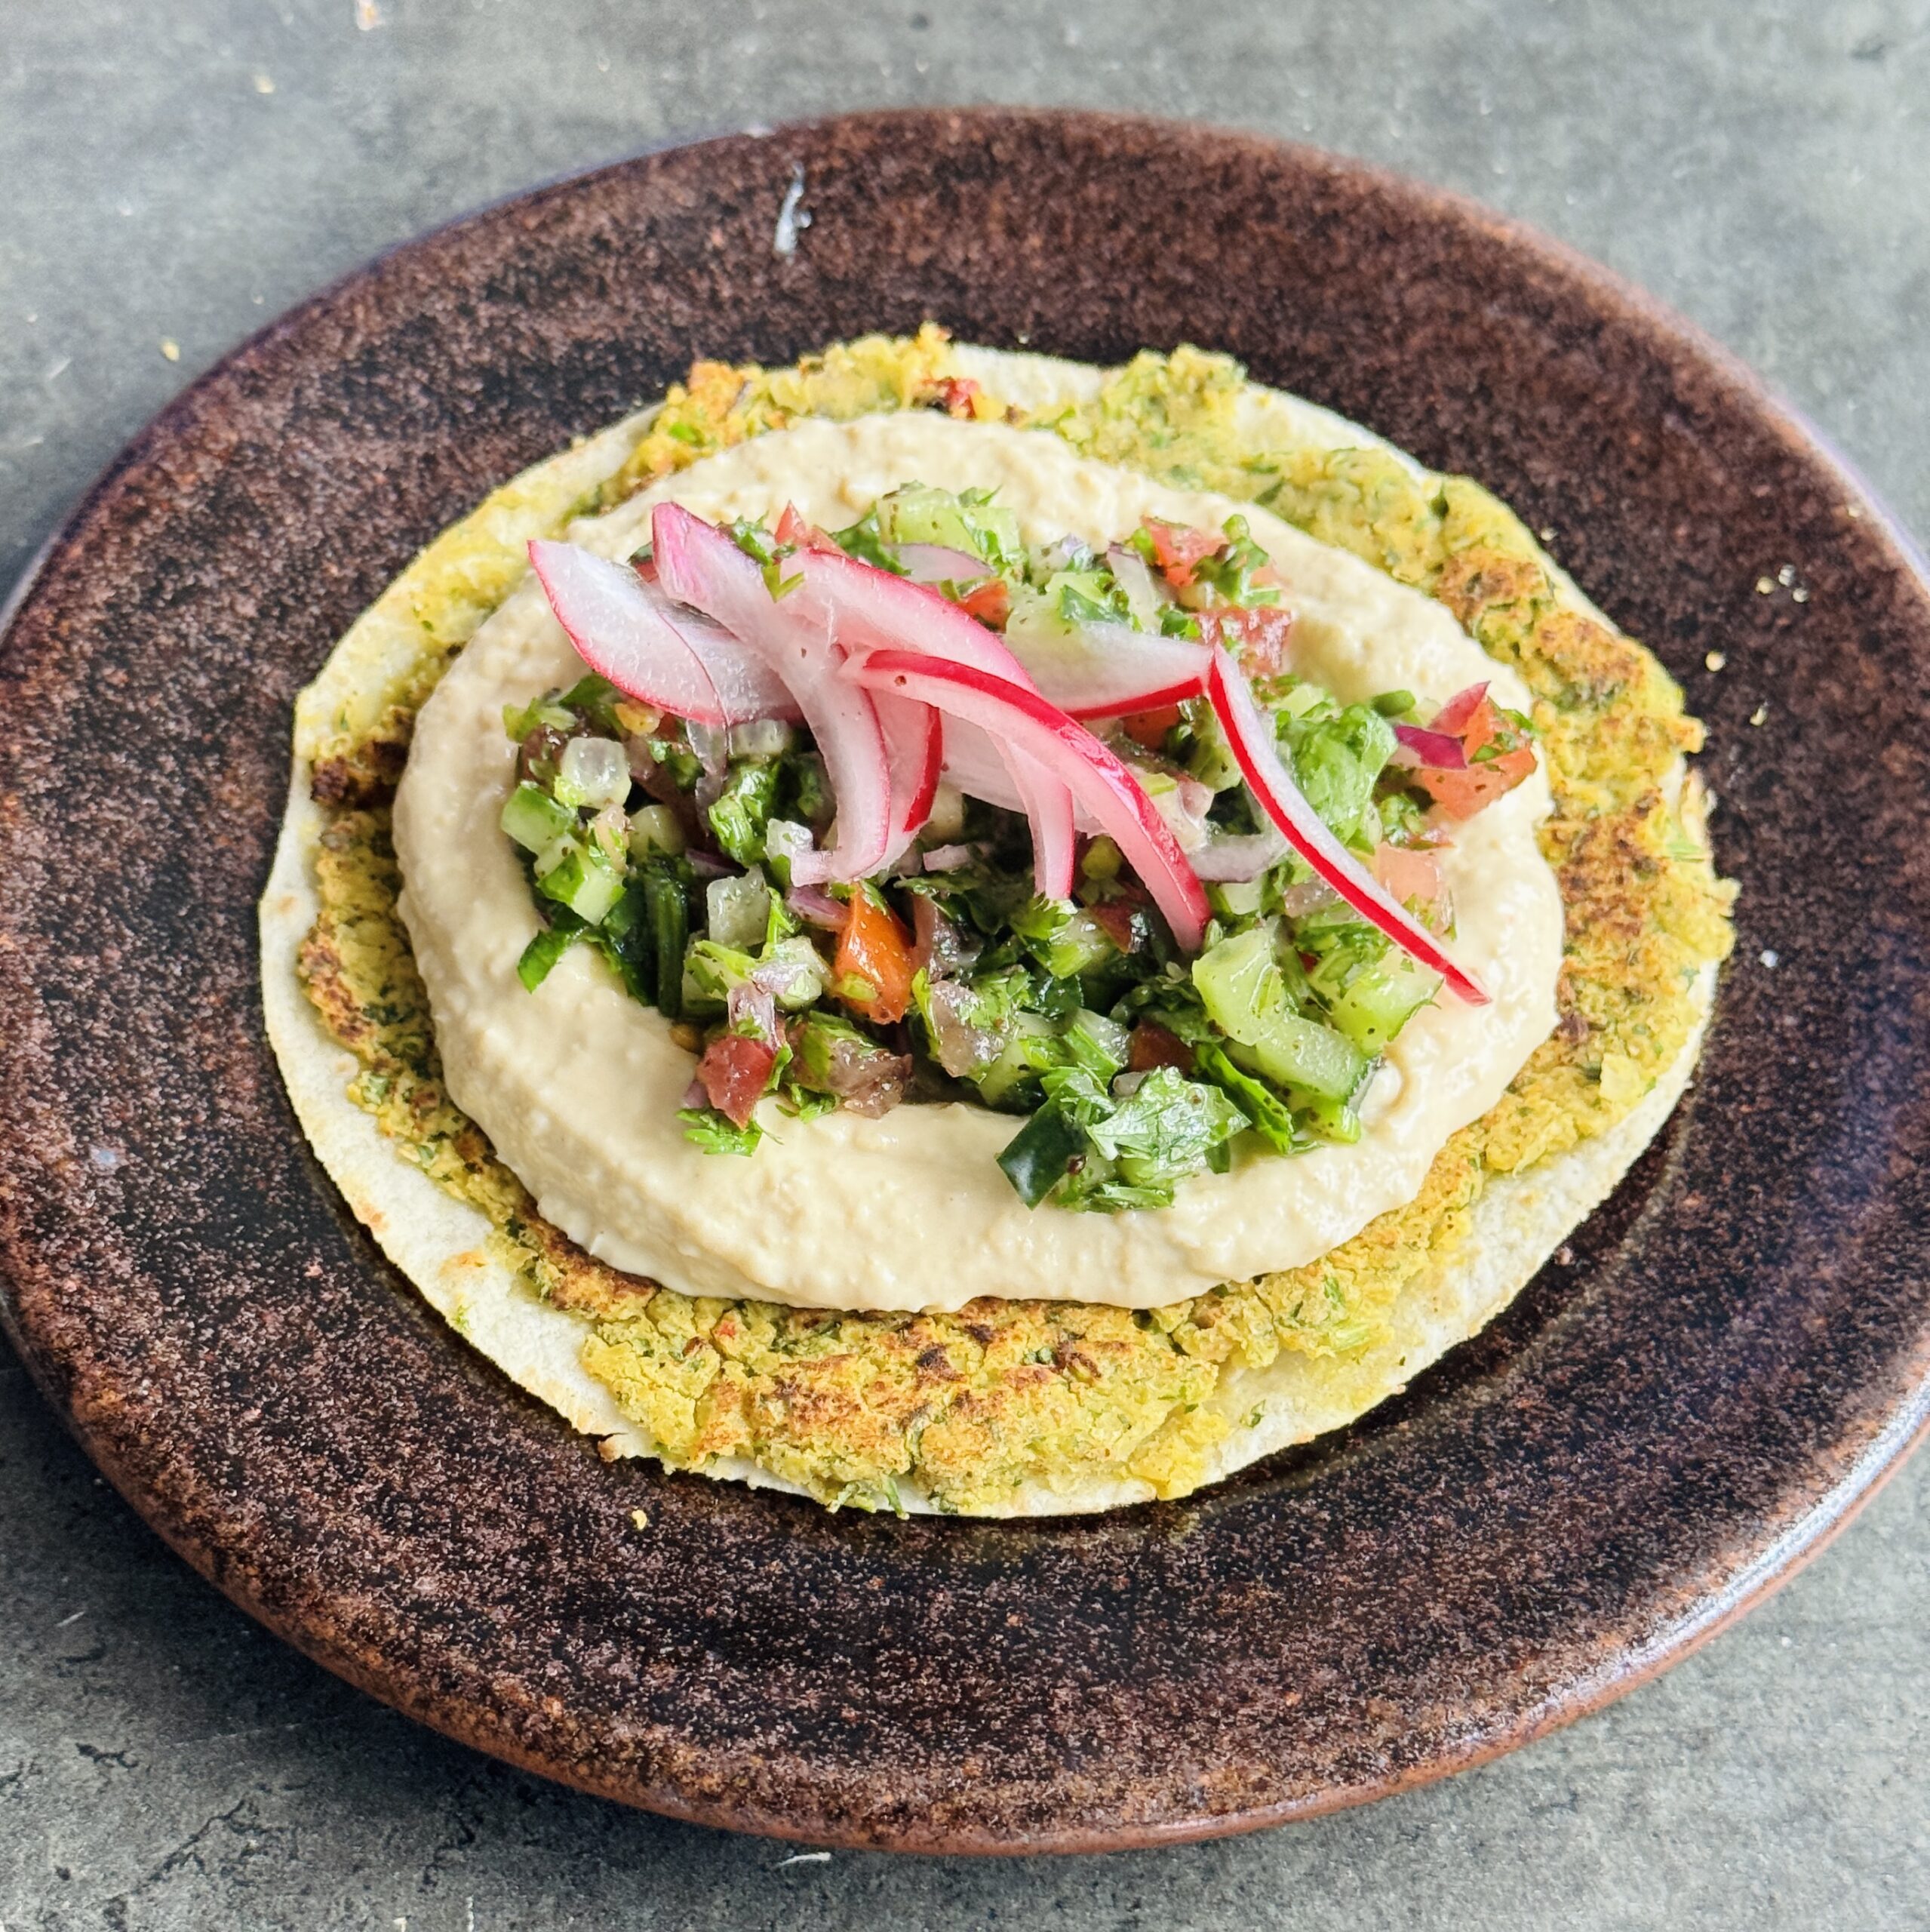
Smashed Falafel Tacos
Takes 30 minutes
Serves 4
Ingredients
For the Falafel
- 1 x 400 g tin chickpeas drained and rinsed (240 g drained weight)
- 40 g red onion ¼ onion, roughly chopped
- 1 garlic clove
- 20 g fresh parsley or coriander
- 2 tsp ground cumin 4 g
- 1 tsp ground coriander 2 g
- ¼ tsp black pepper
- ¼ tsp ground chilli
- Juice of 1 lemon about 30 ml
- ½ tsp salt 3 g
- 45 –60 ml water 3–4 tbsp
- 8 small corn tortillas or 4 large wheat wraps
For the Shiraz Salad
- 25 g fresh mint or herb of choice
- 150 g cucumber ½ cucumber, finely diced
- 40 g red onion ¼ onion, finely diced
- 120 g ripe tomato 1 medium tomato, finely diced
- Generous pinch of salt
- Generous pinch of sumac
- 30 ml olive oil 2 tbsp
To Serve
- 150 g hummus
- Pickled red onions
Instructions
Make the Falafel Mixture
- Drain and rinse the chickpeas. Add the chickpeas, red onion, garlic, herbs, cumin, coriander, black pepper, chilli, lemon juice, salt and water to a food processor.
- Blend until smooth and the herbs are fully incorporated, giving the mixture a slight green colour. Taste and adjust the seasoning if needed.
Prepare the Tacos
- Using clean hands, form the falafel mixture into balls to help portion it evenly.
- Spread a thin layer of the falafel mixture over one side of each tortilla or wrap, about 5–10 mm thick, ensuring it covers the surface evenly.
Cook
- Heat a non-stick frying pan over a high heat and add a little oil.
- Place the tacos falafel-side down into the hot pan and cook for 3–4 minutes until golden and slightly crisp.
- Carefully flip and cook the tortilla side for a further 1–2 minutes. Repeat with the remaining tacos.
Make the Shiraz Salad
- Finely dice the cucumber, tomato, red onion and herbs.
- Mix with the olive oil, sumac and a generous pinch of salt. Taste and adjust the seasoning as desired.
Serve
- Spread a heaped tablespoon of hummus onto each taco. Top with a generous spoonful of the Shiraz salad and finish with some pickled red onions.
- Serve straight away while the tacos are hot and crispy. Enjoy!

High-Protein Red Pepper Pesto Shakshuka with Whipped Tofu Eggs
Takes 20 minutes
Serves
Ingredients
- Olive oil
- 1 onion finely chopped
- 2 garlic cloves minced
- 1 –2 peppers or courgette diced (optional)
- 2 handfuls spinach
- 1 tin chopped tomatoes
- 1 tsp smoked paprika
- Salt & pepper
- Optional: cherry tomatoes or mushrooms
Egg-style tofu topping
- 1 block silken or soft tofu
- Pinch of salt
- 1 –2 tsp olive oil optional, for richness
To finish
- 2 tsp pesto or more to taste
Instructions
Build the base (one pan):
- Heat olive oil in a wide pan over medium heat. Add onion and cook for 5–6 minutes until soft and sweet. Stir in garlic, tinned tomatoes and your chosen veg, cooking until tender. Season with salt, pepper, and smoked paprika. Fold in spinach at the end until just wilted.
Blend the “eggs”:
- Add the tofu to a jug or bowl with a pinch of salt and a drizzle of olive oil. Use an immersion blender to whizz until completely smooth, thick, and creamy.
Assemble:
- Spoon or gently spread the blended tofu over the warm veg in the pan so it sits like a soft “egg white” layer.
Create the yolk:
- Make a small well in the centre of each serving and spoon in a teaspoon of pesto to mimic an egg yolk.
Serve immediately:
- Enjoy warm straight from the pan, it’s perfect with sourdough toast or roasted potatoes for a hearty weekend brunch.

Cherry Sorbet & Date Ice Cream Sandwiches
Takes 2 hours 30 minutes
Serves 9
Ingredients
The Fruity Center
- 4 Large bananas peeled, sliced, and frozen solid
- 400 g Frozen sweet cherries
- 250 g Premium Medjool dates pitted
The Chocolate Finish
- 100 g High-quality dark chocolate
Instructions
Prep your date bases
- Create the bottom shell of your sandwiches inside the mould. Take 9 of your pitted Medjool dates. Tear them open slightly and place one into the bottom of each of the nine large ice cube tray sections, ensuring the outer skin side faces down. Use your thumb or a small spoon to firmly compress the dates right into the corners of the moulds, creating a flat, sweet base layer.
Process the Nama J2 sorbet
- Harness the power of your juicer for an ultra-smooth finish. Ensure the sorbet attachment is securely fitted to your Nama J2 Juicer. Alternating between the 4 frozen bananas and the 400g of frozen cherries, feed them through the hopper. Watch as it instantly transforms the frozen fruit into a super-smooth, vibrant purple banana-cherry sorbet.
Assemble the sandwiches
- Layer the sorbet and seal with the top dates. Working quickly while the sorbet is perfectly soft, spoon the fresh banana-cherry mixture directly on top of the compressed date bases, filling each ice cube section near to the top. Take your remaining Medjool dates, flatten them slightly with your fingers, and press one firmly onto the top of the sorbet in each section to seal the sandwich. Transfer the tray to the freezer for at least 2 hours to firm up.
Melt the dark chocolate
- Prepare your glossy coating. Once the sandwiches are solid, melt the 100g of dark chocolate. You can do this gently using a bain-marie (a heatproof bowl set over a pan of simmering water) or in short 20-second bursts in the microwave, stirring well between each burst until smooth. Pour the melted chocolate into a small, narrow cup or deep bowl.
Dip and set
- Unmould and add the final chocolate snap. Pop the frozen date sandwiches out of the flexible silicone ice cube tray. Take each sandwich and dip it halfway into the melted dark chocolate. Because the dates and sorbet are freezing cold, the chocolate will form a beautiful, crisp, fast-setting shell almost instantly.
Storage & Serving
- Serve immediately, or store them layered with baking paper in an airtight container in the freezer. For the best texture, let them sit on the kitchen counter for 2 to 3 minutes before biting in, allowing the Medjool dates to get beautifully chewy and the Nama sorbet to return to its perfect creaminess!

Crunchy Peanut Butter Banana Popsicles
Takes 2 hours 15 minutes
Serves 4
Ingredients
The Loaded Banana Popsicles
- 2 large Ripe bananas
- 100 g Smooth peanut butter approx. ⅓ cup
- 50 g Roasted salted peanuts (roughly chopped)
- A pinch of flaky sea salt
- 4 Wooden ice cream sticks
The Crisp Chocolate Shell
- 150 g High-quality dark chocolate
- 1 tbsp Coconut oil
Instructions
Prep the components
- Set up your assembly station with your chopped nuts and peanut butter. Peel the 2 bananas and slice them in half crosswise to create four shorter pieces. Roughly chop the 50g of roasted peanuts and spread them out on a shallow plate mixed with a pinch of flaky sea salt. Place your 100g of peanut butter in a small bowl (if it’s a bit stiff, microwave it for 10 seconds to make it easily spreadable).
Stuff and skewer the bananas
- Slice the bananas lengthwise. Take each banana and gently press a wooden ice cream stick into the center of the banana.
Coat in crunch
- Roll the stuffed bananas in peanuts until fully coated. Using a butter knife or small spatula, coat the entire outside of the banana popsicle with a thin layer of the peanut butter—this acts as the “glue.” Immediately roll the banana in the plate of chopped salted peanuts, pressing gently so the nuts stick firmly to all sides. Place the coated popsicles on a tray lined with baking paper. Repeat with the remaining bananas and freeze for at least 2 hours until solid.
Melt the chocolate shell
- Once the popsicles are fully frozen, melt the 150g of dark chocolate and 1 tbsp of coconut oil together. You can do this in a heatproof bowl set over a pan of simmering water, or in short 30-second bursts in the microwave. Stir until completely smooth, then pour the melted chocolate into a tall, narrow glass (this makes dipping much easier).
Dip and set
- Take a frozen banana popsicle by its wooden stick and dip it completely into the tall glass of melted chocolate. Hold it above the glass for a few seconds to let any excess drip off. Because the banana is freezing cold, the chocolate shell will harden and set almost instantly.
Storage
- Serve immediately, or store the finished popsicles in an airtight container in the freezer for up to 1 month. If eating straight from the deep freeze, let them sit on the counter for 3 minutes before biting into them so the banana center becomes beautifully creamy!

Air Fryer Apricot Bakewell Puff Pastry Tarts
Takes 40 minutes
Serves 4
Ingredients
Base
- 1 sheet vegan puff pastry
Frangipane
- 120 g ground almonds
- 100 g caster sugar
- 75 g self-raising flour
- 90 ml melted plant-based butter
- 60 ml water
- 1 tsp almond extract
To Finish
- 2 tbsp flaked almonds
- 6 ripe apricot for topping
- Icing sugar to dust optional
Instructions
Make the Frangipane
- Mix the ground almonds, flour, sugar and a pinch of salt in a bowl.
- In a separate bowl combine melted butter, almond extract and water.
- Pour wet into dry and mix into a thick smooth batter.
Prepare the Pastry
- Cut the puff pastry into 4-6 squares or circles.
- Using a knife, lightly score a 1cm border around each tart — don’t cut all the way through. This helps create a puffed crust.
- Prick the centre with a fork.
Prepare the apricots
- Cut the apricots in half, remove the stones and slice into slices approx ½ cm thick.
Assemble the Tarts
- Spread 1-2 tbsp of frangipane inside the centre of each tart, keeping within the border.
- Place a generous serving of sliced apricots on top, followed by a sprinkle of sugar on top
- Finish with a sprinkle of flaked almonds.
Air Fry
- Air fry at 170°C for 12-16 minutes until the pastry is deeply golden, the frangipane is puffed and set and the almonds are toasted.
- Depending on your air fryer, you may need to cook in batches.
- Allow to cool for 10 minutes before serving.
- Optional: dust with icing sugar before serving.

Our Cool Jim’s Granola is a delicious mix of oats, seeds, sultanas, coconut, goji berries and cashews. It’s perfect paired with milk, yoghurt or porridge, or even just straight out of the tub. Made with real ingredients and free from artificial preservatives, this granola makes a tasty high fibre brekkie or snack. Dave & Steve X
INGREDIENTS
Oats (56%), Seeds (11.5%) [Yellow Flaxseed, Pumpkin], Sultanas [Sultanas, Sunflower Oil], Agave Syrup, Dessicated Coconut, Olive Oil, Coconut Oil, Dried Goji Berries, Molasses, Rice Flour, Cashew Nut Pieces, Sea Salt.
ALLERGEN INFORMATION
For allergens, including Cereals containing Gluten, see highlighted ingredients.
May also contain traces of Peanuts, Nuts, Sesame and Soya.
NUTRITIONAL INFORMATION
| Typical | per 100g |
|---|---|
| Energy | 1851kJ | 442kcal |
| Fat | 17g |
| Of which: | |
| Saturates | 6.5g |
| Carbohydrate | 54g |
| Of which: | |
| Sugars | 15g |
| Fibre | 10g |
| Protein | 12g |
| Salt | 0.15g |

Steve’s Dreamy Granola is made with oats, seeds, nuts, coconut, and raspberries and is his delicious high fibre, low sugar version of granola Nirvana! This gorgeous granola makes a perfect brekkie with milk, yogurt, porridge or it can be enjoyed by itself as a tasty snack. Dave & Steve X
INGREDIENTS
Oats (46.5%), Chicory Root Fibre, Seeds (8.4%) [Pumpkin, Flaxseed], Coconut (6.5%) [Desiccated Coconut, Coconut Flakes], Coconut Oil, Olive Oil, Almonds (Nuts), Rice Flour, Freeze Dried Raspberries (0.85%), Sea Salt.
ALLERGEN INFORMATION
For allergens, including Cereals containing Gluten, see highlighted ingredients.
May also contain traces of Peanuts, Nuts, Sesame and Soya.
NUTRITIONAL INFORMATION
| Typical | per 100g |
|---|---|
| Energy | 1978kJ | 472kcal |
| Fat | 21 g |
| Of which: | |
| Saturates | 8.6g |
| Carbohydrate | 57g |
| Of which: | |
| Sugars | 3.7g |
| Fibre | 6.9g |
| Protein | 12g |
| Salt | 0.46g |
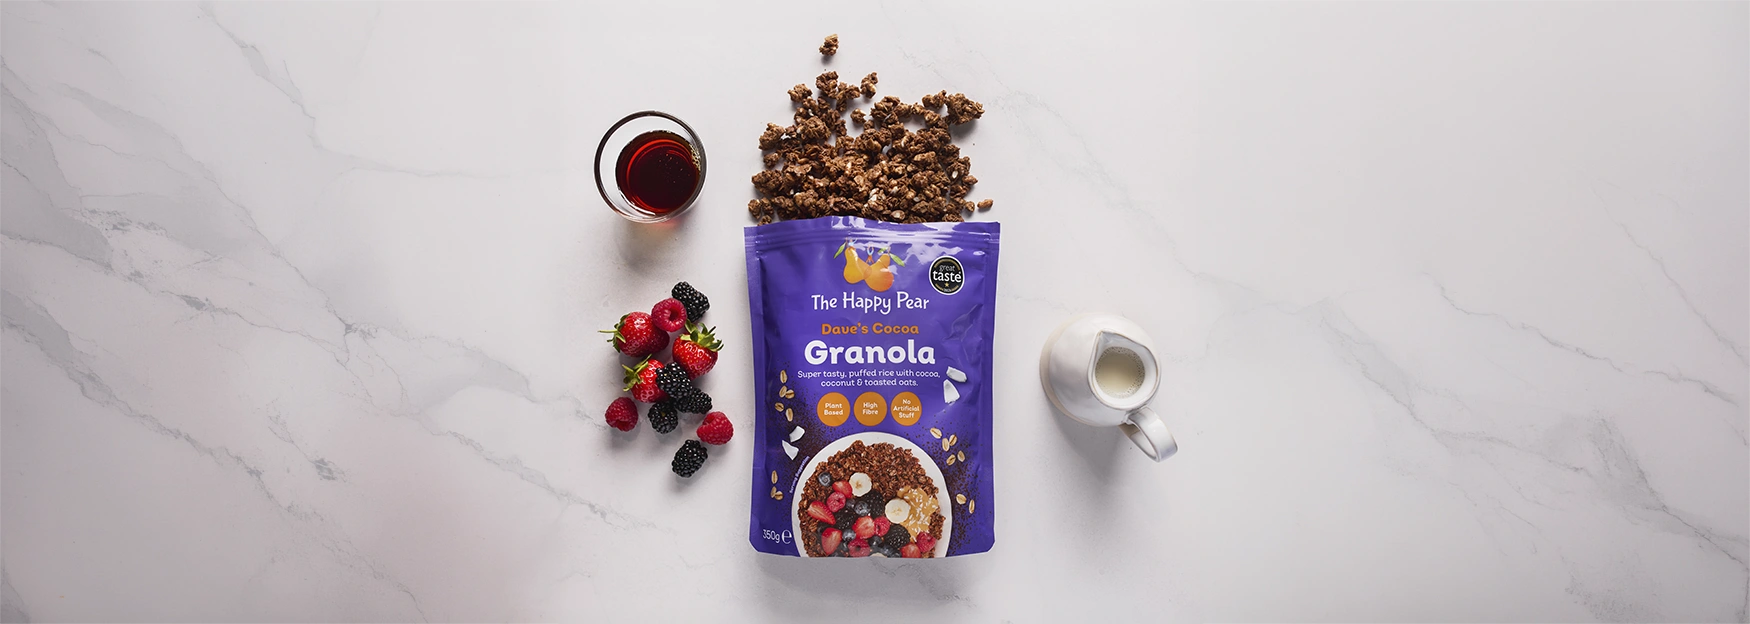
Dave’s Cocoa Crunch is a delicious mix of oats, sunflower seeds, coconut and cocoa powder. It makes a perfect brekkie with milk, porridge or fruit, and it’s free from refined sugars and artificial colours. This crunchy creation is a great source of fibre and it can be enjoyed straight from the tub, as a tasty snack! Dave & Steve X
INGREDIENTS
Oats (50%), Date Syrup, Olive Oil, Coconut Oil, Puffed Brown Rice (4.6%), Dessicated Coconut (3.5%), Rice Flour, Fat Reduced Cocoa Powder (1.1%), Sea Salt.
ALLERGEN INFORMATION
For allergens, including Cereals containing Gluten, see highlighted ingredients.
May also contain traces of Peanuts, Nuts, Sesame and Soya.
NUTRITIONAL INFORMATION
| Typical | per 100g |
|---|---|
| Energy | 1875kJ | 447kcal |
| Fat | 17g |
| Of which: | |
| Saturates | 7.3g |
| Carbohydrate | 60g |
| Of which: | |
| Sugars | 23g |
| Fibre | 8.5g |
| Protein | 9.1g |
| Salt | 0.60g |

Healthier Peanut Butter Caramel Cups
Takes 25 minutes
Serves 12
Ingredients
Chocolate Coating
- 250 g dark chocolate
- A handful of roasted peanuts roughly chopped, for decoration
- Flaky sea salt to finish
Peanut & Date Base
- 100 g pitted dates about ⅔ cup
- 200 g peanut butter about ¾ cup
- Pinch of salt
- 1 tsp vanilla extract
Peanut Butter Caramel
- 100 g smooth peanut butter about ⅓ cup
- 90 ml maple syrup about ¼ cup + 2 tbsp
- 45 ml warm water 3 tbsp
- Pinch of salt
- Equipment
- 12- hole muffin tin or silicone muffin mould
Instructions
Make the Peanut Butter Caramel
- Whisk together the peanut butter, maple syrup and salt in a bowl. The mixture will appear quite thick at first.
- Gradually whisk in the warm water, 1 tablespoon at a time. The water will emulsify with the peanut butter, transforming it into a smooth, glossy caramel sauce.
- Set aside.
Make the Cups
- Blend the dates, peanut butter, salt and vanilla extract in a food processor until a smooth, sticky paste forms.
- Melt the dark chocolate in a heatproof bowl over a pan of gently simmering water, or in short bursts in the microwave.
- Spoon a layer of melted chocolate into the base of each muffin mould and spread it slightly up the sides.
- Add a spoonful of the peanut and date mixture to each mould and gently press it down.
- Spoon over a layer of the peanut butter caramel.
- Cover with the remaining melted chocolate, ensuring the filling is fully enclosed.
- Sprinkle with the chopped roasted peanuts.
- Place in the freezer for 20–30 minutes, or until completely set.
- Remove from the moulds, sprinkle with flaky sea salt and serve.
Storage
- Store in an airtight container in the fridge for up to 1 week, or in the freezer for up to 3 months.

Crispy Rice Paper Rolls
Takes 30 minutes
Serves 2
Ingredients
The Crispy Rice Paper Wraps
- 10 Large rice paper sheets 2 per roll
- 2 tbsp Olive oil for frying
The Filling
- 200 g Firm tofu crumbled
- 100 g Mushrooms of choice roughly chopped
- 1 medium Carrot finely diced into ½cm cubes
- 5 Fresh radishes sliced into thin discs
- 20 g Fresh coriander finely chopped
- 1 tbsp Cooking oil for sautéing
The Gochujang Dressing & Dip (Make a double batch: half goes into the pan, half is reserved for dipping!)
- 3 tbsp Gochujang Korean chili paste
- 2 tbsp Maple syrup
- 2 tbsp Tamari or soy sauce
- 2 tbsp Sesame oil
- Juice of ½ Lime
- 75 ml Water
Instructions
Prep the vegetables
- Crumble the 200g firm tofu into a bowl with your hands. Finely cube the carrot into small, even ½cm pieces. Roughly chop your mushrooms, slice the radishes thinly, and finely chop the coriander.
Sear the filling
- Heat a non-stick pan over high heat and add 1 tbsp of cooking oil. Once shimmering, add the crumbled tofu, chopped mushrooms, and diced carrots. Fry for 5–6 minutes, stirring occasionally, until the mushrooms have released their water and the tofu edges look lightly golden.
Glaze and cool
- In a small bowl, whisk all the dressing ingredients together until smooth. Pour half of this mixture into the pan with the vegetables (reserve the other half for dipping later). Stir well for 1 minute until the sauce thickens and coats the filling. Stir in the chopped coriander and radishes, then remove from the heat and let it cool slightly.
Roll the parcels
- Submerge a sheet of rice paper in a shallow plate of warm water until it becomes soft and pliable (about 10–15 seconds). Lay it flat on a clean surface. Place 3 tbsp of filling in the center, top with a few fresh radish slices and extra coriander, then fold in the sides and roll it up tightly. Repeat this process with a second damp rice paper sheet, wrapping it directly over the first roll to create a sturdy, double-layered seal.
Pan-fry until shattering
- Wipe your non-stick pan clean, return it to medium-high heat, and add 2 tbsp of olive oil. Once hot, carefully add the rice paper rolls, leaving space between them so they don’t stick together. Fry for roughly 3 minutes per side, turning carefully with tongs, until all sides are blistered, golden, and crisp.
Garnish and serve
- Transfer the crispy rolls to a serving plate. Pour the remaining half of your gochujang dressing into a small ramekin on the side for dipping. Serve while steaming hot for maximum crunch!
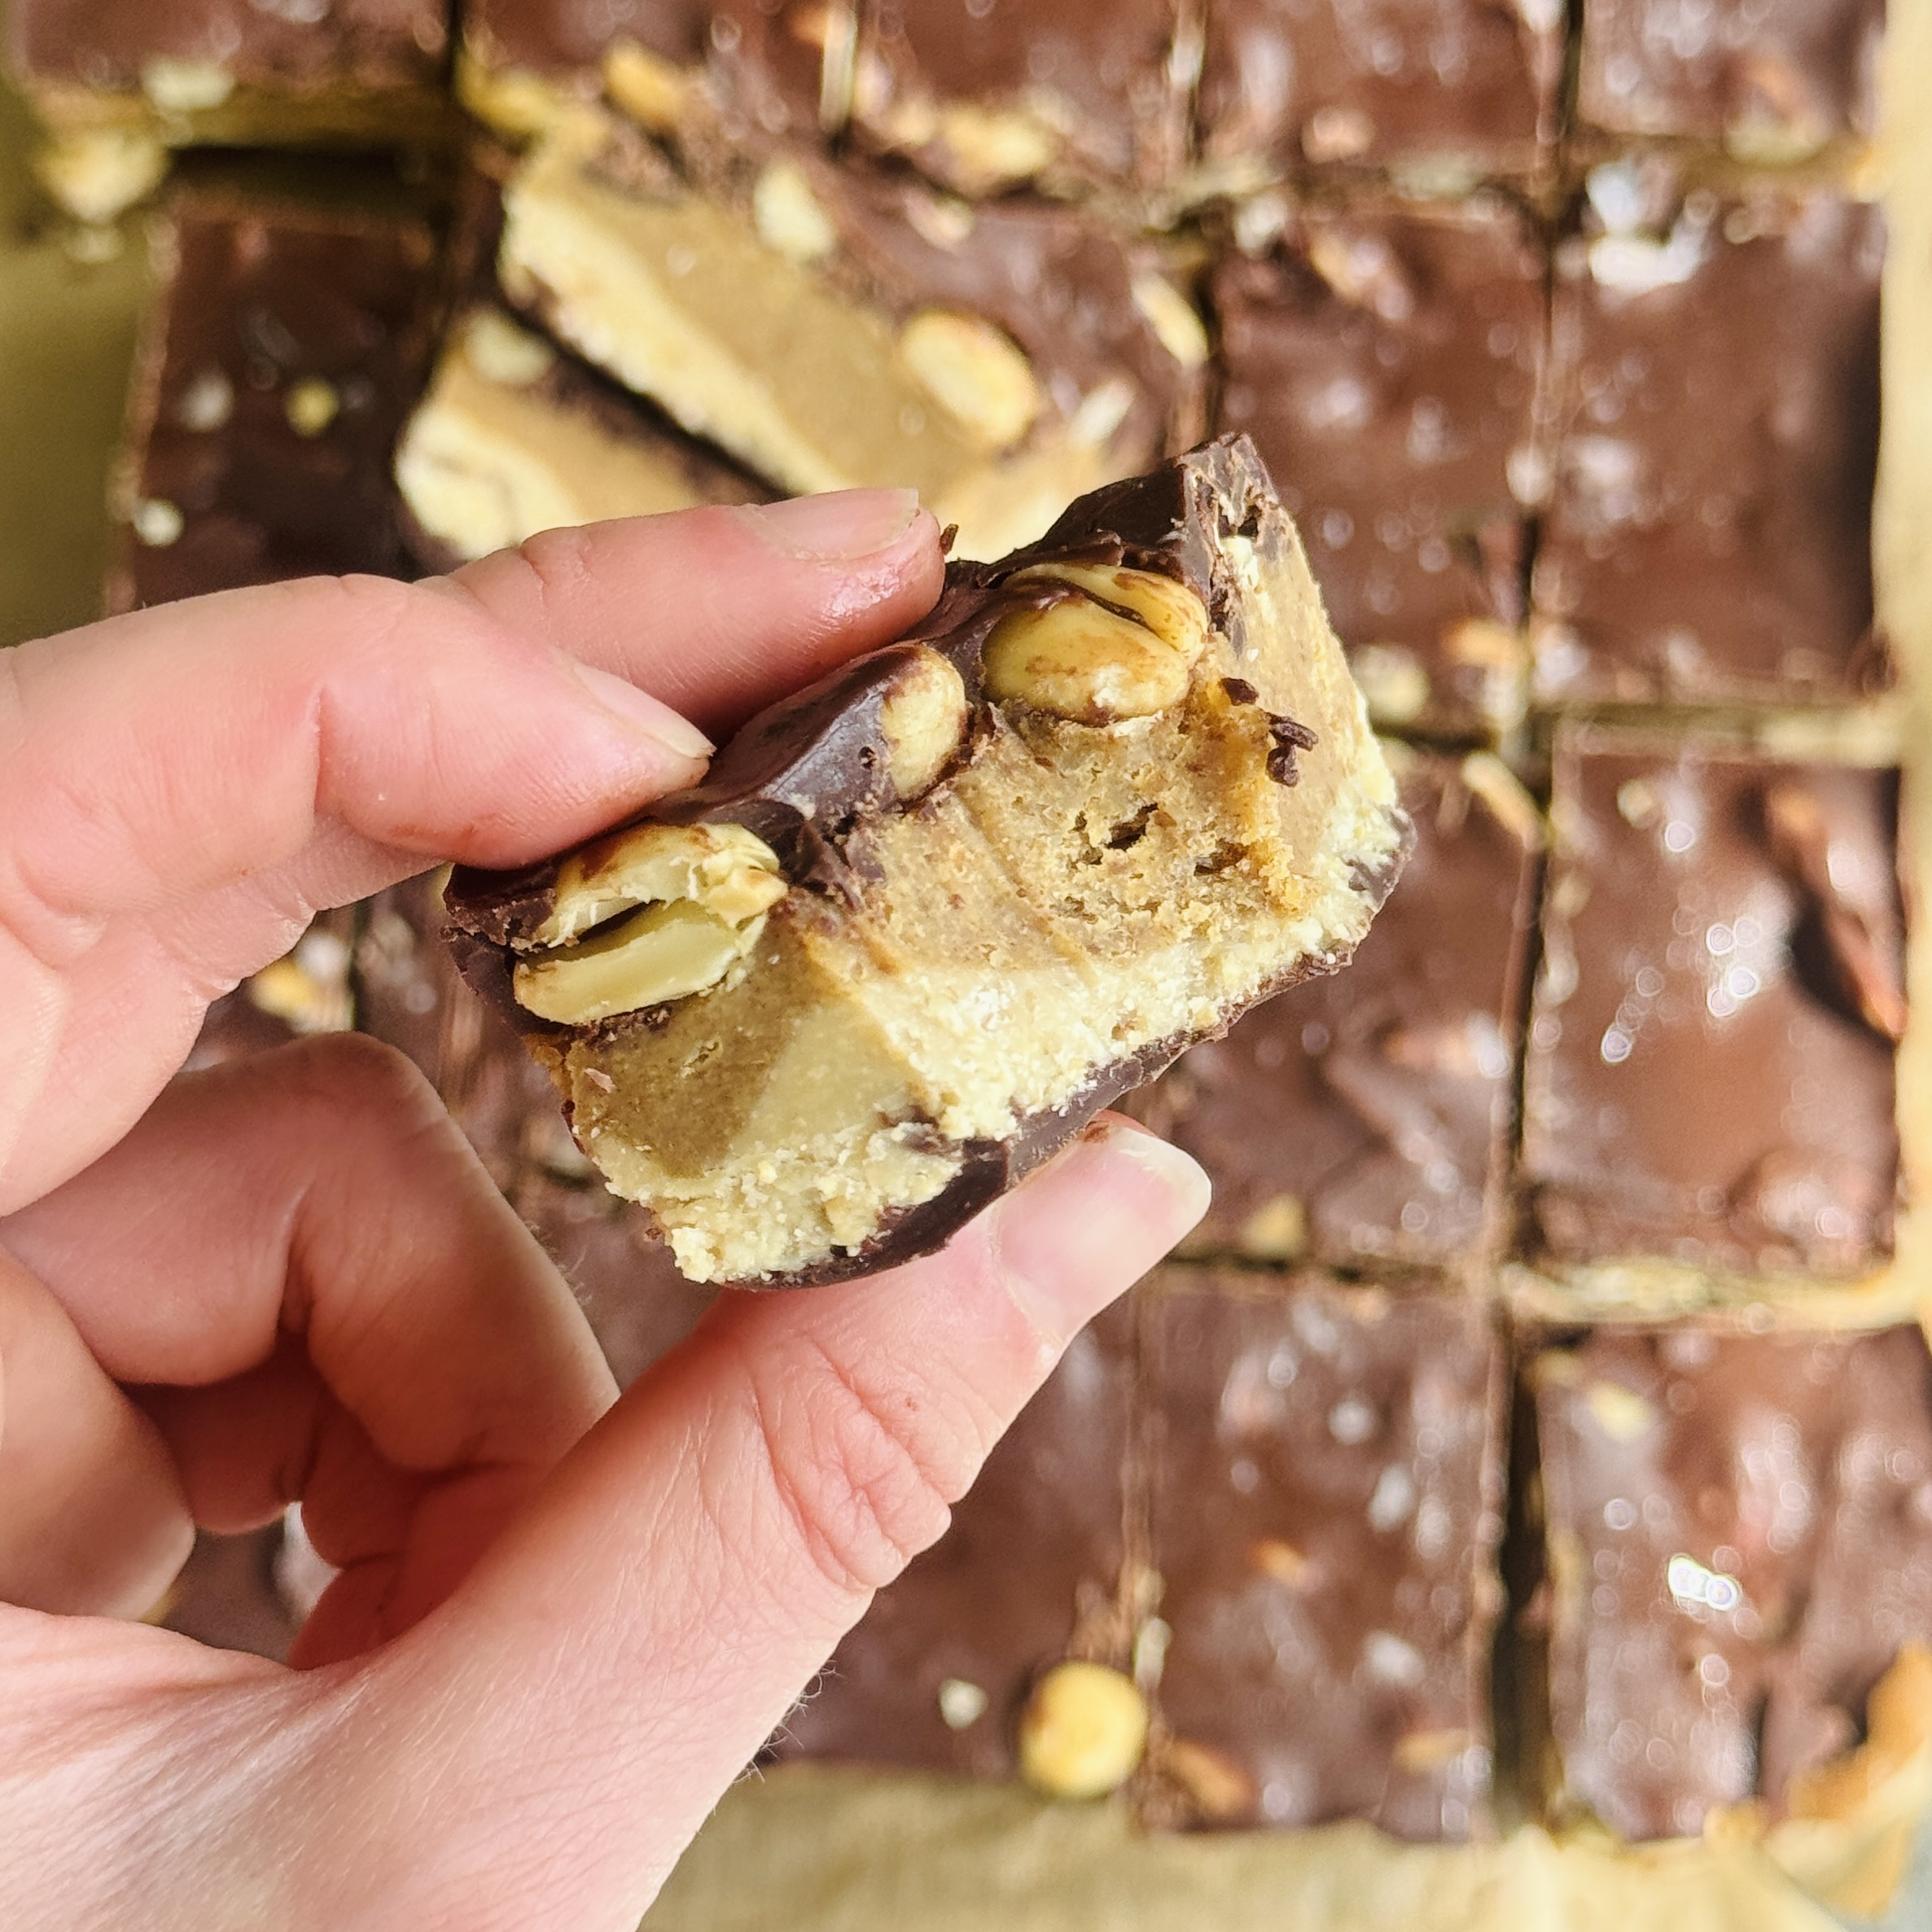
Healthier Snickers Ice Cream Bars
Takes 2 hours 20 minutes
Serves 24
Ingredients
The Vanilla Ice Cream Base
- 240 g roasted salted cashews (approx. 1½ cups)
- 60 ml maple syrup ¼ cup
- Pinch of salt
The Gooey Peanut Butter Salted Caramel Layer
- 240 g dates pitted (approx. 1½ cups / 10 large dates)
- 100 g roasted cashew nuts approx. ⅔ cup
- A big pinch of sea salt
- 10 tbsp warm water 150ml / just over ½ cup
- 150 g smooth peanut butter approx. ½ cup + 2 tbsp
- 1 tsp vanilla extract
The Crunch & Chocolate Shell
- 70 g roasted salted peanuts (approx. ½ cup)
- 250 g high-quality dark chocolate 70% or higher (approx. 1½ cups chopped)
- 1 tsp coconut oil
Instructions
Blend the ice cream base
- In a food processor, combine the 240g of roasted salted cashews, 60ml of maple syrup, 1 tsp of coconut oil, and a pinch of salt. Blend on high for 60 to 90 seconds until the mixture is a nut butter consistency.
Freeze the first layer
- Pour the creamy mixture into a lined pan to create the base layer. Line a standard loaf tin or a square baking dish with parchment paper, leaving some overhang on the sides to use as handles later. Pour the blended ice cream base into the tin and place it flat in the freezer for 1 to 2 hours until it is firm to the touch.
Make the date caramel
- In a small saucepan, add the 240g of pitted dates and 100g of roasted cashews. Pour in the 10 tbsp of warm water and bring to a gentle simmer for a few minutes on the stove to soften the dates. Strain the water out of the saucepan into a bowl (saving the liquid). Put the softened dates and cashews into the food processor. Add the 150g of smooth peanut butter, 1 tsp of vanilla extract, a big pinch of sea salt, and a splash of the saved date water. Blend until it forms a thick, ultra-sticky, glossy caramel paste. If it's too thick to spread, add an extra tablespoon of warm water.
Layer the caramel and nuts
- Spread the caramel over the frozen base and press the remaining nuts into it. Take the frozen ice cream base out of the freezer. Gently spread the salted date caramel evenly across the surface. Take the 70g of peanuts, chop them roughly, and scatter them over the caramel. Press down firmly with your hands so the nuts get locked into the caramel layer. Return to the freezer for 30 minutes.
Slice into bars
- Lift the mixture out using the parchment paper and cut into uniform bars. Once the caramel and nut layer is set, lift the block out of the tin using the parchment handles. Place it on a chopping board and use a sharp knife to slice it into 6 to 8 rectangular bars. Place the bars back on a lined tray in the freezer while you melt your chocolate.
Coat in dark chocolate
- Dip the frozen bars into melted chocolate to seal the layers. Melt the 250g of dark chocolate with 1 tsp of coconut oil in the microwave in 30-second bursts. Pour the melted chocolate into a tall glass. Take each frozen bar and dip it completely into the chocolate, letting any excess drip off. Because the bars are freezing cold, the chocolate will harden into a crisp shell almost instantly.
Storage
- Store your finished bars in an airtight container in the freezer. When you are ready to enjoy one, let it sit on the counter for 3 to 5 minutes. This allows the date caramel to become perfectly gooey and the cashew base to soften into a premium ice cream texture!
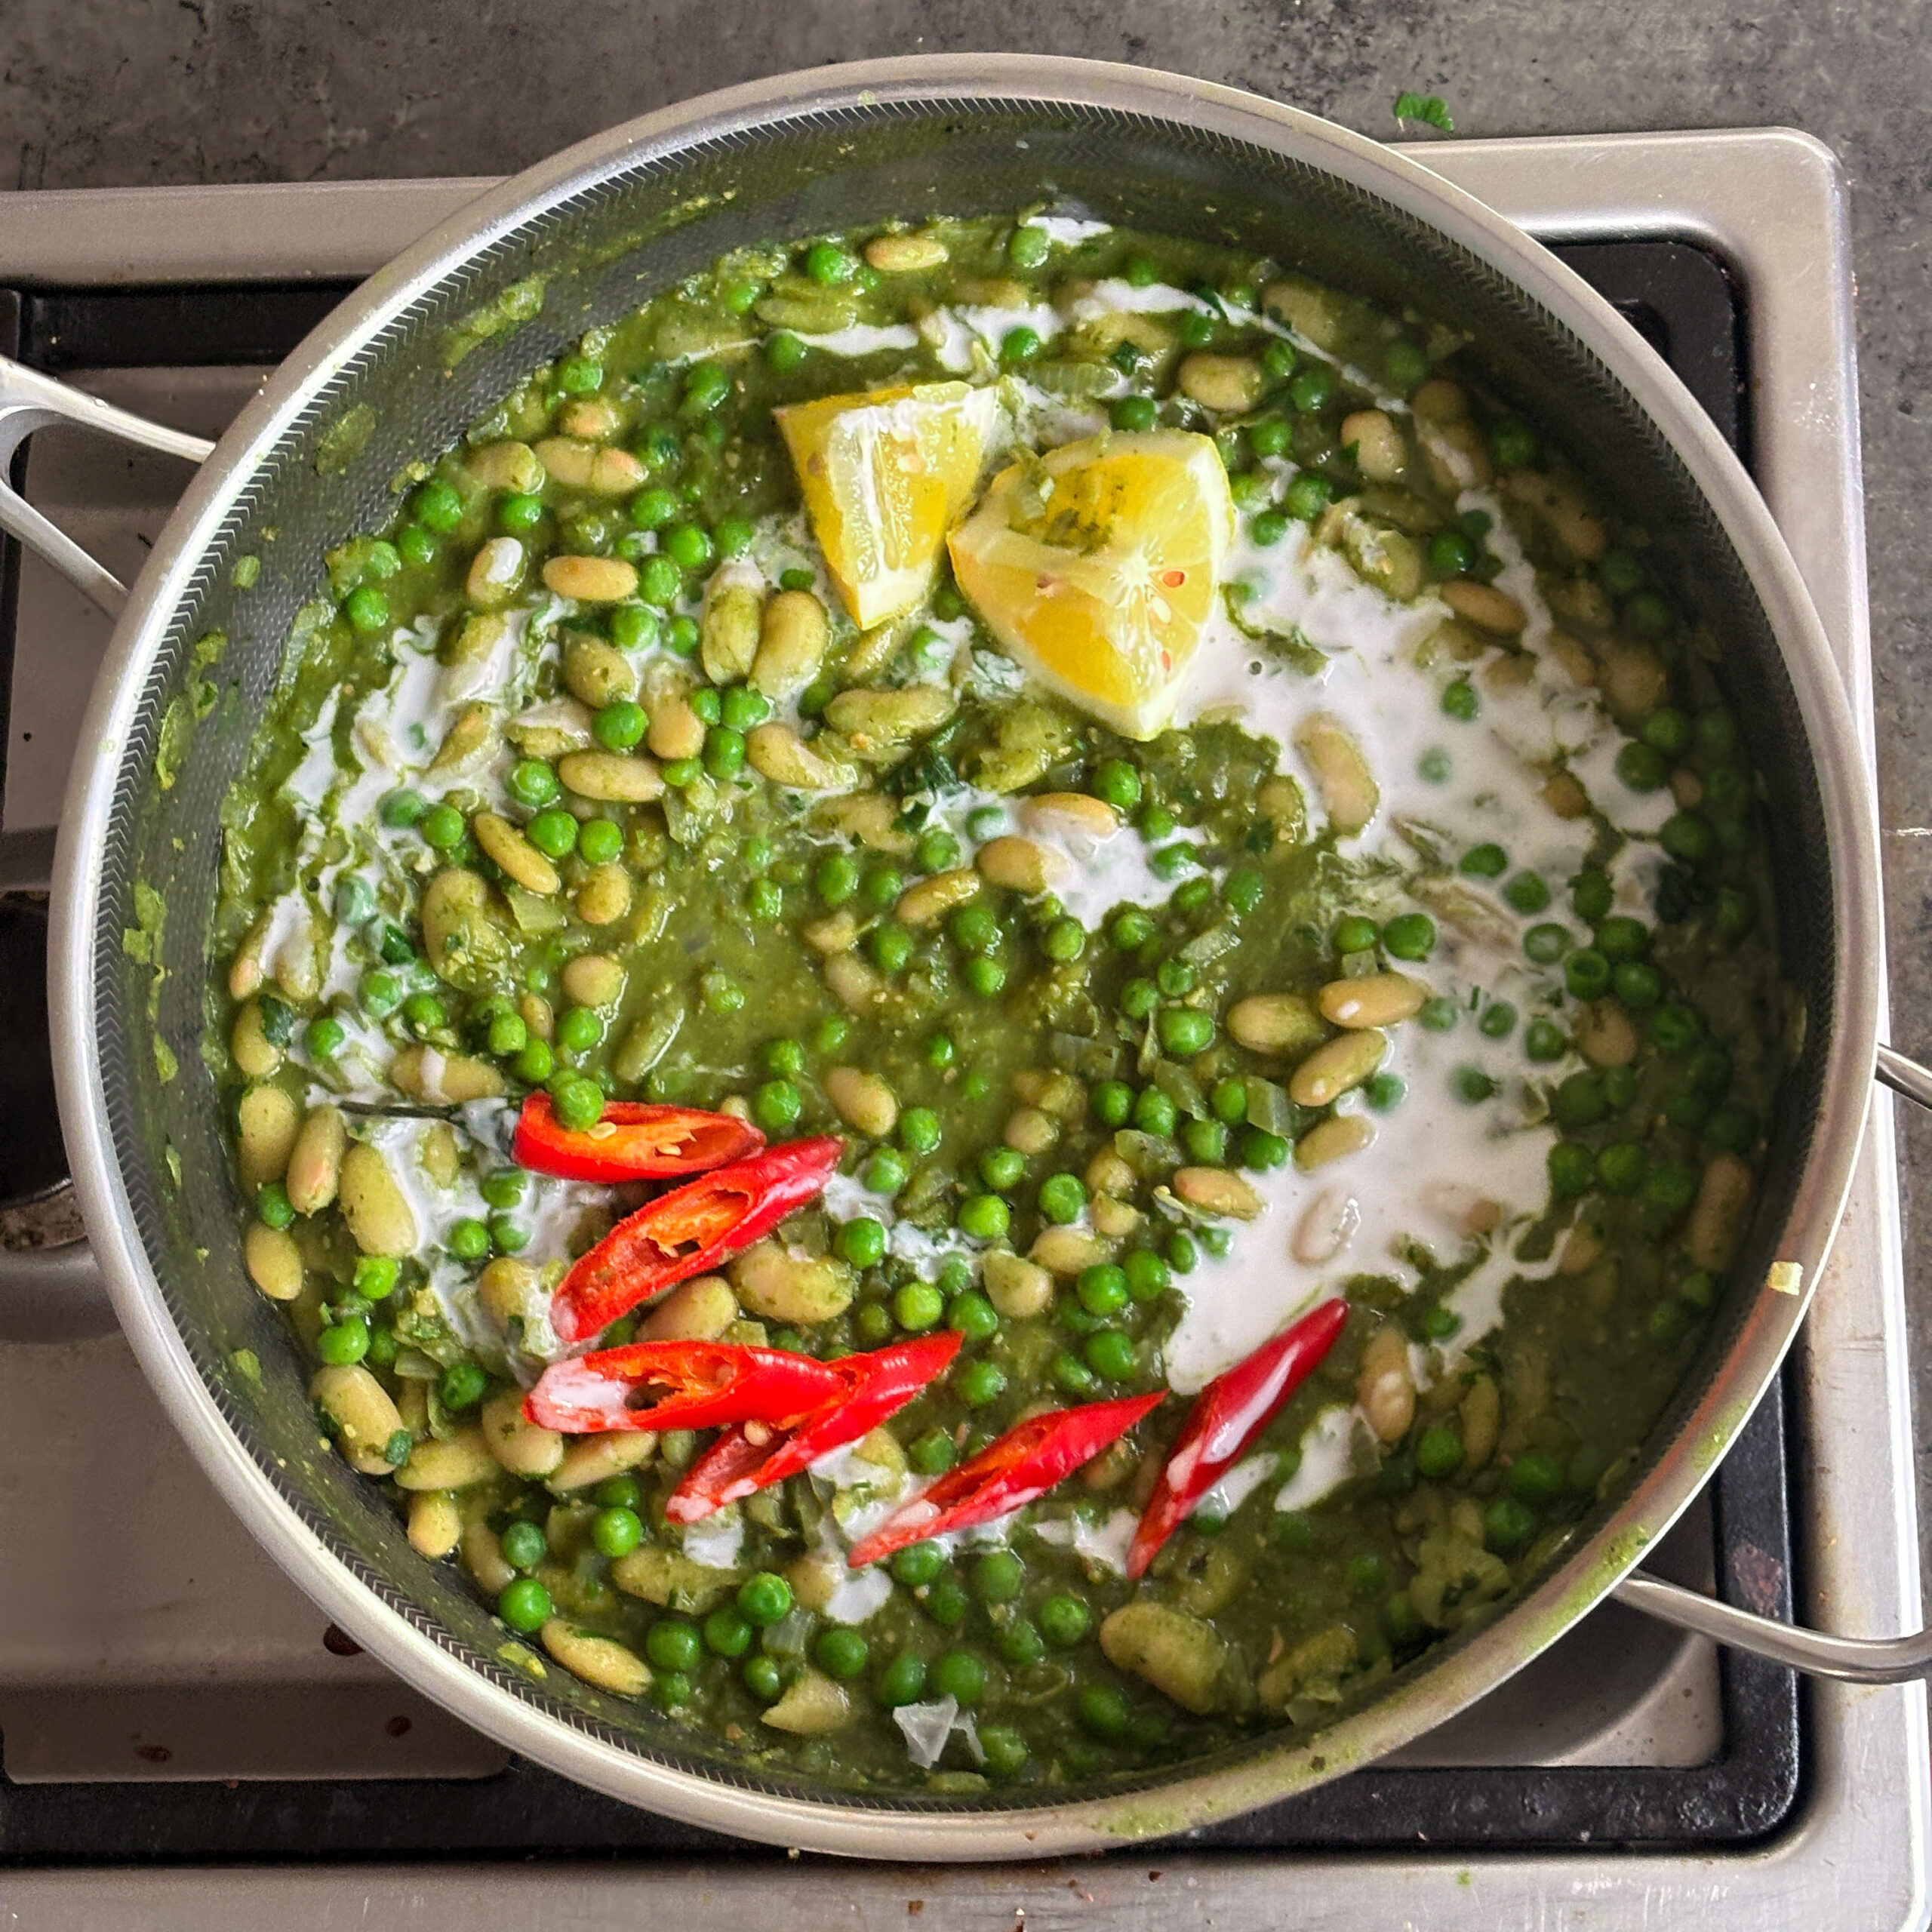
Spring Green Beanotto
Takes 20 minutes
Serves 4
Ingredients
- 1 white onion finely chopped (about 150g)
- 3 garlic cloves roughly chopped
- 100 g of kale or cavalo nero stems removed
- 60 g Spinach 2 cups
- 2 tbsp olive oil
- Sea salt and black pepper
- 1 jar Bold Bean Organic White Beans 570g jar
- 200 ml vegetable stock
- ½ tub The Happy Pear Basil Pesto 135g
- Zest and juice of 1 lemon
- A handful flat-leaf parsley finely chopped (about 15g)
- 120 g Peas 1 cup
Optional
- 150 g Asparagus chopped
To serve
- Coconut yoghurt
- Extra chopped parsley
- Pickled red onions
Instructions
Start the base
- Peel and finely dice the onion and garlic. Heat the olive oil in a large saucepan over a medium heat. Add the onion with a pinch of salt and cook for 5–7 minutes until soft and lightly golden, add the garlic and cook for a further 2 mins.
Blend the sauce
- Into a blender add the cold veg stock, spinach, kale, juice of ½ lemon and blend till smooth.
Build the beanotto
- Add the beans to the onions and garlic and stir well. Pour in the green sauce a ladle at a time, stirring gently and allowing it to simmer and thicken, much like a risotto. Continue for 5 minutes until creamy and rich.
Season and enrich
- Stir in The Happy Pear Basil Pesto along with the peas, lemon zest and juice and season well with salt and pepper. If asparagus, stir them in now and cook for a further 2–3 minutes until just tender. We recommend frying off the asparagus in a separate pan before adding.
Finish and serve
- Remove from the heat and fold through the chopped parsley. Taste and adjust seasoning if needed.
- Serve hot, topped with finely sliced fresh chilli, a dollop of coconut yoghurt and extra parsley and a wedge of lemon
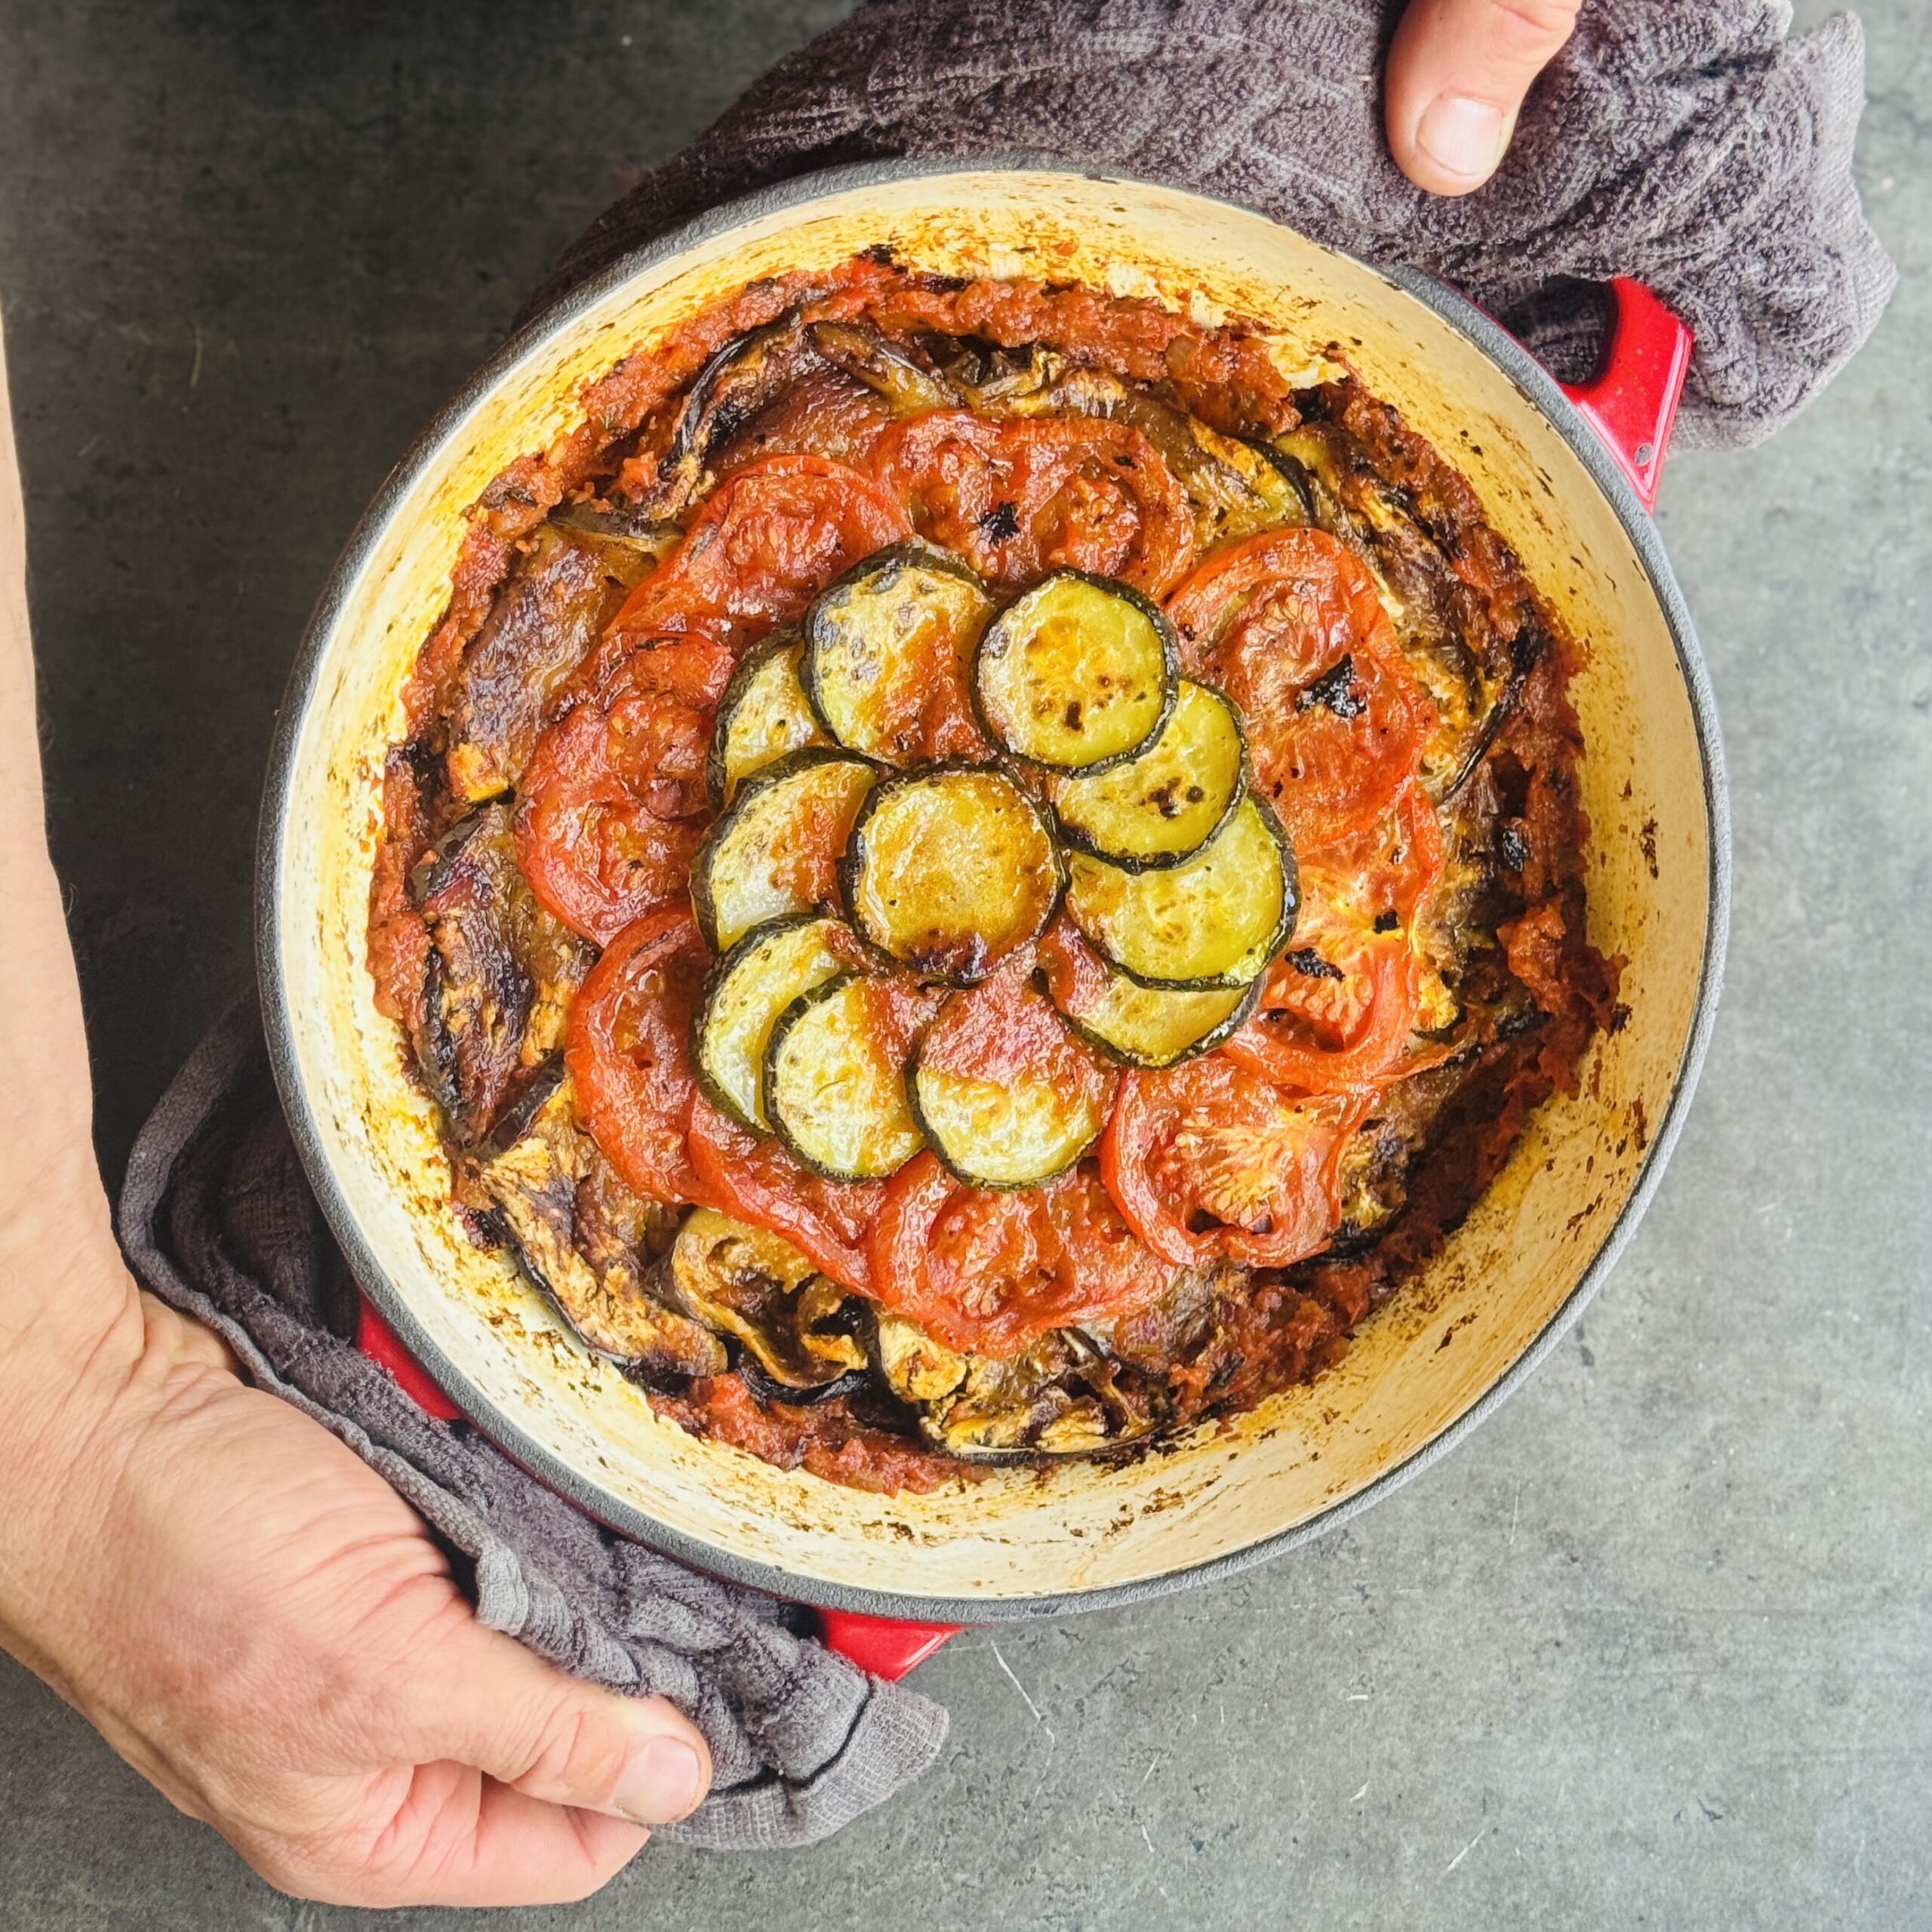
Elegant Summer Ratatouille
Takes 1 hour
Serves 4
Ingredients
For the smooth tomato & pepper base
- 30 ml olive oil 2 tbsp, plus extra for drizzling
- 300 g onions 2 medium, diced
- 3 cloves garlic minced
- 1 jar roasted red peppers drained and roughly chopped (200–250g drained weight)
- 1 x 400g tin chopped tomatoes
- 15 ml maple syrup 1 tbsp
- Salt and black pepper to taste
For the vegetable layer & garnish
- 2 aubergines approx. 500g total
- 2 courgettes approx. 400g total
- 2 large vine tomatoes approx. 300g
- 20 g fresh basil
Instructions
Cook the aromatics
- Preheat the oven to 200°C fan.
- Heat a large ovenproof pan or shallow casserole dish over medium heat and add the olive oil. Add the diced onions and cook for 4–5 minutes until soft and translucent. Stir in the garlic and cook for another 1–2 minutes until fragrant.
Make the sauce
- Add the roasted peppers, chopped tomatoes, maple syrup, and a generous pinch of salt and pepper. Simmer gently for 3–4 minutes.
- Using a hand blender, blend the sauce directly in the pan until smooth and velvety. Taste and adjust the seasoning if needed.
Slice the vegetables
- Slice the aubergines, courgettes, and tomatoes into thin rounds, roughly ½–1cm thick. Try to keep the slices as even as possible so they cook uniformly.
Arrange the vegetables
- Arrange the sliced vegetables upright in concentric circles over the sauce, alternating aubergine, courgette, and tomato as you go. Pack them fairly tightly together so they hold their shape while baking.
Bake
- Drizzle generously with olive oil and season with a little extra salt and pepper.
- Cover with a lid or foil and bake for 25 minutes. Remove the cover and bake for a further 10 minutes until the vegetables are tender and lightly golden around the edges.
Finish and serve
- Scatter over the fresh basil just before serving. The heat from the vegetables will gently release the basil’s aroma and bring the whole dish to life.
- Serve warm with crusty bread, grains, or a simple leafy salad.
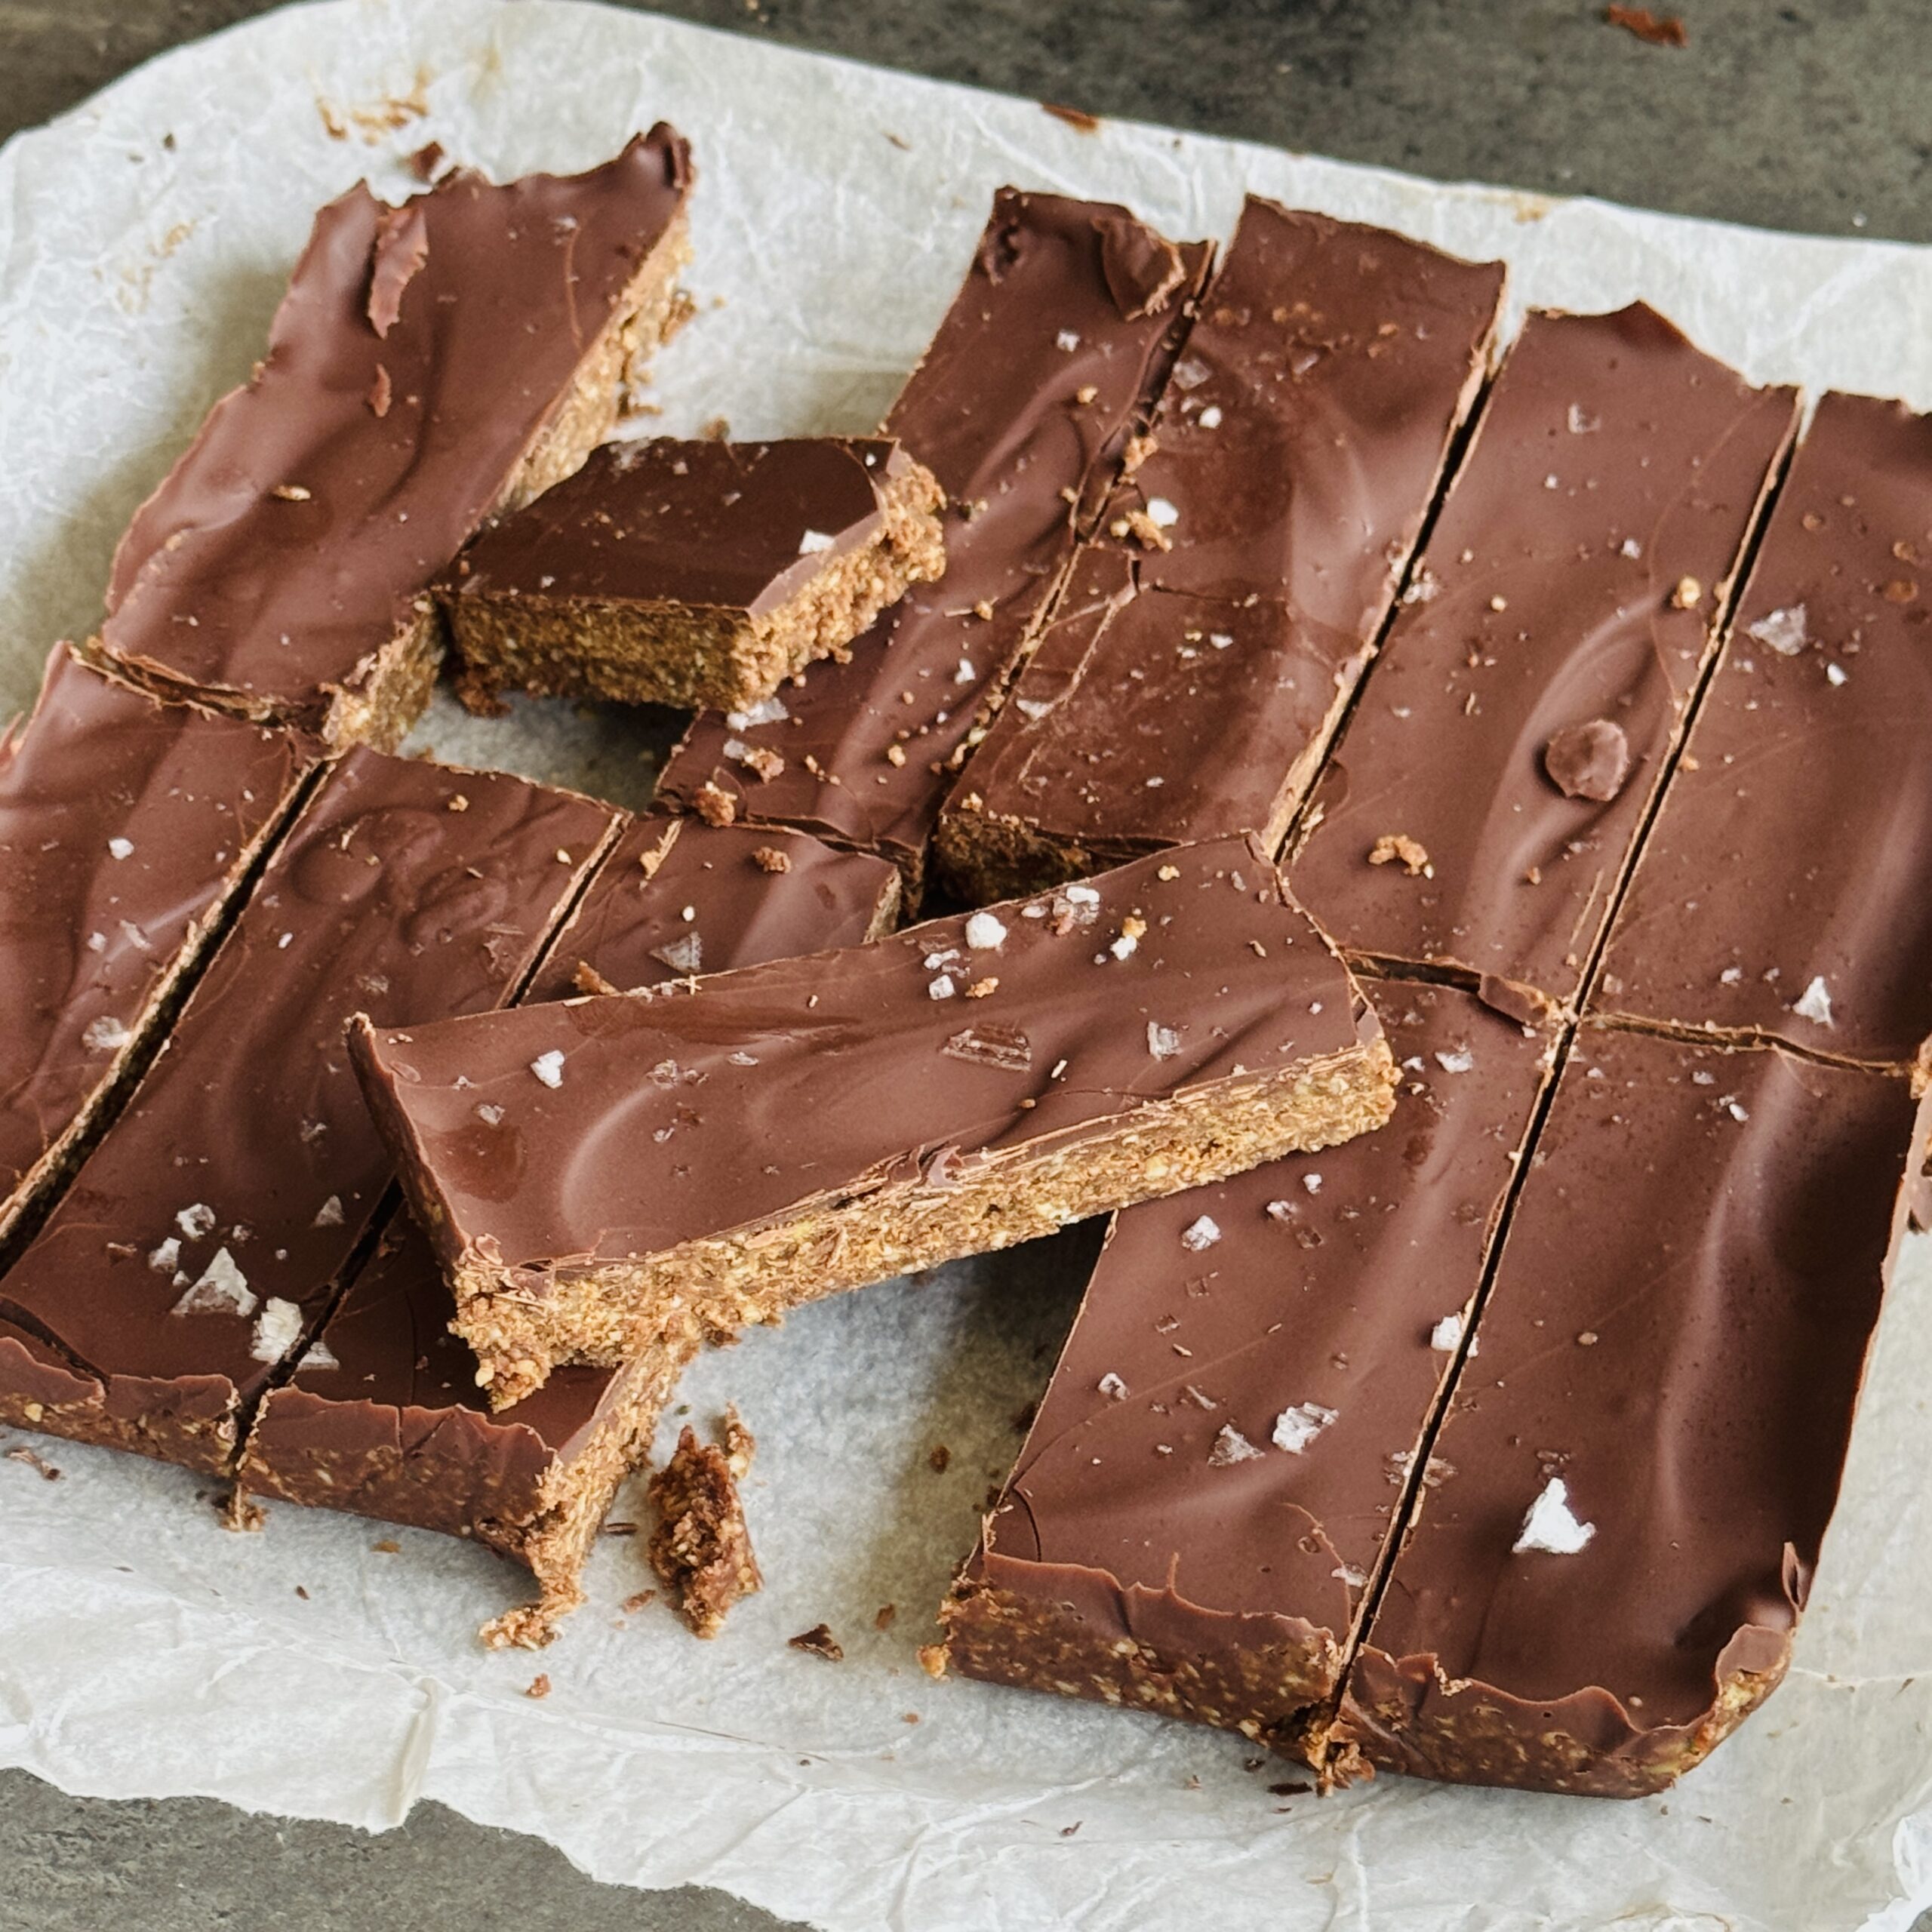
High Protein Fudgy Brownie Bars
Takes 45 minutes
Serves 10
Ingredients
The High-Protein Dry Mix
- 130 g Defatted peanut flour 50% protein by weight
- 120 g Pumpkin seeds Boosted to maximize whole-food protein and zinc
- 60 g Rolled oats
- 50 g Hemp seeds
- 30 g cocoa powder
- Pinch of fine sea salt
The Wet Binder
- 140 g Smooth peanut butter
- 80 g Maple syrup
- 45 ml 3 tbsp Coconut oil, melted
- 1 tsp Pure vanilla extract
- 10 tbsp Plant-based milk or water as needed to bind
The Chocolate Coating
- 100 g Dark chocolate chips
- 1 tsp Coconut oil helps the chocolate slice cleanly without cracking
- Flaky sea salt for topping
Instructions
Blend the dry ingredients
- In a food processor/ blender add the pumpkin seeds, hemp seeds and oat flakes and blend till they reach a smooth powder. Remove them and add to a large bowl along with the peanut flour, cocoa, and salt and whisk together to remove lumps.
Melt the wet ingredients
- In a small saucepan over low heat, combine the 140g peanut butter , 80g maple syrup , 45ml coconut oil , and 1 tsp vanilla. Whisk constantly just until the mixture melts into a smooth, liquid pourable consistency. Do not let it boil.
Form a fudgy dough
- Pour the warm liquid directly into your dry ingredients and fold with a spatula. Gradually splash in the plant-based milk one tablespoon at a time. Stir until the mixture transforms into a deep, dark, cohesive chocolate dough that easily holds its shape when pressed together.
Press into the tin
- Line a 20x20cm baking tin with parchment paper. Transfer the chocolate brownie dough into the tin and press down with maximum force using a flat spatula or damp hands. Compacting it tightly is what gives it that signature dense, store-bought bar texture.
Top with chocolate shell
- Melt the 100g dark chocolate with 1 tsp of coconut oil in the microwave or a double boiler. Pour the glossy chocolate over the flapjack base, tilting the pan so it coats the surface completely. Scatter a few flakes of sea salt across the wet chocolate.
Chill and slice
- Place the tin into the fridge for 30 minutes until the chocolate shell has hardened and the base is completely firm. Lift out using the parchment paper handles and slice cleanly into 10 even bars.
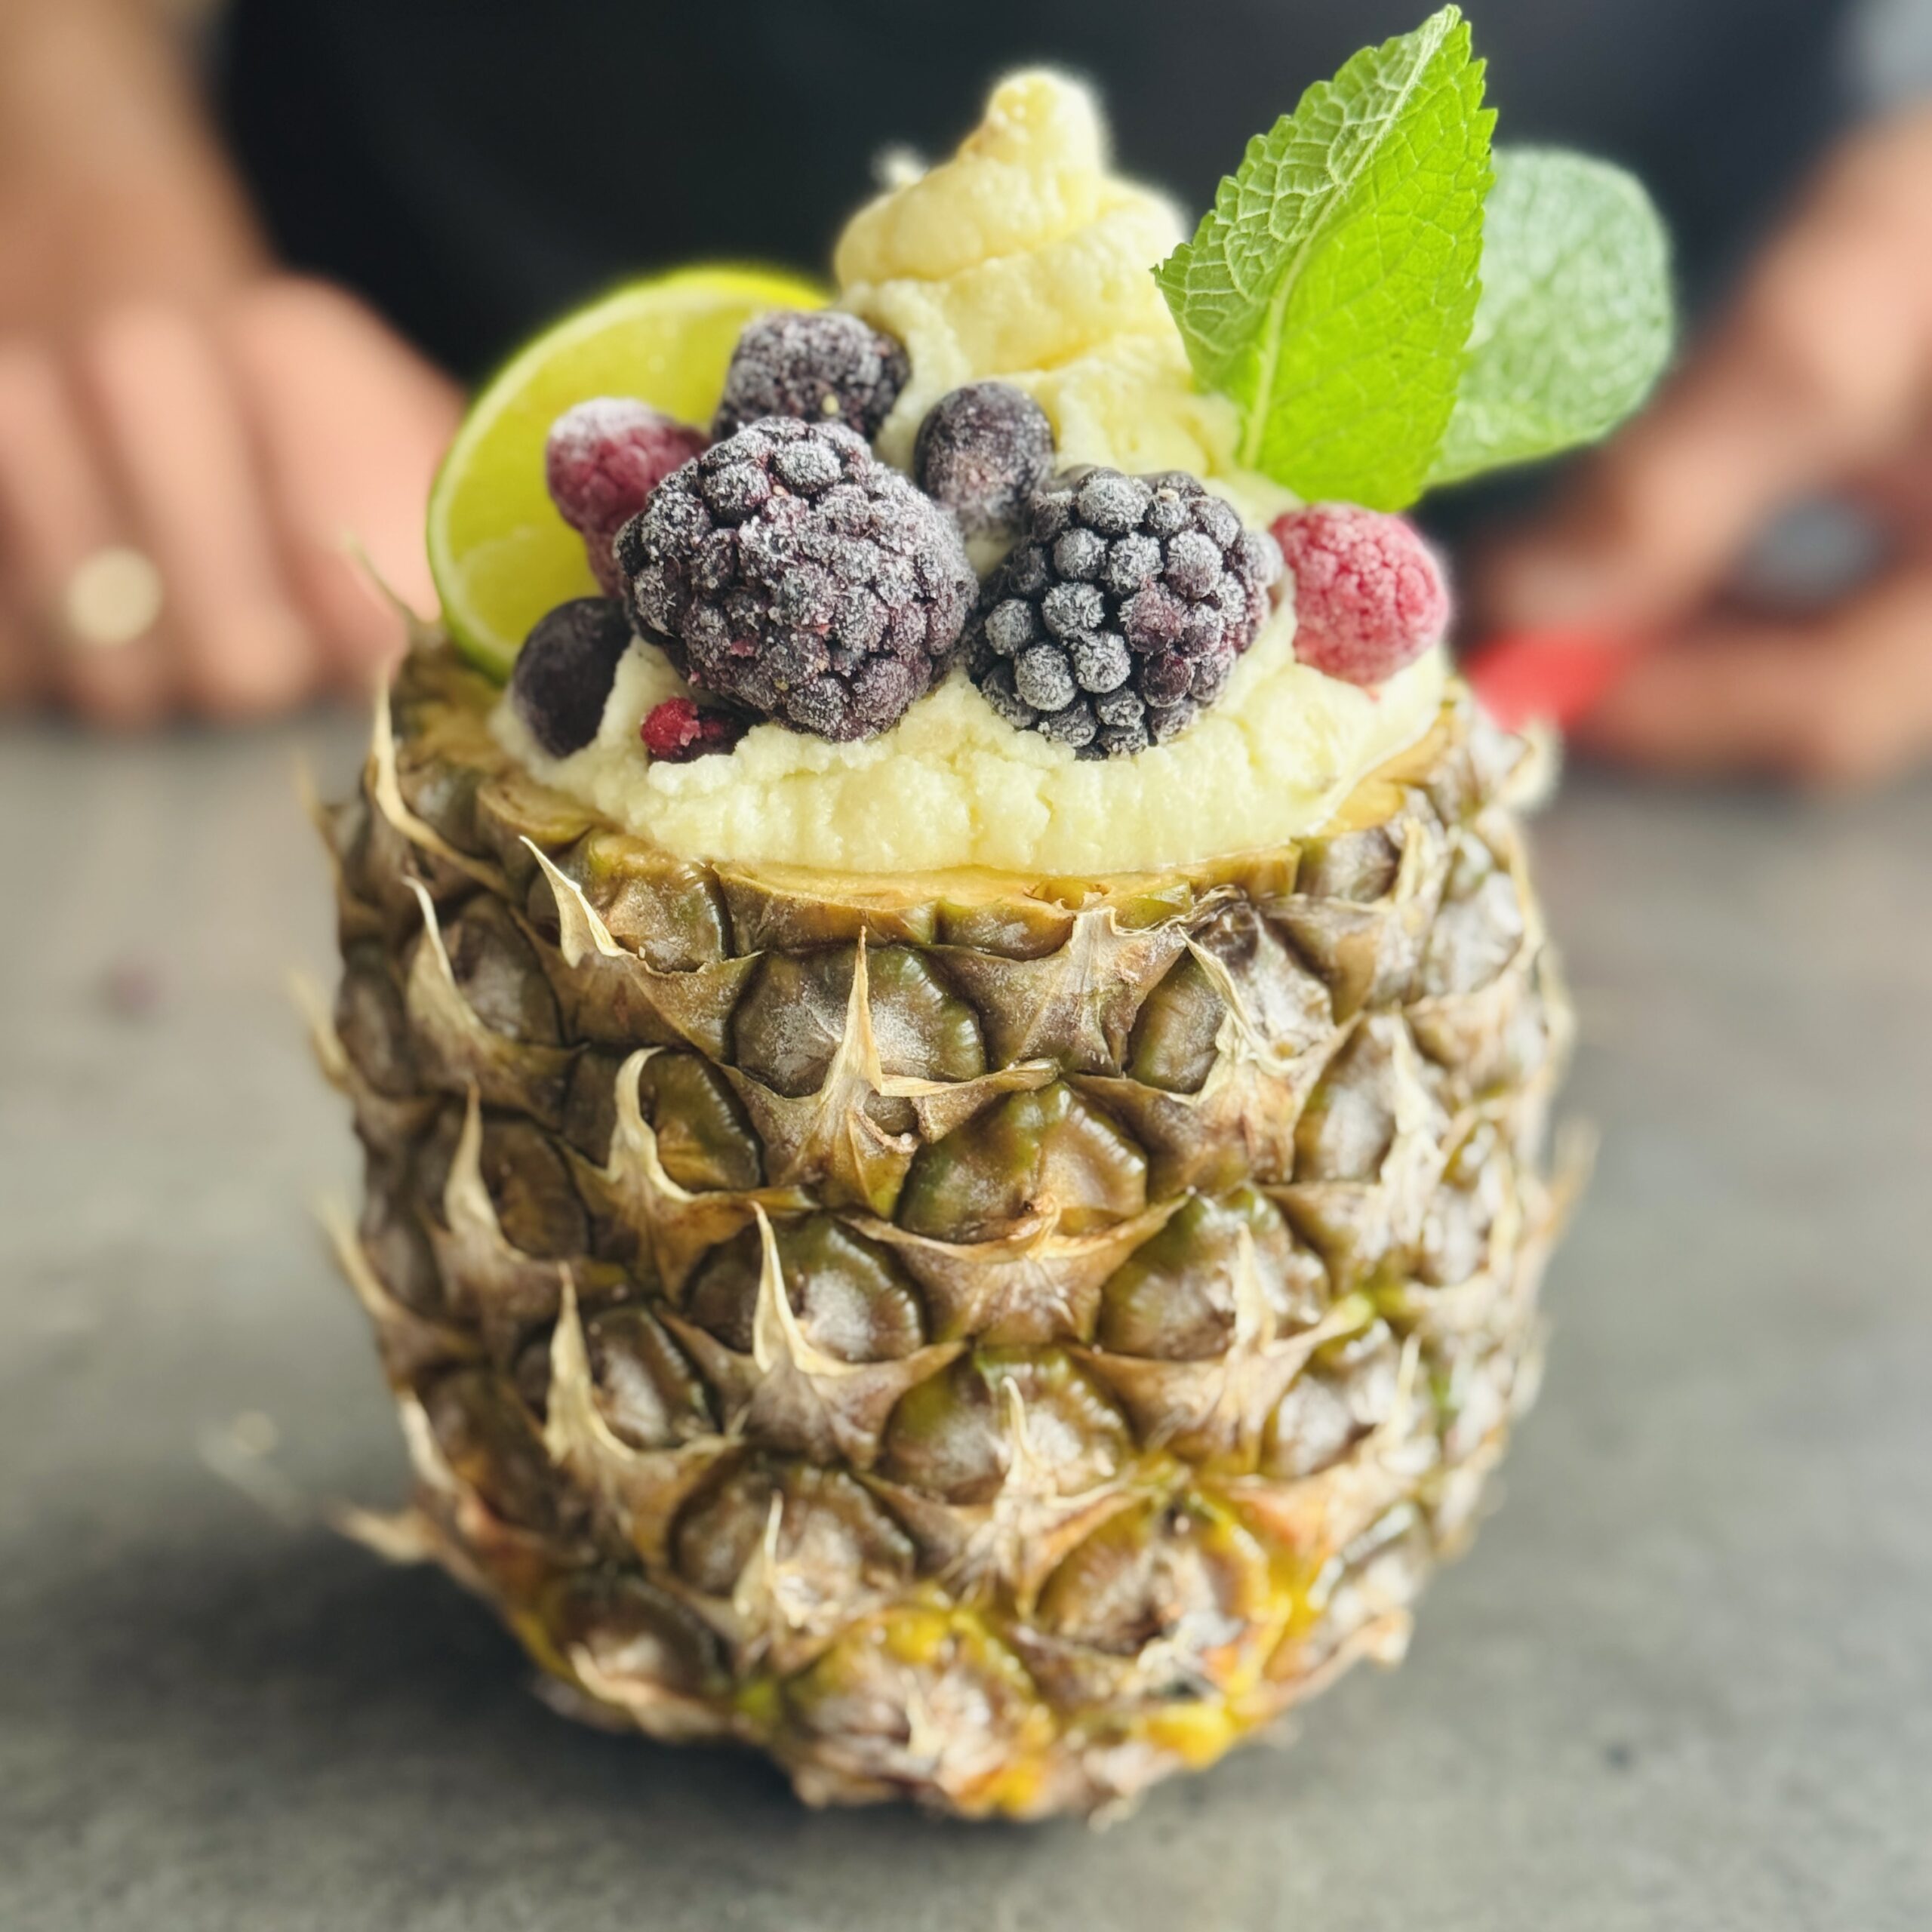
Piña Colada Pineapple & Coconut Cream Sorbet
Takes 6 hours 10 minutes
Serves 4
Ingredients
- 1 large ripe pineapple peeled, cored & chopped into chunks
- 400 ml full-fat coconut milk or coconut cream
- Juice of 2 limes
- 2 –3 tbsp maple syrup or honey optional, depending on sweetness of pineapple
- 1 tsp vanilla extract
- Small pinch sea salt
Optional extras
- 2 tbsp toasted desiccated coconut
- Zest of 1 lime
- Small thumb fresh ginger
- Tiny splash of dark rum or rum extract for authentic piña colada flavour
- Few fresh mint leaves
Instructions
- Spread the pineapple and banana pieces onto trays or plates lined with parchment paper. Freeze until completely solid — ideally overnight. If using coconut milk, freeze it in ice cube trays for a creamier texture.
- Assemble the Nama Juicer with the sorbet attachment.
- Alternate feeding frozen pineapple, banana, and frozen coconut cubes through the machine.
- Add lime juice, vanilla, sea salt, and any optional extras as you go.
- Stir through toasted coconut and lime zest at the end for texture and freshness.
To Serve
- Serve immediately for soft-serve texture, or freeze for 1–2 hours for a firmer scoopable sorbet.
Top with:
- Toasted coconut flakes
- Fresh pineapple wedges
- Lime zest
- Mint leaves
- Crushed roasted macadamias for extra richness
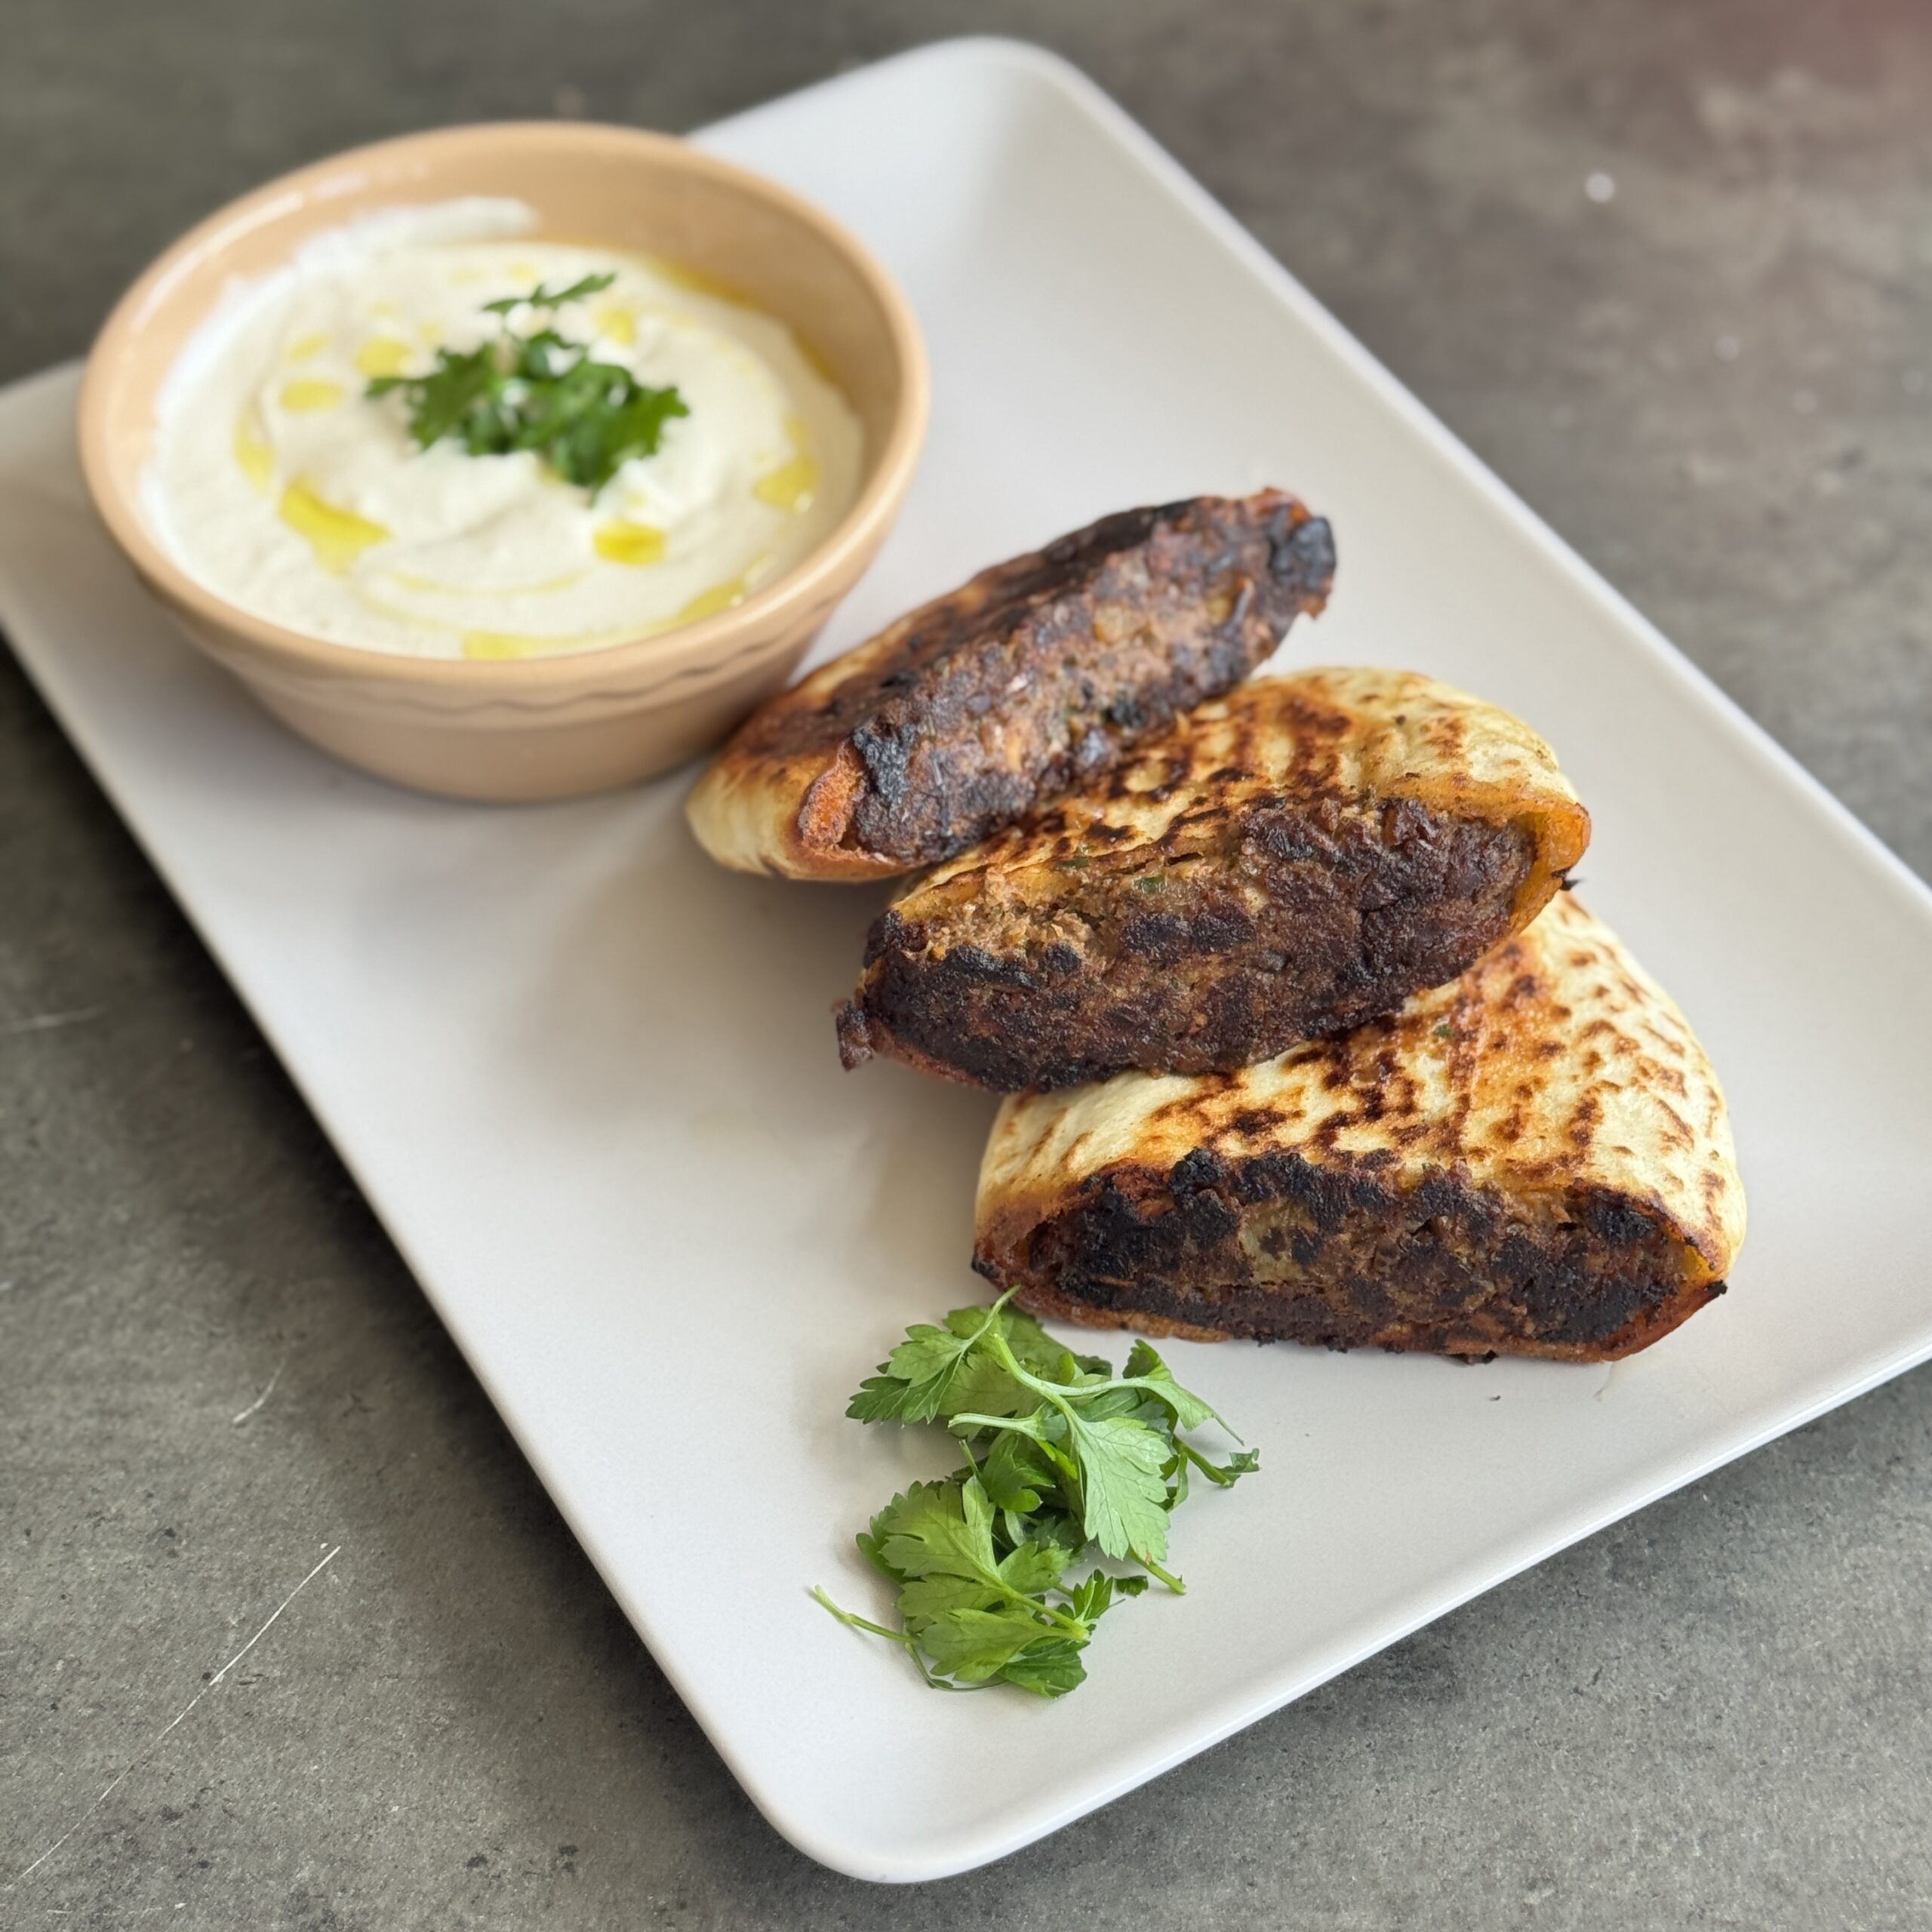
Plant-Based “Meaty” Arayes
Takes 25 minutes
Serves 3
Ingredients
The Filling
- 250 g mushrooms
- 240 g cooked brown lentils drained well (1½ cups)
- 60 g walnuts/pecans ½ cup
- 100 g small onion 1 small onion
- 2 cloves garlic
- 15 g tomato paste 1 tbsp
- 8 g cumin 1 tbsp
- 2 g smoked paprika 1 tsp
- 1 g cinnamon ½ tsp
- 15 ml pomegranate molasses 1 tbsp, optional but recommended
- 30 ml tamari/soy sauce 2 tbsp
- Salt and black pepper to taste
The Build
- 4 large thick pita breads (standard or wholemeal)
- 30 ml extra virgin olive oil 2 tbsp, for brushing
- Lemon-Tahini Dip
- 60 g tahini ¼ cup
- Juice of ½ lemon
- 1 g garlic powder ½ tsp
- 60 g yogurt of choice ¼ cup
- 30 –45ml warm water 2–3 tbsp, to thin
- Salt to taste
Instructions
Prepare the filling
- Peel the onion and garlic and roughly chop. Roughly chop the mushrooms and walnuts/pecans. Drain and rinse the lentils. Into a food processor add all the ingredients and blend until cohesive but still with a little texture. It should feel like a thick paste.
Cook the filling to evaporate some water
- Into a large pan add 30ml (2 tbsp) of oil and fry the filling for 3–4 mins, stirring regularly to brown and cook off some of the water in order to concentrate the flavours and texture.
Stuff the pita
- Quarter the pitas if large and if smaller cut in half and spread the filling evenly into each pocket. Carefully open the pockets and spread about 30g (2 tbsp) of the filling into each. Use the back of a spoon to flatten the filling so it reaches the very edges of the pita.
Crisp the sides
- Brush with olive oil and fry each side until golden and shattering. Lay the pitas flat in the pan. Brush the top side with olive oil, then flip. Brush the other side. Cook for 3–4 minutes per side, pressing down with a spatula, until the bread is dark golden and very crispy.
Sear the open edge
- Cook the “meat” side first to seal the filling and create a crust. Heat a large non-stick pan over medium-high heat with a splash of oil. Place the pita quarters in the pan upright, with the exposed filling touching the pan. Press down gently for 2 minutes until the filling is browned and “sealed.”
Make the dip and serve
- Whisk the tahini sauce until creamy and serve alongside the hot pitas. Whisk the tahini, lemon juice, yoghurt and garlic powder. Gradually add warm water one tablespoon at a time until it reaches a smooth, drizzling consistency. Serve the Arayes hot, dipped straight into the tahini sauce.
Serving Suggestion
- The Fresh Balance: Serve these with a side of fresh parsley and red onion salad tossed in sumac. The acidity of the salad perfectly balances the rich, nutty flavor of the walnut and mushroom filling.
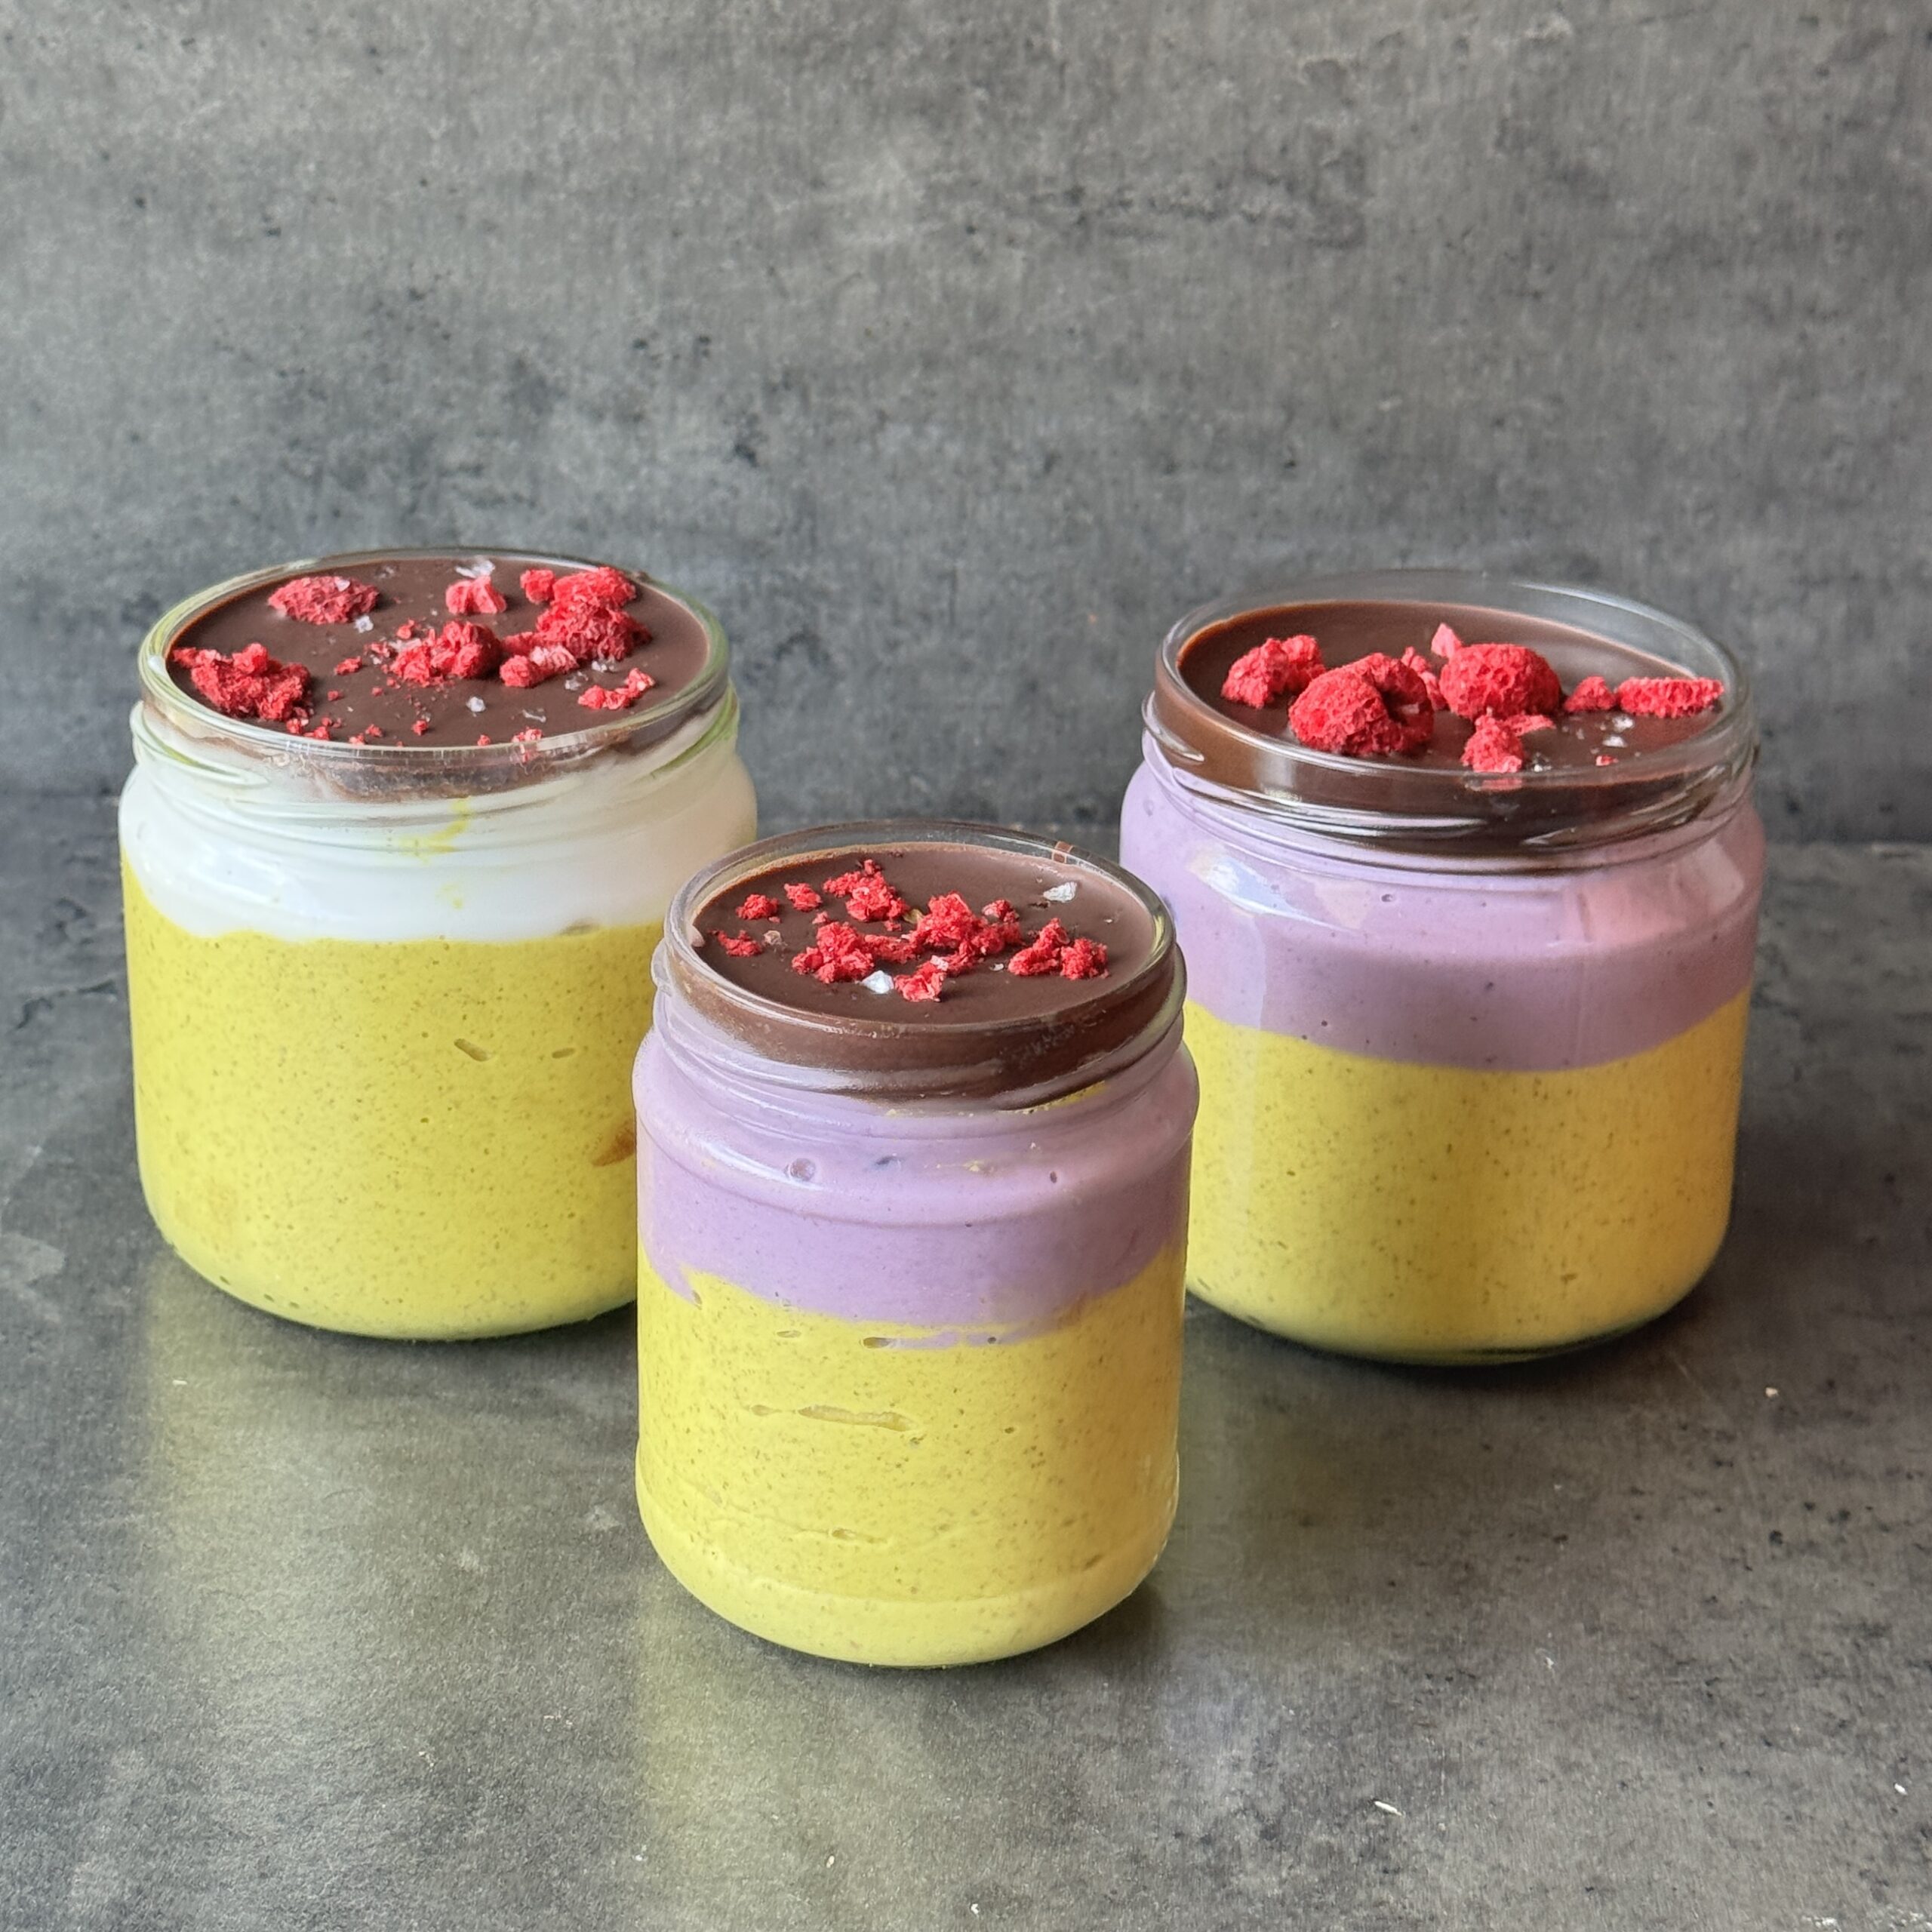
Blended Mango Chia Overnight Oats
Takes 4 hours 10 minutes
Serves 4
Ingredients
- 200 g 2 cups rolled oats
- 2 tbsp chia seeds
- 250 ml 1 cup plant-based milk
- 225 g 1½ cups frozen mango
- 50 ml / 2–3 tbsp maple syrup to taste
- 1 tsp vanilla extract optional
- 1/2 tsp ground turmeric
- Pinch of salt
Chocolate topping:
- 80 –100g dark chocolate
- 1 tsp coconut oil optional, helps it snap nicely
To Serve:
- 245 g / 1 cup plant-based yogurt
Instructions
Blend:
- Add all oat ingredients to a blender and blend until smooth and creamy.
Chill:
- Pour evenly into 2 jars or containers. Cover and refrigerate for at least 4 hours or overnight. It will thicken up nicely.
Make the chocolate shell:
- Melt the chocolate gently (microwave in short bursts or over a bain-marie).
Stir in the coconut oil if using.
- Let it cool slightly (so it’s not piping hot).
Create the shell:
- Pour a thin layer of melted chocolate over each jar.
- Tilt or swirl to spread evenly across the top.
- Place in the fridge for approx. 10 minutes until it hardens into a shell.
To serve:
- Crack the chocolate layer with a spoon and dig in.
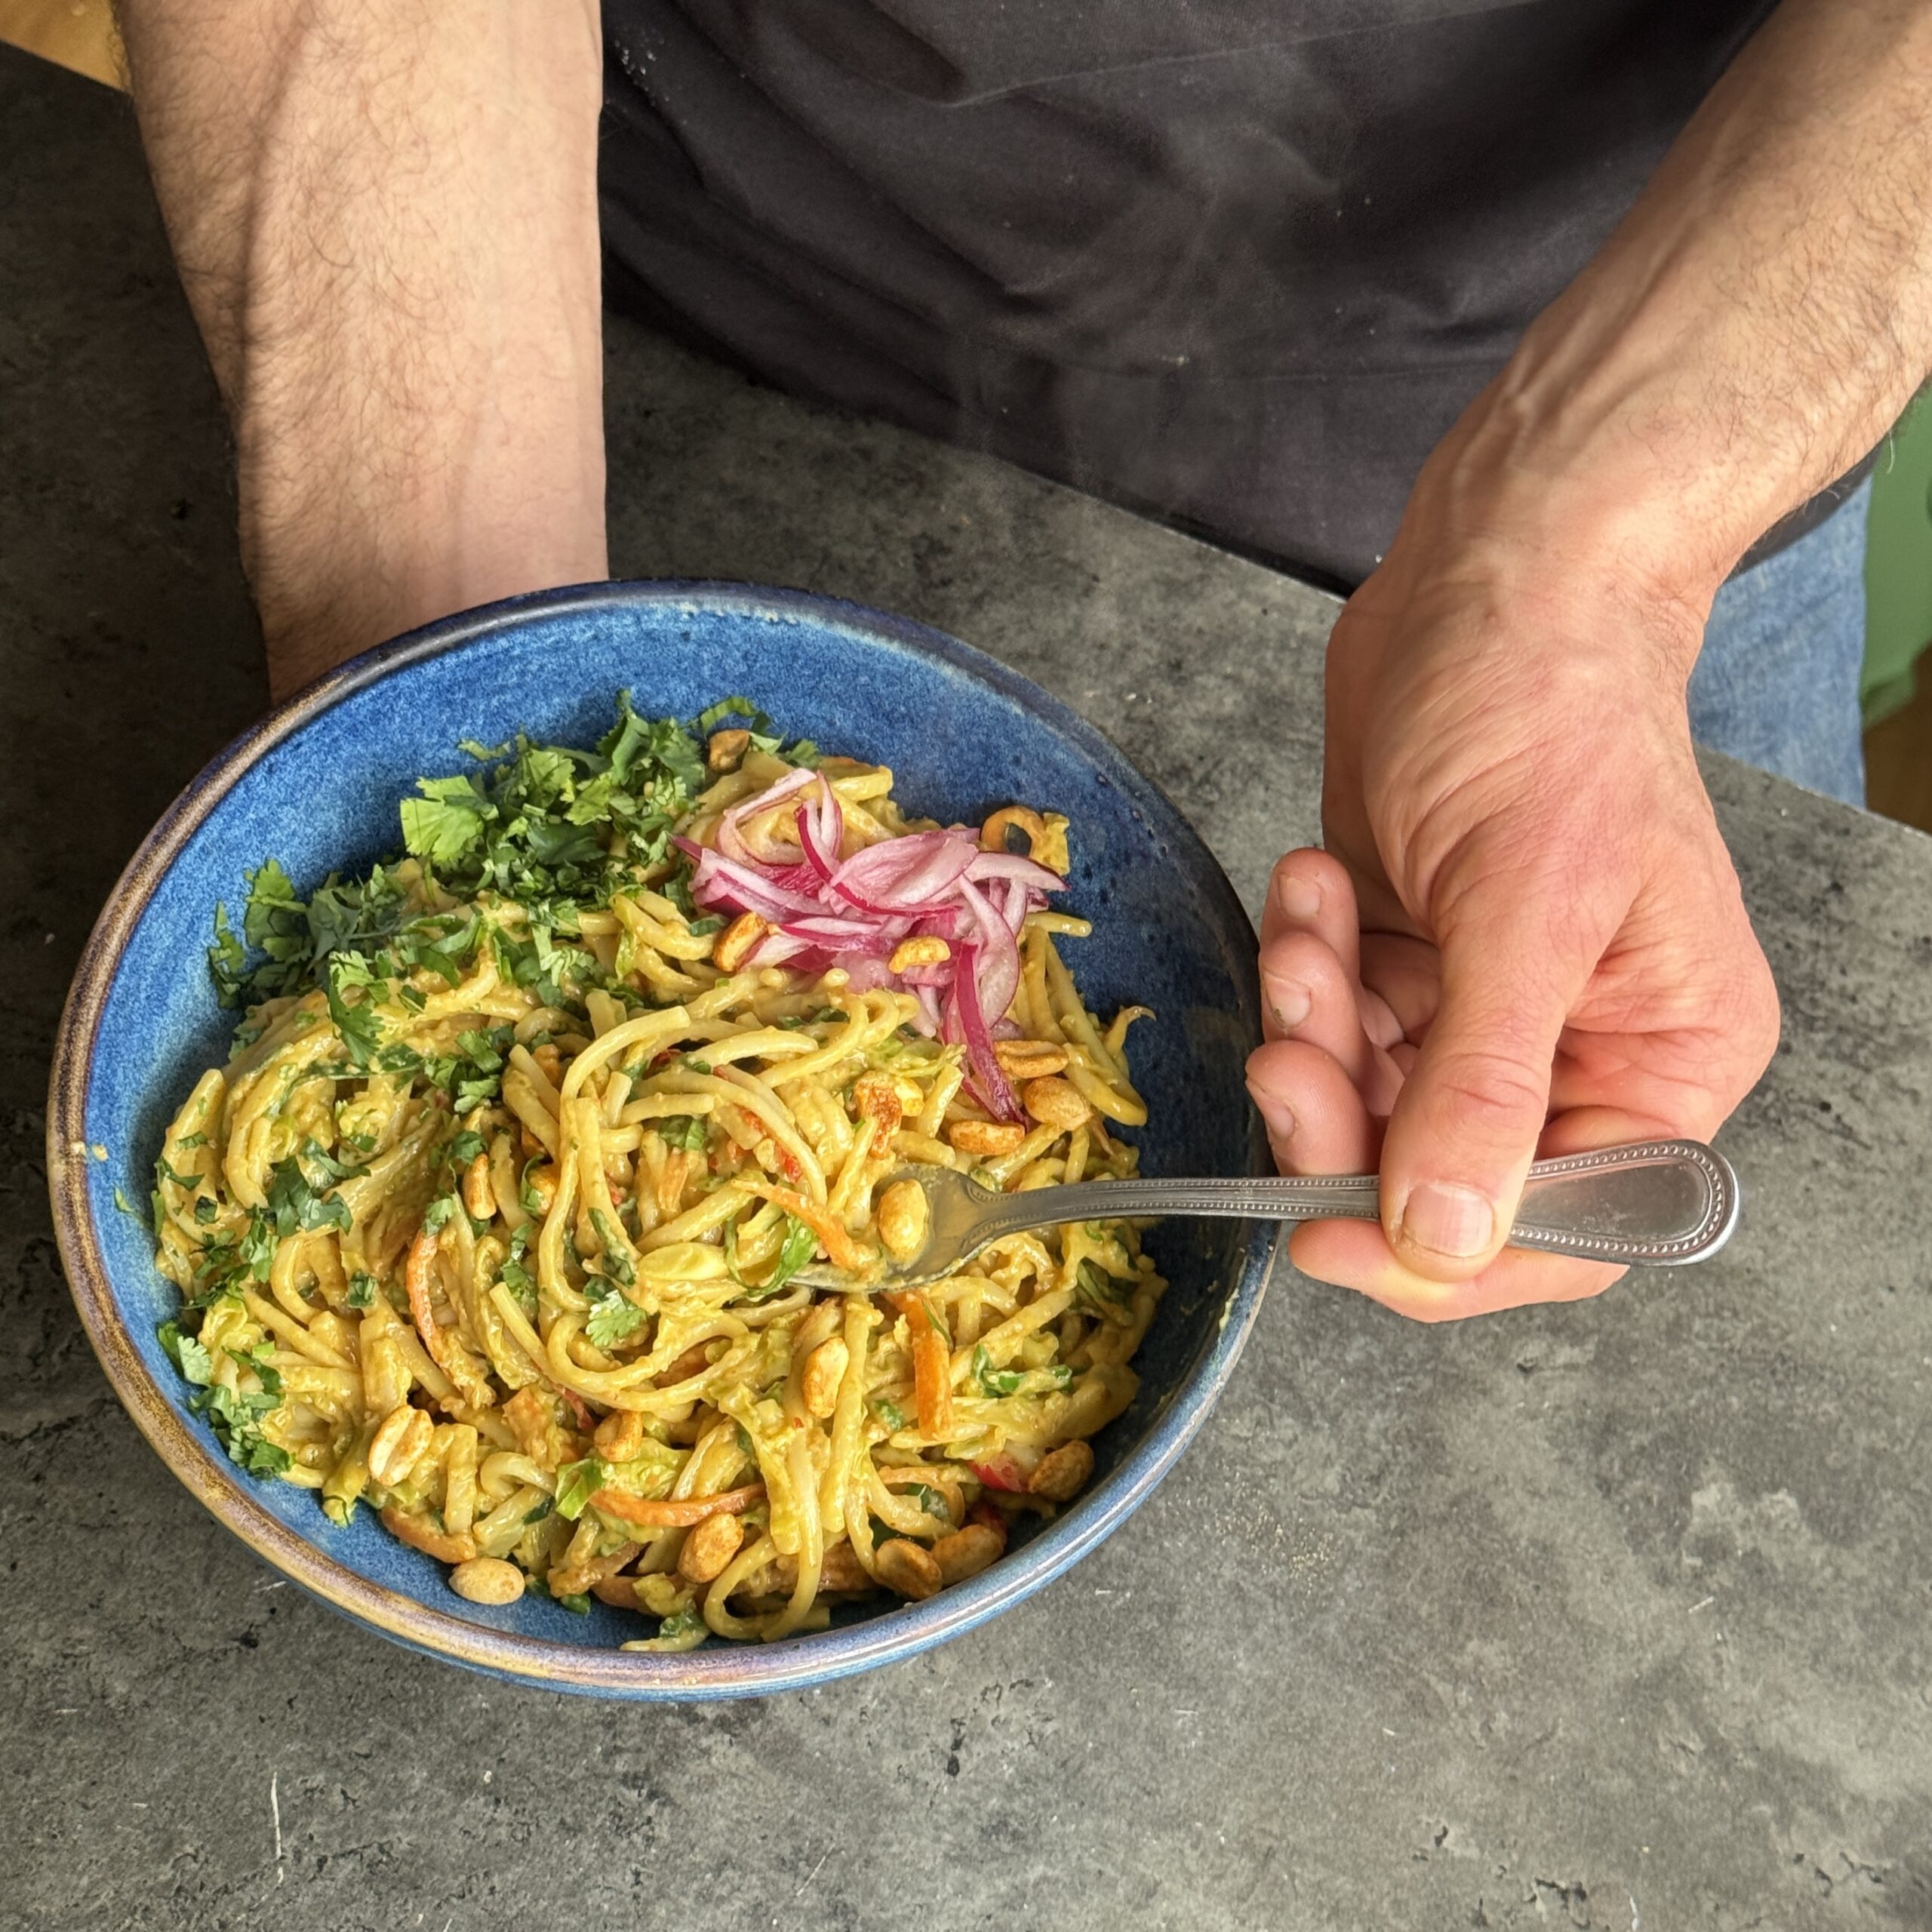
Creamy Peanut Spicy Noodles
Takes 6 minutes
Serves 4
Ingredients
Noodles & Veg:
- 250 g udon noodles
- 1 carrot approx. 100g
- ½ savoy cabbage approx. 300g
- 1 bunch scallions / green onions approx. 100g
- 20 g fresh coriander
Sauce:
- 60 g peanut butter ¼ cup
- 200 ml coconut milk ¾ cup + 1 tbsp
- 10 g fresh ginger 1 tbsp grated
- 1 clove garlic approx. 5g
- 2 g chilli powder ½ tsp
- 30 ml tamari 2 tbsp
- 15 ml maple syrup 1 tbsp
- Juice of ½ lime approx. 15ml / 1 tbsp
- Pinch of salt
- 150 ml veg stock ⅔ cup
- 1 g ground turmeric ½ tsp
To Serve:
- Pickled red onion
- Roasted peanuts
Instructions
Prep your veg
- Finely slice the cabbage into long strips. Cut the carrot into matchstick-sized pieces (julienne). Finely slice the scallions and roughly chop the coriander.
Cook the noodles
- Cook the noodles according to the pack instructions. Once cooked, drain and rinse to remove excess starch so they don’t stick together.
Make the sauce
- Finely dice or grate the garlic and ginger. Add to a bowl with all remaining sauce ingredients and mix well until smooth and combined. Taste and adjust seasoning if needed.
Cook the veg
- Heat a large frying pan or wok on high heat. Once hot, add 1 tbsp oil along with the carrot, cabbage, scallions, and a generous pinch of salt. Cook for 4–5 minutes, stirring occasionally.
Add noodles & sauce
- Add the cooked noodles and sauce to the pan. Mix well and heat through. Taste and adjust seasoning—add more tamari, lime juice, salt, or a pinch of chilli if you like more heat.
Garnish & enjoy
- Serve topped with chopped coriander, pickled red onion, and roasted peanuts.

Sweet Potato & Black Bean Tacos with a Guacamole Cream
Takes 18 minutes
Serves 4
Ingredients
Sweet Potato & Black Bean Filling
- 500 g sweet potatoes
- 30 ml olive oil 2 tbsp
- 2 ripe tomatoes
- 1 x 400g tin black beans approx. 240g drained / 1½ cups
- 15 g fresh coriander approx. ½ cup chopped
- 6 corn or wheat tacos of choice
- Juice of ½ lime approx. 1 tbsp
- 1 tbsp ground coriander
- 1 tbsp ground cumin
- 1 tsp smoked paprika
- Salt and black pepper to taste
Guacamole Cream
- 2 ripe avocados approx. 300g flesh / 2 cups
- 200 g yoghurt of choice approx. ¾ cup
- 10 g fresh coriander approx. ⅓ cup
- 30 g finely diced red onion 2 tbsp
- Juice of ½ lime approx. 1 tbsp
- 1 tsp garlic powder
- Salt to taste
To Serve
- Pickled red onions
- Fresh coriander
Instructions
Prepare & Roast the Sweet Potatoes
- Preheat the oven or air fryer to 200°C.
- Cut the sweet potatoes into small bite-sized cubes, then toss with the olive oil and a generous pinch of salt.
- Roast for 25 minutes, until soft and slightly charred around the edges.
Make the Sweet Potato & Black Bean Filling
- Drain and rinse the black beans until the water runs clear, then add to a large bowl.
- Dice the tomatoes and finely chop the coriander. Add both to the bowl with a pinch of salt.
- Add the roasted sweet potatoes, ground cumin, ground coriander, smoked paprika and lime juice. Roughly mash everything together.
- Taste and adjust the seasoning with more salt, pepper, lime juice or chilli if desired.
Make the Guacamole Cream
- Add the avocado flesh, yoghurt, coriander, red onion, lime juice, garlic powder and salt to a blender.
- Blend until smooth and creamy. Taste and adjust with more salt, lime juice, chilli powder or black pepper if needed.
Fill & Fry the Tacos
- Fill each taco with the sweet potato and black bean mixture. Top with pickled red onions and fresh coriander.
- Fold over and cook in a hot pan until golden on both sides.
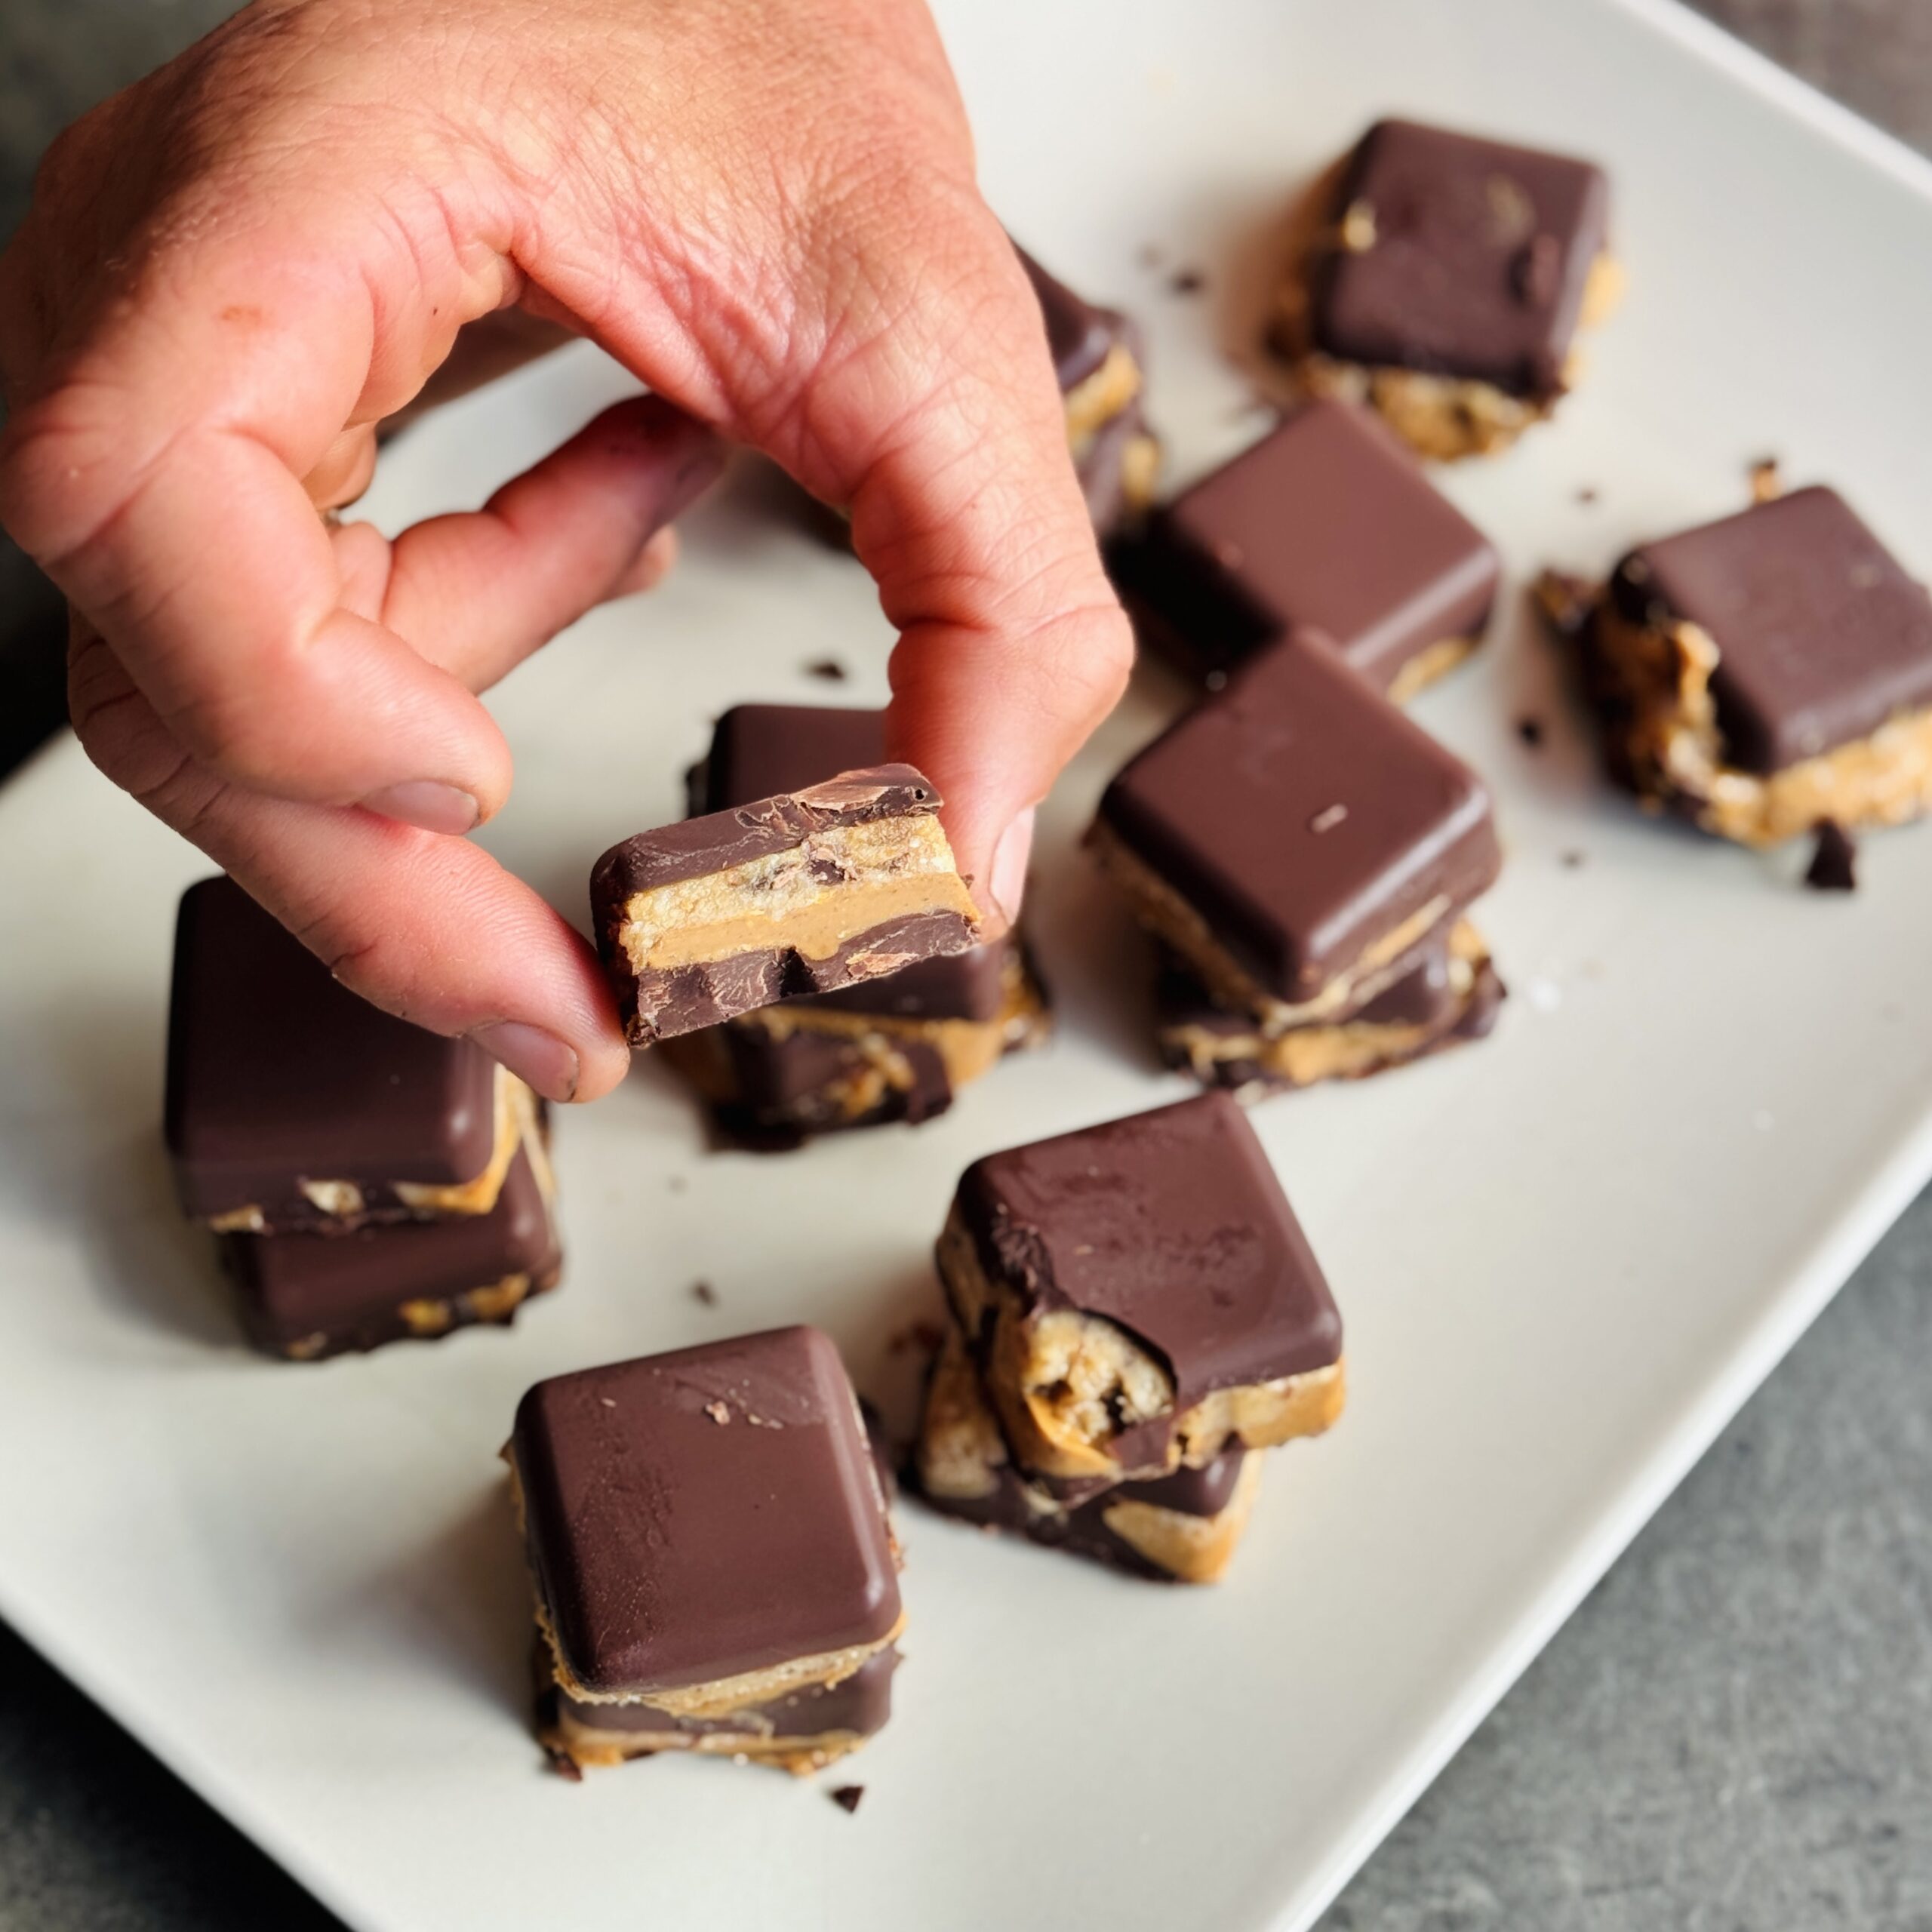
No-Bake Cookie Dough Bites
Takes 45 minutes
Serves 12
Ingredients
Choc Chip Cookie Dough Base
- 120 g Cashew nuts
- 80 g Pitted dates Medjool are best for stickiness
- 30 ml Oat milk 2 tbsp
- 5 ml Pure vanilla extract 1 tsp
- 50 g Chocolate chips or cacao nibs
- Pinch of sea salt
The Filling & Topping
- 100 g Smooth peanut butter or almond butter
- 200 g Dark chocolate chips for melting
- Extra flaky sea salt for garnish
Instructions
Blend the dough base
- Blend the cashew nuts until they reach a bread crumb like consistency. Add the 80g dates, 30ml oat milk, 1 tsp vanilla, and salt. Process until the mixture clumps together. Move the dough to a bowl and fold in the 50g chocolate chips by hand.
Create the chocolate base
- Melt the chocolate and coat the bottom of the moulds to create the first layer. Melt the 200g chocolate chips using a bain-marie or 30-second bursts in the microwave. Spoon a small amount into each of the 12 mould cavities (filling about ¼ of the way). Freeze for 10 minutes until firm.
Add the cookie dough layer
- Press the cashew dough onto the set chocolate, leaving room for the filling. Take small pinches of the cookie dough mixture and press them firmly onto the set chocolate in the moulds. You want this layer to reach about ⅔ of the way up the cavity, making sure to leave a flat surface for the nut butter.
Add the nut butter center
- Spoon a layer of smooth nut butter over the dough for a creamy surprise. Divide the 100g peanut butter between the 12 moulds, smoothing it out with the back of a teaspoon. Leave about 2–3mm of space at the very top of the mould to allow for the final chocolate seal.
Seal and set
- Top with the remaining chocolate and chill until completely hardened. Pour the remaining melted chocolate over the nut butter layer until the moulds are full. Sprinkle with flaky sea salt while the chocolate is still wet. Place in the fridge for at least 20 minutes (or the freezer for 10) before popping them out of the moulds.
Tips
- Nut Butter Tip: If your peanut butter is too thick to pour, warm it in the microwave for 10 seconds so it levels out smoothly in the mould.
- Storage: These are best kept in the fridge in an airtight container; they will stay fresh and “snappy” for up to 2 weeks.
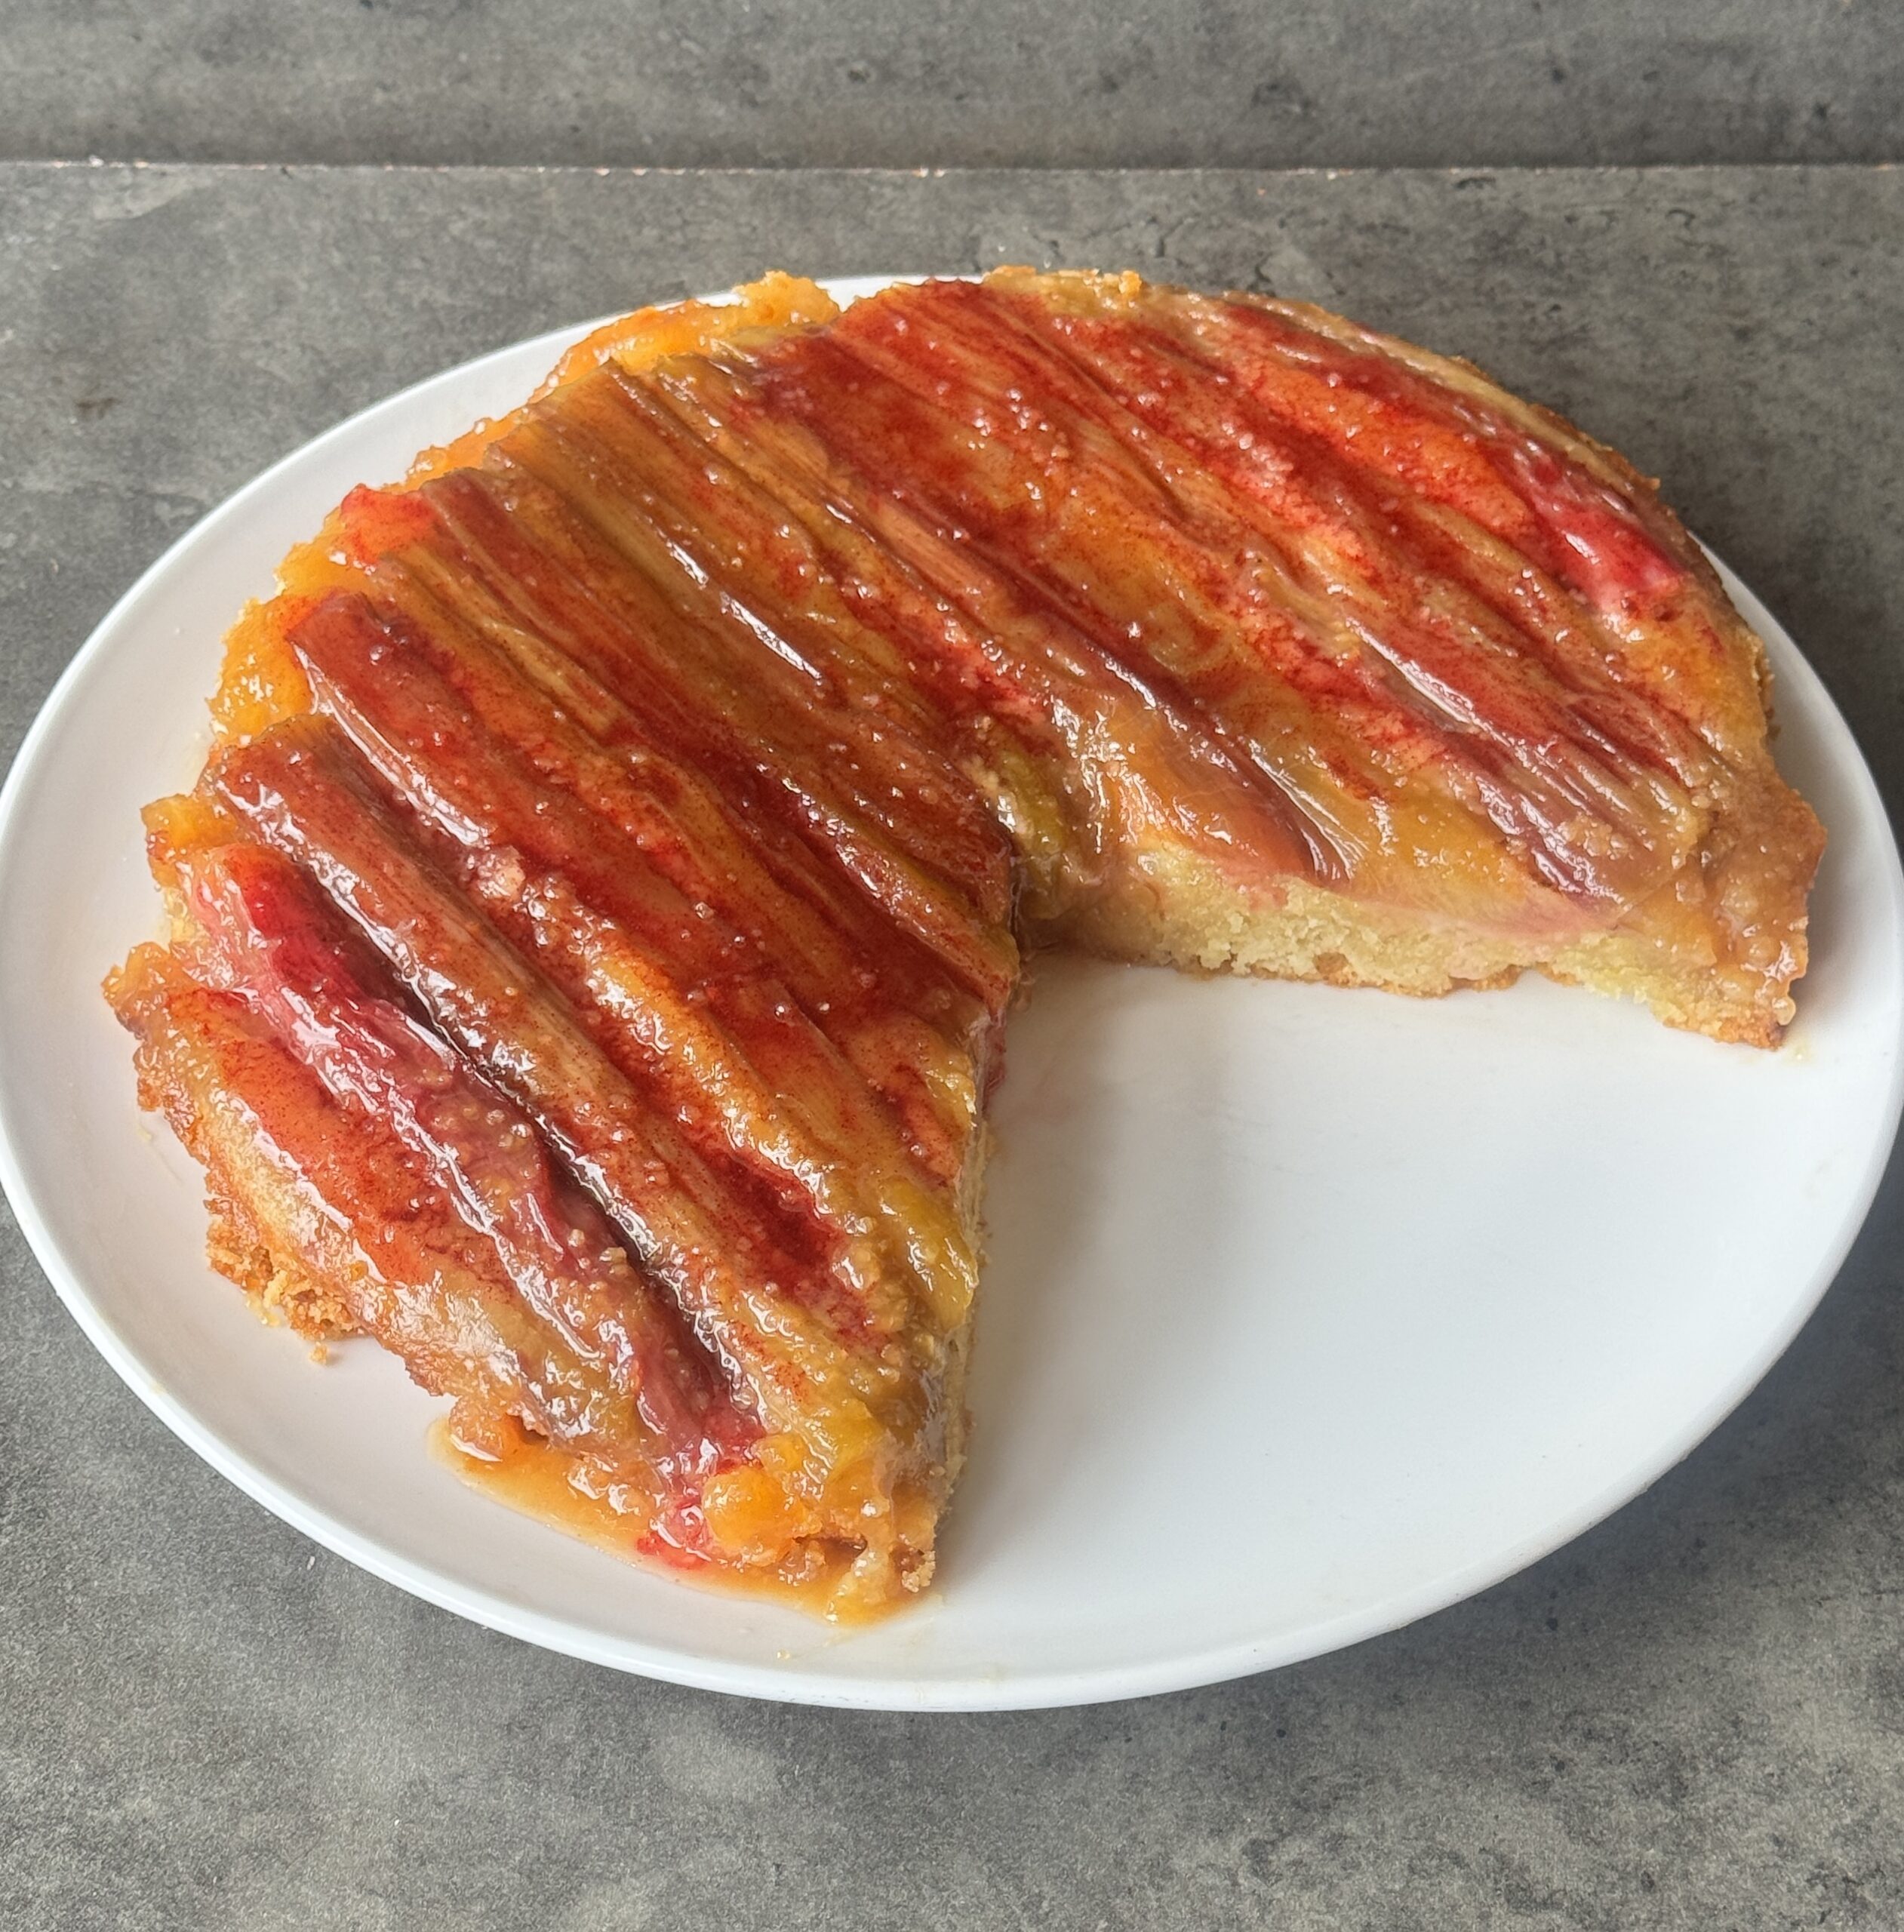
Upside-Down Rhubarb & Frangipane Cake
Takes 1 hour
Serves 8
Ingredients
The Rhubarb Base
- 400 g rhubarb trimmed and cut into 5cm lengths (about 4 cups)
- 50 g plant-based butter ¼ cup
- 100 g caster sugar ½ cup
- 25 g flaked almonds ¼ cup
The Frangipane Sponge
- 200 g ground almonds 2 cups
- 175 g caster sugar ¾ cup + 2 tbsp
- 125 g self-raising flour sieved (1 cup)
- 150 g plant-based butter melted (⅔ cup)
- 120 ml water ½ cup
- 1 tsp almond extract
- Pinch of salt
Instructions
Prepare the tin and rhubarb
- Preheat the oven to 180°C (160°C fan). Grease a 20cm round cake tin (or use an ovenproof skillet). Melt the butter with the sugar in a pan and simmer for about 2 minutes, until slightly thickened and lightly pink. Pour this syrup into the base of the tin. Scatter over the flaked almonds, then arrange the rhubarb pieces neatly on top, fitting them snugly together.
Combine the dry ingredients
- In a large bowl, whisk together the ground almonds, sieved flour, caster sugar and a pinch of salt. Whisking helps break up any clumps and keeps the sponge light rather than dense.
Mix the wet ingredients
- In a separate jug, combine the melted butter, water and almond extract. Stir well until fully mixed.
Form the batter
- Pour the wet mixture into the dry ingredients and fold together using a spatula until smooth, thick and glossy. The batter should be scoopable, with no streaks of flour remaining.
Bake and turn out
- Gently spoon the batter over the rhubarb, smoothing the top without disturbing the fruit. Bake for 35–40 minutes, or until a skewer inserted into the centre comes out clean. Allow the cake to rest in the tin for 5–10 minutes, then run a knife around the edge and carefully turn it out onto a serving plate.
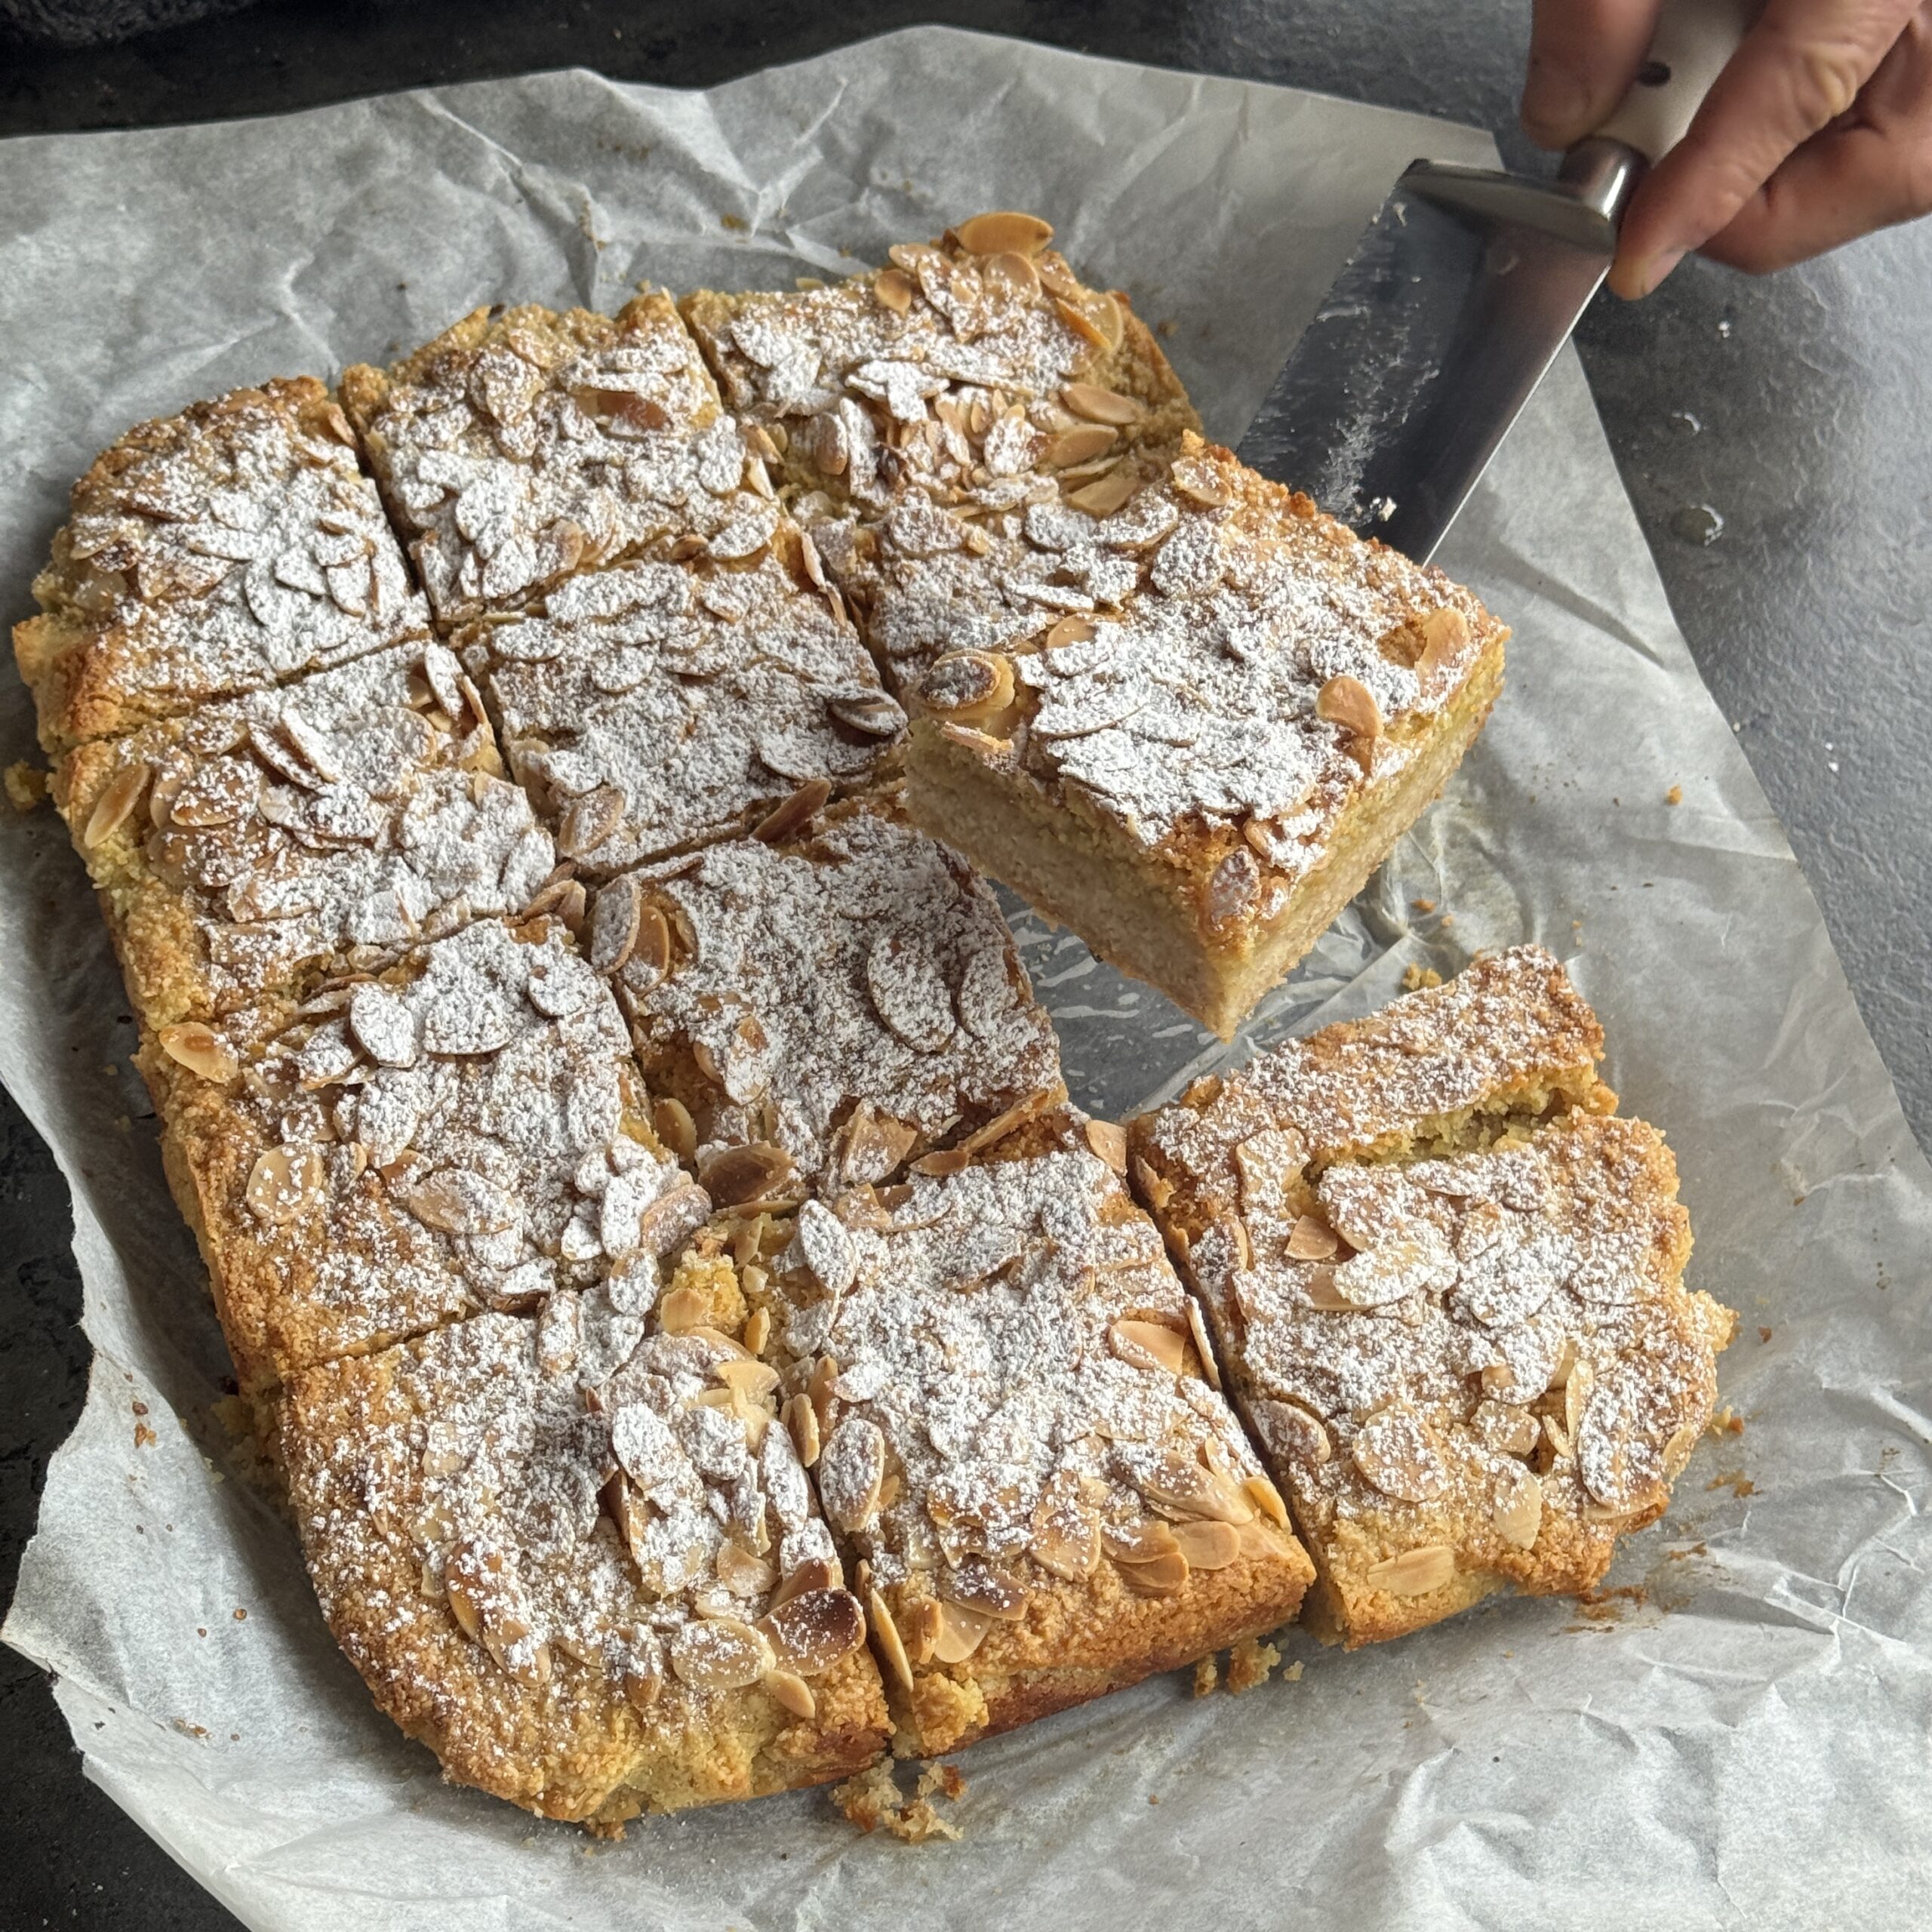
Almond Croissant Breakfast Squares
Takes 50 minutes
Serves 16
Ingredients
Base
- 200 g almond flour 2 cups
- 320 g rolled oats 3⅓ cups
- 130 ml maple syrup ½ cup
- 600 ml almond or oat milk 2½ cups
- 2 tsp almond extract
Almond Filling
- 200 g almond flour 2 cups
- 90 ml maple syrup 6 tbsp
- 120 ml melted coconut oil or vegan butter 8 tbsp / ½ cup
- 2 tsp almond extract
To Top
- 25 g flaked almonds ¼ cup
- 1 –2 tbsp maple syrup for drizzling
Instructions
- Preheat the oven to 180°C (350°F). Line a brownie tin (approx. 23x23cm / 9×9 inch) with baking parchment.
- In a large bowl, mix together the almond flour, oats, maple syrup, plant milk, and almond extract until smooth. Pour into the prepared tin and spread evenly.
- In a separate bowl, stir together all filling ingredients until a thick, spreadable paste forms.
- Drop spoonfuls of the filling over the base. Sprinkle with flaked almonds and lightly press them in. Drizzle with maple syrup.
- Bake for 35–40 minutes until golden brown and set. Allow to cool fully before slicing into 16 squares.
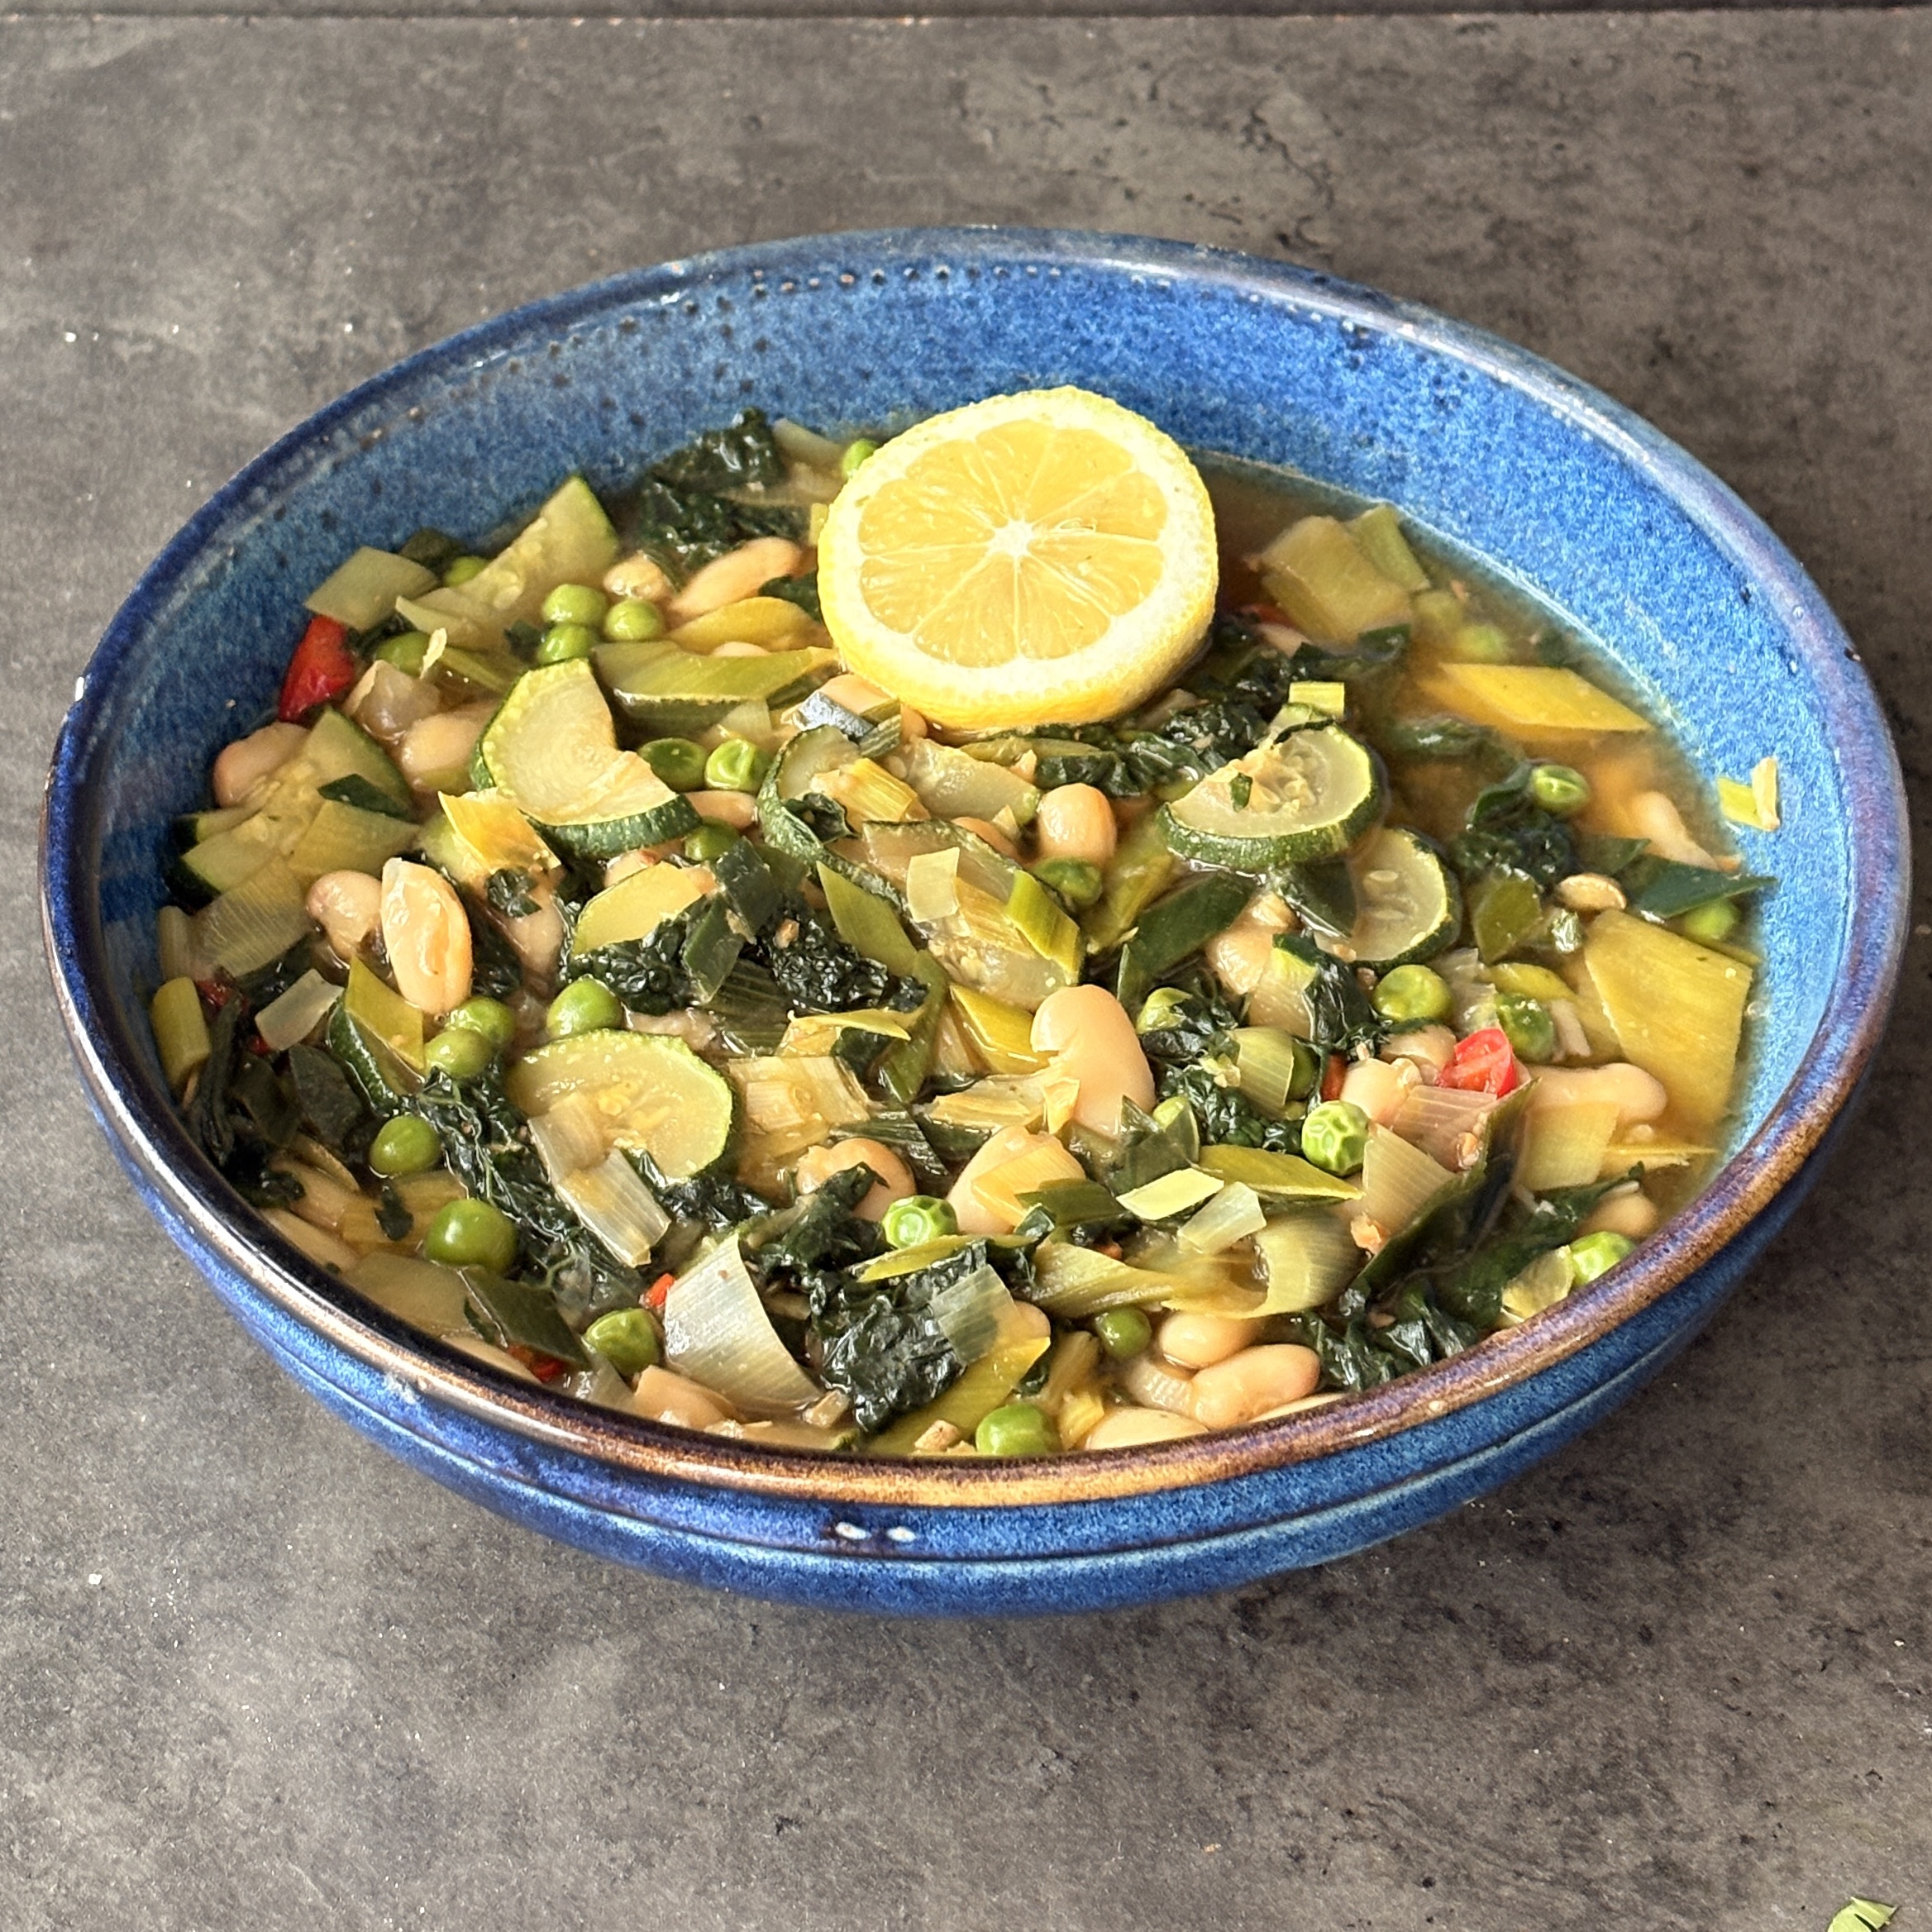
Spring Veg Longevity Soup
Takes 15 minutes
Serves 4
Ingredients
Stew base
- 1 tbsp olive oil 15 ml
- 1 leek
- 2 cloves garlic
- 15 g fresh ginger thumb-sized piece (about 1 tbsp grated)
- ½ red chilli
- 1 litre vegetable stock 4 cups
- 2 × 400 g tins cannellini beans drained (about 500 g drained weight)
- 1 small courgette about 150 g
- 150 g frozen peas 1 cup
- 60 g kale about 2 large handfuls
To finish
- 18 g miso 2 tbsp
- 1 tbsp tamari or soy sauce
- 1 lemon
Instructions
Sauté the base flavours
- Heat 1 tbsp olive oil (15 ml) in a large saucepan over medium heat. Trim the root from the leek, slice it in half lengthways, wash well and finely slice. Peel and finely chop the garlic and ginger. Finely slice the ½ red chilli.
- Turn the heat up slightly and add the leek, garlic, ginger and chilli to the pan. Cook for 2 minutes, stirring, until fragrant and softened.
Sweat the vegetables
- Add 100 ml vegetable stock (about ⅓ cup) and place a lid on the pan. Let the vegetables sweat for 2–3 minutes.
Add the vegetables
- Slice the courgette into small bite-sized pieces and add to the pot along with the 150 g frozen peas (1 cup). Let the stew simmer for about 5 minutes until the vegetables are tender.
Add the broth and beans
- Pour in the remaining vegetable stock to make 1 litre total (4 cups). Drain and rinse the cannellini beans and add them to the pot. Bring to a gentle simmer.
Add the greens
- Remove the tough stems from the kale and tear or slice the leaves into bite-sized pieces. Stir into the stew and cook for 2 minutes until wilted.
Add the miso for depth
- Ladle some hot broth into a small bowl and whisk with the miso (18 g / 2 tbsp) until smooth. Stir this mixture back into the stew.
Finish and serve
- Finely zest half the lemon into the stew, then squeeze in the juice of half the lemon (about 15 ml / 1 tbsp). Add the tamari or soy sauce.
- Taste and adjust seasoning as needed.
- Serve hot with toasted sourdough bread.

Stuffed Sourdough Batard Sandwich
Takes 25 minutes
Serves 6
Ingredients
- 1 large sourdough batard loaf
- 200 g The Happy Pear Roasted Red Pepper Hummus ¾ cup
- 300 g firm tofu
- 1 tbsp tamari 15ml
- 1 tbsp olive oil 15ml
- 1 cucumber sliced
- 1 beetroot cooked & sliced
- 2 tbsp olive oil 30ml
- 2 tbsp vinegar 30ml
- 1 tbsp maple syrup 15ml
- Pinch of salt & black pepper
- 150 g vegan cheese 1 cup grated or sliced
- 100 g Basil Pesto ⅓ cup
- 100 g The Happy Pear Sundried Tomato Pesto ⅓ cup
- 1 large handful mixed leaves 40g
Instructions
Prep the loaf:
- Slice the top off the sourdough loaf and set it aside. Scoop out some of the soft interior to create a hollow cavity for the filling.
Cook the tofu:
- Slice the tofu and fry in 1 tbsp olive oil over medium heat until golden. Add the tamari and cook for another 1–2 minutes until nicely coated. Set aside.
Dress the beetroot:
- In a small bowl, mix the olive oil, vinegar, maple syrup, salt, and pepper. Toss the sliced beetroot in the dressing.
Assemble the sandwich:
- Start layering inside the hollowed loaf spread a generous layer of hummus on the base, add the fried tofu, layer in sliced cucumber, vegan cheese, spoon over basil pesto, add dressed beetroot and finish with mixed leaves
Finish the lid:
- Spread sundried tomato pesto on the inside of the “lid” of the loaf, then place it back on top.
Serve:
- Press down gently, then slice into 6 thick wedges and serve.
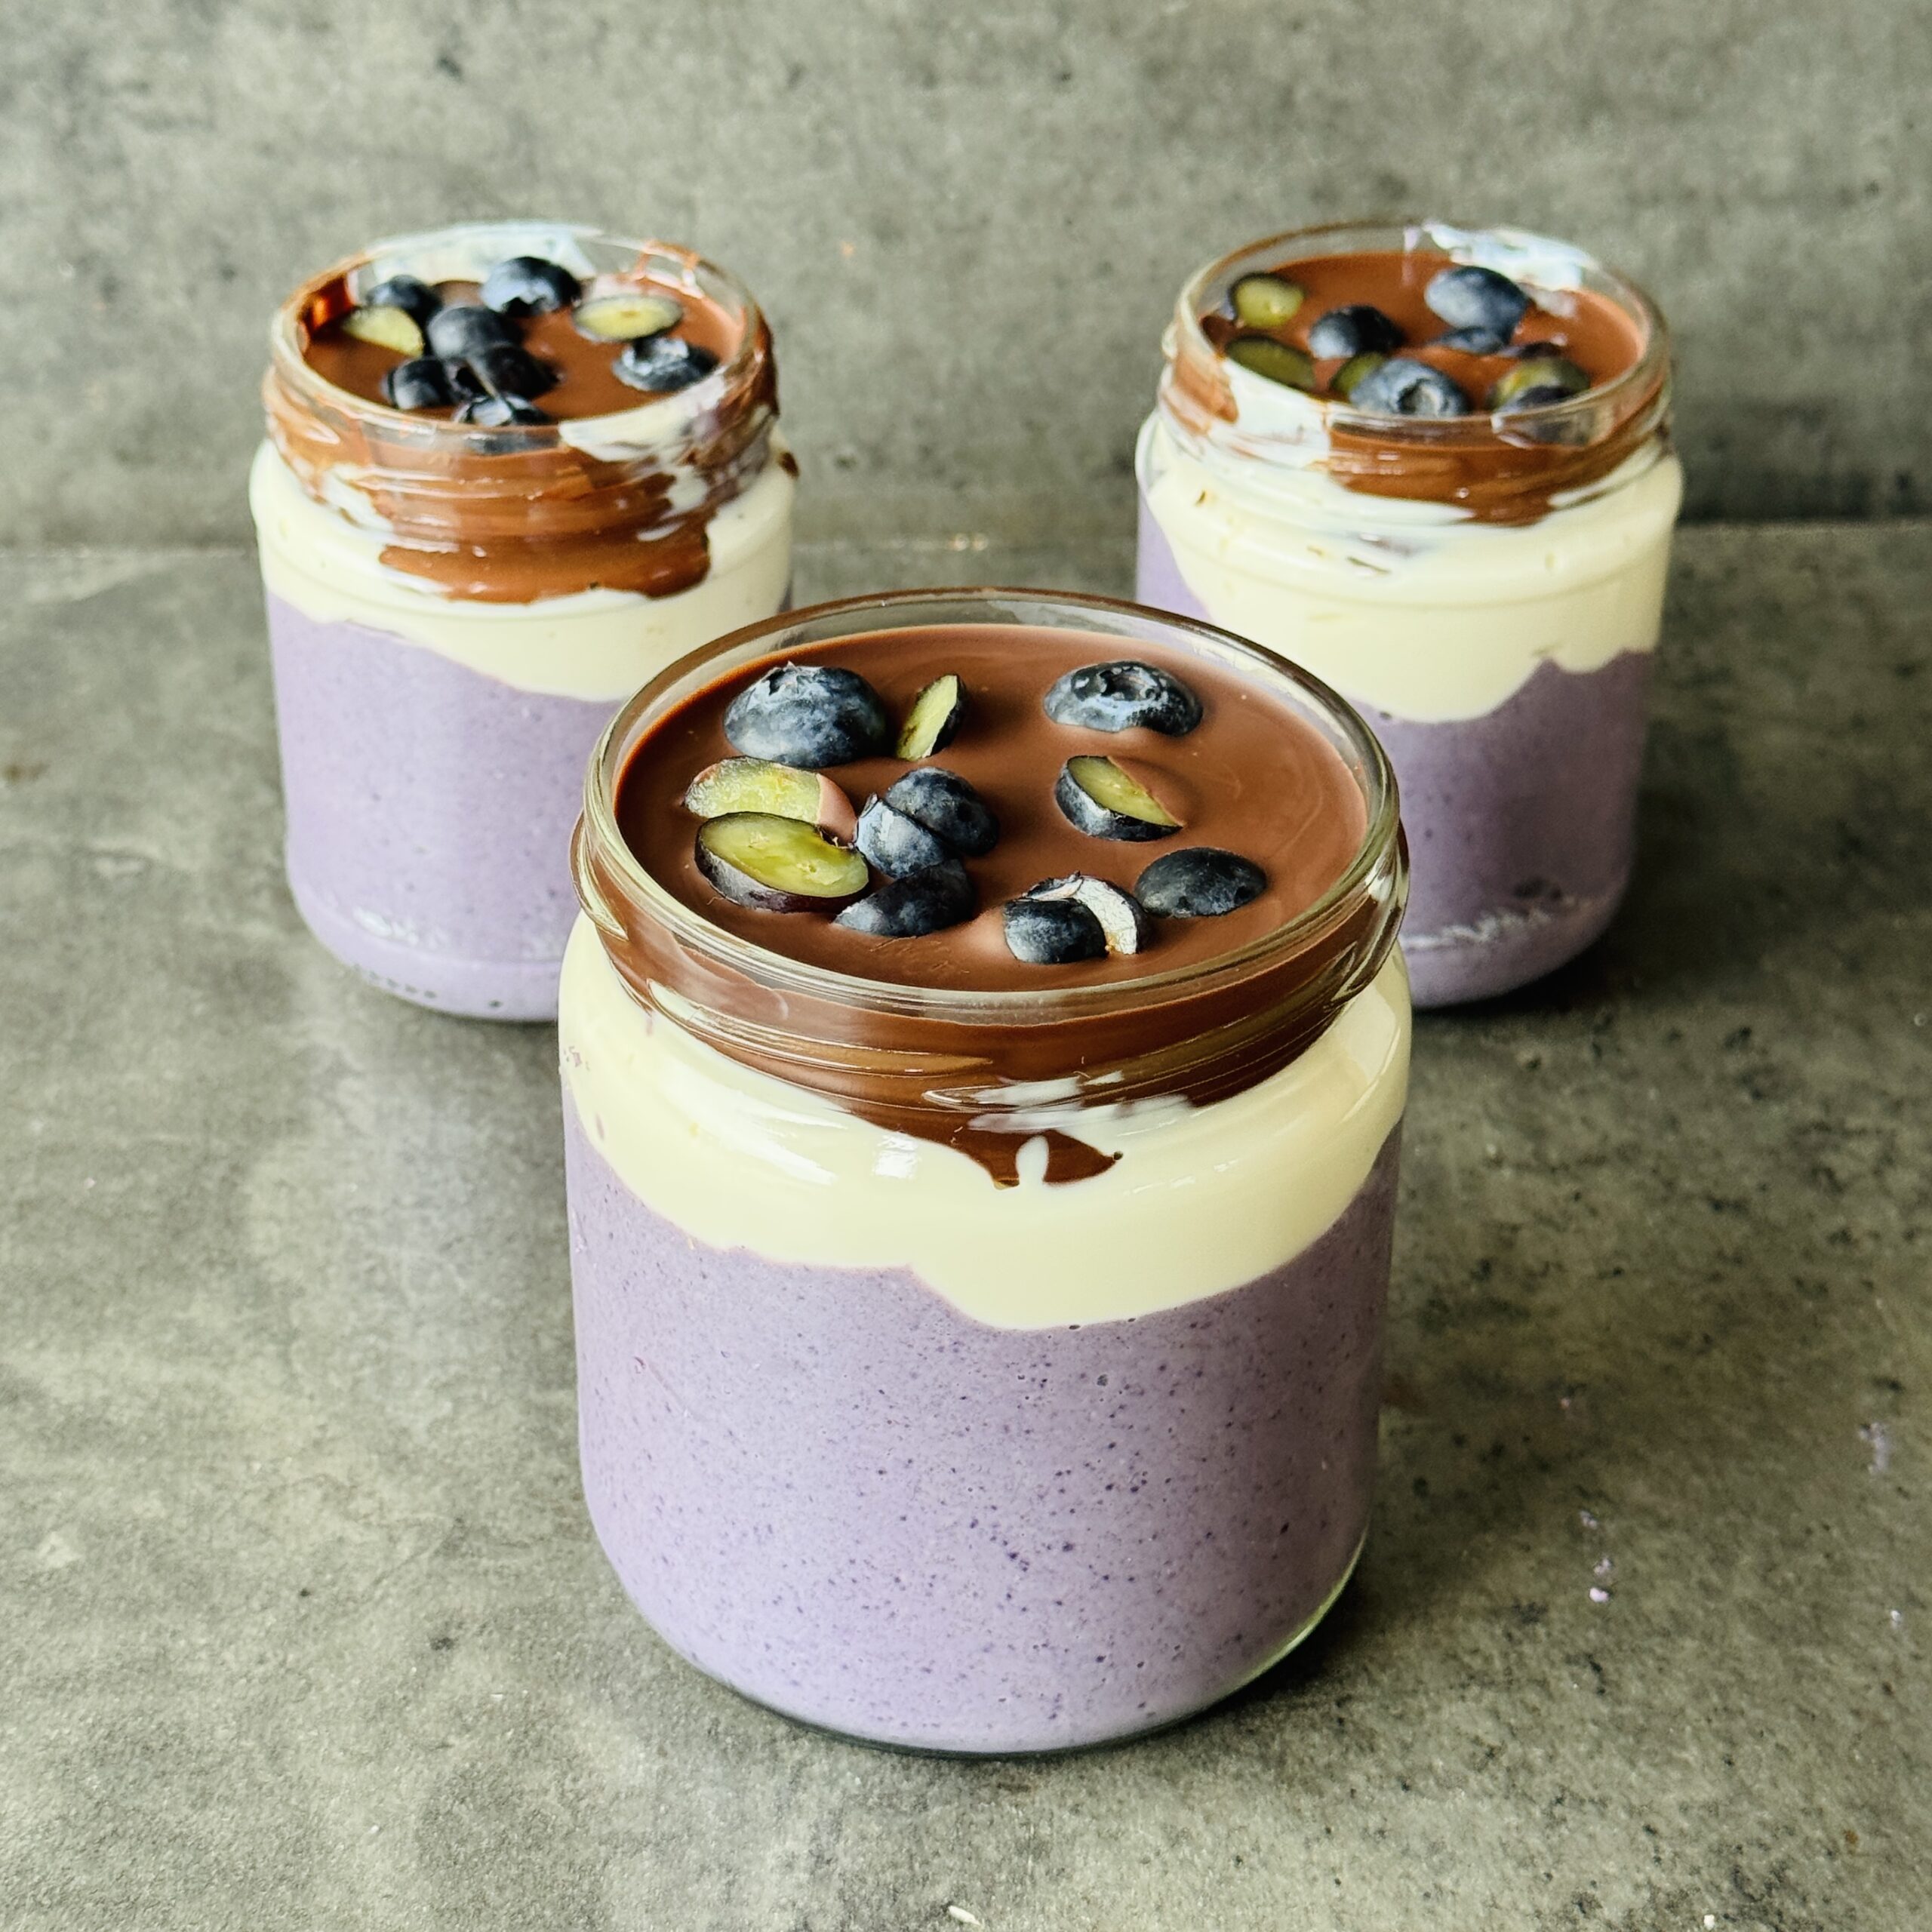
Blended Blueberry Chia Overnight Oats
Takes 4 hours 5 minutes
Serves 4
Ingredients
- 200 g 2 cups rolled oats
- 2 tbsp chia seeds
- 360 ml/ 1½ cups plant-based milk
- 245 g / 1 cup plant-based yogurt
- 225 g 1½ cups blueberries (fresh or frozen)
- 50 ml/ 2–3 tbsp maple syrup to taste
- 1 tsp vanilla extract optional
- Pinch of salt
Chocolate topping:
- 80 –100g dark chocolate
- 1 tsp coconut oil optional, helps it snap nicely
Instructions
Blend:
- Add all oat ingredients to a blender and blend until smooth and creamy.
Chill:
- Pour evenly into 2 jars or containers. Cover and refrigerate for at least 4 hours or overnight. It will thicken up nicely.
Make the chocolate shell:
- Melt the chocolate gently (microwave in short bursts or over a bain-marie).
- Stir in the coconut oil if using.
- Let it cool slightly (so it’s not piping hot).
Create the shell:
- Pour a thin layer of melted chocolate over each jar.
- Tilt or swirl to spread evenly across the top.
- Place in the fridge for ~10 minutes until it hardens into a shell.
To serve:
- Crack the chocolate layer with a spoon and dig in
Tips to level it up:
- Add a layer of nut butter under the chocolate for a “snickers” vibe
- Sprinkle a pinch of flaky sea salt on the chocolate before it sets
- Stir in some protein powder or hemp seeds for extra fuel
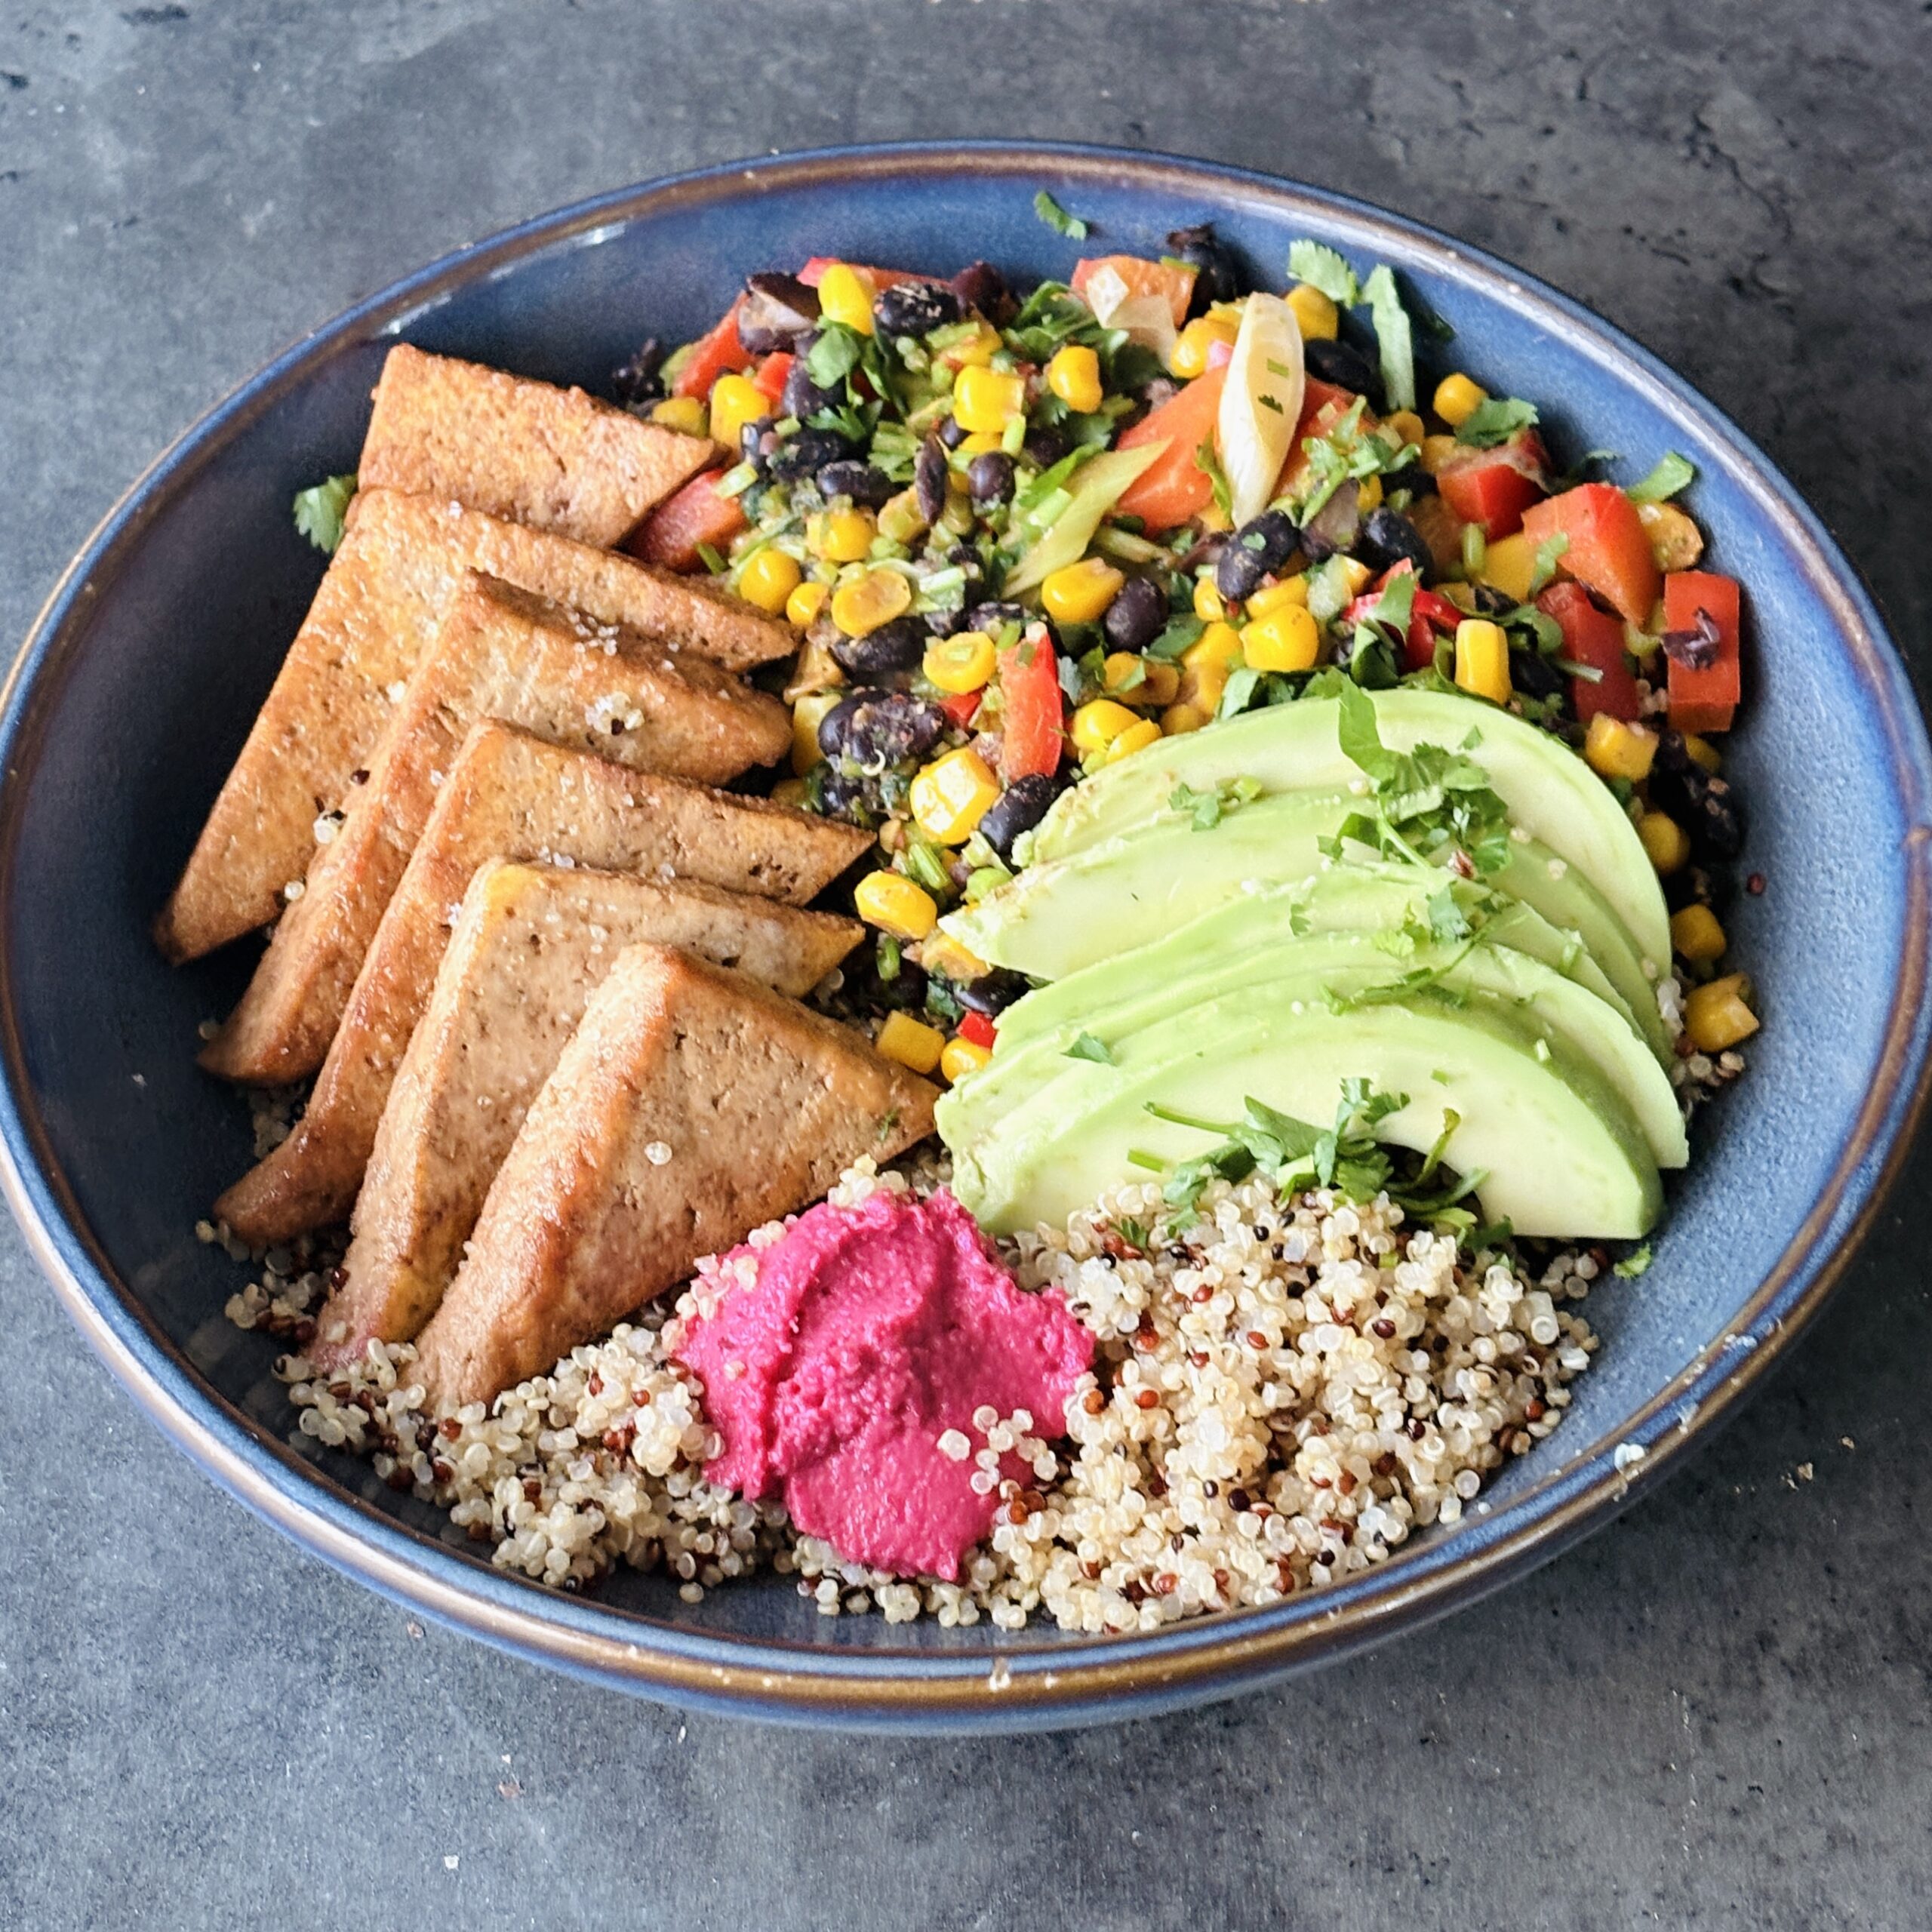
30g Protein Vegan Burrito Bowl (10-Minute Dinner)
Takes 10 minutes
Serves 2
Ingredients
Seared tofu steaks
- 200 g firm tofu
- 2 tbsp tamari 30 ml
- 1 tbsp olive oil 15 ml
Black bean salsa
- 1 × 400 g tin black beans drained
- 150 g tin sweetcorn about 1 cup
- 1 red pepper about 150 g
- 2 g smoked paprika 1 tsp
- 2 g ground cumin 1 tsp
- ½ –1 tsp chilli powder 1–2 g
- 3 g sea salt ½ tsp
- 2 spring onions
- 1 lime
- 10 g fresh coriander small handful
To finish
- 200 g cooked quinoa about 1 cup
- 1 ripe avocado
- Sweet beet hummus or pickled red onion optional
Instructions
Sear the tofu steaks
- Slice the 200 g tofu into thin triangular “steaks”. Heat 1 tbsp olive oil (15 ml) in a large frying pan over medium heat. Add the tofu and cook for 3–4 minutes per side until golden.
- Drizzle over 2 tbsp tamari (30 ml) and turn the tofu so the pieces are well coated. Remove from the pan and set aside.
Prepare the salsa ingredients
- Drain and rinse the black beans and drain the sweetcorn. Dice the red pepper into small pieces.
- Trim and finely slice the spring onions (we like to slice them at a 45° angle) and separate the green parts from the white parts. Finely chop the coriander stalks and set the leaves aside for later.
Cook the black bean salsa
- Using the same pan, add the diced pepper, the white parts of the spring onions, and the chopped coriander stalks. Cook for about 2 minutes.
- Add the black beans, sweetcorn, smoked paprika, ground cumin, chilli powder, and sea salt. Stir well and cook for 2–3 minutes until heated through. Squeeze in the juice of the lime.
Prepare the toppings
- Slice the avocado. Roughly chop the reserved coriander leaves.
Build the burrito bowls
- Divide the 200 g cooked quinoa (about 1 cup) between two bowls to create a base. Spoon over the warm black bean salsa, then add the sliced avocado and the seared tofu steaks.
Finish and serve
- Sprinkle with the chopped coriander leaves. Add a spoon of sweet beet hummus or pickled red onion if using, and serve immediately.

Gochujang Glazed Mushroom Skewers with Fennel Bean Salad
Takes 30 minutes
Serves 2
Ingredients
Mushroom Skewers
- 2 portobello mushrooms
Gochujang Sauce
- 30 g gochujang 2 tbsp
- 20 g maple syrup 1 tbsp
- 5 g rice vinegar 1 tsp
- 15 g sesame oil 1 tbsp
- 15 g tamari 1 tbsp
Fennel Salad
- 1 bulb fennel finely sliced
- 1 × 400g tin cannellini beans drained and rinsed
- ½ red chilli finely diced
- 10 g fresh mint chopped
- 10 g fresh dill chopped
- Zest of 1 lemon
Dressing
- 45 g olive oil 3 tbsp
- 40 g maple syrup 2 tbsp
- Juice of ½ lemon
- Salt to taste
Instructions
Prepare the mushrooms
- Bring a pot of salted water to the boil. Add the portobello mushrooms and simmer for 2 minutes to soften. Drain well and allow to cool slightly.
Make the sauce
- In a small bowl, mix together the gochujang, maple syrup, rice vinegar, sesame oil and tamari until smooth.
Cook the skewers
- Thread the mushrooms onto skewers. Heat a pan over medium-high heat with a little oil. Cook for 6–8 minutes, turning occasionally, until golden and lightly charred. Brush generously with the gochujang sauce in the final minutes so it caramelises.
Prepare the salad
- Combine the sliced fennel, cannellini beans, red chilli, mint, dill and lemon zest in a large bowl.
Make the dressing
- Whisk together the olive oil, maple syrup, lemon juice and a pinch of salt until emulsified.
Assemble the salad
- Pour the dressing over the salad and toss well to coat. Taste and adjust seasoning if needed.
Serve
- Serve the hot glazed mushroom skewers alongside the fresh fennel salad.

High Protein Tiramisu Baked Oats
Takes 29 minutes
Serves 2
Ingredients
Chocolate Coffee Oat Base
- 150 g rolled oats
- 4 g baking powder 1 tsp
- 5 ml vanilla extract 1 tsp
- 30 g maple syrup 2 tbsp
- 5 g ground coffee 1 tbsp, fine grind
- 5 g cocoa powder 1 tbsp
- Pinch of salt
- 150 g plant-based yoghurt
- 80 ml strong black coffee cooled
- 50 ml plant-based milk
High-Protein “Mascarpone” Layer
- 350 g plant-based yoghurt
- 30 g vanilla protein powder approx. 1 scoop
- 15 g maple syrup 1 tbsp
- 2.5 ml vanilla extract ½ tsp
Topping
- 15 g cacao powder 3 tbsp, for dusting
Instructions
Prep the oven & dish
- Preheat the oven to 180°C (160°C fan) / 350°F. Lightly grease a small to medium ovenproof dish (around 750ml capacity).
Make the oat base
- In a bowl, mix together the rolled oats, baking powder, ground coffee, cocoa powder and salt.
- Add the yoghurt, cooled coffee, plant-based milk, maple syrup and vanilla extract. Stir until fully combined into a thick, cake-like batter.
Bake
- Spoon the mixture into your dish and smooth the top. Bake for 25–30 minutes until set around the edges but still slightly soft and fudgy in the centre.
- Allow to cool slightly before adding the topping.
Make the protein layer
- While the oats bake, whisk together the yoghurt, maple syrup and vanilla extract.
- Sieve in the protein powder and whisk until completely smooth and creamy, with no lumps.
Layer & finish
- Once the baked oats have cooled a little, spread the protein “mascarpone” layer evenly over the top. Finish with a generous dusting of cacao powder using a fine sieve until fully covered and velvety.
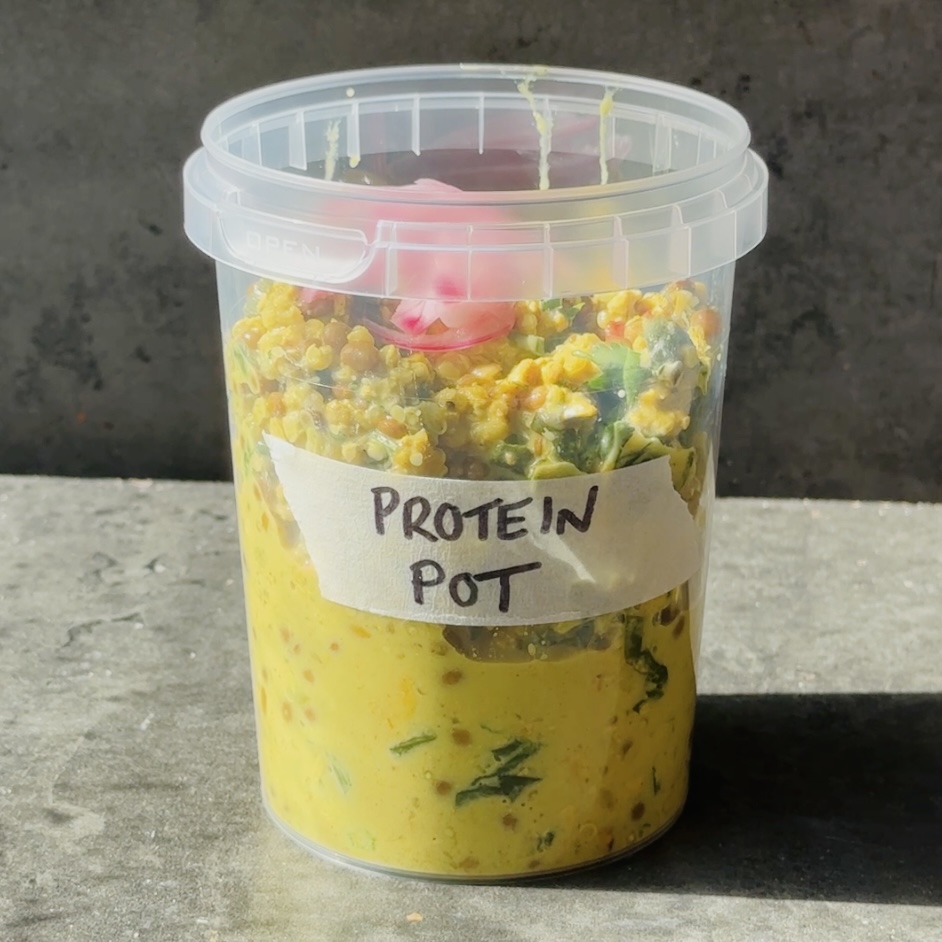
Baked Lentil Protein Pot
Takes 30 minutes
Serves 3
Ingredients
- 1 tbsp oil olive or coconut oil work well
- 250 g of firm tofu
- 3 tbsp tamari
- 1 tbsp maple syrup
- 1 tsp vinegar of choice
- 2 cloves garlic peeled and finely chopped
- A thumb-sized piece of ginger peeled and finely grated
- 1 × 400g tins cooked lentils we used beluga; brown or green also work
- 100 g baby spinach
- 1 × 400g tin coconut milk
- Juice of 1 lime
- 1 tbsp curry powder
- 1 tbsp ground cumin
- ½ tsp ground black pepper
- Sea salt to taste
- 1 tbsp tamari or soy sauce
- 1 tbsp maple syrup
- 100 g dried quinoa
- 300 ml veg stock
To serve:
- Pickled red onions
- Yoghurt of choice
- Fresh coriander/ cilantro
Instructions
Sizzle & Glaze the Tofu
- Preheat your oven to 200°C. Drain the tofu and rip it into bite-sized pieces. Heat 1 tbsp oil in a large non-stick, oven-proof pan (or a regular frying pan) over high heat. Fry the tofu for 3–4 minutes until golden and crisp on the edges.
Create the Aromatics
- While the tofu fries, whisk together the tamari, maple syrup, and vinegar. Grate the ginger and garlic directly into this liquid. Pour the sauce over the browned tofu and fry for another 1–2 minutes, stirring constantly until the tofu is sticky, dark, and the sauce has been fully absorbed.
Assemble the Pot
- To the pan with the tofu, add the rinsed lentils, curry powder, turmeric, black pepper, and lime juice. Stir in the dried quinoa, coconut milk, and veg stock. Finally, fold in the spinach (it will look like a lot, but it will wilt down perfectly in the oven).
The Bake
- If your pan isn’t oven-proof, transfer the mixture to a baking dish now. Cover tightly with a lid or foil—this is the secret to fluffy quinoa.
- Bake for 15–20 minutes. * Around the 15-minute mark, check if the quinoa is tender and the liquid has been absorbed. If it needs a little longer, pop it back in for 5 minutes.
Finish and Serve
- Remove from the oven and give it a gentle stir to fluff up the quinoa. Season to taste with a little more sea salt or a squeeze of lime if needed.
- Serve hot or cold, topped with a drizzle of coconut yogurt, pickled red onions, and a scatter of fresh coriander or chili flakes.
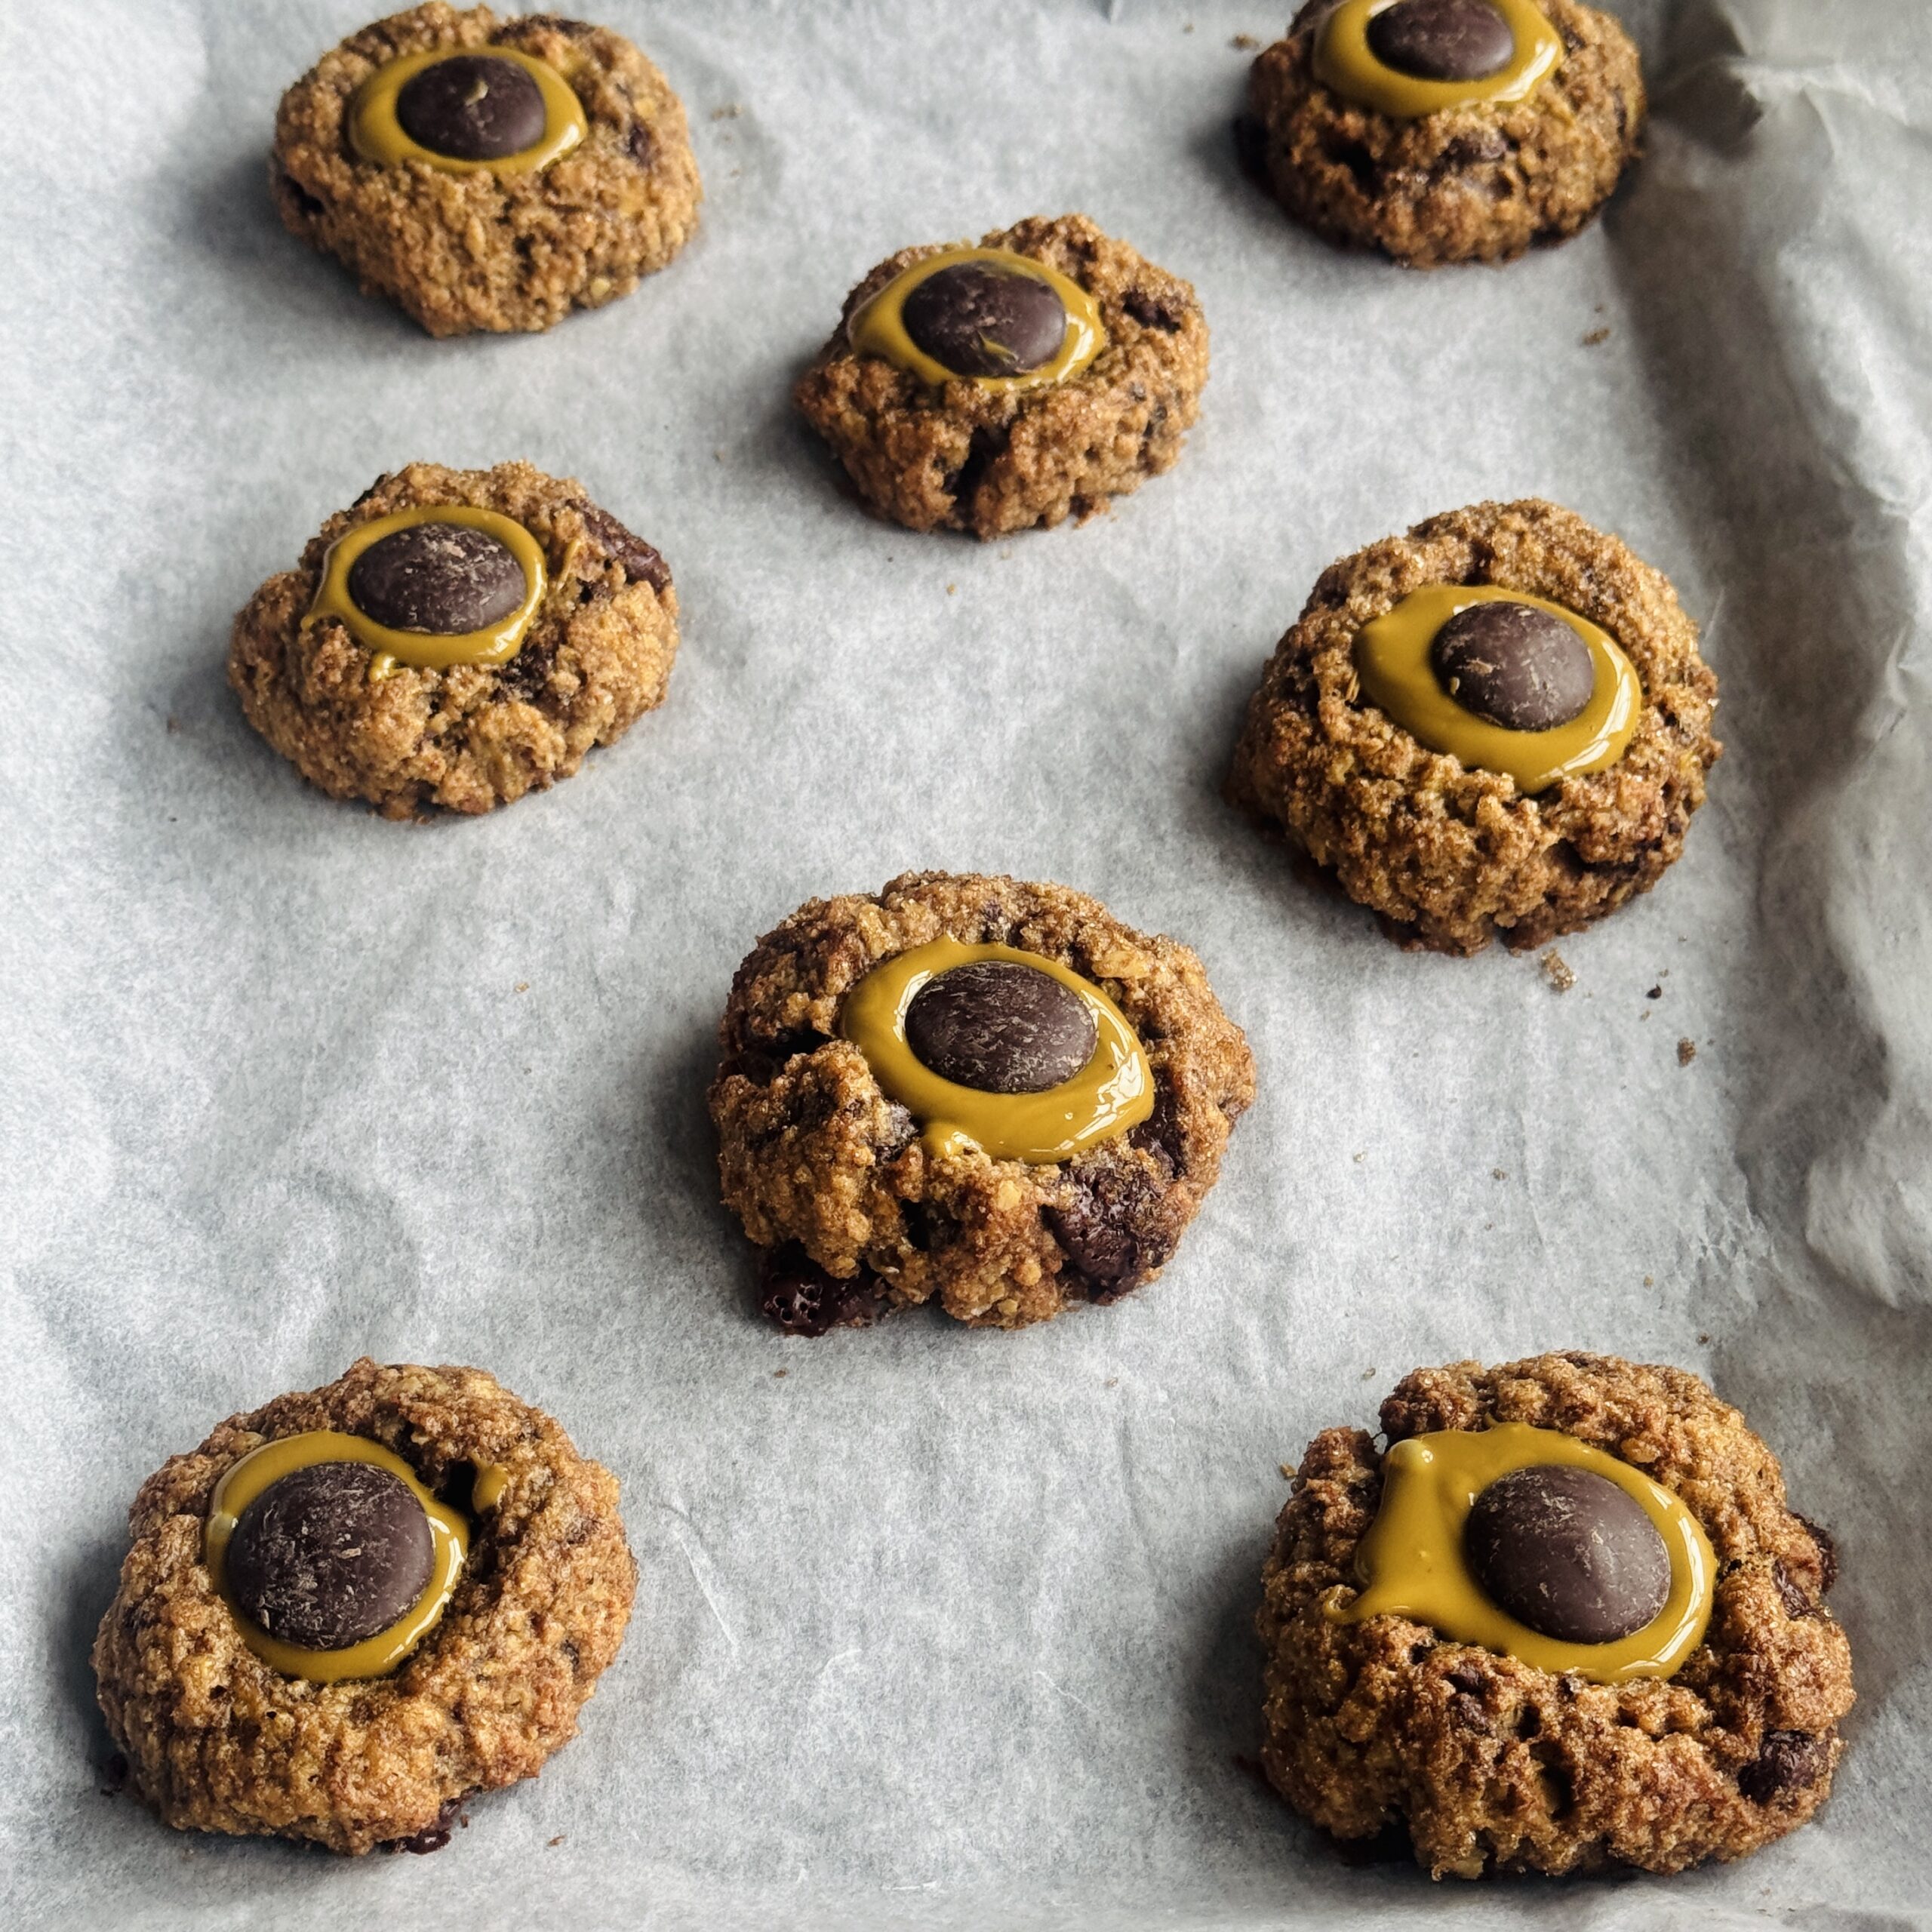
Cashew & Almond Nut Milk & Chewy No-Waste Nut Pulp Cookies
Takes 30 minutes
Serves 12
Ingredients
Nut Milk Ingredients Ingredients
- 80 g raw almonds
- 80 g raw cashews
- 1 litre water
- 2 –3 pitted dates optional, for sweetness
- 1 tsp vanilla extract optional
- Small pinch of sea salt
Thumbprint Cookie Ingredients
- Pulp from your nut milk from above batch
- 100 g rolled oats
- 2 ripe bananas mashed
- 3 tbsp maple syrup or honey
- 2 tbsp coconut oil melted
- 1 tsp cinnamon
- 1 tsp vanilla extract
- 1 tsp baking powder
- Pinch of salt
- 50 g Dark chocolate chips
Thumb print coating and filling
- 30 g coconut sugar
- 40 g Pistachio butter
- To Make the Nut Milk
- Add everything into your Nama M1 Plant-Based Milk Maker.
- Run the “nut milk” cycle. Saving the pulp for the cookies!
Taste and adjust:
- More water = lighter milk
- Pinch of salt = enhances flavour
- Dates = natural sweetness
Instructions
To Make the Nut Milk
- Add everything into your Nama M1 Plant-Based Milk Maker.
- Run the “nut milk” cycle. Saving the pulp for the cookies!
- Taste and adjust:
- More water = lighter milk
- Pinch of salt = enhances flavour
- Dates = natural sweetness
To Make the Cookies
- Preheat oven to 180°C.
- In a bowl, mix: nut pulp, mashed banana, maple syrup, melted coconut oil, vanilla
- Stir in oats, oat flour, cinnamon, baking powder, salt
- Fold in any extras such a the chocolate chips
- Roll into balls approx 2-3cm in diameter, next roll in coconut sugar, place on the baking parchment and flatten with your thumb so there is an independent in the middle
- Bake for 12–15 mins until golden on edges.
- Leave to cool for 10 mins
- Spoon in some pistachio nut butter and a chocolate chip on top for a beautiful finish!
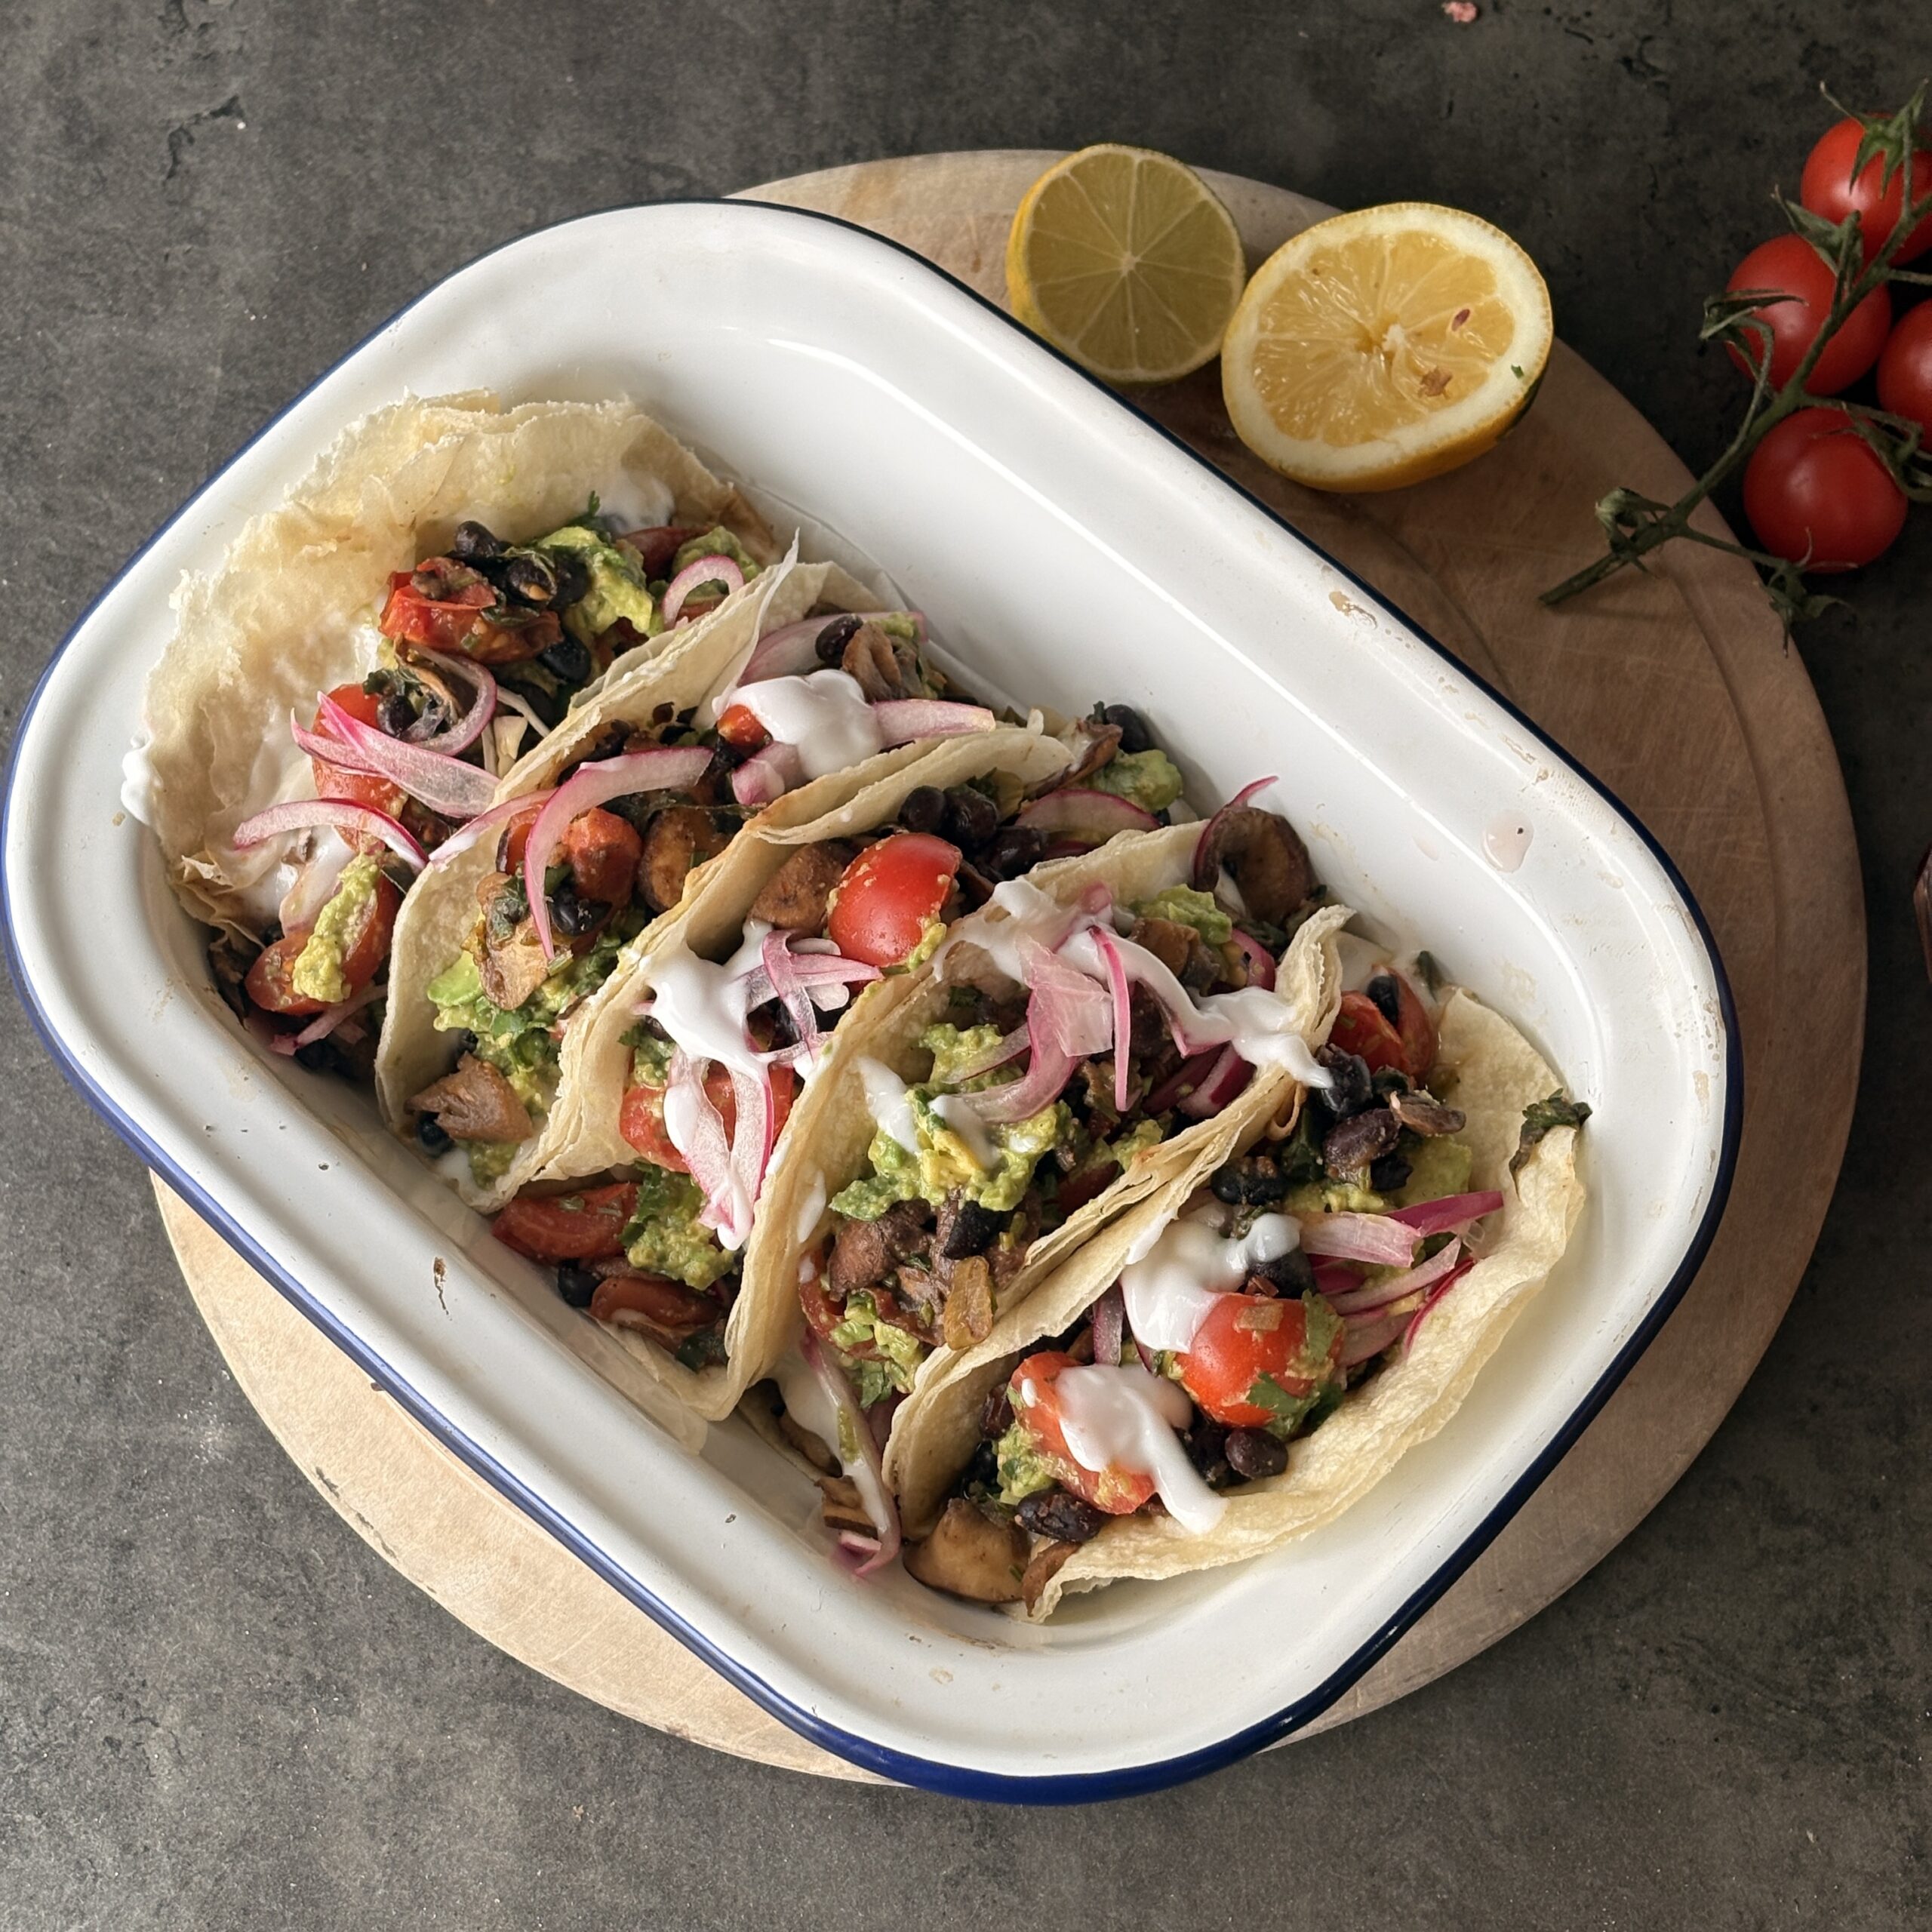
Easy Vegan Tacos in 10 mins
Takes 10 minutes
Serves 6
Ingredients
- Whole Wheat tortillas 300g slice into small 8-9cm circles OR 8-10 small soft tortillas
Blackbean mushroom salsa
- 1 tbsp olive oil
- 150 g Oyster mushrooms or mushroom of choice
- 1 tin of Black beans
- 10 Cherry tomatoes
- 2 tbsp tamari/ soy sauce
- 3 Scallions or green onions
- 1 clove of garlic
- 1/2 tsp black pepper
- 1/2 tsp smoked paprika
- 1.5 tsp ground cumin
- Chilli flakes to serve
Coriander yogurt
- 1 x lime
- 200 ml coconut yogurt natural or Soy natural yoghurt
- 15 g fresh coriander/ cilantro
Guacamole
- 2 ripe avocados
- 10 cherry tomatoes
- 1 lime
- ¼ red onion
- 1 clove garlic
- Pinch salt
- ½ tsp ground cumin
- Pinch black pepper
Pickled red onion
- 3/4 Red onion
- 50 ml white rice vinegar or apple cider vinegar
- 50 ml water
- Pinch salt
Instructions
Pickled the red onions
- First let’s pickle the onions. This will bring out the bright pink colour and soften the raw onion taste as well as give a nice acidity to the tacos. Peel and slice the red onion into long thin slices. In a glass add the sliced onion along with the vinegar and fill the remaining space with water so that the onions are submerged and leave to sit to pickle.
Prep the veg
- Finely dice the coriander including the stalks
- Slice the scallions, quarter the cherry tomatoes and finely slice the mushrooms into small bite sized pieces. Drain and rinse the black beans
Make the coriander yoghurt
- Mix the soy yoghurt with half the diced coriander and the juice of 1/2 lime and mix well, this is to function like a healthier sour cream.
Cook the mushrooms and make the salsa
- Heat a non-stick wide bottomed pan on high heat. Add 1 tbsp oil and once hot add the mushrooms along with a pinch of salt and cook for 5 mins stirring regularly
- Add the scallions and the black beans and cherry tomatoes and pinch of salt a fry,
- Slice the garlic finely and add to the pan
- Fry to 2-3 mins stirring regularly
- Add the spices and tamari and mix well and turn off the heat, taste and adjust the seasoning to your liking.
Make the guacamole
- Halve the avocados and remove the pit. Scoop the avocado flesh onto a chopping board and dice into small squares. Squeeze the juice of ½ a lime over the avocado with a pinch of salt and mix. Peel the garlic and red onion, then finely chop and add to the bowl. Quarter the cherry tomatoes and add them to the mixture.Sprinkle in the cumin, salt and black pepper and add it to the bowl.
- Use a fork to mash some of the avocado to bring it together until well combined but still chunky. Adjust the seasonings to taste.
Plate up using a muffin tray
- To plate up, use a muffin tray turned upside down to hold the tacos while you fill them.
- Add a tbsp of the yoghurt coriander mix
- A generous spoonful of the mushroom black bean mix, followed by a generous serving of guacamole
- Top with some pickled red onion and some chopped coriander
- Enjoy!
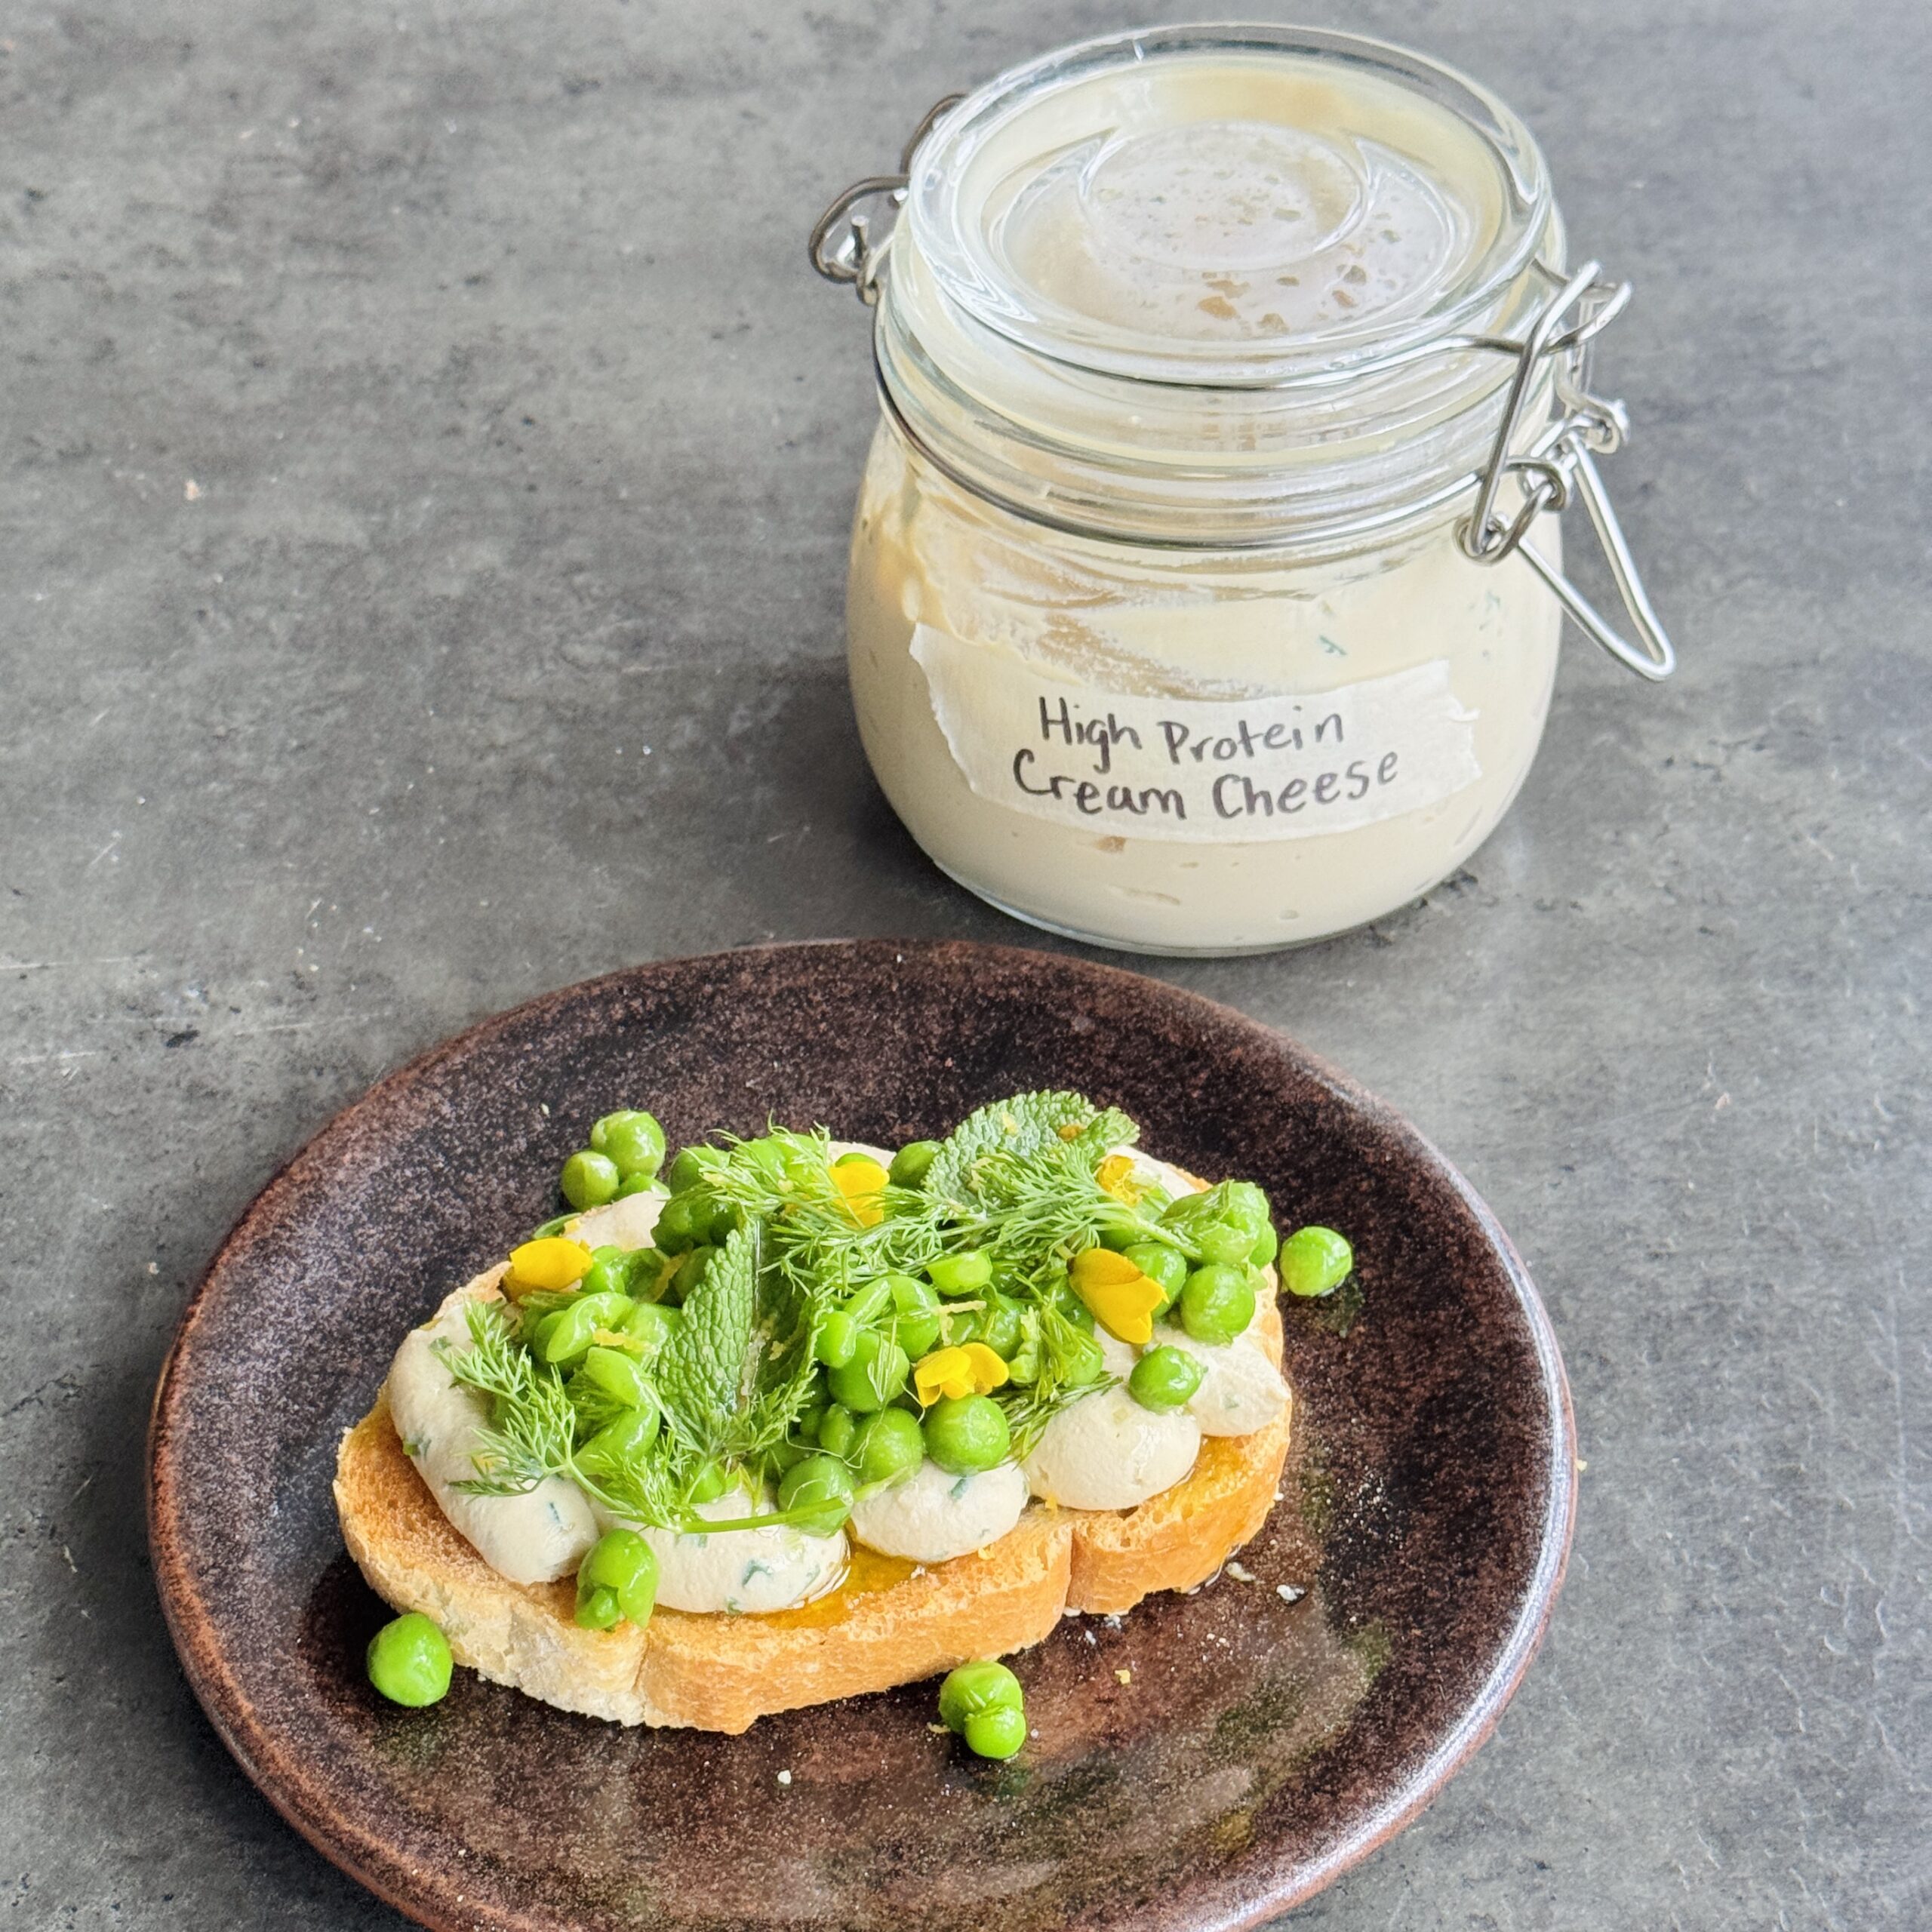
High-Protein, High-Fibre Cream Cheese
Takes 14 minutes
Serves 10
Ingredients
- 400 g firm tofu organic, non-silken
- Juice of 1 lemon divided
- 15 g white miso paste 1 tbsp
- 2 –3g sea salt ½ tsp, adjust to taste
- Small bunch of fresh chives finely chopped
Instructions
The Structural Reset Boil
- Cut the tofu into large cubes. Bring a pot of water to the boil and add the juice of ½ a lemon. Add the tofu and boil for 10 minutes. This helps soften the protein structure and removes any “beany” aftertaste.
Drain and Prep
- Drain the tofu in a sieve and allow it to steam-dry for 2–3 minutes. You want it warm for the smoothest blend, but without excess surface water.
The Big Blend
- Place the warm tofu into a food processor or high-speed blender. Add the remaining lemon juice, white miso, and salt. Blend on high until completely smooth — it should look like whipped cream.
The Finish
- Taste and adjust the seasoning if needed. Transfer to a bowl and fold in the finely chopped chives.
Set
- Transfer to an airtight container and refrigerate for at least 2 hours. As it cools, it will thicken into a perfectly spreadable consistency.
Shelf Life
- Store in an airtight container in the fridge for up to 5 days.

Banana Date Sushi
Takes 10 minutes
Serves 12
Ingredients
- 200 g Medjool dates
- 100 g peanut butter or pistachio butter approx. ⅓ cup
- 2 bananas
- 50 g desiccated coconut approx. ½ cup
- 5 g freeze-dried raspberries approx. ¼ cup, lightly crushed
- 100 g dark chocolate approx. ⅔ cup chopped or chips
Instructions
Toast the coconut
- Add the desiccated coconut to a dry frying pan over a medium heat. Toast for 5–6 minutes, stirring regularly, until it turns a beautiful golden brown. Remove immediately from the heat to prevent burning and set aside.
Create the date “nori” sheet
- Remove the stones from the dates. Flatten and arrange them on a sheet of baking parchment in a rectangular shape, slightly overlapping so there are no gaps.
- Place a second sheet of parchment on top and use a rolling pin (or a clean glass bottle) to roll the dates into one thin, even sheet.
Layer the flavours
- Peel away the top layer of parchment.
- Spread an even layer of nut butter over the date sheet, leaving a small 1cm gap at the top edge.
- Sprinkle over the toasted coconut and crushed freeze-dried raspberries.
The “sushi” roll
- Peel the bananas. If they’re very curved, gently straighten them or cut into shorter, straighter halves.
- Place the bananas along the bottom edge of the date sheet.
- Using the parchment to help you, roll the date sheet up tightly over the bananas, like a sushi roll. Press firmly so it holds together.
Chill and slice
- Place the rolls in the freezer for 10–15 minutes. This helps firm everything up and makes slicing much easier.
- Once chilled, use a sharp knife to cut into 2cm thick “sushi” rounds.
The chocolate finish
- Melt the dark chocolate using a bain-marie or in the microwave in 30-second bursts.
- Drizzle over the rounds or dip one half of each piece into the chocolate for a more striking finish.
- Allow to set on parchment in the fridge or freezer.
Storage tip
- Store in an airtight container in the freezer. They taste like a gourmet frozen chocolate bar and can be enjoyed straight from frozen!
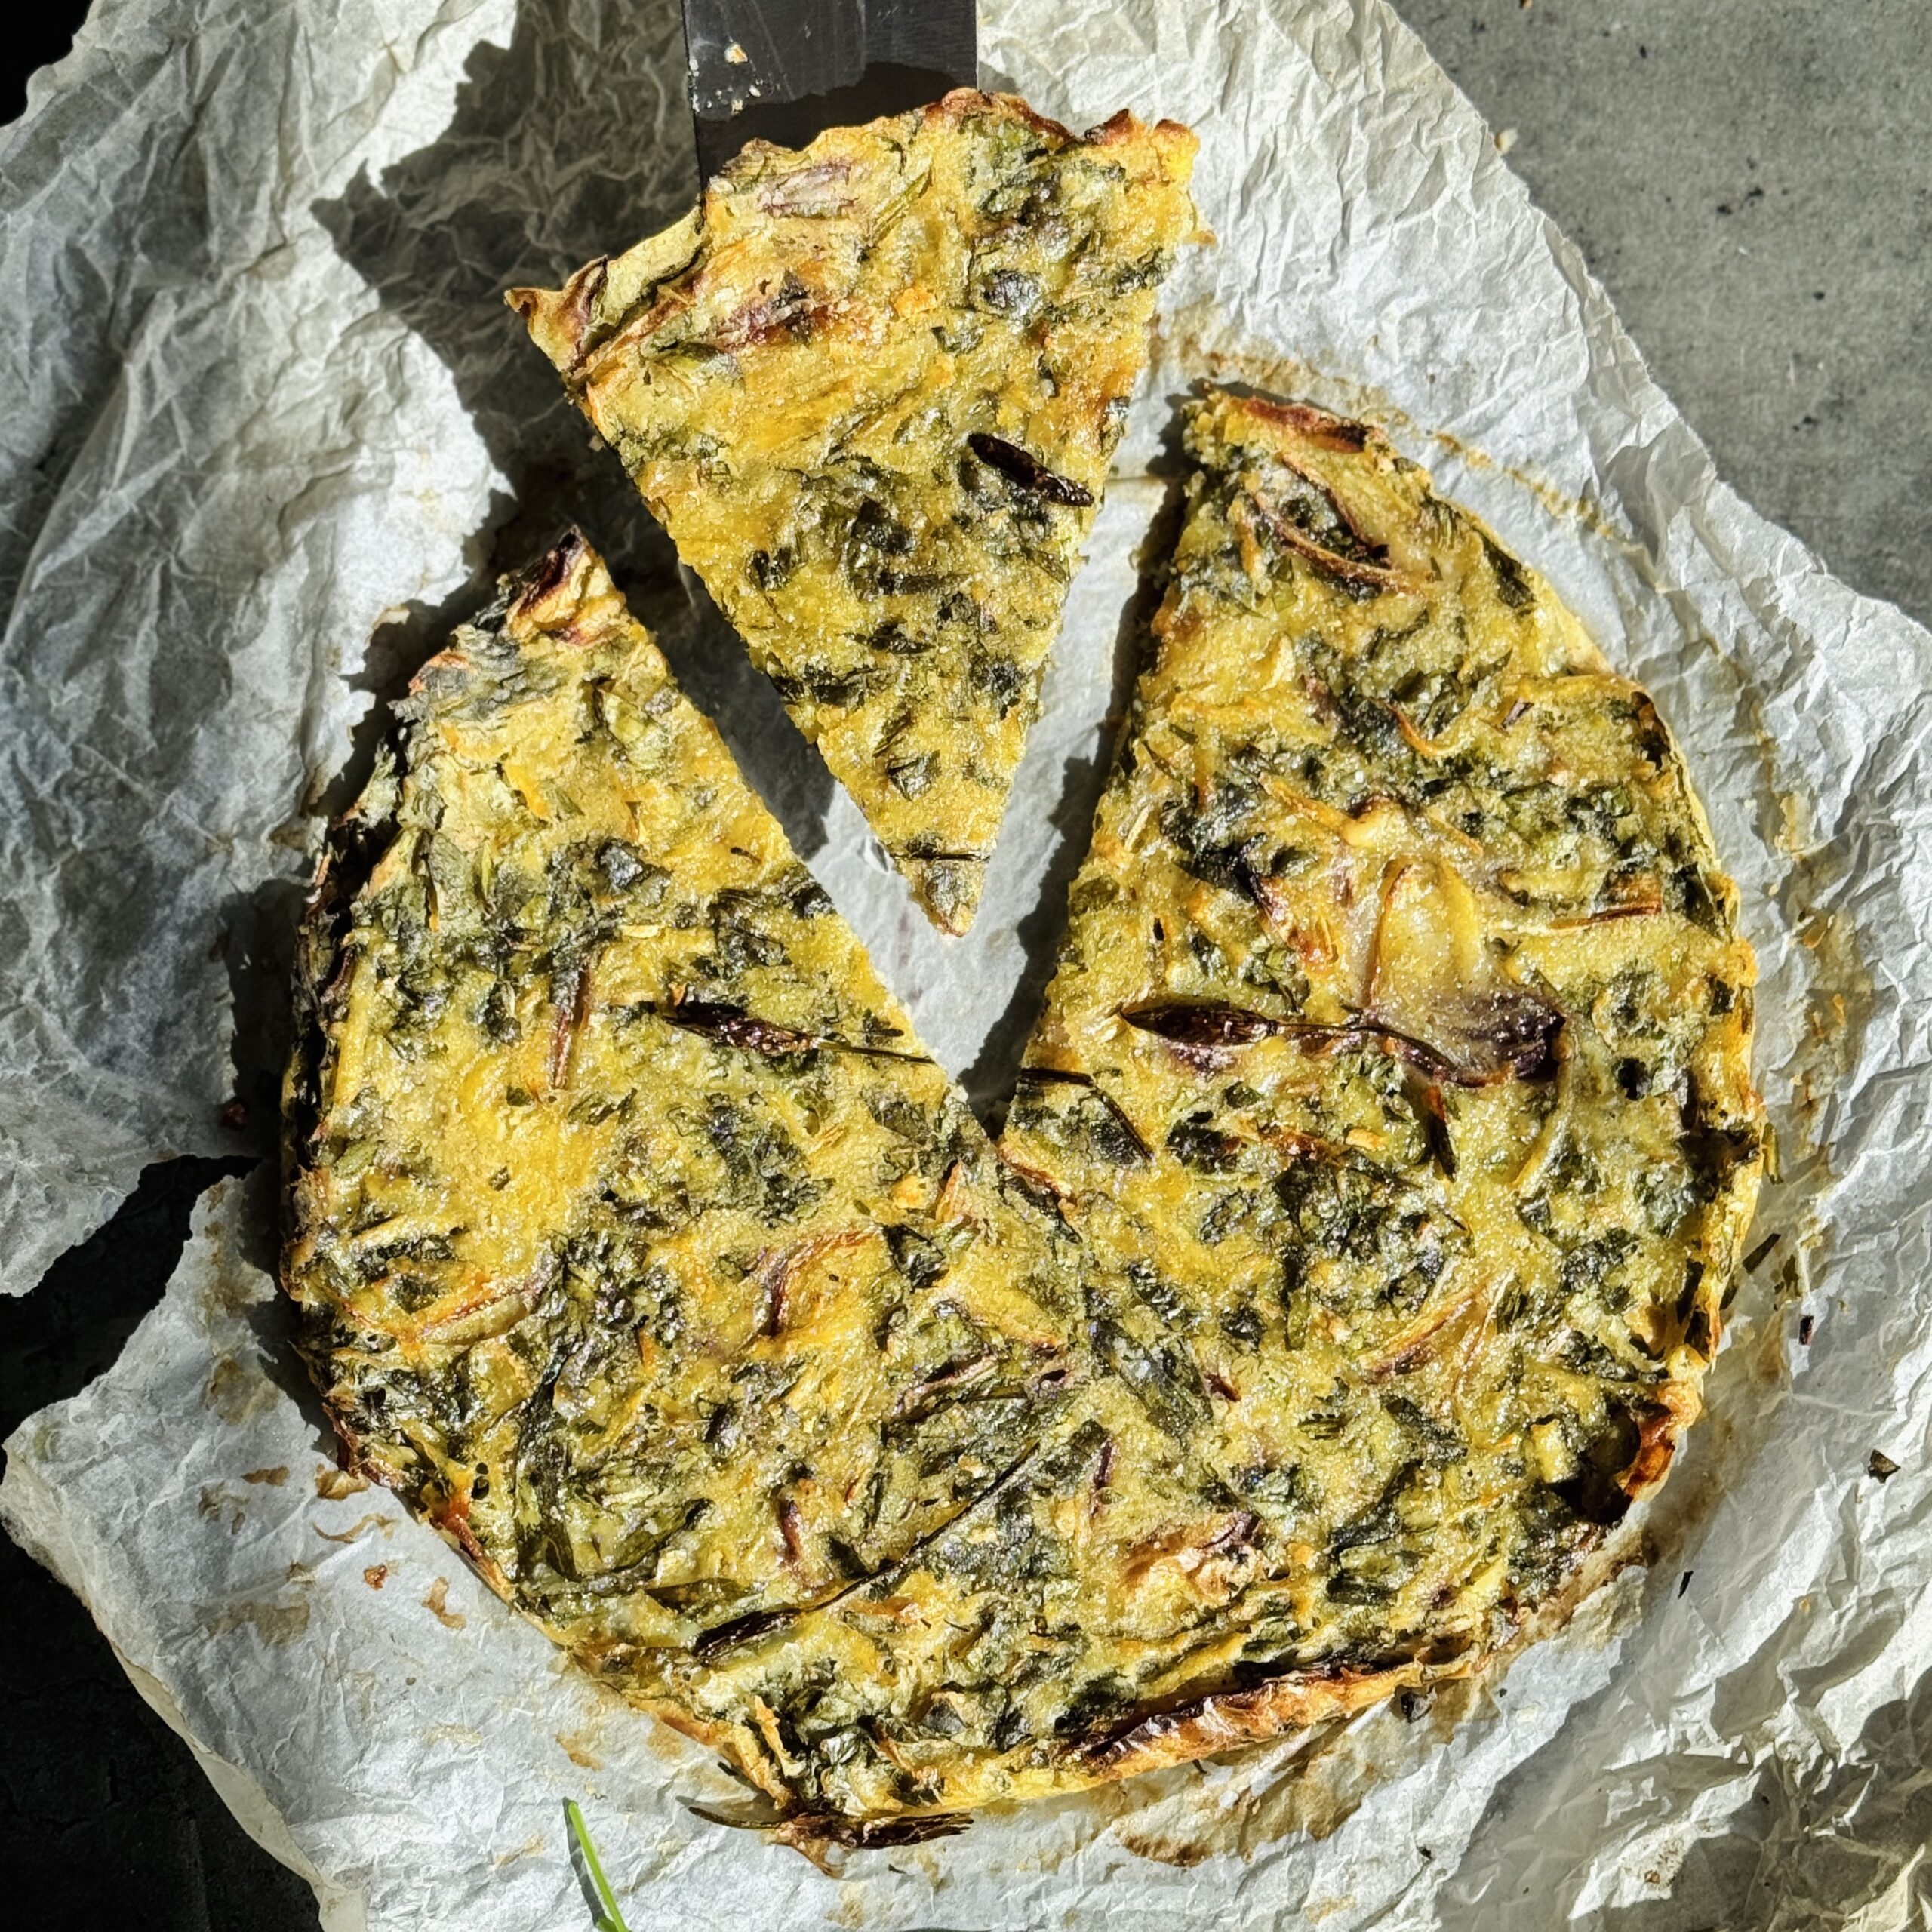
Wild Garlic Scarpaccia
Takes 1 hour 10 minutes
Serves 6
Ingredients
For the Batter:
- 150 g 1 cup plain flour
- 350 ml 1.5 cups water
- 3 tablespoons 45ml / 3 tbsp olive oil
- 1 teaspoon 5g / 1 tsp salt
- 1 teaspoon 5g / 1 tsp black pepper
For the Topping:
- 100 g 2 cups wild garlic leaves, finely chopped
- 300 g 2 cups potatoes, grated
- 1 small red onion thinly sliced
- 2 cloves garlic minced (10g / 2 tsp)
- 1 tablespoon 15g / 1 tbsp fresh thyme leaves
- 1 tablespoon 15g / 1 tbsp fresh rosemary, finely chopped
- 2 tablespoons 30ml / 2 tbsp olive oil
- Salt and pepper to taste
Instructions
- Preheat the oven to 200°C (392°F). Line a baking sheet or two 8-inch tart tins with parchment paper.
- Prepare the batter: In a large mixing bowl, whisk together the flour, water, olive oil, salt, and black pepper until smooth and lump-free. Set aside to rest while you prepare the topping.
- Prepare the vegetables and wild garlic: Grate the potatoes and squeeze out excess moisture using a clean tea towel. Thinly slice the red onion, mince the garlic, and finely chop the wild garlic leaves. In a mixing bowl, toss the grated potato, red onion, garlic, and wild garlic with 1 tablespoon of olive oil and a generous pinch of salt.
- Assemble the Scarpaccia: Evenly spread the vegetable and wild garlic mixture over the prepared tray or tart tins. Sprinkle over the thyme and rosemary. Pour the prepared batter evenly over the top, ensuring the vegetables are well coated. Drizzle with the remaining olive oil and season with additional salt and pepper to taste.
- Bake the Scarpaccia: Bake in the preheated oven for 50–60 minutes, or until the edges are golden and crispy and the centre is set and firm. If the centre is still too soft, bake for an additional 5–10 minutes.
- Cool and serve: Let the Scarpaccia cool for a few minutes before slicing into squares or wedges. Serve warm or at room temperature.
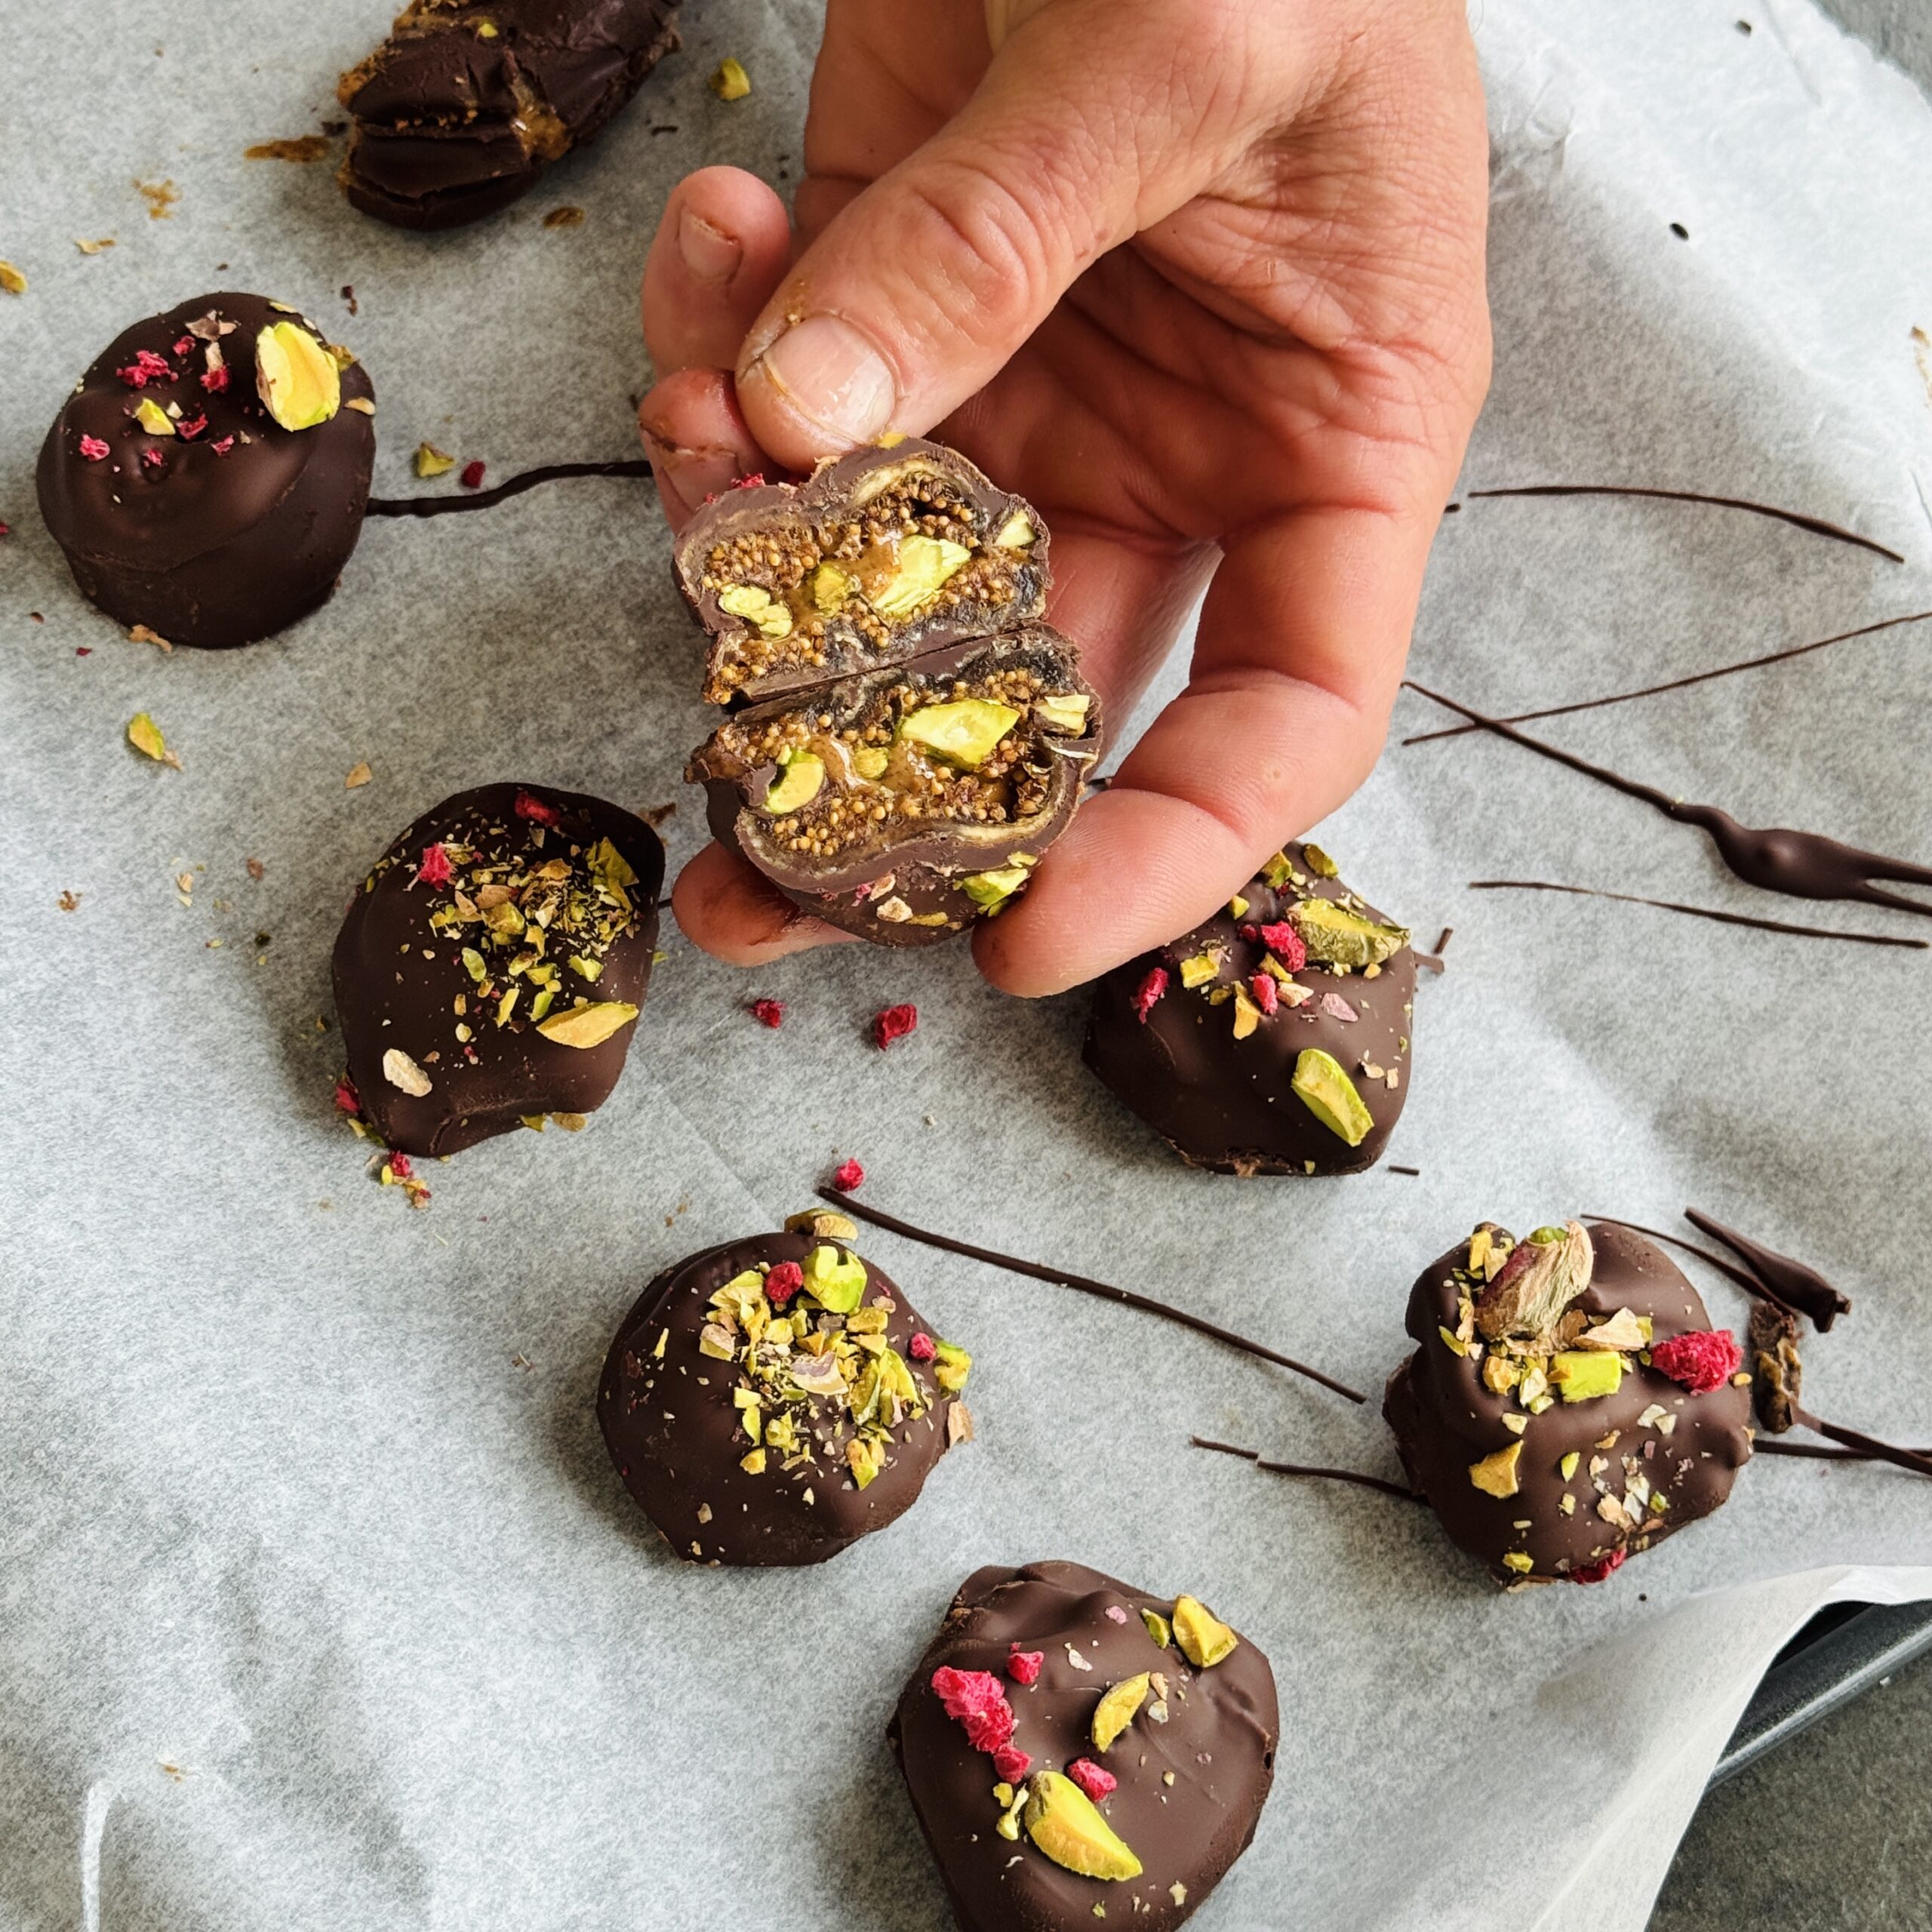
Chocolate Covered Figs with Pistachio
Takes 10 minutes
Serves 10
Ingredients
- 10 large plump dried figs
- 50 g almond or peanut butter
- 50 g shelled pistachios finely chopped
- 10 g freeze-dried raspberries lightly crushed
- 75 g dark chocolate 70% cocoa works best
Instructions
Prep the “Buns”
- Start by trimming the hard woody stem off the top of each fig. Slice them in half horizontally (across the “equator”) to create a top and a bottom “bun.”
Stuff the Burgers
- Lay the bottom halves open on a tray. Add a generous teaspoon of nut butter to each. Sprinkle with a layer of chopped pistachios and freeze-dried raspberries, then gently press the top half of the fig back on to close the “burger.”
Melt the Chocolate
- Break the dark chocolate into small pieces. Melt it slowly using a microwave (30-second bursts, stirring in between) or a bain-marie.
- Pro Tip: Pour the melted chocolate into a narrow, deep glass. This makes it much easier to submerge the figs fully without needing a huge amount of chocolate.
Dip and Coat
- Pierce a stuffed fig with a toothpick so it’s secure. Dunk it straight into the chocolate until fully coated. Lift it out, let the excess drip off, and place it onto a plate lined with parchment paper.
Set and Serve
- Repeat with the remaining figs. For a final touch, you can sprinkle a few leftover pistachio crumbs on top while the chocolate is still wet. Place the tray in the fridge for 15–20 minutes until the chocolate is snappy and set.

Fresh Summer Rolls with Peanut Ginger Dip
Takes
Serves 8
Ingredients
- 1 ripe Avocado
- 1 medium Carrot
- ¼ Red cabbage
- 15 g fresh Coriander
- ½ Cucumber
- 4 Scallions of green onions
- 1 butterhead lettuce
- 8 sheets of rice paper
Tofu
- 200 g firm Tofu
- 2 tbsp tamari/ soy sauce
- 1 tbsp maple syrup
- 1 tsp rice vinegar or vinegar of choice
Peanut Dipping sauce
- 3 tbsp peanut butter
- 1 tbsp tamari/ soy sauce
- 1 tbsp maple syrup
- 1 tbsp sesame oil
- ½ thumb sized piece of fresh ginger
- Juice ½ lemon
- 2 tbsp water
Instructions
Marinate & Prep the Tofu
- Slice: Cut the 200g firm tofu into long, thin batons (about 8cm long).
- Sear: Heat a non-stick pan over medium heat with a splash of oil. Fry the tofu for 2 minutes on each side until lightly golden.
- Glaze: Pour in the 2 tbsp tamari, 1 tbsp maple syrup, and 1 tsp rice vinegar. Let it bubble and coat the tofu until the liquid is absorbed and sticky. Remove from heat and let cool.
Prepare the “Rainbow” Fillings
- The Crunch: Julienne (cut into matchsticks) the carrot and cucumber.
- The Base: Shred the red cabbage finely and separate the butterhead lettuce leaves.
- The Aromatics: Slice the scallions into thin strips and pick the coriander leaves.
- The Creaminess: Slice the avocado into thin wedges just before assembling to prevent browning.
Mix the Almond Dipping Sauce
- In a small bowl, grate the ginger finely.
- Whisk in the almond butter, tamari, maple syrup, sesame oil, and lemon juice.
- Add the water one tablespoon at a time until you reach a smooth, pourable consistency. Set aside.
Assemble the Rolls
- Dip: Submerge one rice paper sheet in a shallow dish of lukewarm water for about 10 seconds. Lay it flat on a clean, damp work surface.
- Layer: Place a lettuce leaf on the bottom third of the paper. Top with a pinch of cabbage, carrots, cucumber, scallions, and a piece of the glazed tofu.
- Place 2 slices of avocado and a few coriander leaves in the center of the paper (just above your main pile).
- Roll: Fold the bottom of the paper over the filling, tuck in the sides, and roll tightly upward. The avocado and coriander will show through the top of the translucent paper!
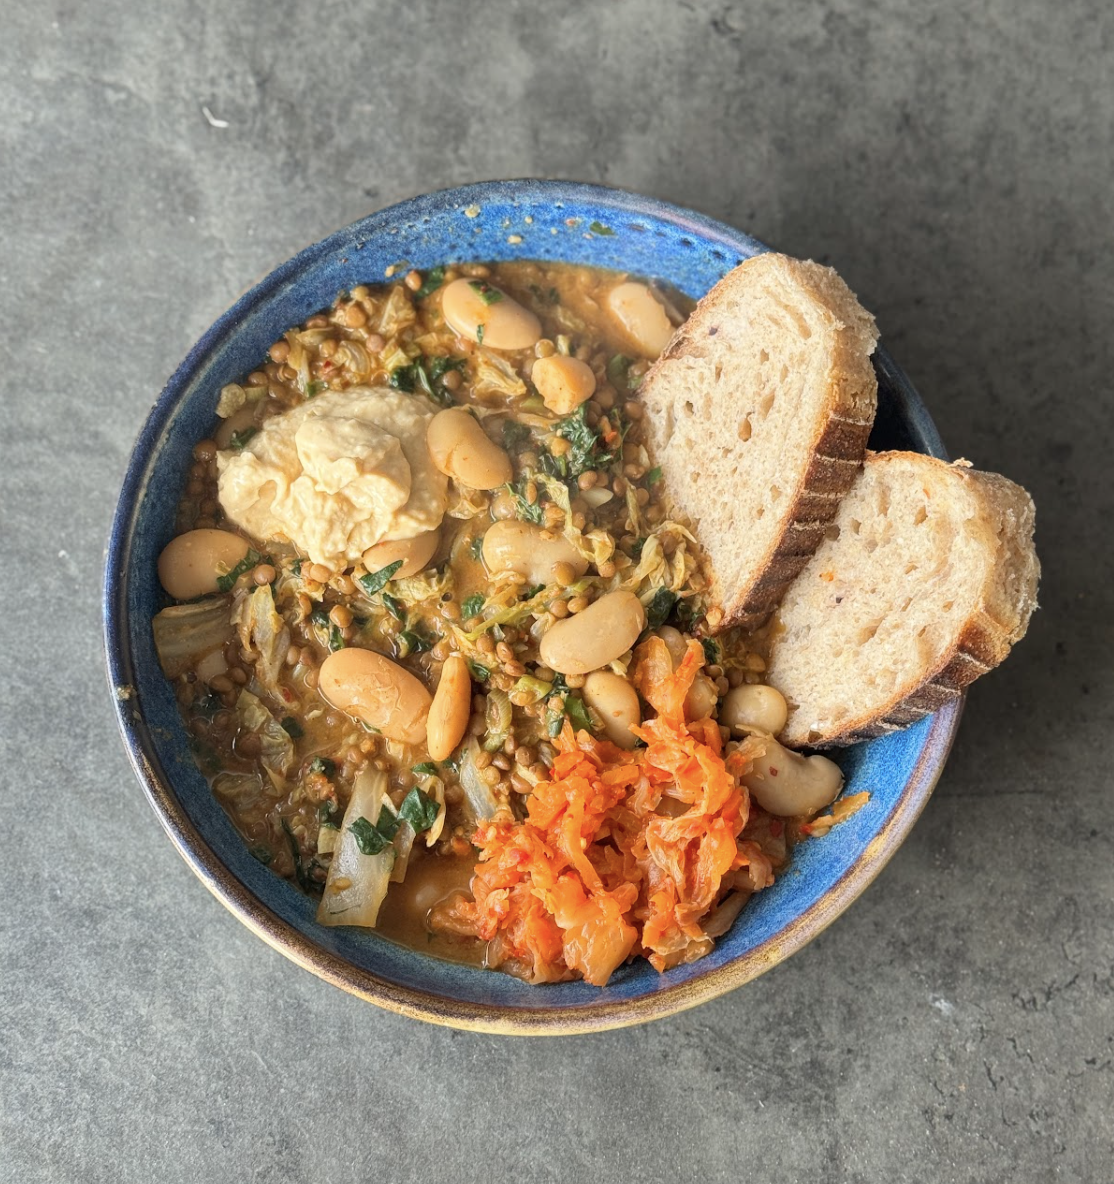
Speedy Superfood Bean Bowl
Takes 10 minutes
Serves 4
Ingredients
- 1 x 400g tin cooked lentils about 1½ cups drained
- 1 x 400g tin cooked chickpeas about 1½ cups drained
- 2 scallions green onions, finely sliced
- 15 g fresh ginger 1 tbsp finely chopped
- 1 clove garlic finely chopped
- 300 ml vegetable stock 1¼ cups
- 16 g peanut butter 1 tbsp
- 18 g miso paste 1 tbsp
- 2 g chilli powder 1 tsp
- 5 ml olive oil 1 tsp, optional
- 40 g kale stalks removed (1 large handful / about 1½ cups chopped)
- Optional: 80g chopped vegetables such as cabbage or courgette ½ cup
Instructions
Prepare the base flavours
- Finely slice the scallions. Peel and finely chop the ginger and garlic.
Sauté the aromatics
- Heat the olive oil (if using) in a large pan over medium heat. Add the scallions, ginger, and garlic. Cook for 1–2 minutes, stirring, until fragrant.
Add the beans and spices
- Drain and rinse the lentils and chickpeas. Add them to the pan along with the chilli powder. Stir well to coat in the spices.
Create the creamy broth
- Pour in the vegetable stock. Stir in the peanut butter until fully dissolved. Simmer for 2–3 minutes.
Add greens and finish
- Spoon a little hot broth into a small bowl and mix with the miso paste to loosen, then stir it back into the pan. Add the chopped kale and any optional vegetables. Cook for 1–2 minutes more, until the greens are wilted.
Taste and serve
- Taste and adjust seasoning if needed. Serve warm as is, or with wholegrain toast, brown rice, or quinoa.

Our Bestselling Carrot Cake
Takes 1 hour
Serves 12
Ingredients
For the Cake
- 400 g self-raising flour 3¼ cups
- 300 g caster sugar 1½ cups
- 250 ml sunflower oil neutral tasting (1 cup)
- 200 g grated carrot 2 cups, packed
- 150 ml water ⅔ cup
- 100 g raisins ⅔ cup
- 100 g chopped walnuts 1 cup
- 1 tsp ground cinnamon
- 1 tsp ground allspice
For the Cream Cheese Icing
- 450 g vegan cream cheese 2 cups
- 150 g icing sugar 1¼ cups
Instructions
- Preheat the oven: Preheat to 180°C fan (350°F).
- Prepare the tins: Grease and line two 20cm (8-inch) round cake tins with baking parchment on the base and sides. Use coconut oil or plant-based butter to help the parchment stick.
- Mix the dry ingredients: In a large bowl, sieve the self-raising flour. Add the caster sugar, grated carrot, raisins, walnuts, cinnamon, and allspice. Mix well to combine.
- Add the wet ingredients: Pour in the sunflower oil and water.
- Mix the batter: Stir gently with a spatula (or use a hand mixer briefly) until just combined. Do not overmix.
- Bake: Divide the batter evenly between the tins. Bake for 35–40 minutes, rotating halfway through. The cakes are ready when a skewer inserted into the centre comes out clean. If needed, bake a few minutes longer. Allow to cool completely on a wire rack.
- Make the icing: In a bowl, soften the vegan cream cheese with a fork. Sift in the icing sugar and whisk together until smooth and creamy.
- Assemble: Place one cake layer on a serving plate. Spread half the icing over the top, leaving a small border at the edge. Place the second cake on top and gently press down. Spread the remaining icing over the top.
- Decorate (optional): Finish with extra chopped walnuts, raisins, or a light sprinkle of cinnamon.
- Slice and enjoy!
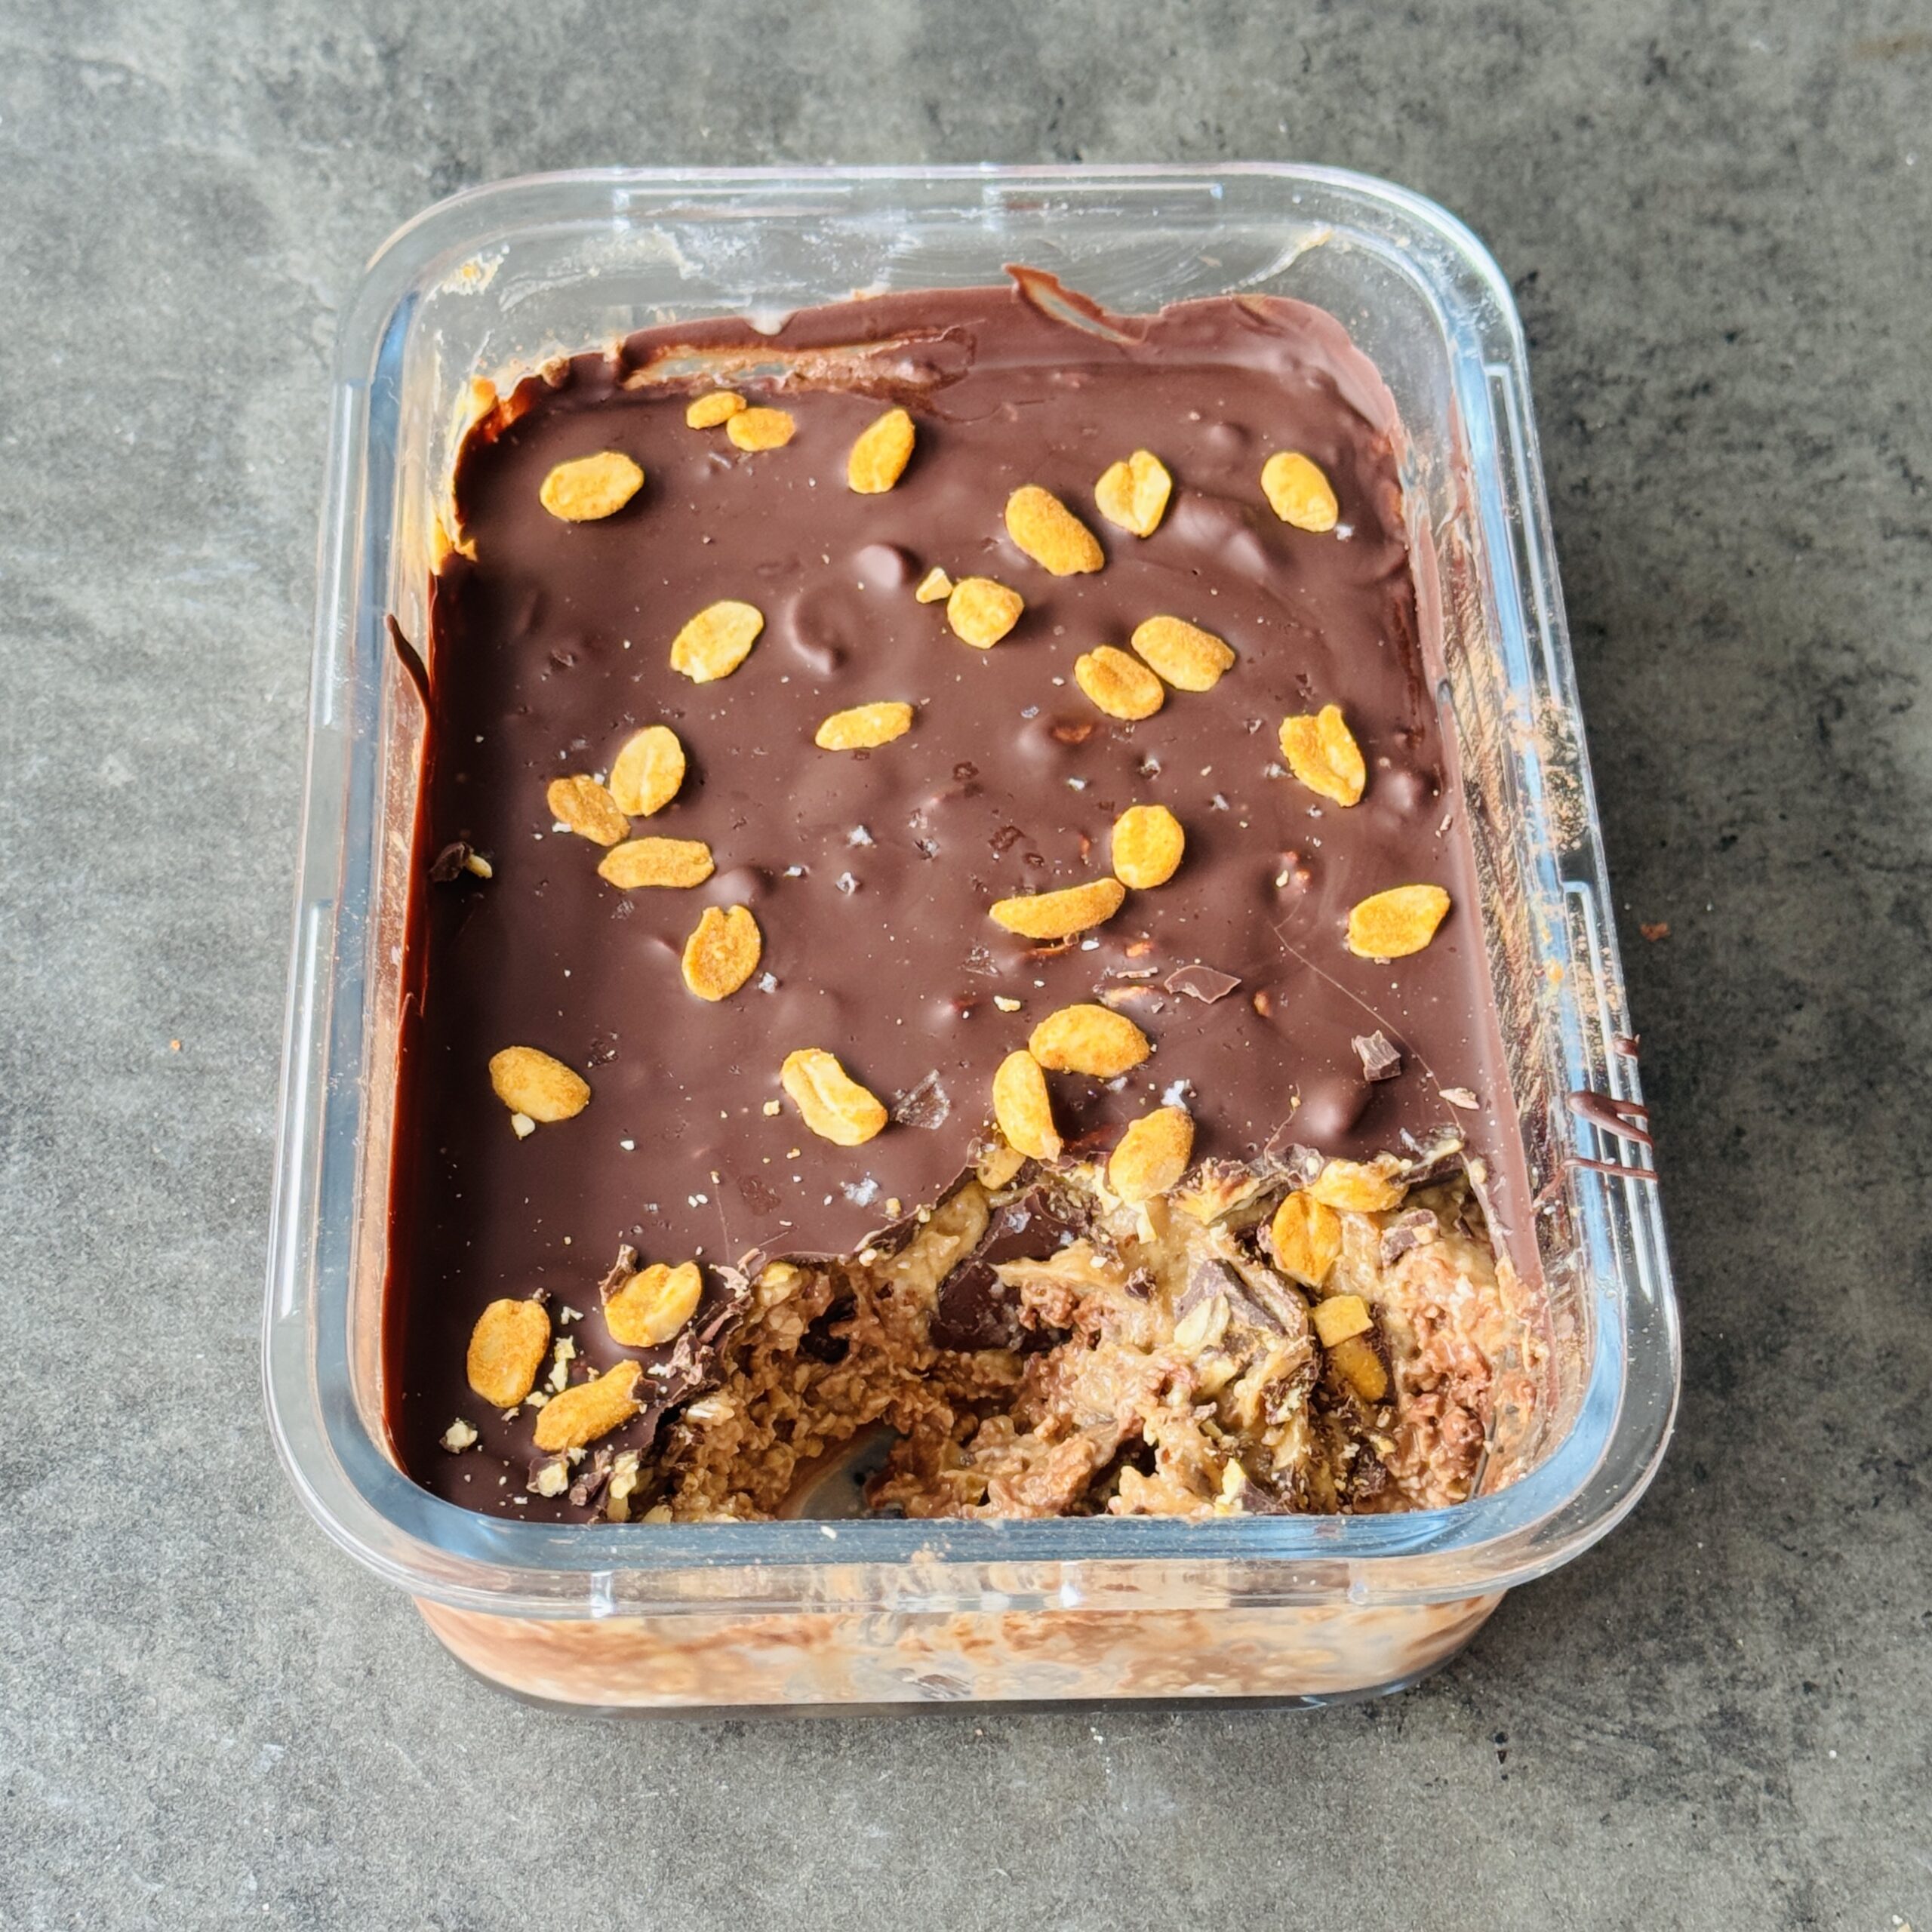
Snickers Overnight Oats
Takes 10 minutes
Serves 2
Ingredients
For the oats
- 100 g oat flakes 1 cup
- 2 tbsp cocoa powder
- 200 ml oat milk ⅓ cup
- 1 tsp vanilla extract
- 2 tbsp maple syrup
- Pinch of salt
For the date caramel
- 100 g dates about 1 cup, pitted
- 50 g peanut butter ¼ cup
- 150 ml water ⅔ cup
- Pinch of salt
- ½ tsp vanilla extract
Toppings
- 50 g roasted salted peanuts ⅓ cup
- 100 g dark chocolate about ¾ cup chopped or chips
Instructions
Make the oat base
- In a bowl, mix the oat flakes, cocoa powder, oat milk, vanilla extract, maple syrup and a pinch of salt. Stir well until fully combined.
Prepare the date caramel
- Add the dates, peanut butter, water, salt and vanilla extract to a blender or food processor. Blend until smooth and creamy. Add a little more water if needed to loosen the texture.
Assemble
- Divide the chocolate oat mixture between two jars or containers. Spoon over a generous layer of date caramel.
Add toppings
- Sprinkle over the roasted peanuts and finish with melted or chopped dark chocolate.
Chill
- Cover and leave in the fridge overnight (or at least 4 hours).
Serve
- Enjoy straight from the fridge, or let it sit at room temperature for 5–10 minutes before eating.
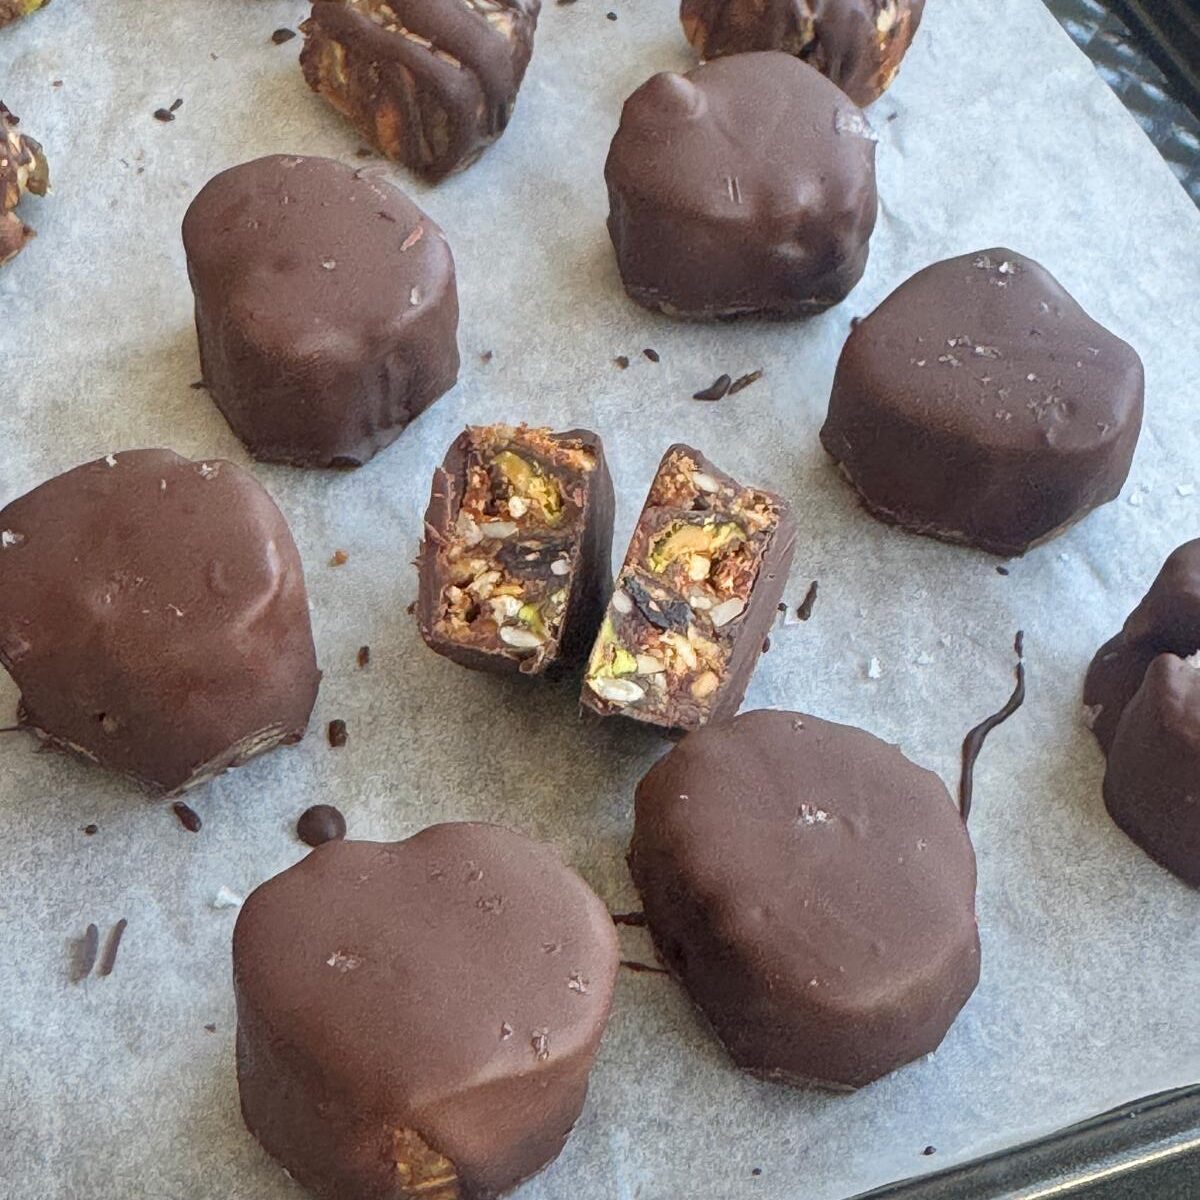
Pistachio & Peanut Butter Date Rounds
Takes 20 minutes
Serves 12
Ingredients
- 12 large medjool dates
- 75 g pistachios
- 75 g cashew nuts
- 50 g peanut butter
- 50 g mixed seeds
- 25 g goji berries
- 1 tbsp coconut oil
- 1 tsp cinnamon optional
- 200 g dark chocolate
Instructions
- Remove the stone in the dates and roughly chop them up.
- Heat the coconut oil in a pan over medium heat.
- Once it has melted add the peanut butter and mix till it starts to come together.
- Add the remaining ingredients (except the dark chocolate) and mix and cook for 5-8 mins until the dates soften, mash them to ensure all the ingredients are mixed together and the dates have broken down. .
- Turn off heat and once cooled, transfer the date mixture to some baking paper and roll into a log shape, making sure to roll it tightly so that it will hold its shape.
- Refrigerate the log for 10 mins to make it easier to slice or simply slice through the paper while warm. It does hold its shape better when cool so do your best to be patient!
- Melt your chocolate using a bain marie or microwave. Cover each piece with chocolate.
- Refrigerate until set and enjoy

Creamy Spring Greens Lasagne
Takes 20 minutes
Serves 4
Ingredients
Base
- 15 ml olive oil 1 tbsp
- 1 medium onion finely chopped
- 1 medium courgette finely sliced
- 400 g cooked butterbeans drained (1 tin, about 2¼ cups)
- 200 g frozen peas 1½ cups
- 150 g lasagne sheets broken into pieces (about 8 sheets / 5 cups pieces)
- 400 ml vegetable stock 1¾ cups
Spring Green Sauce
- 2 cloves garlic or 50g wild garlic ½ cup chopped
- 100 g kale stems removed (4 cups chopped)
- 100 g cashew nuts 1 cup
- 75 ml olive oil ⅓ cup
- 75 ml water ⅓ cup
- Juice of ½ lemon 1½ tbsp
- ¾ tsp salt
Cashew Cream
- 100 g raw cashews ¾ cup
- 200 ml oat milk ¾ cup + 2 tbsp
- 30 ml olive oil 2 tbsp
- Juice of ¼ lime 1 tsp
- 2 g sea salt generous pinch
- Black pepper to taste
To Serve
- 50 g breadcrumbs ½ cup
- Olive oil for drizzling
- Fresh basil or parsley optional
Instructions
Prepare the vegetables
- Peel and finely chop the onion and garlic (if using cloves). Slice the courgette. Drain and rinse the butterbeans.
Blanch the kale
- Bring a saucepan of salted water to the boil (about 1 tbsp salt). Add the kale and simmer gently for 4 minutes. Drain and rinse with cold water.
Make the green sauce
- Blend the cooked kale, garlic or wild garlic, cashews, olive oil, lemon juice, salt, and water until smooth and creamy. Taste and adjust seasoning if needed.
Sauté the vegetables
- Heat the olive oil in a large, deep pan over high heat. Add the onion and cook for 3 minutes, stirring regularly. Add the courgette and cook for 4–5 minutes until softened.
Add pasta and cook
- Stir in the butterbeans, peas, and green sauce. Break the lasagne sheets into bite-sized pieces and mix through, ensuring they don’t stick together. Add the vegetable stock, cover, and simmer over medium heat for about 7 minutes, stirring occasionally, until the pasta is tender and the sauce has thickened.
Make the cashew cream
- Blend the cashews, oat milk, olive oil, lime juice, salt, and black pepper until silky smooth. Add a splash more oat milk if needed to loosen.
Finish and crisp
- Drizzle the cashew cream over the cooked lasagne. Sprinkle with breadcrumbs and drizzle lightly with olive oil. Char lightly with a blowtorch or place under a hot grill for 3–5 minutes until golden and bubbling.
Serve
- Scatter with fresh basil or parsley and serve hot, straight from the pan.

Protein Packed Pea Fritters
Takes 20 minutes
Serves 8
Ingredients
- 300 g frozen peas approx. 2 cups
- 1 garlic clove approx. 5g
- 15 g fresh mint ½ cup packed, plus extra for yogurt
- 130 g self-raising flour 1 cup
- 80 ml water ⅓ cup
- ½ lemon juiced (approx. 15ml / 1 tbsp)
- Zest of ½ lemon
- Salt and pepper to taste
- 200 ml yogurt of choice ¾ cup + 1 tbsp
Instructions
Prep the peas
- Place the frozen peas in a bowl and pour over boiling water. Leave for 2–3 minutes to thaw, then drain, rinse, and set aside.
Prep the aromatics
- Peel and finely grate or dice the garlic. Finely chop the mint, reserving about a third for the yogurt sauce.
Mash and mix
- Mash half of the peas with garlic, 80ml water, and nutritional yeast (optional) until smooth.
- Finely chop the remaining peas and mix with the chopped mint, flour, lemon zest, salt, and pepper.
- Combine both pea mixtures until well mixed.
Shape and cook
- Form small patties with the mixture. Fry in a lightly oiled pan over medium heat for 3–4 minutes per side until golden and crispy, or bake in a preheated oven at 200°C (400°F) for 12–15 minutes, flipping halfway.
Serve
- Mix the reserved mint into the yogurt, then serve the fritters warm with the mint yogurt on the side. Enjoy!
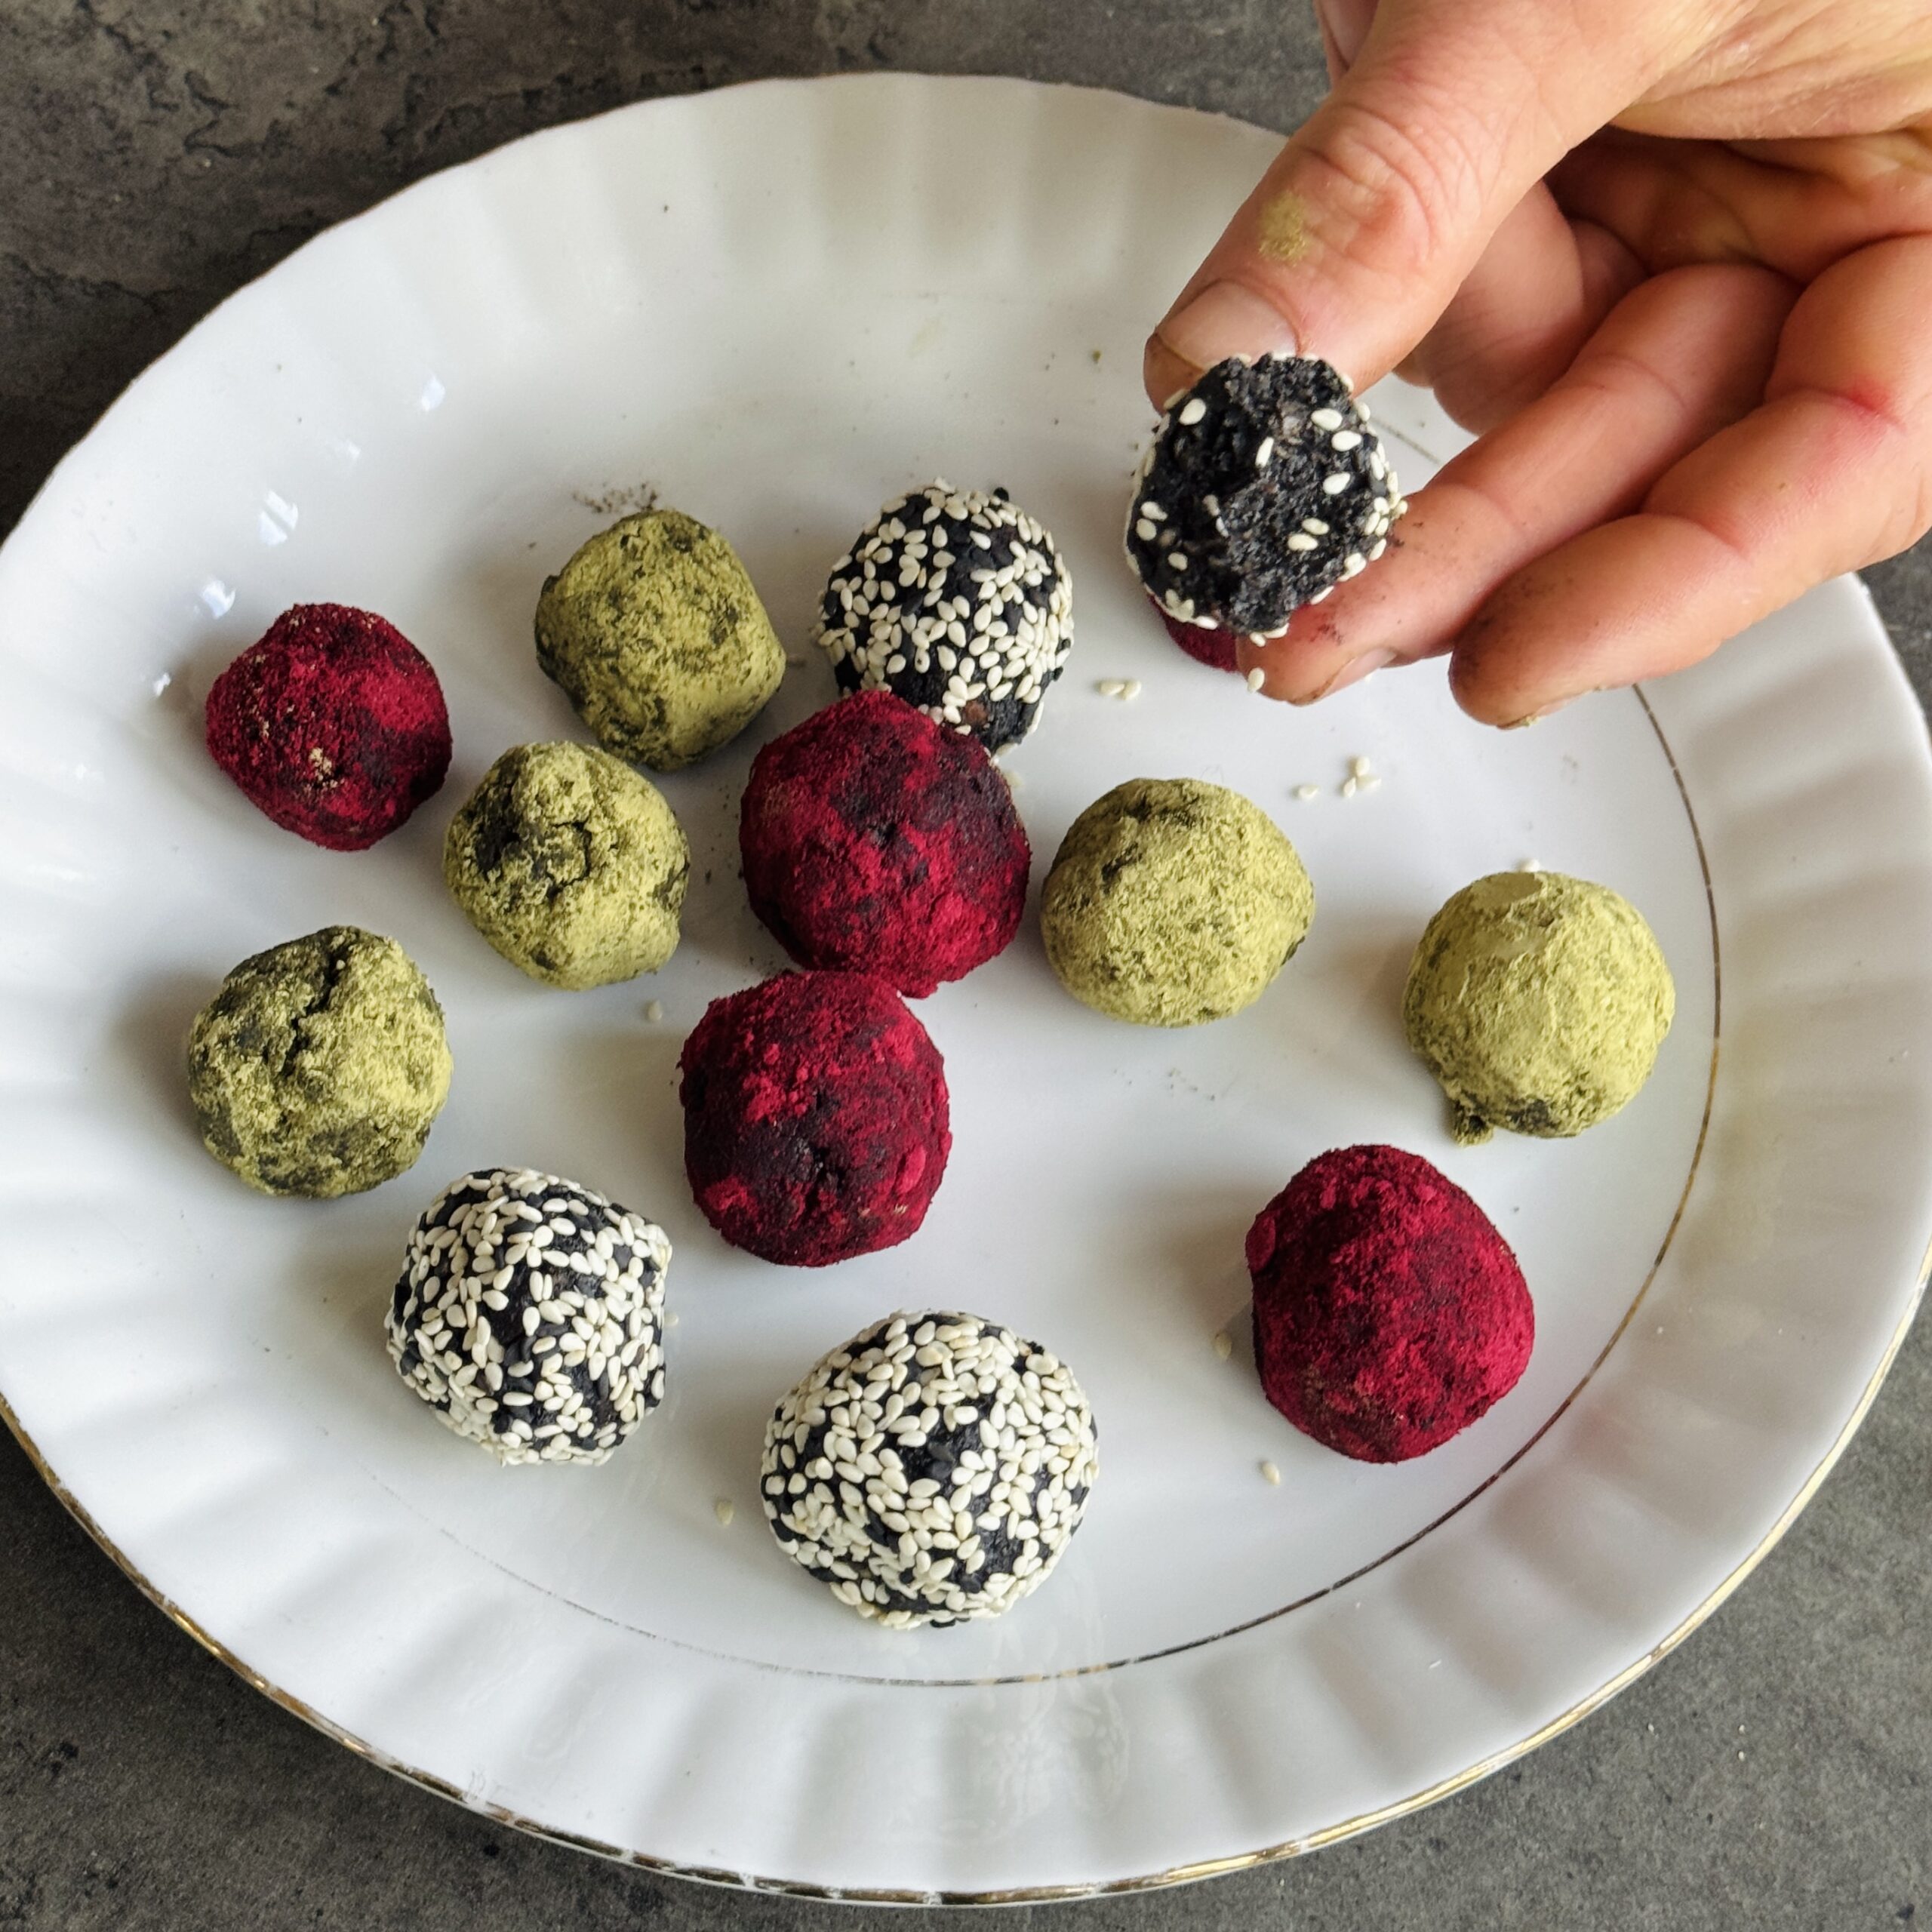
Black Sesame Truffles
Takes 10 minutes
Serves 12
Ingredients
Truffle Base
- 80 g oats 1 cup oat flour or ¾ cup oats
- 90 g pitted dates ½ cup, packed
- 90 g black sesame tahini ⅓ cup
- 1 tsp pure vanilla extract
- 45 g water or oat milk 3 tbsp
- Pinch of sea salt
Coatings (for 3 varieties)
- 12 g beetroot powder 2 tbsp
- 12 g matcha powder 2 tbsp
- 8 g white sesame seeds 1 tbsp
- 8 g black sesame seeds 1 tbsp
Instructions
Blend the base
- Add the oats to a food processor and blend until they form a fine flour (skip this step if using oat flour). Add the dates, black sesame tahini, vanilla extract, water or oat milk and sea salt.
Process
- Blend until the mixture comes together into a thick, slightly sticky dough. If it feels too dry, add a teaspoon more liquid.
Shape the truffles
- Roll the mixture into about 12 bite-sized balls using your hands.
Prepare the coatings
- Place the beetroot powder, matcha powder, and the mixed white and black sesame seeds into three separate small bowls.
Coat the truffles
- Roll some truffles in each coating until evenly covered. This gives you three colourful variations.
Serve or chill
- Enjoy immediately, or chill in the fridge for about 20 minutes to firm up.
Storage:
- Keep in an airtight container in the fridge for up to 5 days, or freeze for up to 1 month.
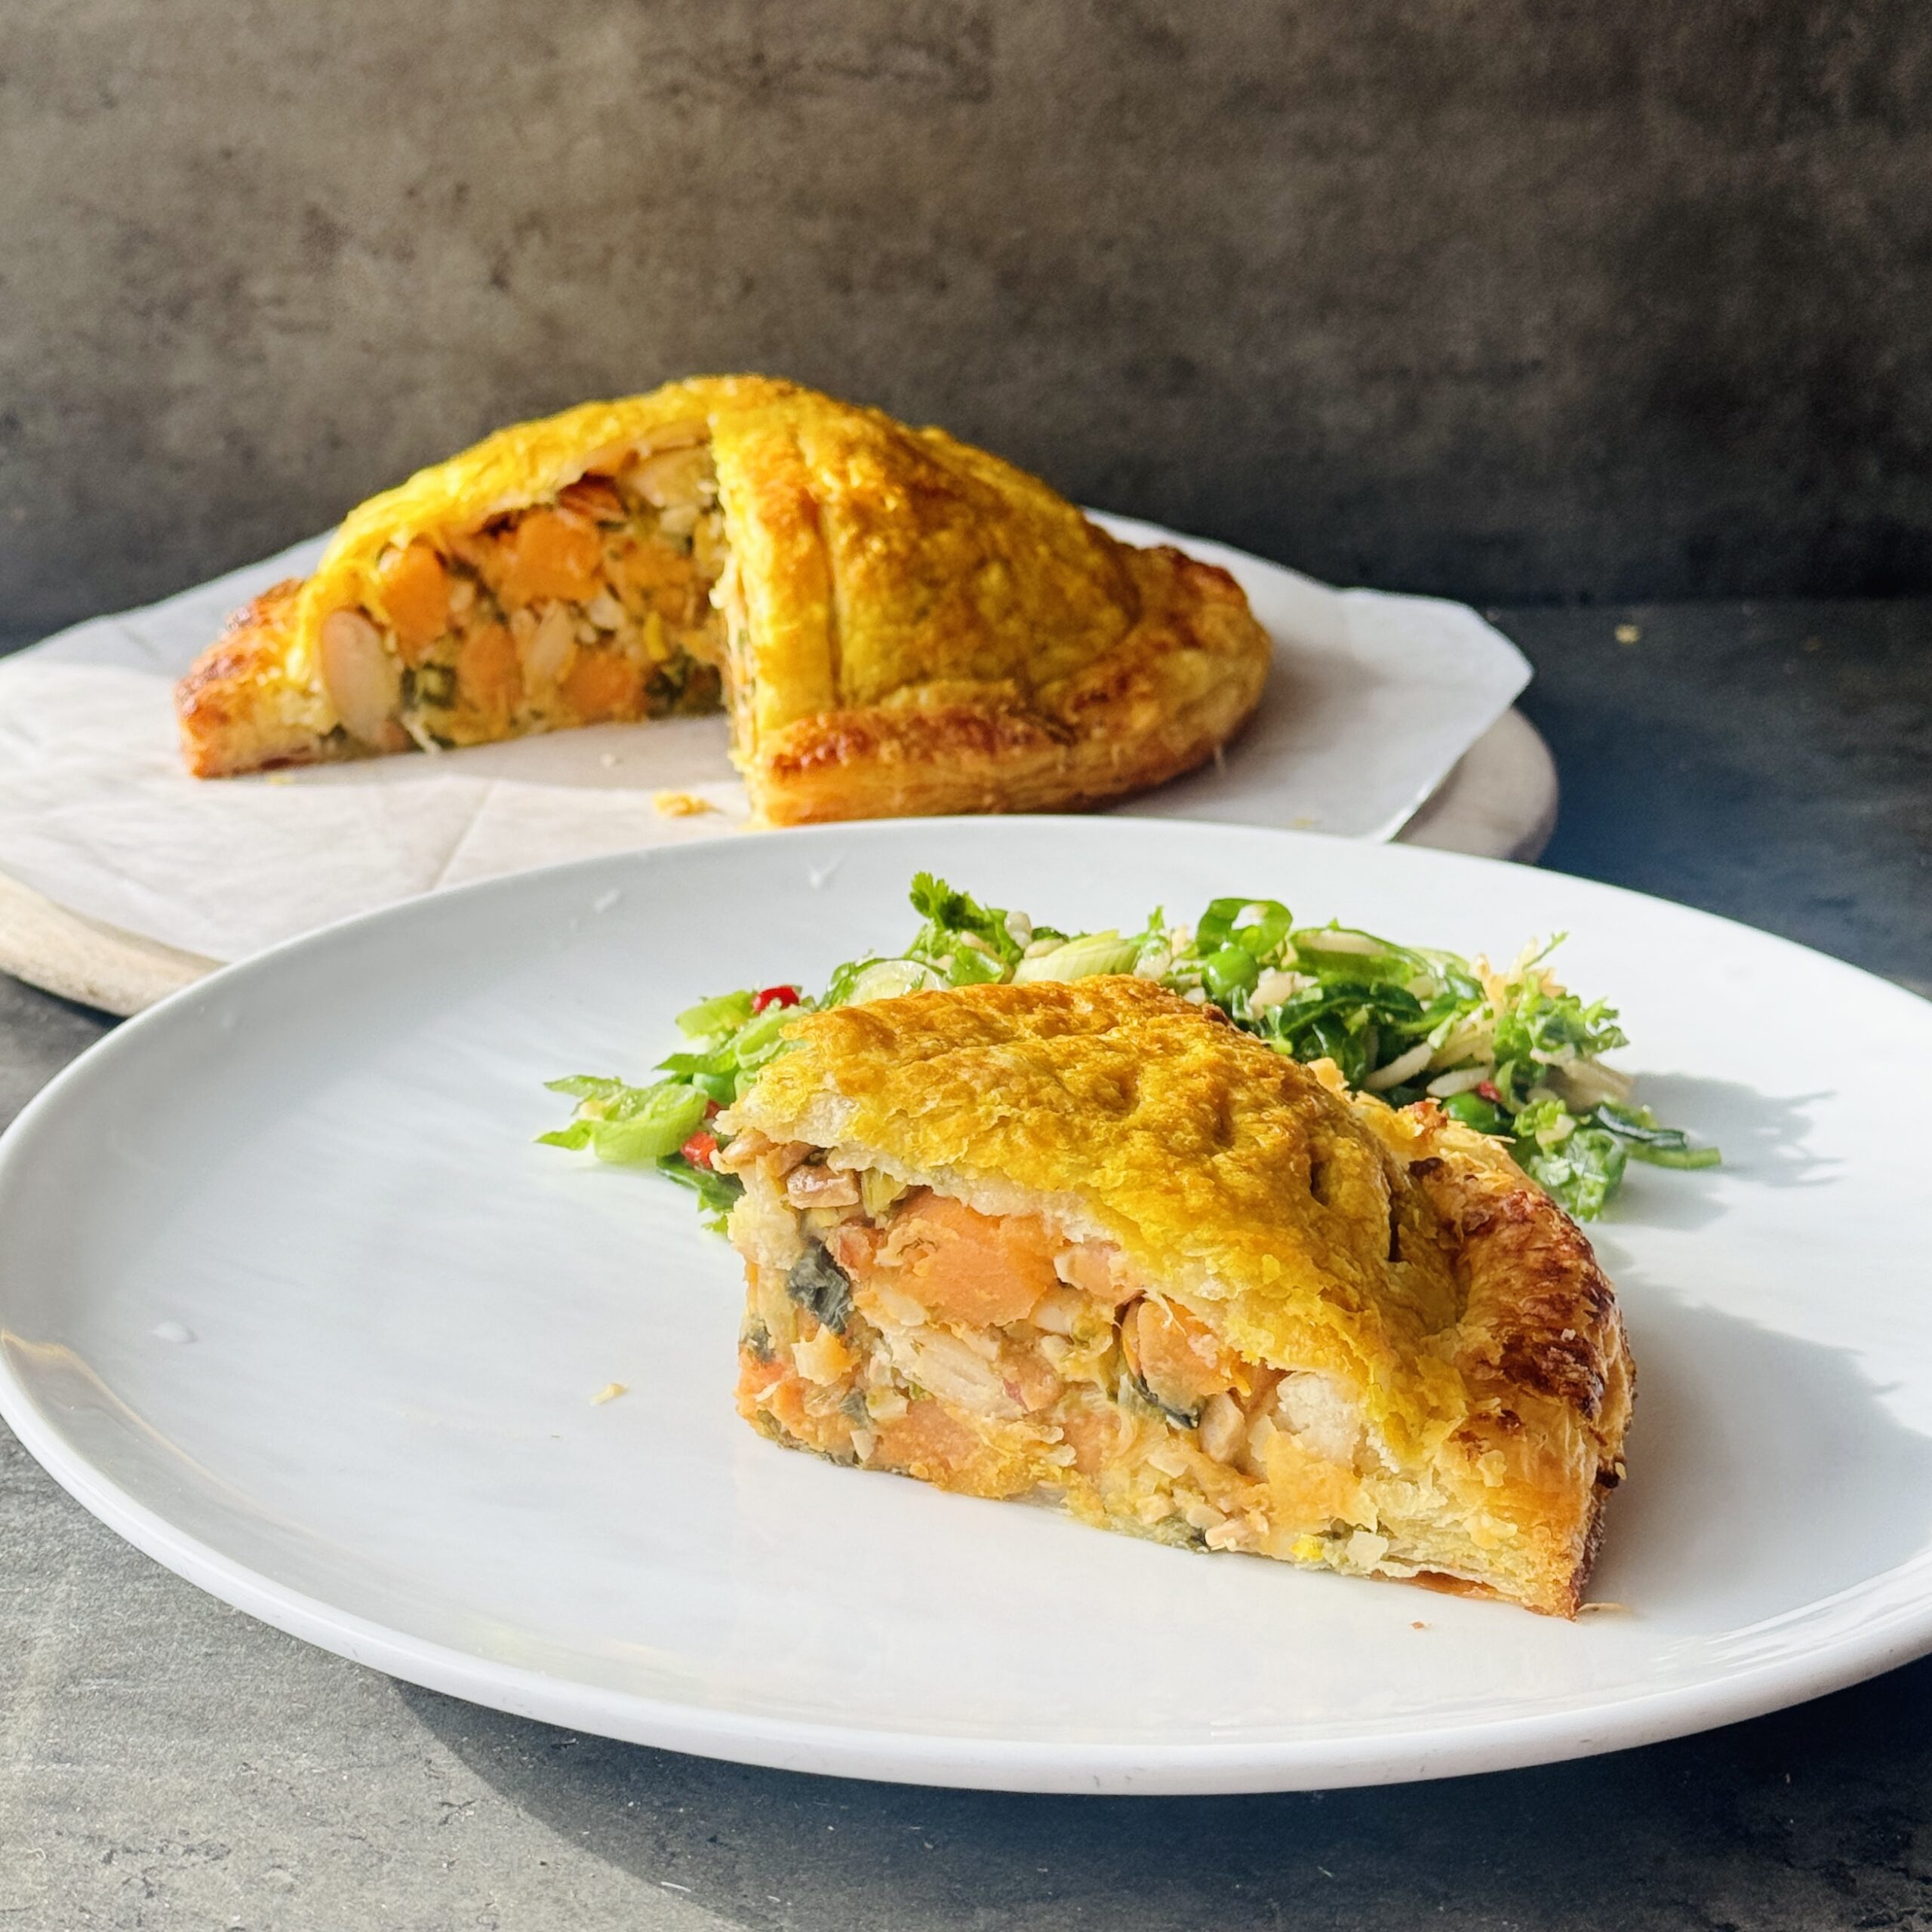
Easter Puff Pastry Pie with Sweet Potato & Leek (Pivithier)
Takes 1 hour
Serves 5
Ingredients
- 3 large leeks
- 750 g sweet potato approx. 4–5 cups, diced
- 2 cloves garlic
- 1 x 400g tin butter beans drained weight ~240g / 1½ cups
- 150 g cashew nuts approx. 1 cup
- 4 tbsp oil approx. 60ml / ¼ cup
- Juice of ½ lemon approx. 1–2 tbsp
- Small bunch fresh coriander or mint 10g / approx. ½ cup chopped
- Pinch of cayenne pepper
- 1½ tsp salt
- ½ tsp ground black pepper
- 2 x 360g sheets puff pastry
For the glaze:
- 2 tbsp oat milk or milk of choice 30ml
- 1 tsp maple syrup
- Pinch of turmeric
- 1 tsp melted plant-based butter or olive oil 5ml
Instructions
Prepare the veg
- Slice the leeks and give them a good wash (they often hide grit between the layers). Peel and finely dice the garlic. Drain and rinse the butter beans. Dice the sweet potatoes into small 1cm cubes. Finely chop the herbs.
Toast the cashews
- Roughly chop the cashew nuts and add to a dry frying pan over medium heat. Toast for 5–7 minutes, stirring regularly, until golden. Remove from the heat and set aside.
Cook the veg
- Heat a large frying pan over high heat and add 2 tbsp of oil. Once hot, add the leeks and sweet potato and cook for 4–5 minutes, stirring regularly. Add the garlic and butter beans, followed by the salt, cayenne and black pepper.
- Cover with a lid and allow to steam for 10 minutes, stirring occasionally. Remove the lid, add the lemon juice, and adjust seasoning to taste.
Add the cashews
- Stir through the toasted cashews. Taste and adjust seasoning if needed. Transfer the mixture to a bowl and allow it to cool completely (this is important before assembling).
Assemble the Pie
- Prepare the pastry
- Unroll the puff pastry sheets and cut two large circles:
- Base: approx 24cm diameter
- Top: approx 28cm diameter (to cover the filling dome)
- Place the smaller circle onto a lined baking tray.
Fill the pie
- Spoon the cooled filling into the centre, forming a mound. Leave a 2–3cm border around the edge. Lightly dampen the border with water or milk.
Seal and shape
- Place the larger pastry circle over the top. Press the edges firmly to seal, crimping with a fork or using the back of a knife for a fluted finish.
- Score curved lines from the centre outwards using a sharp knife (don’t cut through), then make a small hole in the centre to allow steam to escape.
Glaze and bake
- Mix the oat milk, maple syrup, turmeric and melted butter/oil. Brush generously over the pastry.
- Bake in a preheated oven at 200°C (fan 180°C) for 25–30 minutes, until puffed and deeply golden. If it browns too quickly, loosely cover with foil.
Notes
Pro tip
Let the pie rest for 5–10 minutes before slicing—this helps the filling set so you get clean, satisfying wedges.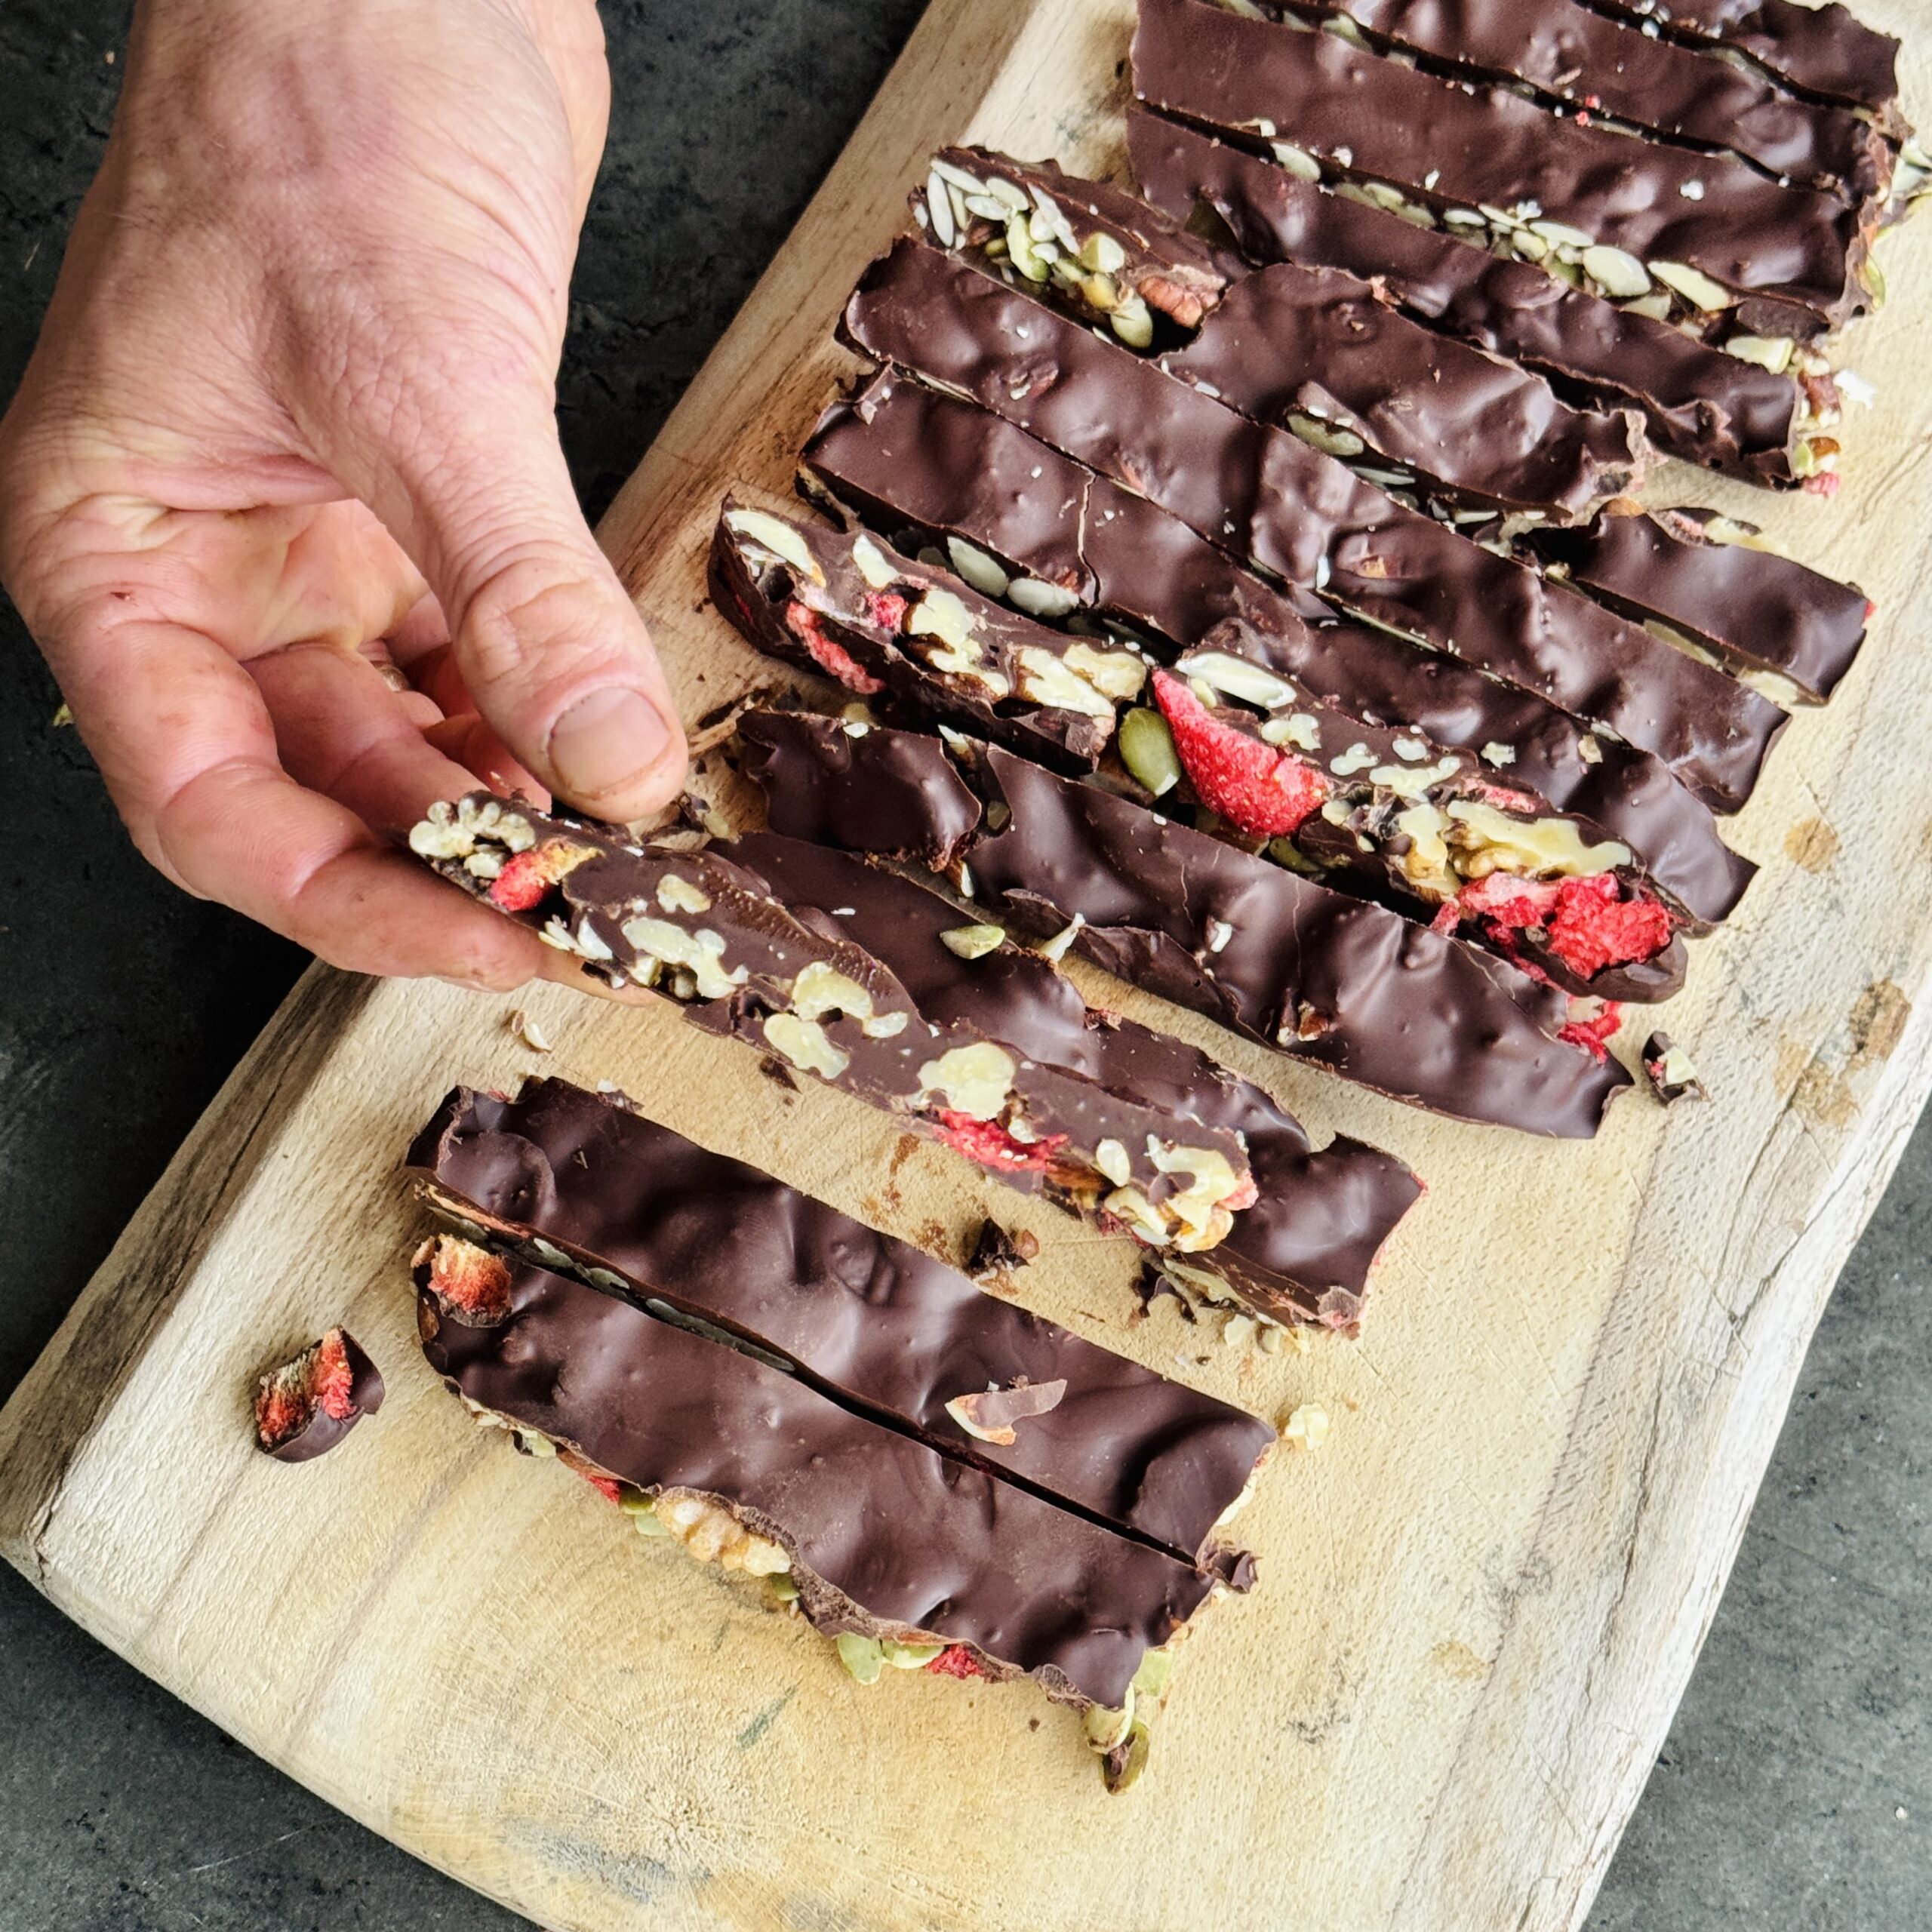
Air Fryer Chocolate Nut Bark
Takes 30 minutes
Serves 8
Ingredients
- 250 g mixed nuts and seeds e.g. almonds, cashews, peanuts, pumpkin seeds, sunflower seeds
- 160 g dark chocolate 2 × 80g bars
Instructions
Prepare the base
- Line a small air fryer tray or basket with parchment paper.
Add the nuts
- Spread the mixed nuts and seeds in an even layer on the parchment.
Add the chocolate
- Break the dark chocolate into pieces and place them evenly over the nuts.
Air fry
- Cook at 180°C for 5 minutes, until the chocolate melts over the nuts.
Set the bark
- Carefully remove from the air fryer and allow it to cool and set completely (you can place it in the fridge to speed this up).
Break into pieces
- Once firm, break or chop into bark-style pieces.
Storage
- Store in an airtight container in the fridge for up to 1 week.
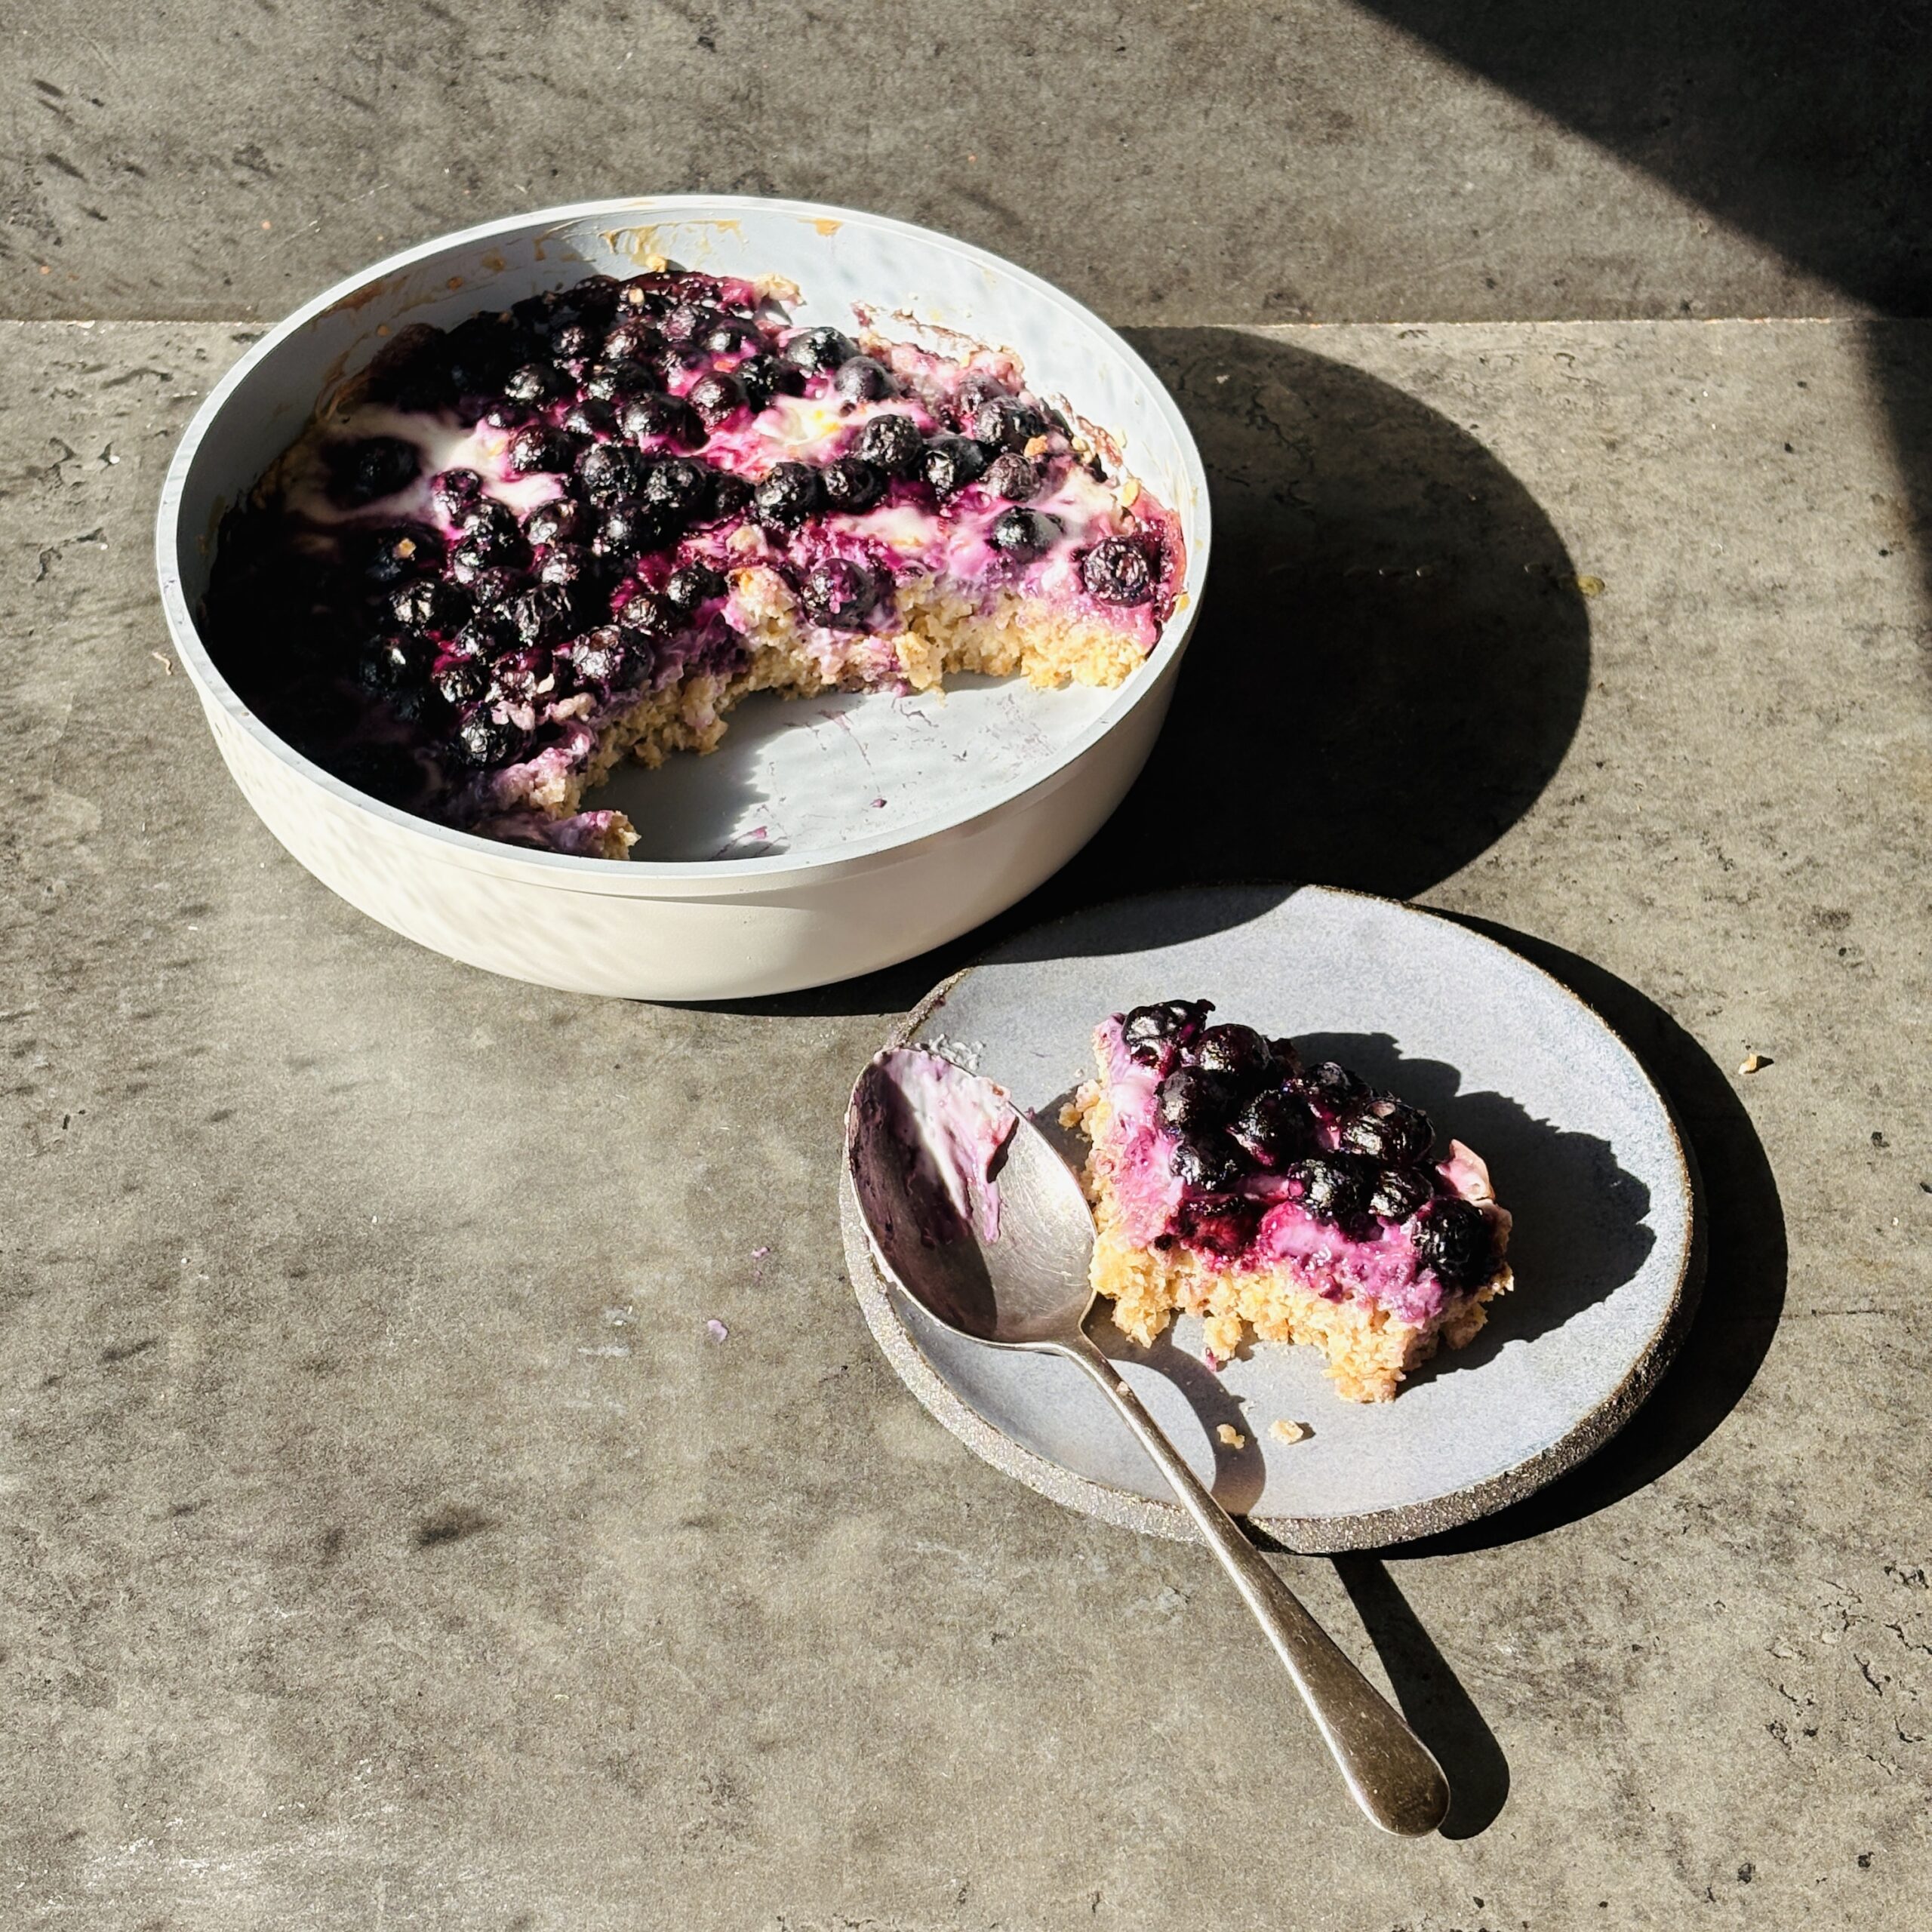
Plant-Based Blueberry Cheesecake Baked Oats
Takes 25 minutes
Serves 3
Ingredients
For the base oat mixture:
- 150 g rolled oats
- 1 tsp baking powder
- 1 tsp vanilla extract
- 2 tbsp maple syrup or your preferred sweetener
- 1/2 tsp cinnamon optional
- Pinch of salt
- 180 ml plant-based yogurt almond, oat, soy, etc.
- 50 ml plant based milk
For the cheesecake swirl:
- 120 ml plant-based yogurt unsweetened, creamy works best
- 2 tbsp maple syrup
- 1 tsp vanilla extract
- 1 tsp lemon juice
For the blueberry layer:
- 120 g fresh or frozen blueberries
- 1 –2 tsp maple syrup optional, depending on sweetness of berries
Instructions
Preheat oven:
- Preheat to 180°C (350°F). Lightly grease a round skillet (20–23 cm / 8–9 inch) with coconut oil or non-stick spray.
Prepare oat base:
- In a bowl, mix the rolled oats, baking powder, cinnamon, and salt.
- Add plant-based milk, maple syrup, and vanilla extract. Stir until fully combined. The mixture should be thick but scoopable.
Prepare cheesecake swirl:
- In a small bowl, whisk together plant-based yogurt, maple syrup, vanilla, and lemon juice until smooth.
Assemble in skillet:
- Spread half of the oat mixture evenly into the skillet.
- Drop spoonfuls of the yogurt mixture over the oats.
- Scatter half of the blueberries on top.
- Add the remaining oat mixture and gently dollop the rest of the yogurt mixture on top.
- Sprinkle remaining blueberries over the top.
- Use a knife or skewer to lightly swirl the yogurt into the oats for a marbled cheesecake effect.
Bake:
- Bake for 25–30 minutes, until the oats are set in the middle and slightly golden on top. If using frozen blueberries, you may need an extra 3–5 minutes.
Cool & serve:
- Let it cool slightly (10–15 mins) before serving. It’s lovely warm, or you can chill for a creamier texture. Serve with extra plant-based yogurt and a drizzle of maple syrup if desired.
Tips & Variations
- Add crunch: Sprinkle chopped nuts or granola on top before baking.
- Flavor boost: Add lemon zest to the yogurt swirl for extra cheesecake tang.
- Extra creamy: Stir 1–2 tbsp of almond butter or cashew cream into the oat batter.
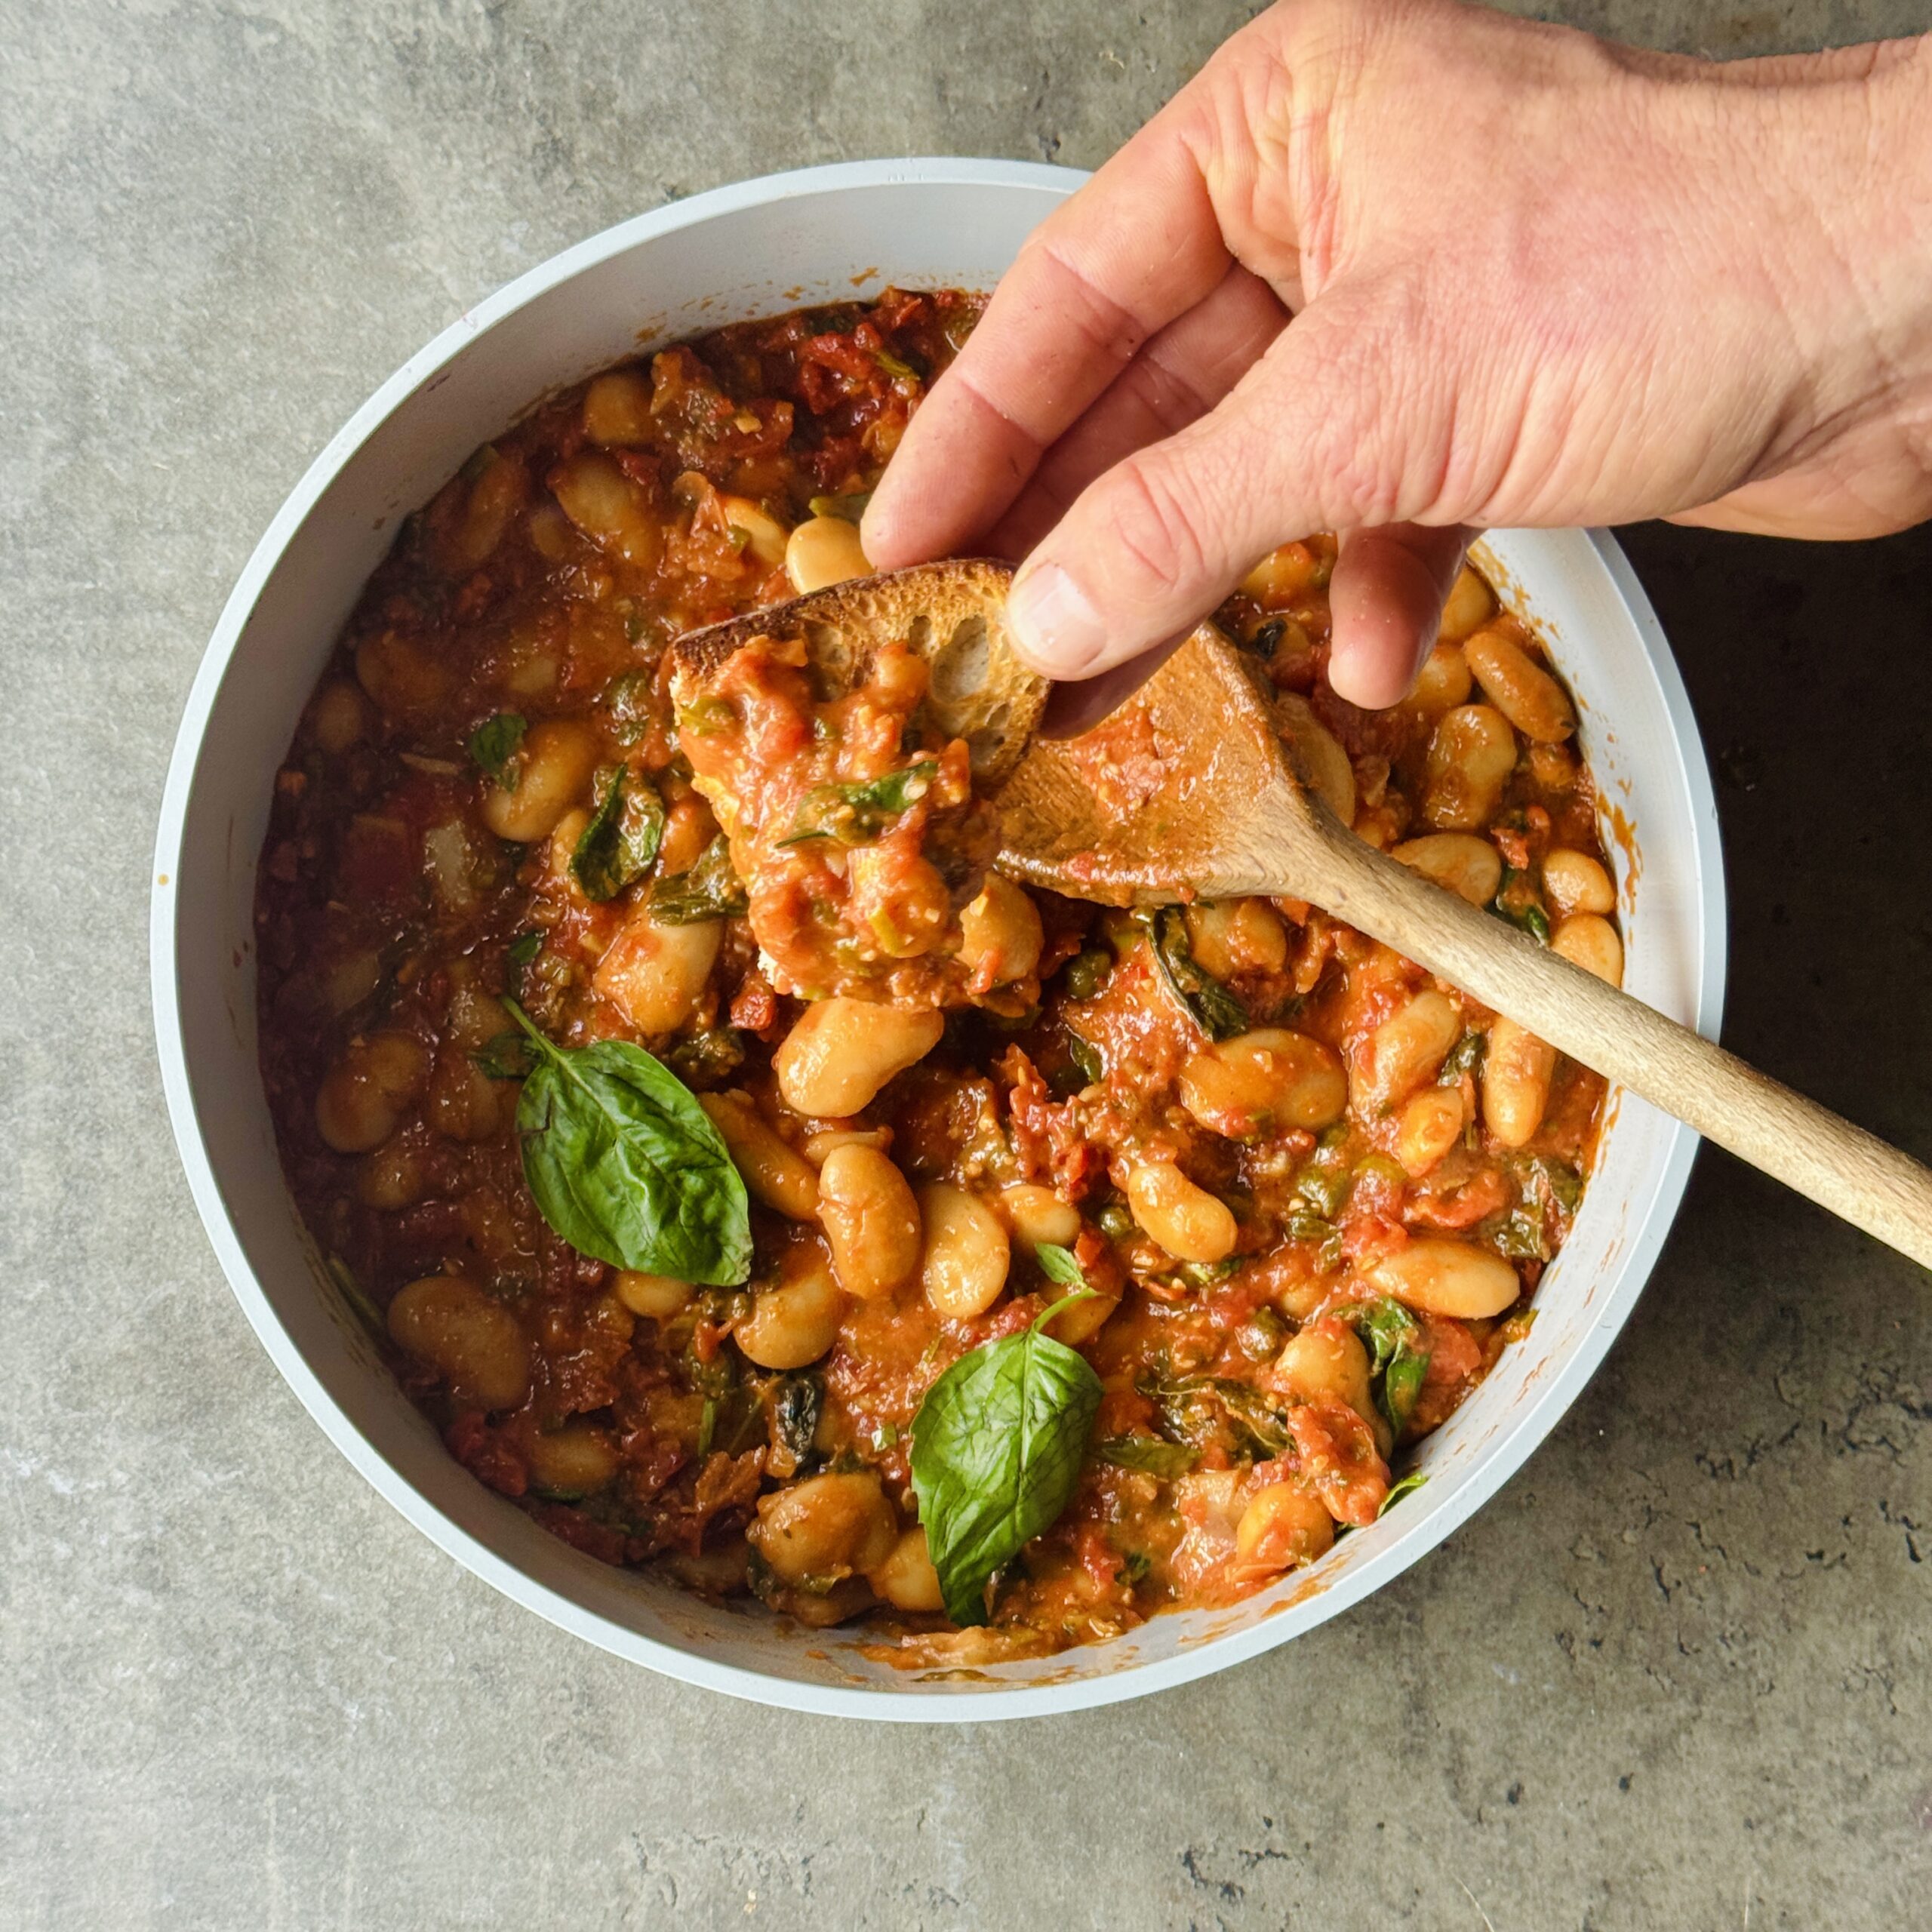
Tuscan One-Pan Bean Bake with Sun-Dried Tomatoes & Basil
Takes 40 minutes
Serves 4
Ingredients
- 2 tbsp olive oil
- 1 large onion
- 2 cloves garlic
- 2 tins 500g drained butter beans or cannellini beans, drained and rinsed
- 120 g sun-dried tomatoes (dried no oil)
- 2 tbsp The Happy Pear Sundried tomato Pesto
- 1 tsp dried oregano
- 1/2 tsp smoked paprika
- ½ tsp chilli flakes optional
- 2 tbsp capers optional
- 1 tin 400g chopped tomatoes
- ½ tin of coconut milk 200ml
- Zest of 1 lemon
- Small handful fresh basil leaves torn
To serve (optional)
- Toasted pine nuts or almonds
- Extra fresh basil
- A squeeze of lemon juice
- Crusty sourdough or focaccia
Instructions
- Preheat the oven to 200°C (180°C fan). Peel and finely dice the onion and garlic, drain and rinse the beans and finely slice the sun dried tomatoes. Roughly chop the fresh basil.
Cook the aromatics.
- Heat the olive oil in a large ovenproof pan or shallow casserole over medium heat. Add the diced onion with a pinch of salt and cook for 5–6 minutes until soft and lightly golden. Stir in the garlic and cook for another minute until fragrant.
Add the rest.
- Add the butter beans, sun-dried tomatoes, sundried tomato pesto, oregano, smoked paprika, chilli flakes (if using), capers, chopped tomatoes, coconut milk and lemon zest. Stir well to combine.
Add the basil.
- Fold in most of the basil.
Bake.
- Transfer the pan to the oven and bake for 15-20 minutes, until the sauce has thickened slightly and smells wonderful!
Finish and serve.
- Remove from the oven, stir through the remaining basil and add a squeeze of lemon juice. Taste an adjust the seasoning to your liking by adding more salt, ground pepper or lemon juice. Serve with some fresh sourdough for a beautiful hearty meal!
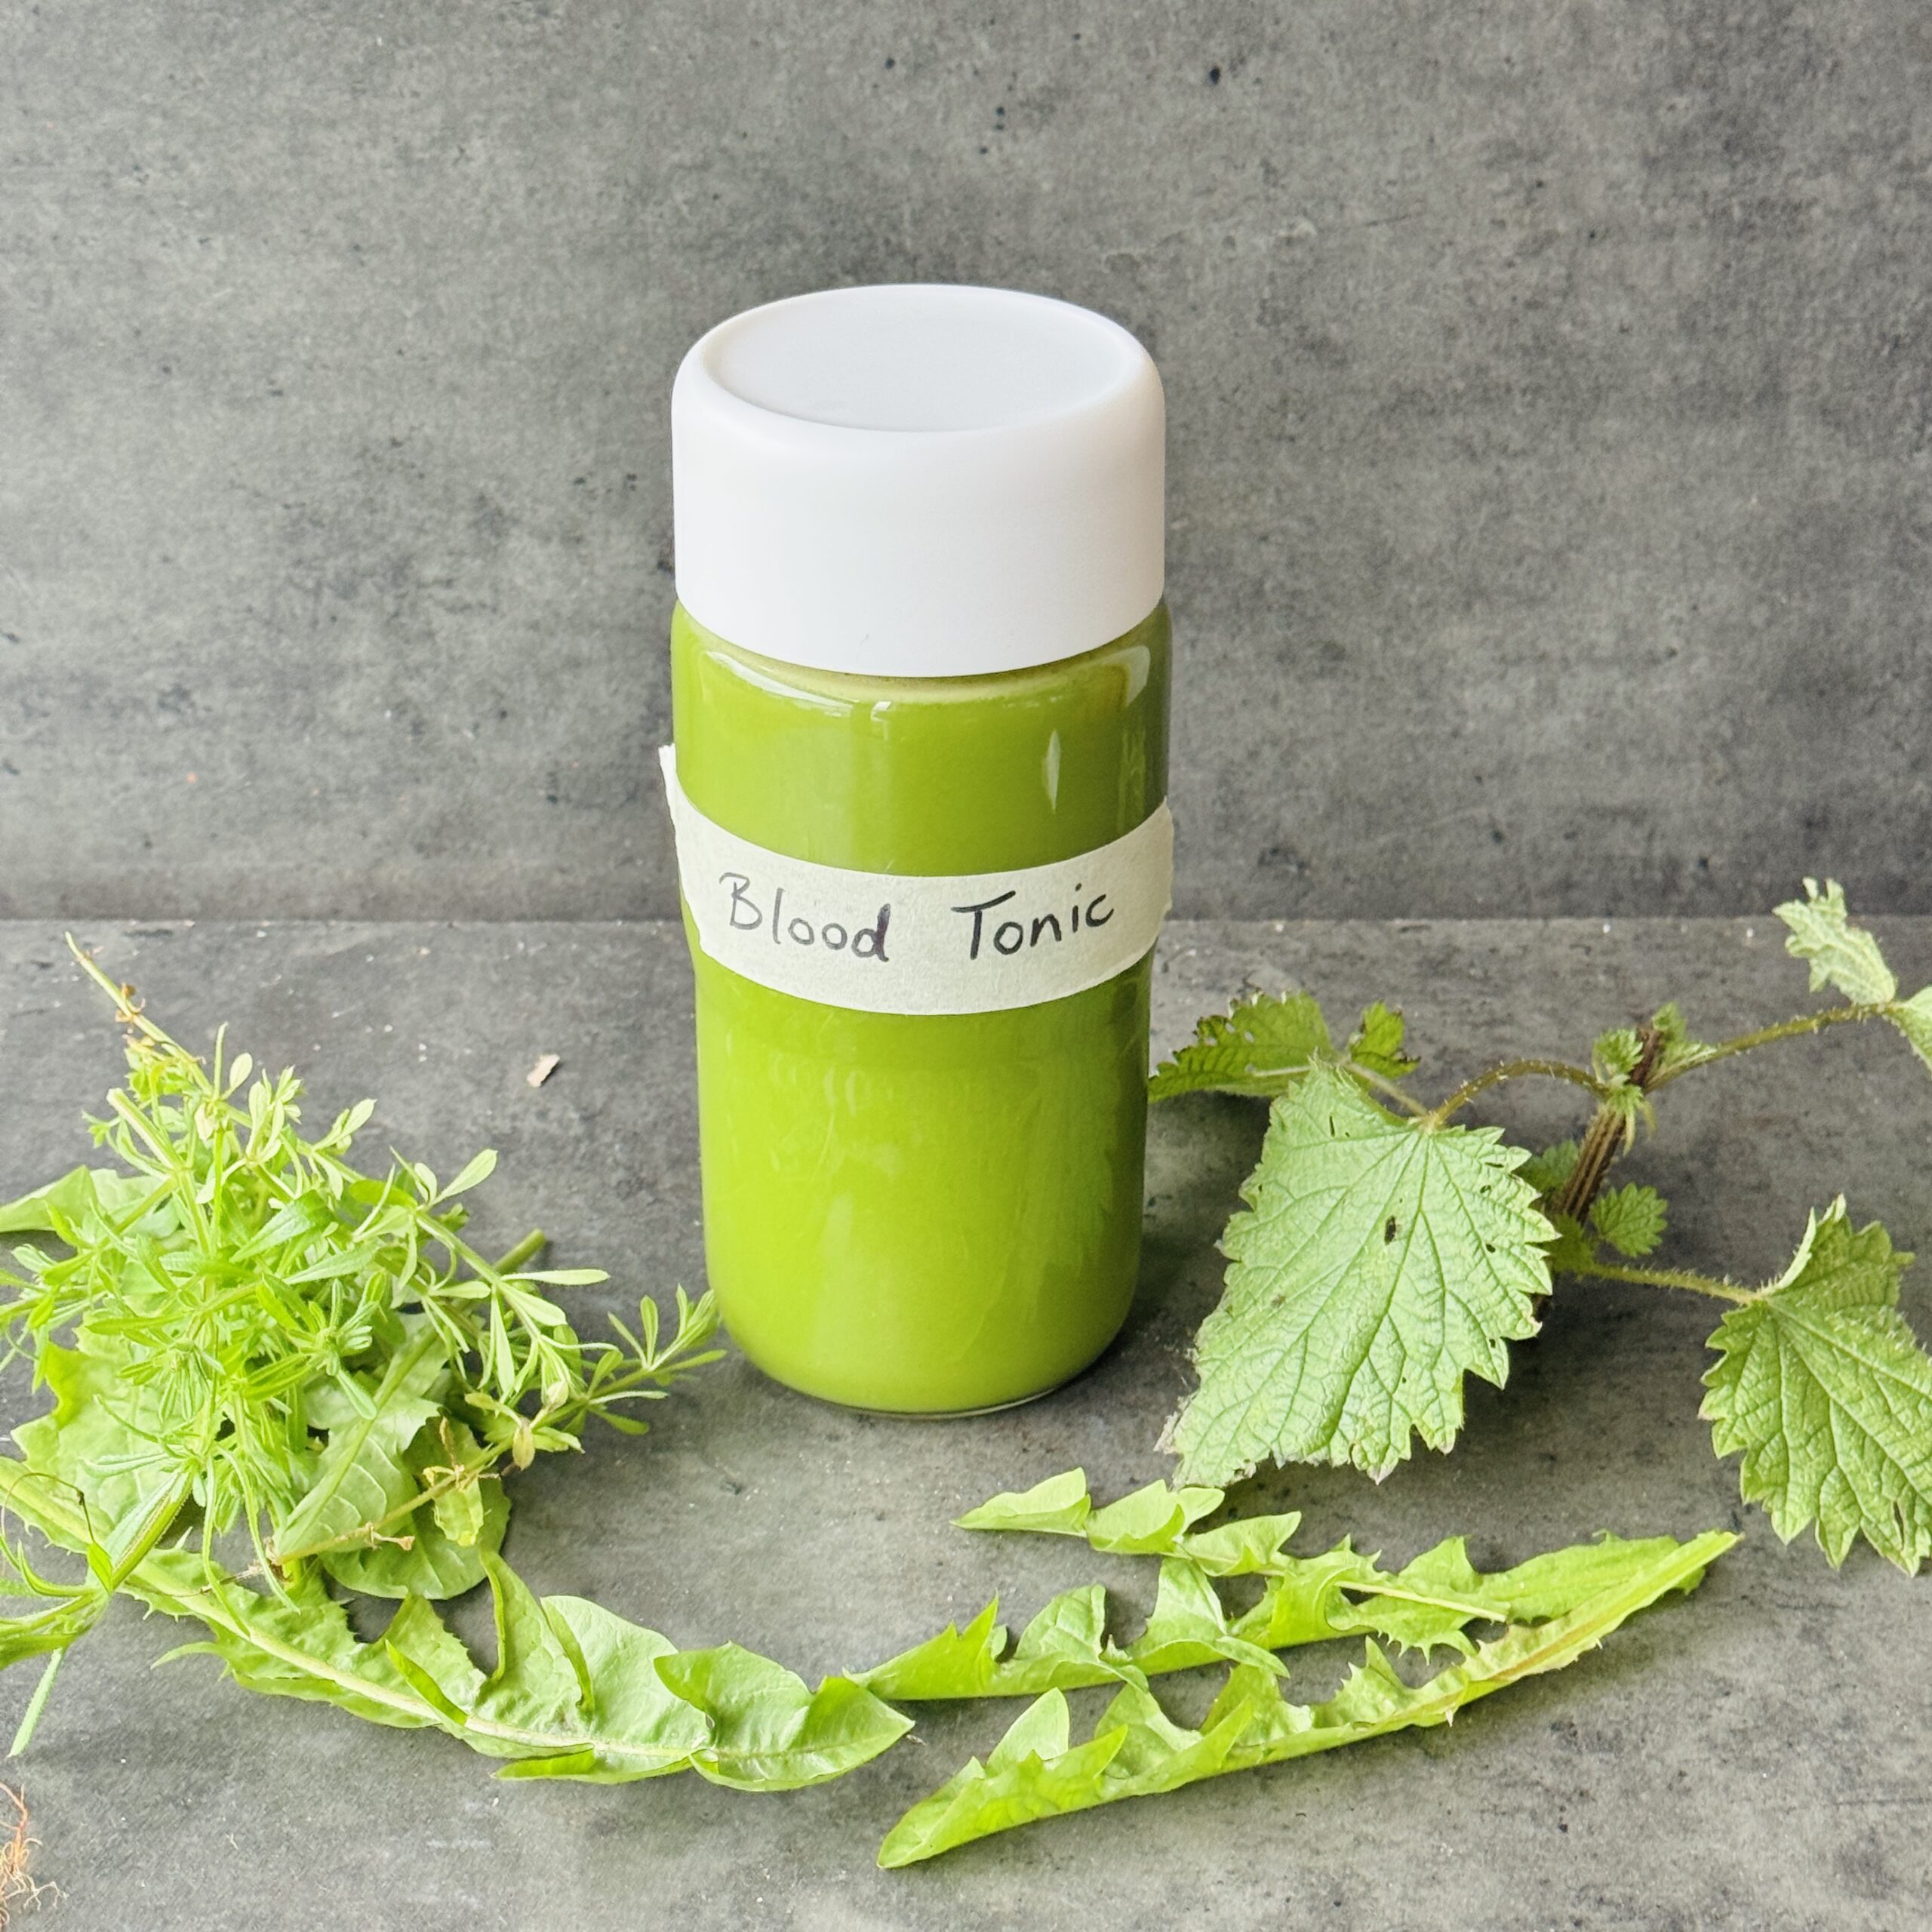
Spring Detox Juice
Takes 10 minutes
Serves 2
Ingredients
- 2 crisp apples Granny Smith or Gala
- 1 medium cucumber
- 1 small fennel bulb including fronds if you like
- 1 cup fresh nettles use gloves to handle!
- 1 cup fresh cleavers or other mild foraged herbs
- Juice of ½ lemon optional
- ½ cup filtered water optional, if you prefer a thinner juice
Instructions
Prepare the ingredients:
- Wash all produce thoroughly.
- Core the apples and cut into pieces.
- Slice the cucumber and fennel into chunks that fit your juicer.
- Lightly rinse the nettles and cleavers.
Juice:
- Juice the fennel, cucumber, and apples first.
- Add the nettles and cleavers last to preserve their delicate nutrients.
- Stir in ½ cup filtered water if desired for a thinner consistency.
Brighten and serve:
- Squeeze in the lemon juice and mix well.
- Serve immediately over ice and garnish with a fennel frond or small sprig of cleavers.
Tips:
- Always handle nettles with gloves and rinse well.
- Cleavers are a gentle lymphatic tonic, great for spring detox.
- For extra flavor, add mild wild herbs like dandelion leaves, chickweed, or wild mint.
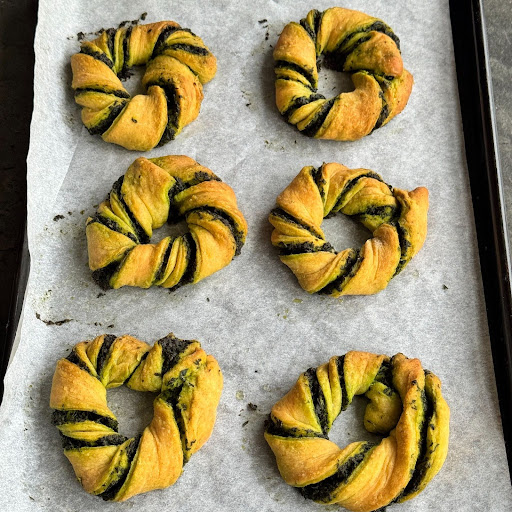
Wild Garlic Bread Swirls
Takes 30 minutes
Serves 12
Ingredients
- 300 g self-raising flour 2 cups
- ½ tsp salt
- 70 g cold vegan butter cut into small cubes (5 tbsp / ~⅓ cup)
- 150 ml water ⅔ cup
Wild Garlic Butter
- 100 g vegan butter 7 tbsp / ~½ cup
- 100 g wild garlic about 4 packed cups
Instructions
- Preheat the oven to 180°C (fan 160°C) and line 2 baking trays with parchment paper.
- Blanch the wild garlic: Bring about 100ml water with 1 tsp salt to a boil in a small saucepan. Add the wild garlic and blanch for 3 minutes until wilted. Drain, rinse under cold water, and squeeze out any excess liquid. Blend with the butter in a food processor until you have a smooth, vibrant green garlic butter.
- Make the dough: In a large bowl mix the flour and salt. Add the cold butter and rub it into the flour with your fingertips until the mixture resembles coarse breadcrumbs. Add the water and mix until it forms a soft dough, then knead lightly for 3–4 minutes until smooth.
- Shape the swirls: Roll the dough on a floured surface into a large rectangle (about 50cm x 30cm). Spread the wild garlic butter evenly over the dough. Fold the dough in half lengthwise, then cut into 12 strips (about 3cm wide). Twist each strip and coil it into a swirl, placing them on the lined trays.
- Bake: Brush the tops with a little oil or melted butter and bake for about 25 minutes, until golden. Sprinkle with a little flaky salt and enjoy warm.
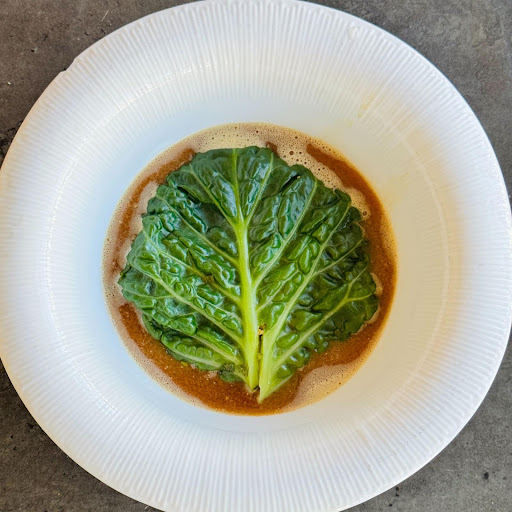
Stuffed Cabbage with Gochujang Tofu in Miso Broth
Takes 30 minutes
Serves 3
Ingredients
Gochujang Tofu Stuffed Cabbage
- 250 g cooked rice
- 250 g firm tofu
- 3 tbsp gochujang OR 1 tbsp tomato puree, ½ tsp smoked paprika, ½ tsp chilli powder, 1 tbsp tamari, 1 tbsp maple syrup, pinch salt
- 2 tbsp tamari
- Juice ½ lemon
- 1 tbsp Sesame oil
- ½ thumb sized piece of ginger
- 2 scallions
- ½ red chilli
- 1 savoy cabbage
Miso Broth
- 2-3 tbsp miso paste white or red, depending on preference
- 2 tsp dried seaweed powder or a few pieces of dried wakame
- 2-3 slices of fresh ginger
- 1 tbsp maples syrup
- 1 tbsp tamari/ soy sauce
- 1 Litre veg stock
- Salt and pepper to taste
Instructions
- Crumble up the tofu, mix the ingredients together for the paste if you dont have guacujang. Finely slice the scallions or green onions. Finely dice the ginger and red chilli
Blanch Cabbage Leaves:
- Fill a saucepan with just boiled water and a pinch of salt.
- Blanch cabbage leaves for 3-4 minutes, then remove and rinse in cold water to stop them from cooking further.
Prepare Filling:
- Heat a wide-bottomed frying pan over high heat.
- Add 1 tbsp sesame oil, followed by the crumbled tofu, rice and pinch of salt. Cook for 4-5 minutes, stirring regularly.
- Once tofu starts to turn golden, add the tamari, grated ginger, scallions, chilli, and guacujang or the dressing. Mix well and cook for an additional 2-3 minutes, stirring regularly. Juice in ½ the lemon and taste and adjust the seasoning to your liking. Transfer this filling to a bowl and rinse the frying pan quickly.
Make the quick fire miso
- In blender add all the ingredients for the miso and blend till smooth. Taste and adjust the seasoning to your liking. Heat up on the stove till gently boiling.
Assemble Rolls:
- Lay out 1 cabbage leaf and carefully cut the thick part of the stem as its often too tough to eat. place approximately 2 tbsp of the tofu and mushroom filling in the centre.
- Carefully roll up the cabbage, folding in the sides as you go to create a mini burrito-like shape. Repeat with remaining cabbage leaves and filling.
Serve:
- Add 1-2 cabbage dumplings to a bowl and carefully pour in the warm miso
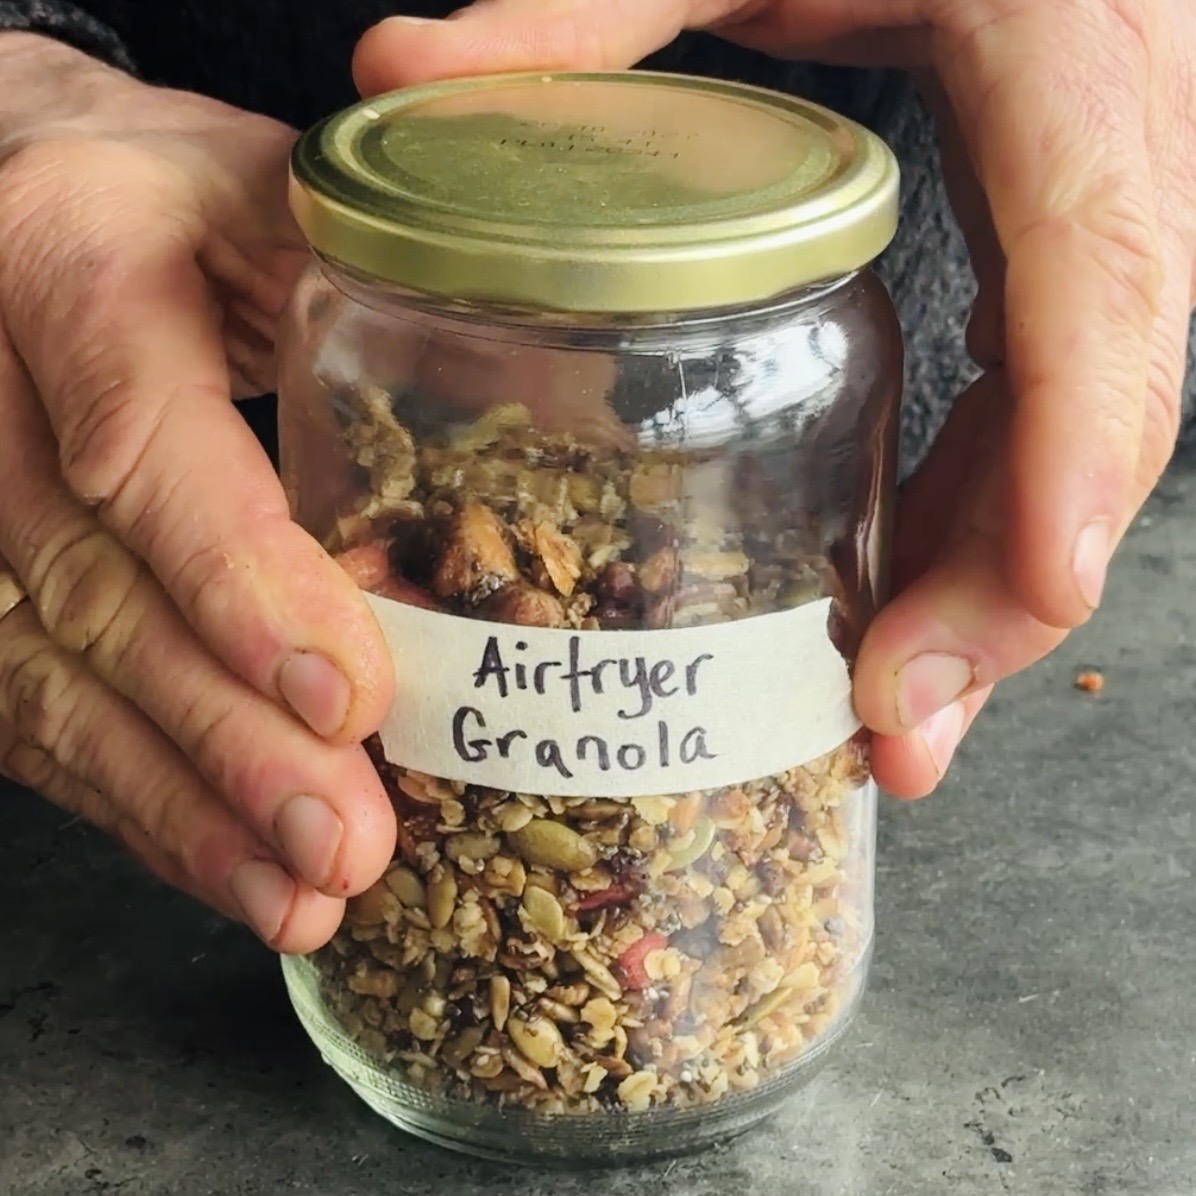
Airfryer Granola
Takes 30 minutes
Serves 8
Ingredients
- 250 g rolled oats 2 ½ cups
- 50 g mixed nuts e.g., walnuts, flaked almonds, pecans (½ cup)
- 50 g mixed seeds e.g., sunflower, pumpkin, chia seeds (½ cup)
- 50 ml maple syrup 3 tbsp + 1 tsp
- 50 g coconut oil 3 ½ tbsp
- ½ tsp ground cinnamon
- 50 g dried fruit of choice ⅓ cup
Instructions
Preheat the airfryer
- Preheat to 200°C and line the basket with parchment paper.
Mix the granola
- In a bowl, combine the oats, nuts, seeds, maple syrup, coconut oil and ground cinnamon. Mix until everything is evenly coated.
Airfry
- Spread the mixture evenly in the lined airfryer basket. Cook for 10 minutes, then remove and stir well to ensure even toasting.
Finish baking
- Return to the airfryer and cook for a further 10 minutes until golden and fragrant.
Cool and add fruit
- Transfer to a bowl to cool completely. Once cooled, stir in the dried fruit.
Serve
- Enjoy with yoghurt, milk, or as a snack on its own.
Storage:
- Keep in an airtight container at room temperature for up to 2 weeks, or freeze for up to 1 month.
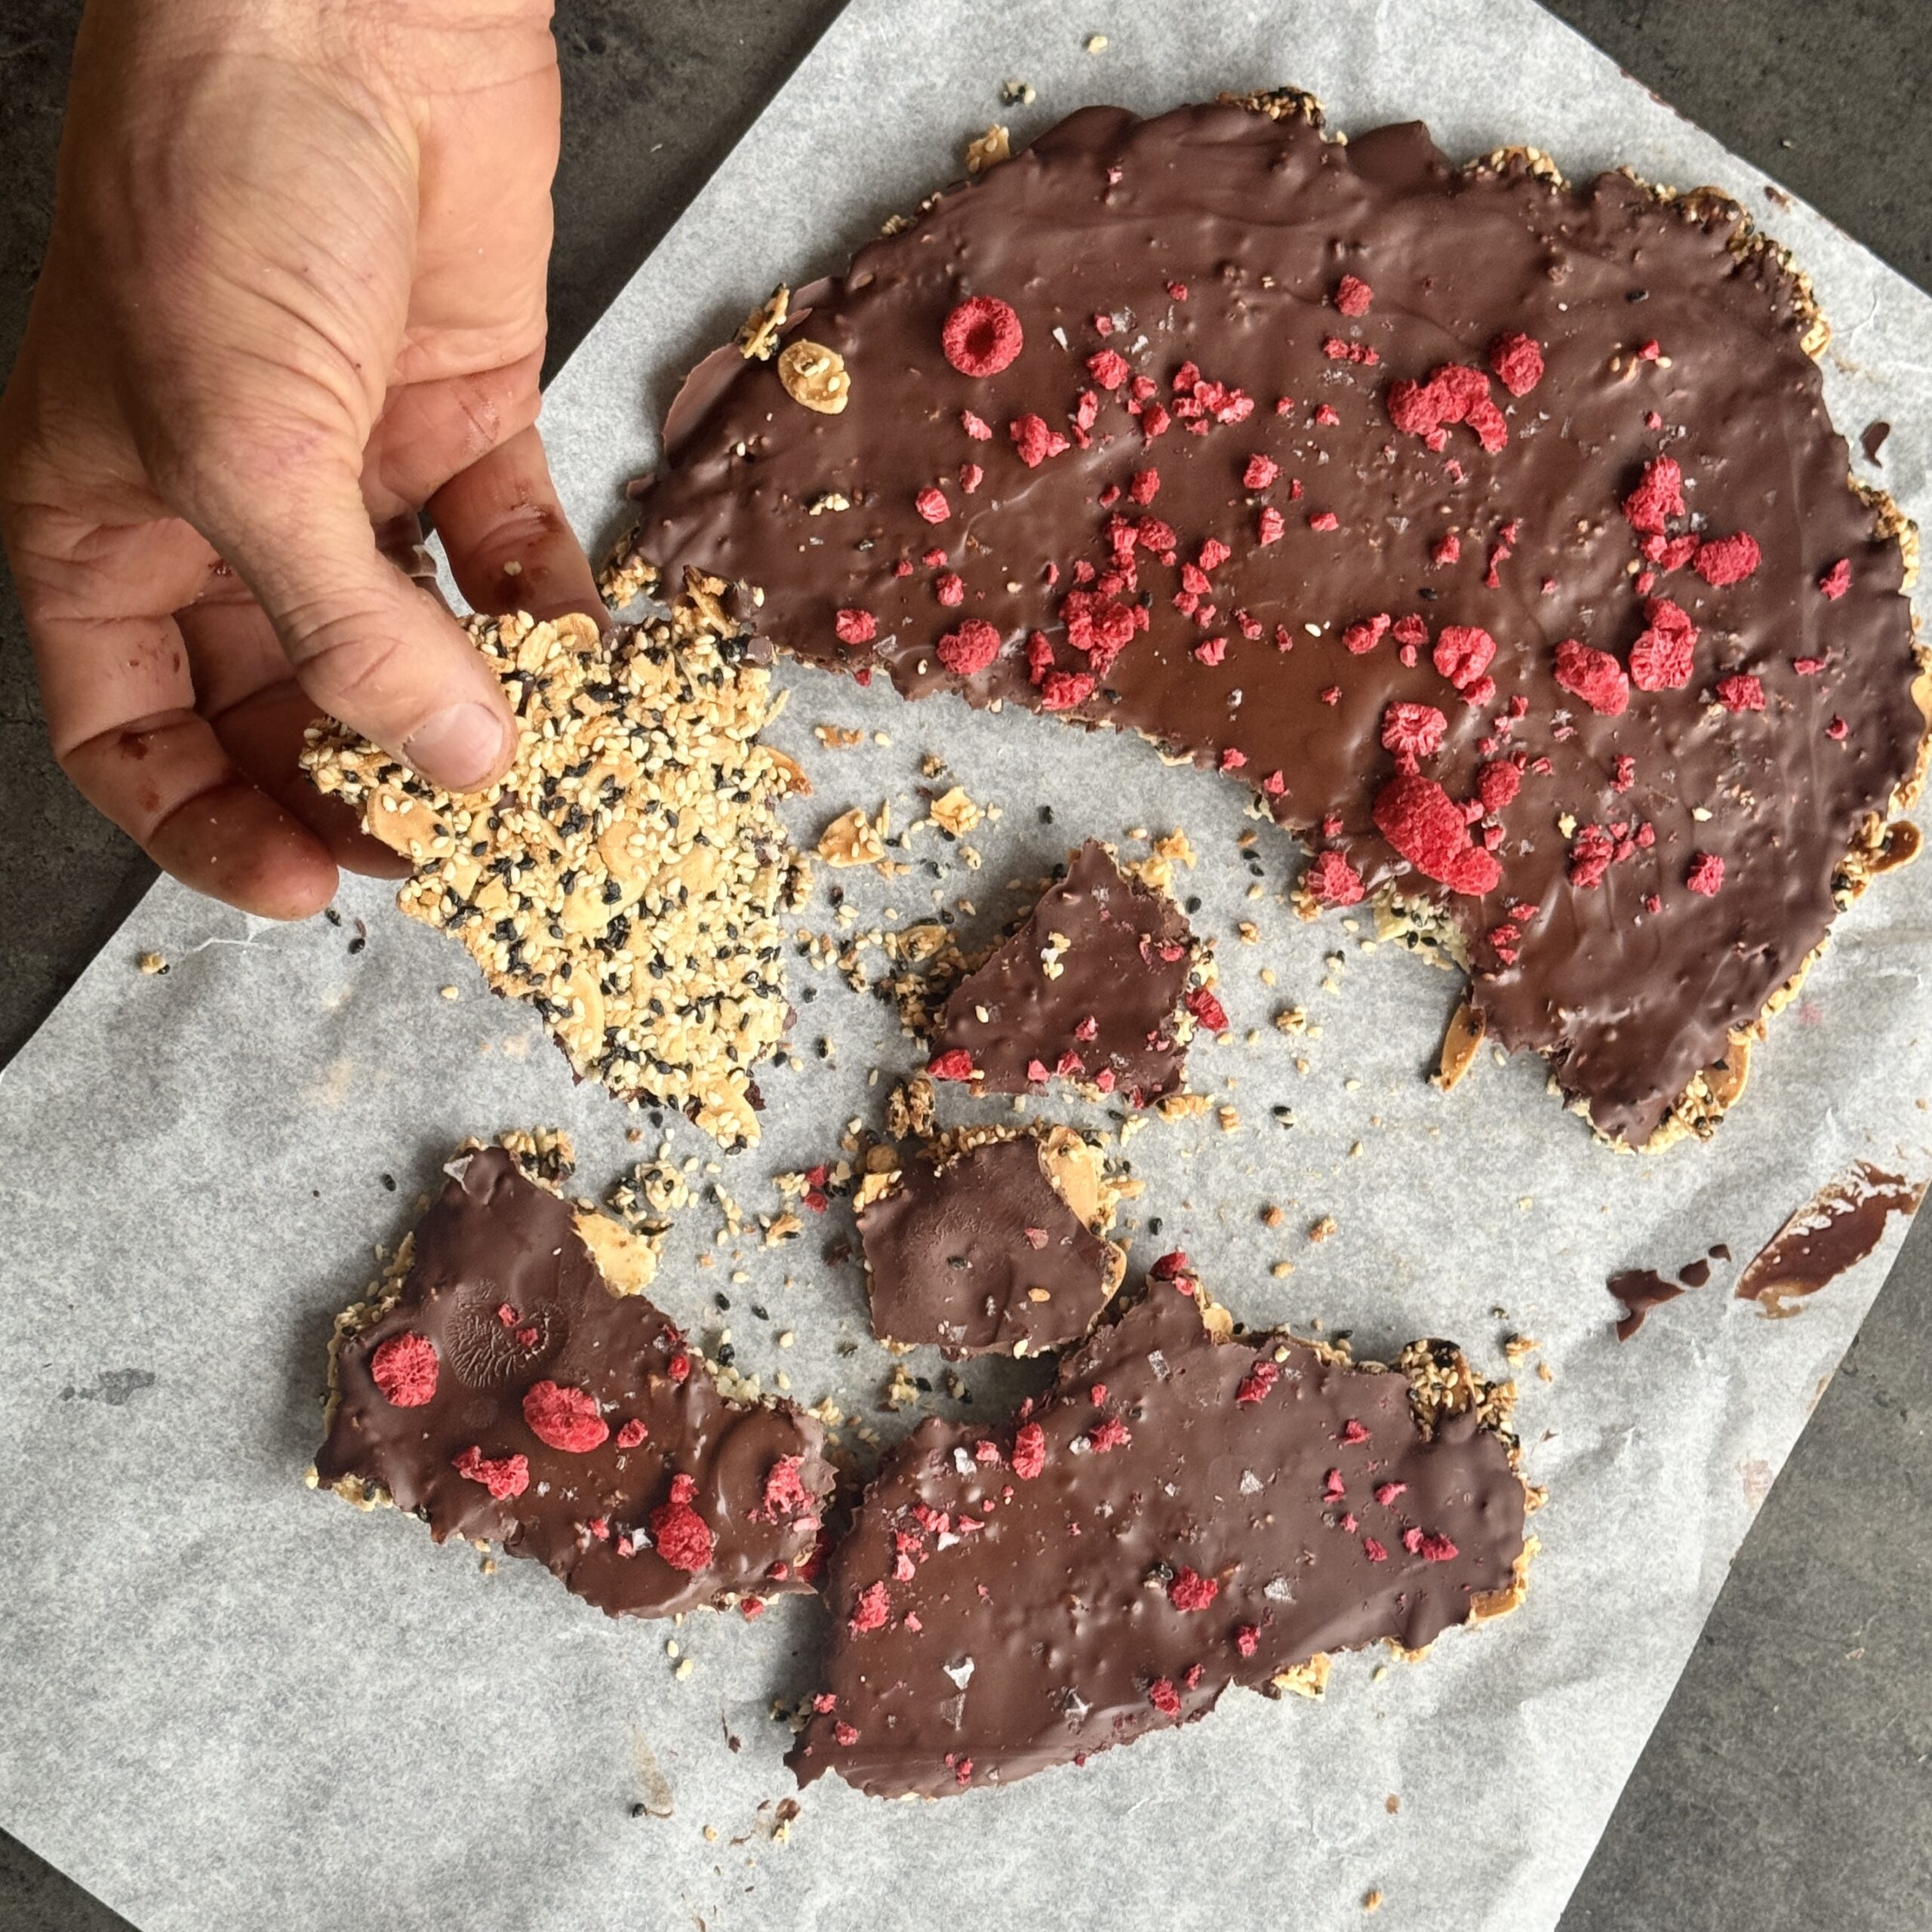
Chocolate Sesame Brittle
Takes 20 minutes
Serves 16
Ingredients
- 100 g sesame seeds about ⅔ cup – a mix of white and black if possible
- 60 g flaked almonds about ⅔ cup (or other chopped nuts or seeds)
- 40 g desiccated coconut about ½ cup
- Pinch of salt
- 70 ml maple syrup about 4 tbsp / ¼ cup
- 2 tbsp tahini sesame paste – extra calcium!
- 150 g dark chocolate about 1 cup chopped
Instructions
- Preheat the oven to 180°C and line a baking tray with baking parchment.
- In a large bowl, mix together the sesame seeds, flaked almonds, desiccated coconut and a pinch of salt until evenly combined.
- Add the tahini and maple syrup, mixing well until everything is evenly coated.
- Tip the mixture onto the lined baking tray and press it down firmly so it spreads evenly to about ½ cm thick.
- Bake for around 15 minutes, until golden brown. Remove from the oven and leave to cool completely.
- Melt the dark chocolate using a bain-marie or microwave.
- Pour the melted chocolate over the brittle and spread it out to create an even layer. Sprinkle with a pinch of sea salt if you like, then leave to set.
- Once firm, break into shards for a delicious, healthier snack.
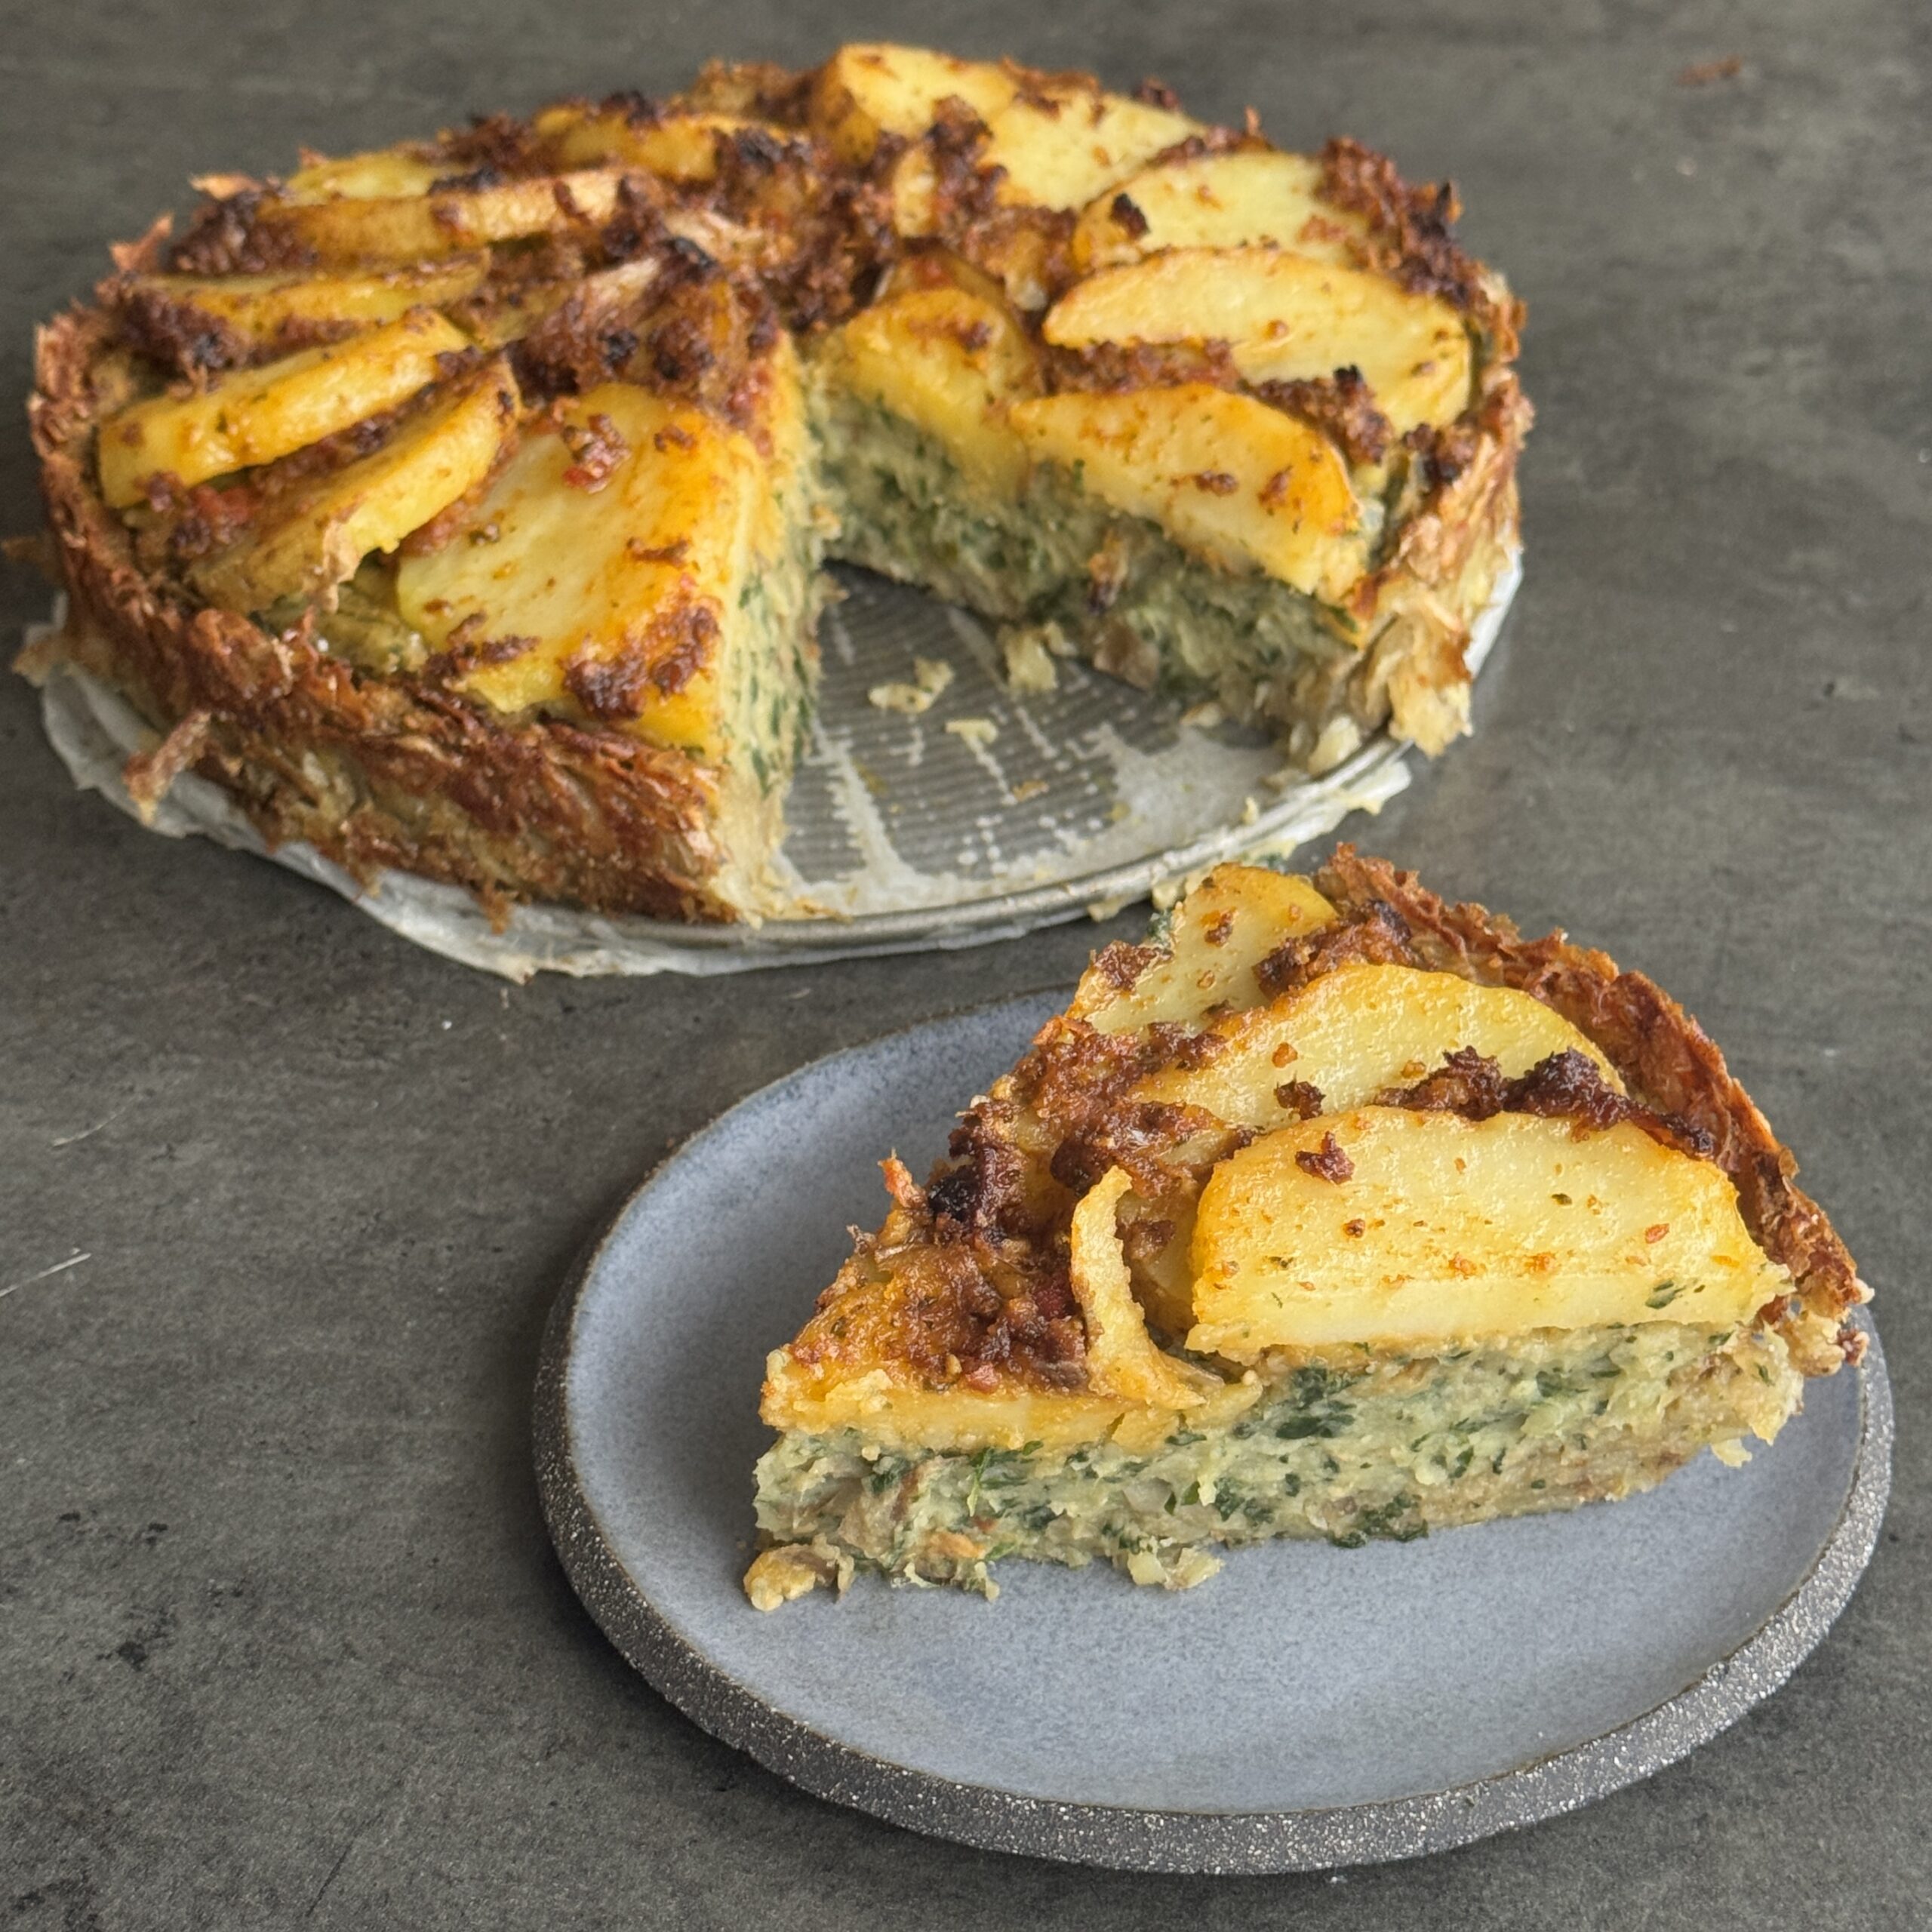
Triple-Layer Pesto Potato Pie
Takes 1 hour 50 minutes
Serves 8
Ingredients
Rosti Base
- 800 g floury potatoes peeled
- 1 small onion finely grated (optional)
- 1 tbsp plain flour
- 1 tsp sea salt
- Black pepper
- 2 –3 tbsp olive oil
Spinach & Basil Pesto Mash
- 600 g floury potatoes peeled & chopped
- 150 g baby spinach fresh or frozen
- 30 g olive oil
- 2 –3 tbsp milk or oat milk
- 3 –4 tbsp lovely basil pesto
- Salt & pepper
- Pinch of nutmeg optional
Gratin Top
- 500 g waxy potatoes very thinly sliced
- 3 –4 tbsp The Happy Pear Sun-Dried Tomato Pesto
- Olive oil
- Salt & pepper
Instructions
Make the Rosti Base
- Grate the potatoes (and onion if using)
- Squeeze out as much liquid as possible – the drier, the crispier.
- Mix with flour, salt, pepper and olive oil.
- Press firmly into a lined or well-oiled round baking dish or ovenproof pan.
- Bake at 190°C for 30–35 minutes until golden and crisp.
Spinach & Basil Pesto Mash
- Boil the potatoes until soft, then drain well.
- Wilt the spinach, squeeze out excess liquid, and finely chop.
- Mash the potatoes with oil, oat milk, salt and pepper.
- Stir through the spinach and The Happy Pear Lovely Basil Pesto, creating a creamy, green mash.
- Spread evenly over the baked rosti base and smooth the top.
Gratin Top
- Toss the sliced potatoes with a little olive oil, salt and pepper.
- Arrange in overlapping layers over the mash.
- Brush generously with The Happy Pear Sun-Dried Tomato Pesto for a golden orange topping and burst of flavour!
Bake
- Cover loosely with foil and bake at 190°C for 30 minutes.
- Remove foil and bake for another 20–25 minutes until golden and tender.
- Finish with an extra brush of The Happy Pear Sun-Dried Tomato Pesto for colour and flavour.
To Serve
- Let it rest for 10 minutes, then slice and serve.
- Great with a simple green salad or some steamed greens on the side.
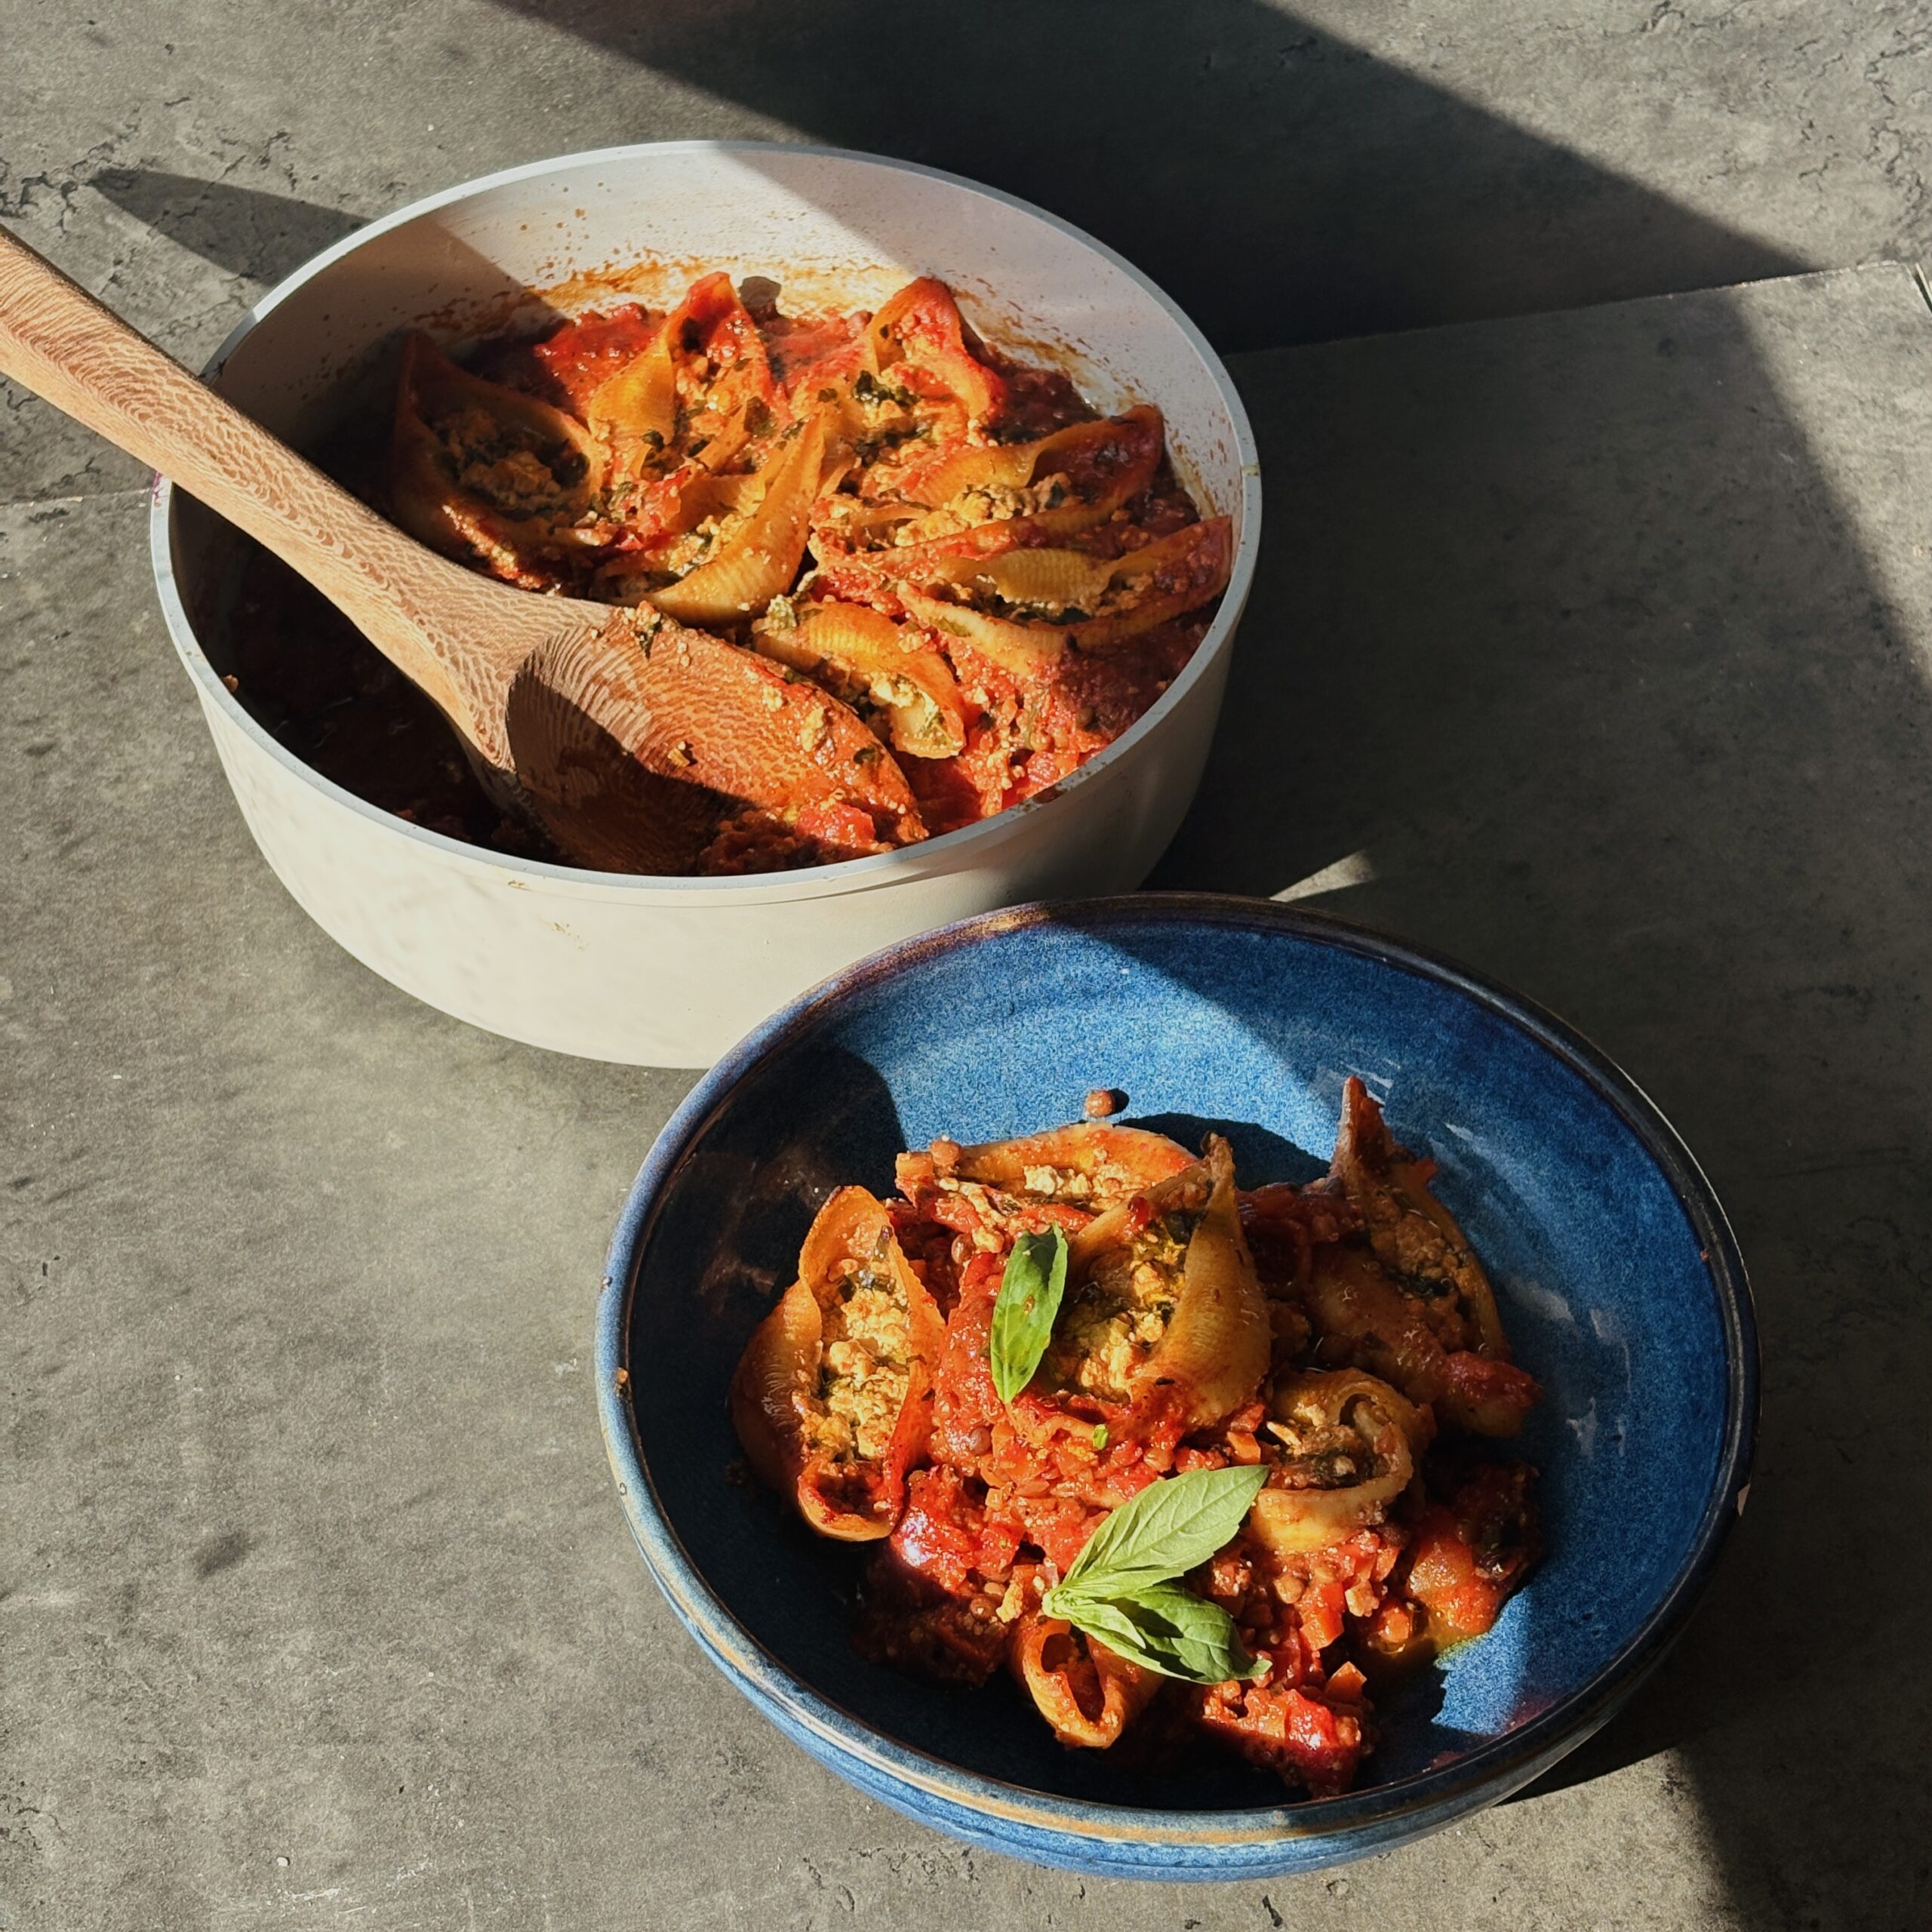
One-Pan Stuffed Pasta Shells with Basil Tofu Ricotta & Lentil Ragu
Takes 50 minutes
Serves 4
Ingredients
Lentil Tomato Ragu
- 1 tbsp olive oil
- 1 onion finely diced
- 2 cloves garlic finely chopped
- 1 carrot finely diced
- 1 tsp dried oregano
- 1/2 tsp smoked paprika
- ½ tsp chilli flakes optional
- 2 tbsp tomato paste
- 2 × 400g tins chopped tomatoes
- 1 × 400g tin cooked lentils drained and rinsed
- 1 tsp salt
- Black pepper to taste
- 1 tsp maple syrup or sugar optional, to balance acidity
- 350 –450 ml vegetable stock
Basil Tofu Ricotta
- 200 g firm tofu
- 1 tbsp white miso
- 1 tbsp lemon juice
- ½ tsp salt
- ¼ tsp black pepper
- 1 tsp garlic powder
- 1 large handful fresh basil finely chopped
- 5-6 tbsp plant milk to loosen
Pasta
- 13-15 large pasta shells conchiglioni
To Finish
- A drizzle of olive oil
- Fresh basil or parsley
Instructions
Start the lentil ragu
- Preheat the oven to 180°C fan (200°C conventional). Drain and rinse the lentils.
- Heat olive oil in a large ovenproof pan or casserole dish over medium heat.
- Add onion, and carrot and cook for 5–6 minutes until softened.
- Add garlic, oregano, smoked paprika and chilli flakes . Cook 1 minute until fragrant.
- Stir in tomato paste and cook another minute to deepen flavour.
- Add chopped tomatoes, lentils, salt and pepper and veg stock. Stir well and bring to a gentle simmer. Taste and adjust the seasoning to your liking.
- The sauce should be quite loose, as the pasta will absorb liquid while baking.
Make the tofu ricotta
- Finely chop the basil leaves and add to a bowl. Crumble the tofu into the bowl with your hands or a fork. Add the miso, lemon juice, salt and pepper, garlic, basil
- Mix well. Add plant milk a little at a time until it becomes creamy but still thick enough to stuff.
- Taste and adjust seasoning to your liking .
Stuff the shells
- Take each uncooked pasta shell and fill it with about 1 tbsp tofu ricotta.
- Nestle the stuffed shells directly into the simmering lentil ragu in the pan, ricotta side up.
- Push them gently into the sauce so they’re partially submerged but still visible on top.
Bake
- Cover the pan with a lid or foil and bake for 25 minutes or until the pasta is cooked and soft..
- Remove the lid and bake for another 5 minutes until the pasta is tender, the sauce is thick and bubbling, the ricotta is lightly golden on top
Finish & serve
- Drizzle with olive oil and scatter over fresh basil or parsley.
- Serve straight from the pan with crusty sourdough or a simple green salad
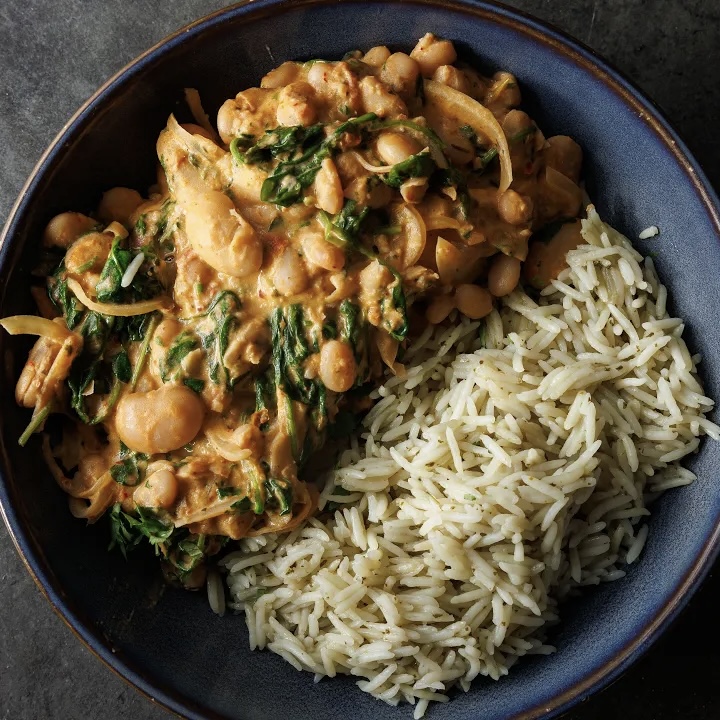
One-Pan “Marry Me” Butter Beans
Takes 10 minutes
Serves 2
Ingredients
- 2 x 400g tins butter beans drained (500g drained weight / about 3 cups)
- 15 ml olive oil or vegan butter 1 tbsp
- ½ tsp chilli powder
- 1 small onion finely sliced (about 100g / 1 cup sliced)
- 100 g sun-dried tomato pesto ⅓ cup
- 200 ml coconut milk ¾ cup + 1 tbsp
- 50 g baby spinach 2 cups
- Salt & black pepper to taste
- Juice of ½ lemon 1–2 tbsp
- 15 g fresh coriander finely chopped (¼ cup)
To Serve
- Cooked rice 1–2 cups, quinoa (1–2 cups), or crusty bread
Instructions
Prepare the ingredients:
- Peel and finely slice the onion. Drain and rinse the butter beans. Finely chop the fresh coriander.
Sauté the onion:
- Heat a frying pan over high heat. Add the olive oil or vegan butter. Once hot, add the onion and cook for 3–4 minutes, stirring occasionally, until softened and starting to brown.
Add beans and flavour:
- Stir in the drained butter beans, chilli powder, and sun-dried tomato pesto. Cook for 2 minutes, stirring occasionally to coat everything well.
Make it creamy:
- Pour in the coconut milk and stir to combine. Add the spinach and lemon juice, and cook briefly until the spinach wilts.
Season and serve:
- Taste and adjust seasoning with salt, pepper, or more lemon if needed.
- Serve hot with cooked rice, quinoa, or crusty bread, and finish with a generous sprinkle of fresh coriander.

Healthier Twix Bars
Takes 1 hour 15 minutes
Serves 8
Ingredients
Almond Shortbread Base
- 180 g ground almonds almond flour
- 70 g coconut oil melted
- 70 maple syrup
- ½ tsp vanilla extract
- Pinch sea salt
Peanut Caramel
- 150 g smooth peanut butter
- 120 ml maple syrup
- 1 tsp vanilla extract
- Pinch sea salt
Chocolate Topping
- 200 g dark chocolate 70–85%
Instructions
Make the Almond Shortbread
- In a bowl, mix all ingredients until a sticky, moldable dough forms. Press evenly into a lined small square or loaf tin. Place in the freezer or fridge for 15–20 minutes to firm up.
Make the Peanut Caramel
- Mix everything together in a bowl until smooth and glossy and caramel like.
Assemble
- Carefully blob spoonfuls of the peanut butter caramel evenly over the cooled almond base. Spread it out ensuring that the almond base stays intact. Place in the freezer for 20 minutes to firm up. Melt the dark chocolate. Pour over the caramel layer and spread evenly. Chill in the fridge for 30 minutes until set.
To Serve
- Slice into bars or fingers to mimic the shape of a Twix bar. Store in the fridge for up to 1 week (or freeze for longer).
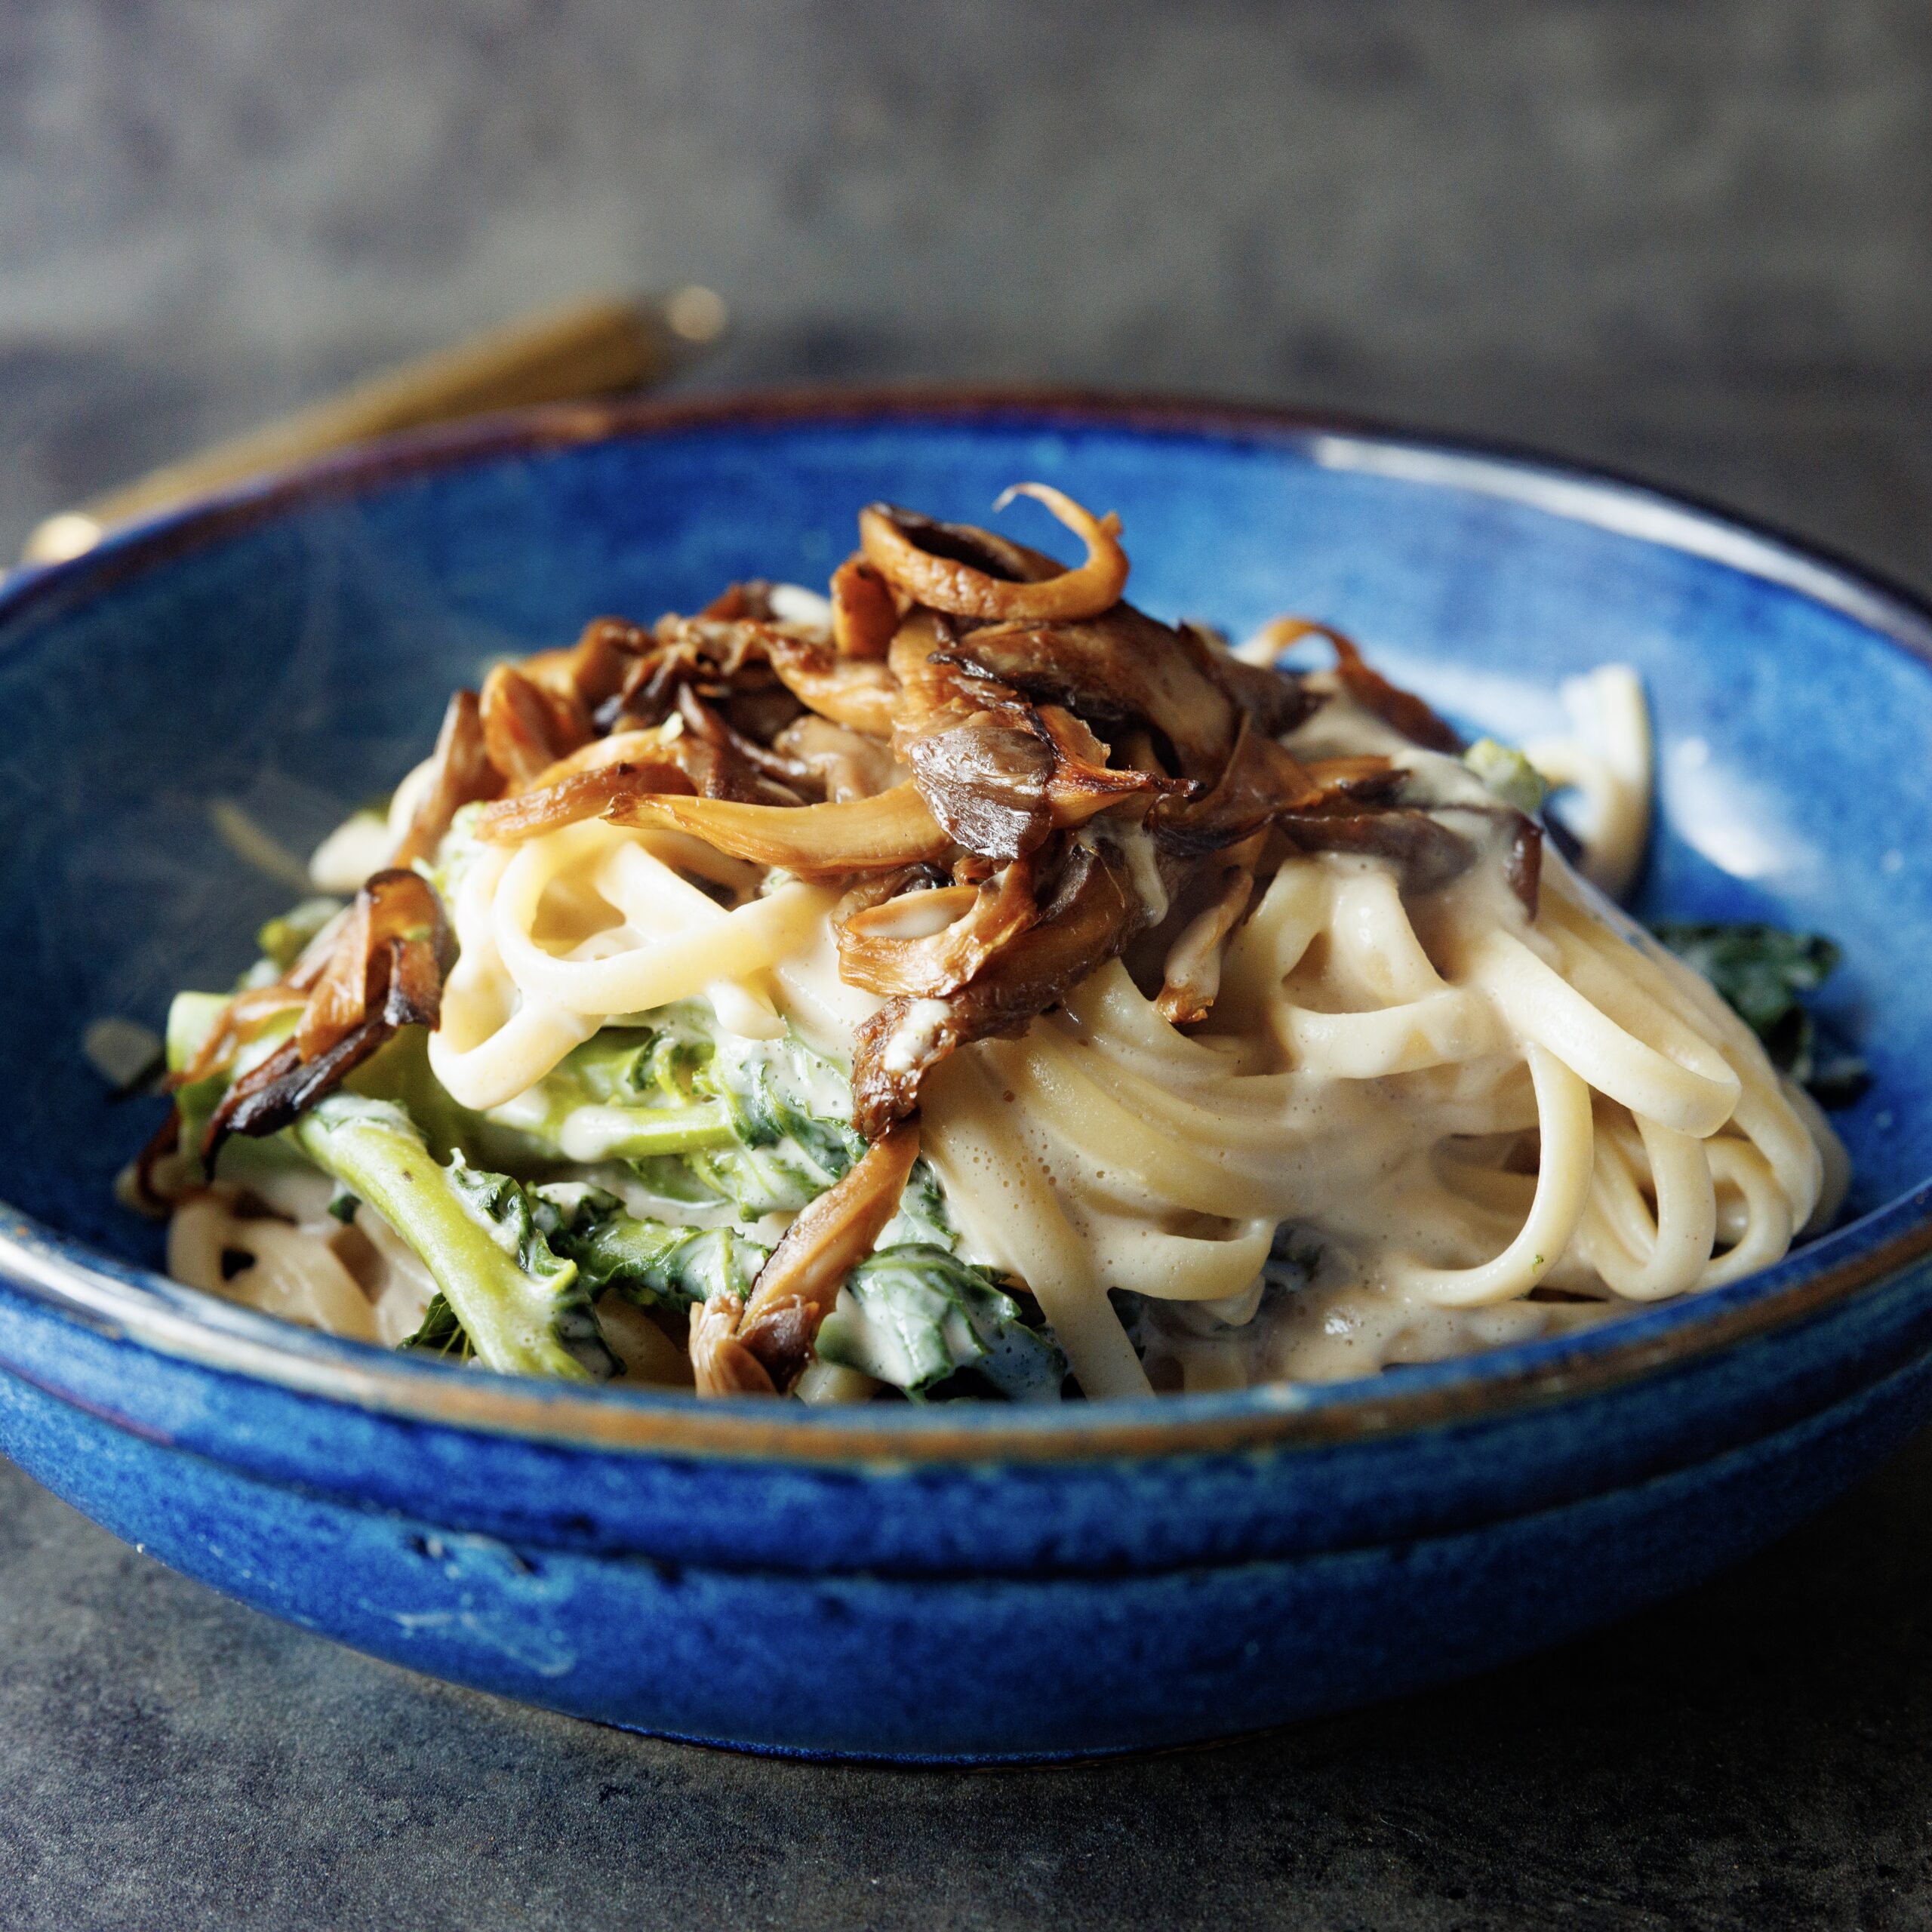
Creamy Mushroom Linguine
Takes 20 minutes
Serves 4
Ingredients
For the Pasta:
- 400 g linguine pasta/wholemeal spaghetti
- 250 g mushrooms of choice oyster, shiitake, chestnut suggested
- 1 large red onion about 200 g
- 2 cloves of garlic
- 2 tbsp tamari
For the Creamy Cashew Sauce
- 100 g cashew nuts
- 500 ml plant milk of choice
- Juice of ½ a lemon
- 1 tsp garlic powder
- 2 tbsp nutritional yeast
- Salt and black pepper to taste
Optional Garnish:
- 1 fresh chilli seeds removed and sliced finely
- 3 sprigs of fresh oregano or thyme leaves removed from the stalk
Instructions
- Prepare the Cashews: Place the cashew nuts in a small pot and cover with boiling water. Simmer gently for 5-10 minutes, then drain and rinse.
- Cook the Pasta: Fill a large saucepan with boiling water and add 1 tbsp of salt. Add your pasta and cook according to package instructions.
- Prepare the Vegetables: Peel and finely slice the onion and garlic. Finely chop the mushrooms.
- Cook the Onion and Mushrooms: Heat a large wide bottom pan over high heat. Add 1 tbsp of oil (or a few sprays of oil), followed by the onions and ½ tsp of salt. Reduce the heat to medium and cook for 4-5 minutes stirring until the onions brown slightly. Stir occasionally. Add the chopped mushrooms and garlic and cook for another 4-5 minutes. Stir in the tamari, cook for an additional minute, then turn off the heat.
- Prepare the Cashew Sauce: While the mushrooms are cooking, make the cashew sauce. Add the drained and rinsed cashew nuts and the rest of the sauce ingredients to a blender or food processor. Blend at high speed until smooth. Add the creamy cashew sauce to the pan, then turn the heat to medium. Cook for 1-2 minutes, stirring continuously, to allow the sauce to thicken.
- Combine the Pasta, Sauce & Mushrooms: Drain the cooked pasta, reserving some pasta water. Mix the pasta into the sauce, making sure the pasta is well coated. If the sauce is too thick, add reserved pasta water until you reach your desired creamy texture. If it is too watery, cook for a few minutes stirring constantly to avoid sticking. Taste and adjust seasoning with salt and black pepper as needed. Add the mushrooms and mix through.
- Garnish and Serve: Optionally, garnish with finely sliced fresh red chilli and/or fresh oregano or thyme. Serve hot and enjoy your creamy, comforting pasta!

Spicy BBQ Tofu Mince
Takes 35 minutes
Serves 4
Ingredients
Tofu Mince
- 250 g firm tofu
- 30 g tamari 2 tbsp
- 8 g cornflour 1 tbsp
- 5 g fresh ginger finely diced (about 1 tsp grated)
Spiced BBQ Sauce
- 2 g smoked paprika 1 tsp
- 1 g garlic powder ½ tsp or ½ small clove fresh garlic, finely chopped
- 30 g tamari or soy sauce 2 tbsp
- 30 g tomato purée 2 tbsp
- 15 g cider vinegar 1 tbsp
- 15 g oil 1 tbsp
- 20 g maple syrup or agave 1 tbsp
- 1 g chilli powder or cayenne ½ tsp
Instructions
- Preheat the oven to 200°C and line a baking tray with baking parchment.
Prepare the tofu:
- Using a box grater, grate the tofu into small mince-like pieces.
Mix:
- In a bowl, combine the grated tofu, ginger, cornflour and tamari. Mix well so everything is evenly coated.
First bake:
- Spread the tofu evenly on the lined tray. Lightly spray or drizzle with a little oil.
- Bake at 200°C for 15 minutes until starting to dry and lightly firm.
Make the BBQ sauce:
- While the tofu is baking, mix all BBQ sauce ingredients together in a bowl.
Second bake:
- Remove the tofu from the oven and toss thoroughly with the BBQ sauce until well coated.
- Return to the oven and bake again at 200°C for 10–15 minutes, until crispy and cooked through.
To Serve
- Use as a punchy sandwich filling, taco mince, loaded baked potato topper, or stir through grains and salads for a smoky protein boost.

High Protein Peanut Butter Cookies
Takes 28 minutes
Serves 4
Ingredients
- 1 ripe banana about 120g / ½ cup mashed
- 125 g peanut butter or almond butter ½ cup
- 60 g protein powder ½ cup
- 15 ml oat milk 1 tbsp
- Large pinch of salt
- 60 ml maple syrup 4 tbsp / ¼ cup
- Optional: chocolate chips and flaky sea salt for topping
Instructions
- Preheat the oven to 180°C (350°F) and line a baking tray with parchment paper.
- Mash the banana in a bowl until completely smooth.
- Mix the dough: Add the peanut butter (or almond butter), protein powder, oat milk, salt, and maple syrup. Stir until the mixture comes together into a soft dough.
- Shape the cookies: Divide into 4 equal portions (you can make 4–6 smaller cookies if preferred). Roll into balls and place on the prepared tray. Flatten slightly with a fork.
- Top (optional): Sprinkle with chocolate chips and a pinch of flaky sea salt.
- Bake for 12–15 minutes, until golden brown around the edges.
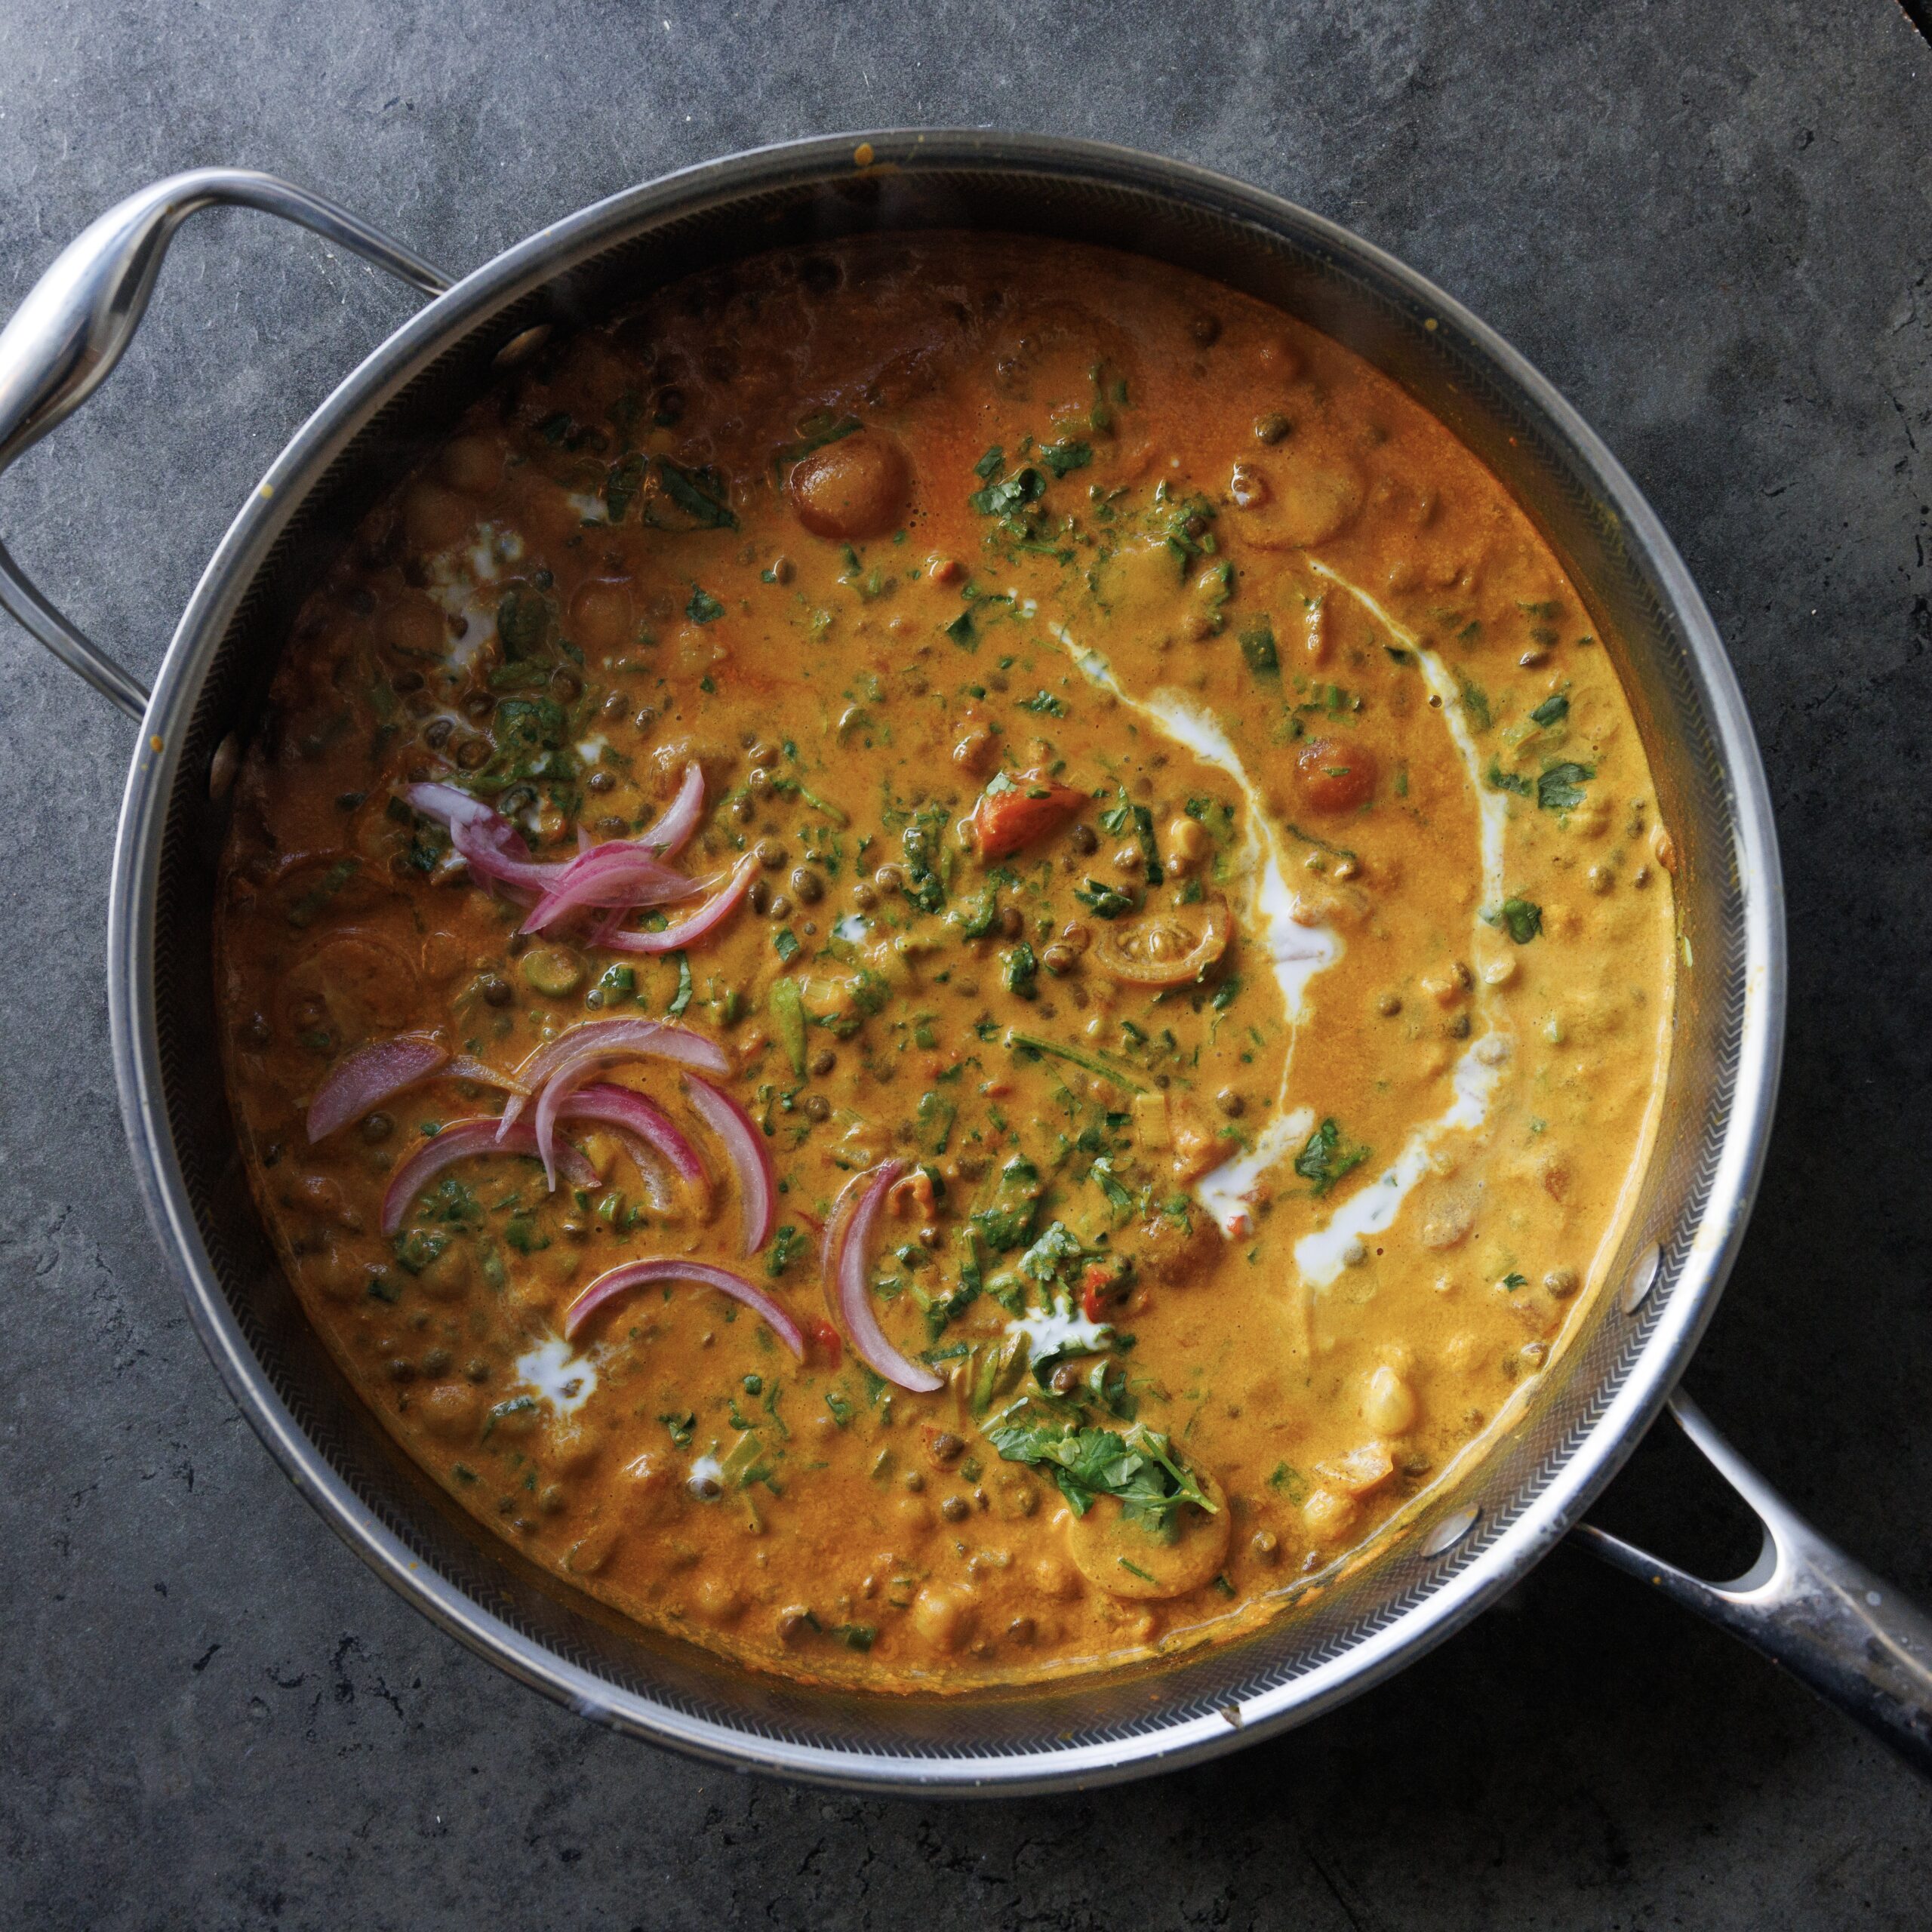
10 Minute Dahl
Takes 10 minutes
Serves 2
Ingredients
- 400 g chickpeas tin of cooked chickpeas
- 400 g cooked lentils tin
- 3 cloves garlic
- 20 g small nub of ginger
- 5 scallions/spring onions
- 2 tbsp oil
- 50 g baby spinach
- 400 g coconut milk tin
- ½ lime or lemon juice
- 15 g fresh coriander
- 10 cherry tomatoes
- 2 tbsp curry powder
- 1 tsp salt adjust to taste
- 2 tsp ground cumin
- ½ tsp turmeric
- ½ tsp black pepper
- 2 tbsp tamari or soy sauce
- 3 wholemeal pitta breads toasted to serve
Instructions
- Drain and rinse the chickpeas and lentils. Peel and finely chop the garlic and ginger, chop the scallions, and halve the cherry tomatoes. Pick the coriander leaves and finely chop the stalks.
- Heat the oil in a large non-stick pan over high heat. Add the garlic and ginger to the pan, then reduce the heat to medium. Cook for 2 minutes, stirring occasionally.
- Add the scallions, cherry tomatoes, coriander stalks, and 1 tsp of salt to the pan. Cook for a further minute.
- Add the coconut milk, lentils, and chickpeas. Stir well. Then, add the curry powder, ground cumin, turmeric, remaining salt, black pepper, tamari/soy sauce, and lime juice. Bring to a boil, then reduce to a simmer for 5 minutes.
- A few minutes before serving, add the spinach to wilt. Taste and adjust seasoning if needed.
- Serve with toasted pitta breads, fresh coriander, and chilli flakes, if desired. Enjoy!
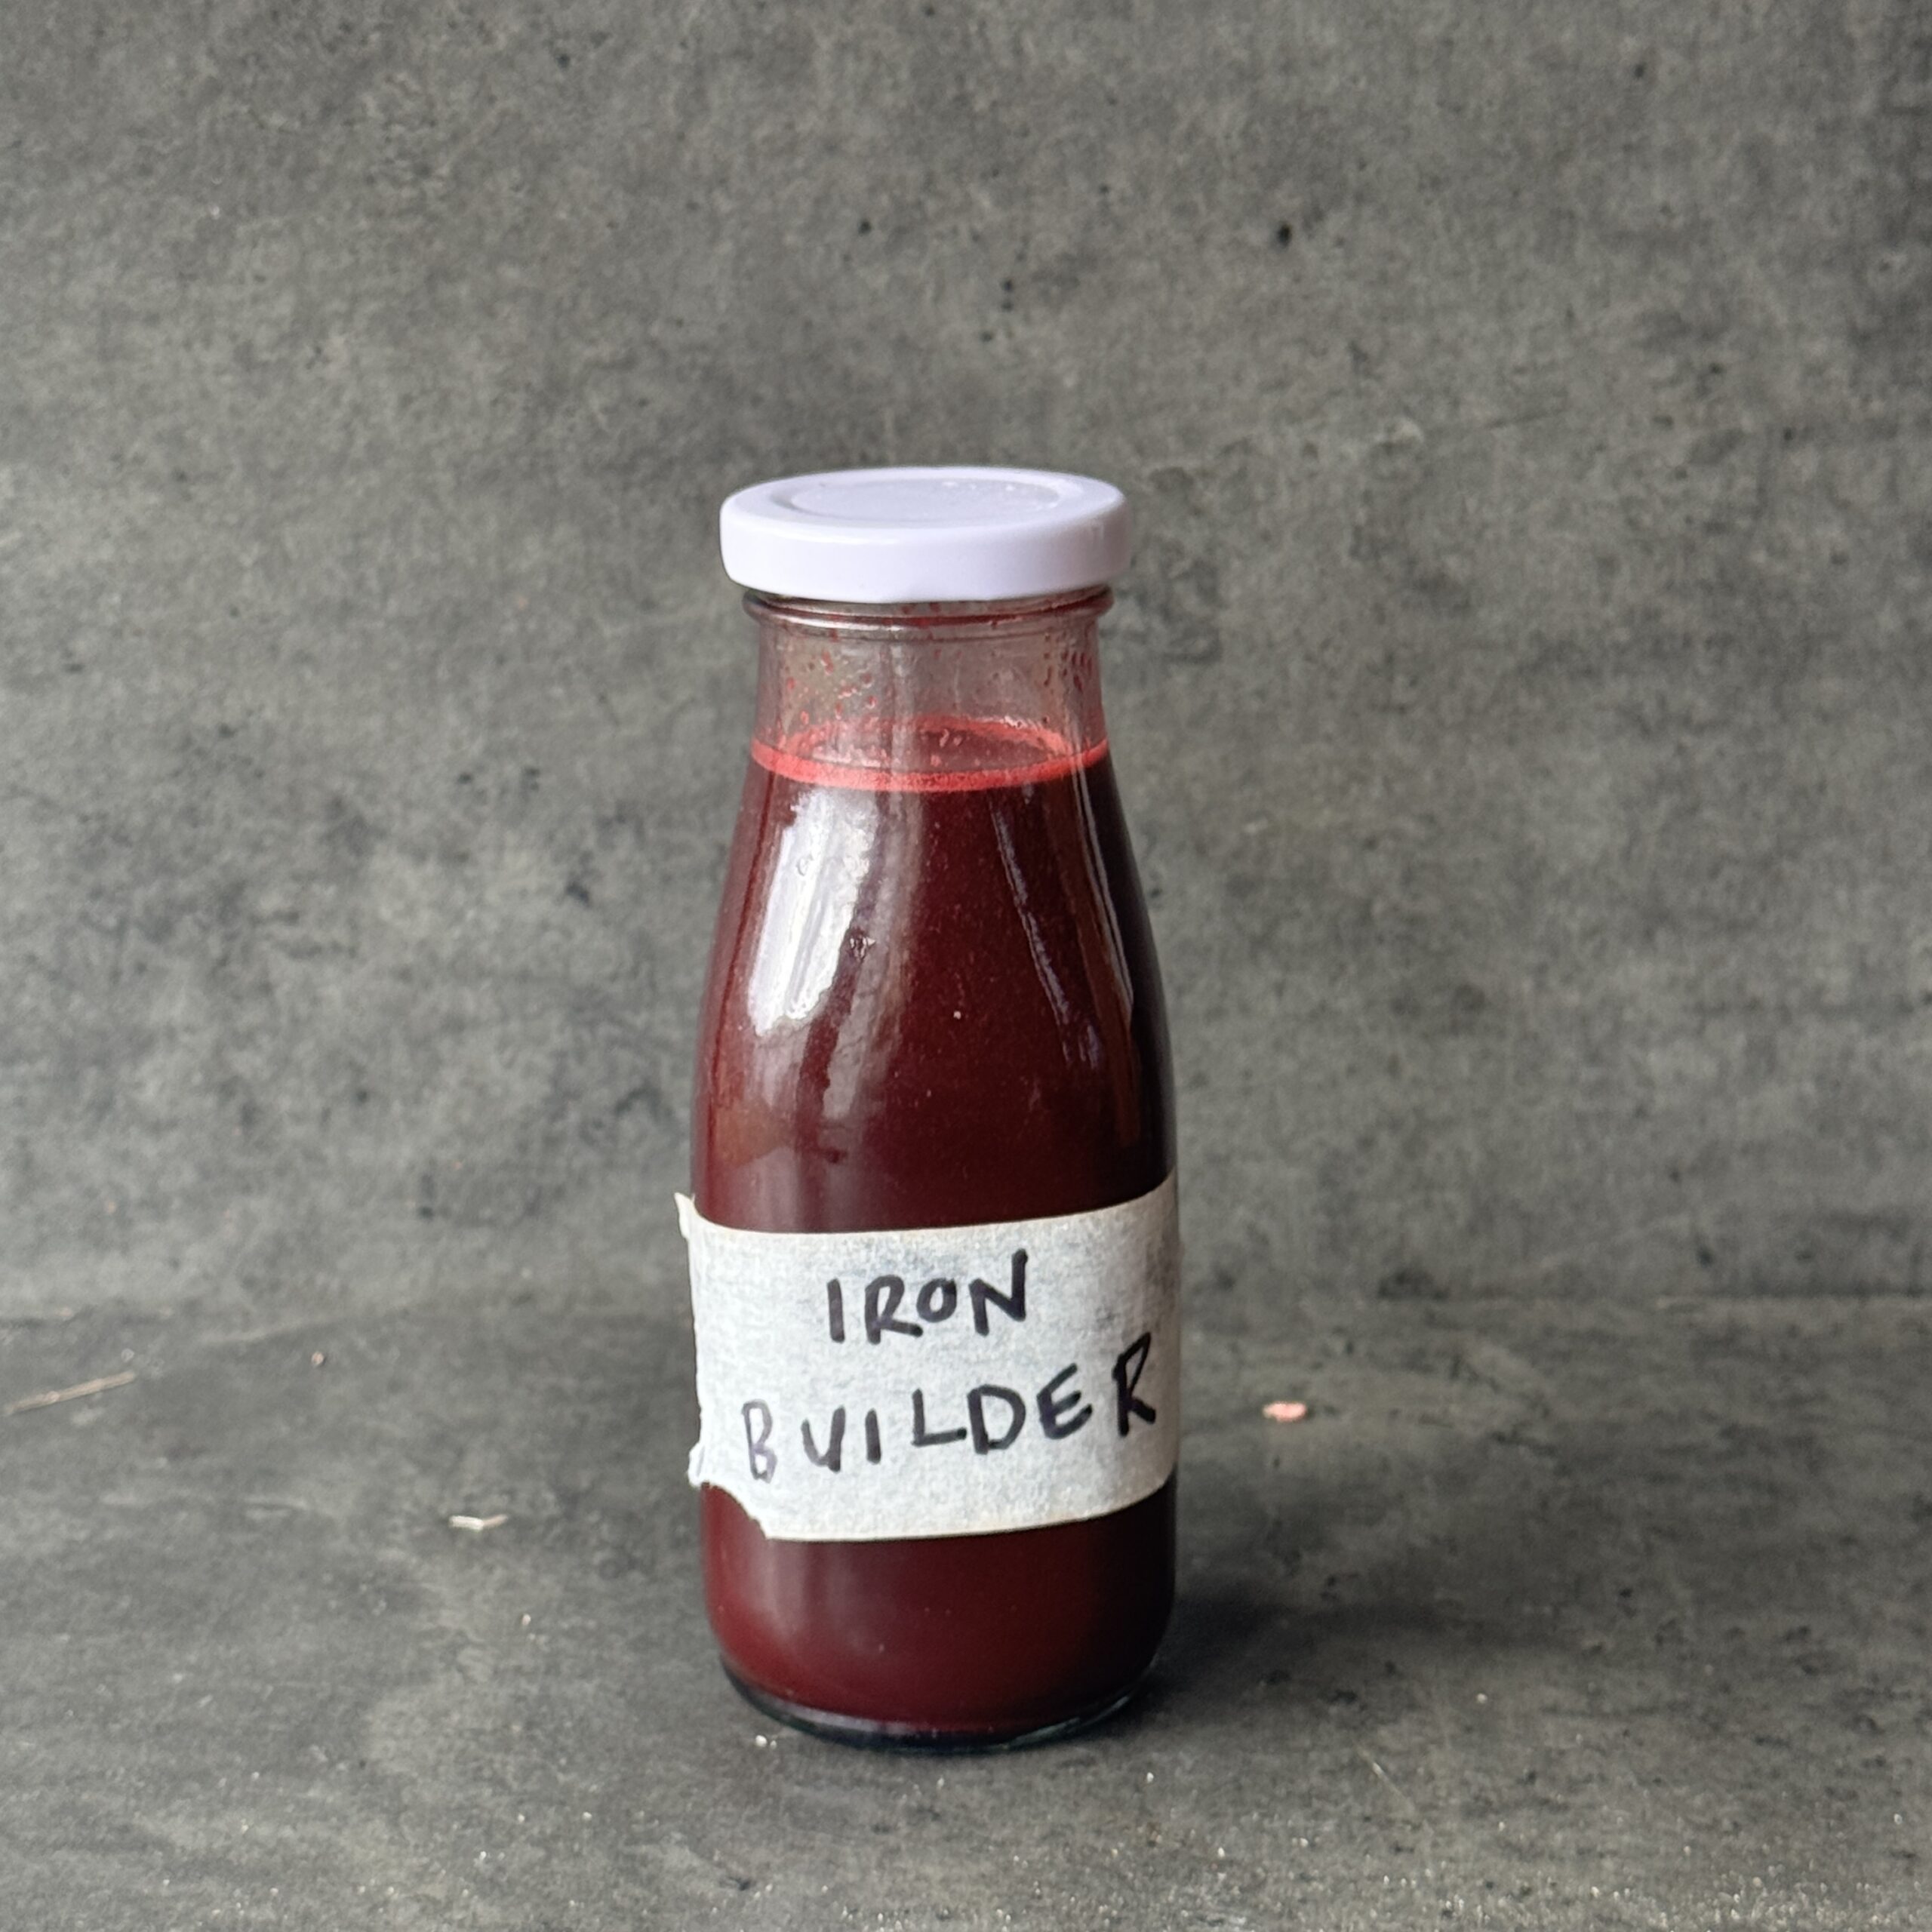
Iron Support Juice
Takes 10 minutes
Serves 2
Ingredients
- 60 g fresh spinach about 2 packed cups
- 200 g raw beetroot peeled and chopped (about 1½ cups)
- 2 medium oranges peeled (approx. 250 g flesh / 1½ cups)
- ½ lemon peeled (approx. 30 g / 2 tbsp juice equivalent)
- 10 g fresh ginger about 1 tbsp grated
- 5 g fresh turmeric or ½ tsp ground turmeric about 1 tsp grated fresh
- 100 –150 ml cold water ⅓–½ cup, optional to loosen
Instructions
- Wash all produce thoroughly. Peel the beetroot if the skin is tough; otherwise scrub well.
- Chop the beetroot into small chunks to help your juicer or blender.
- Pass everything through a juicer, alternating between leafy greens and firmer ingredients.
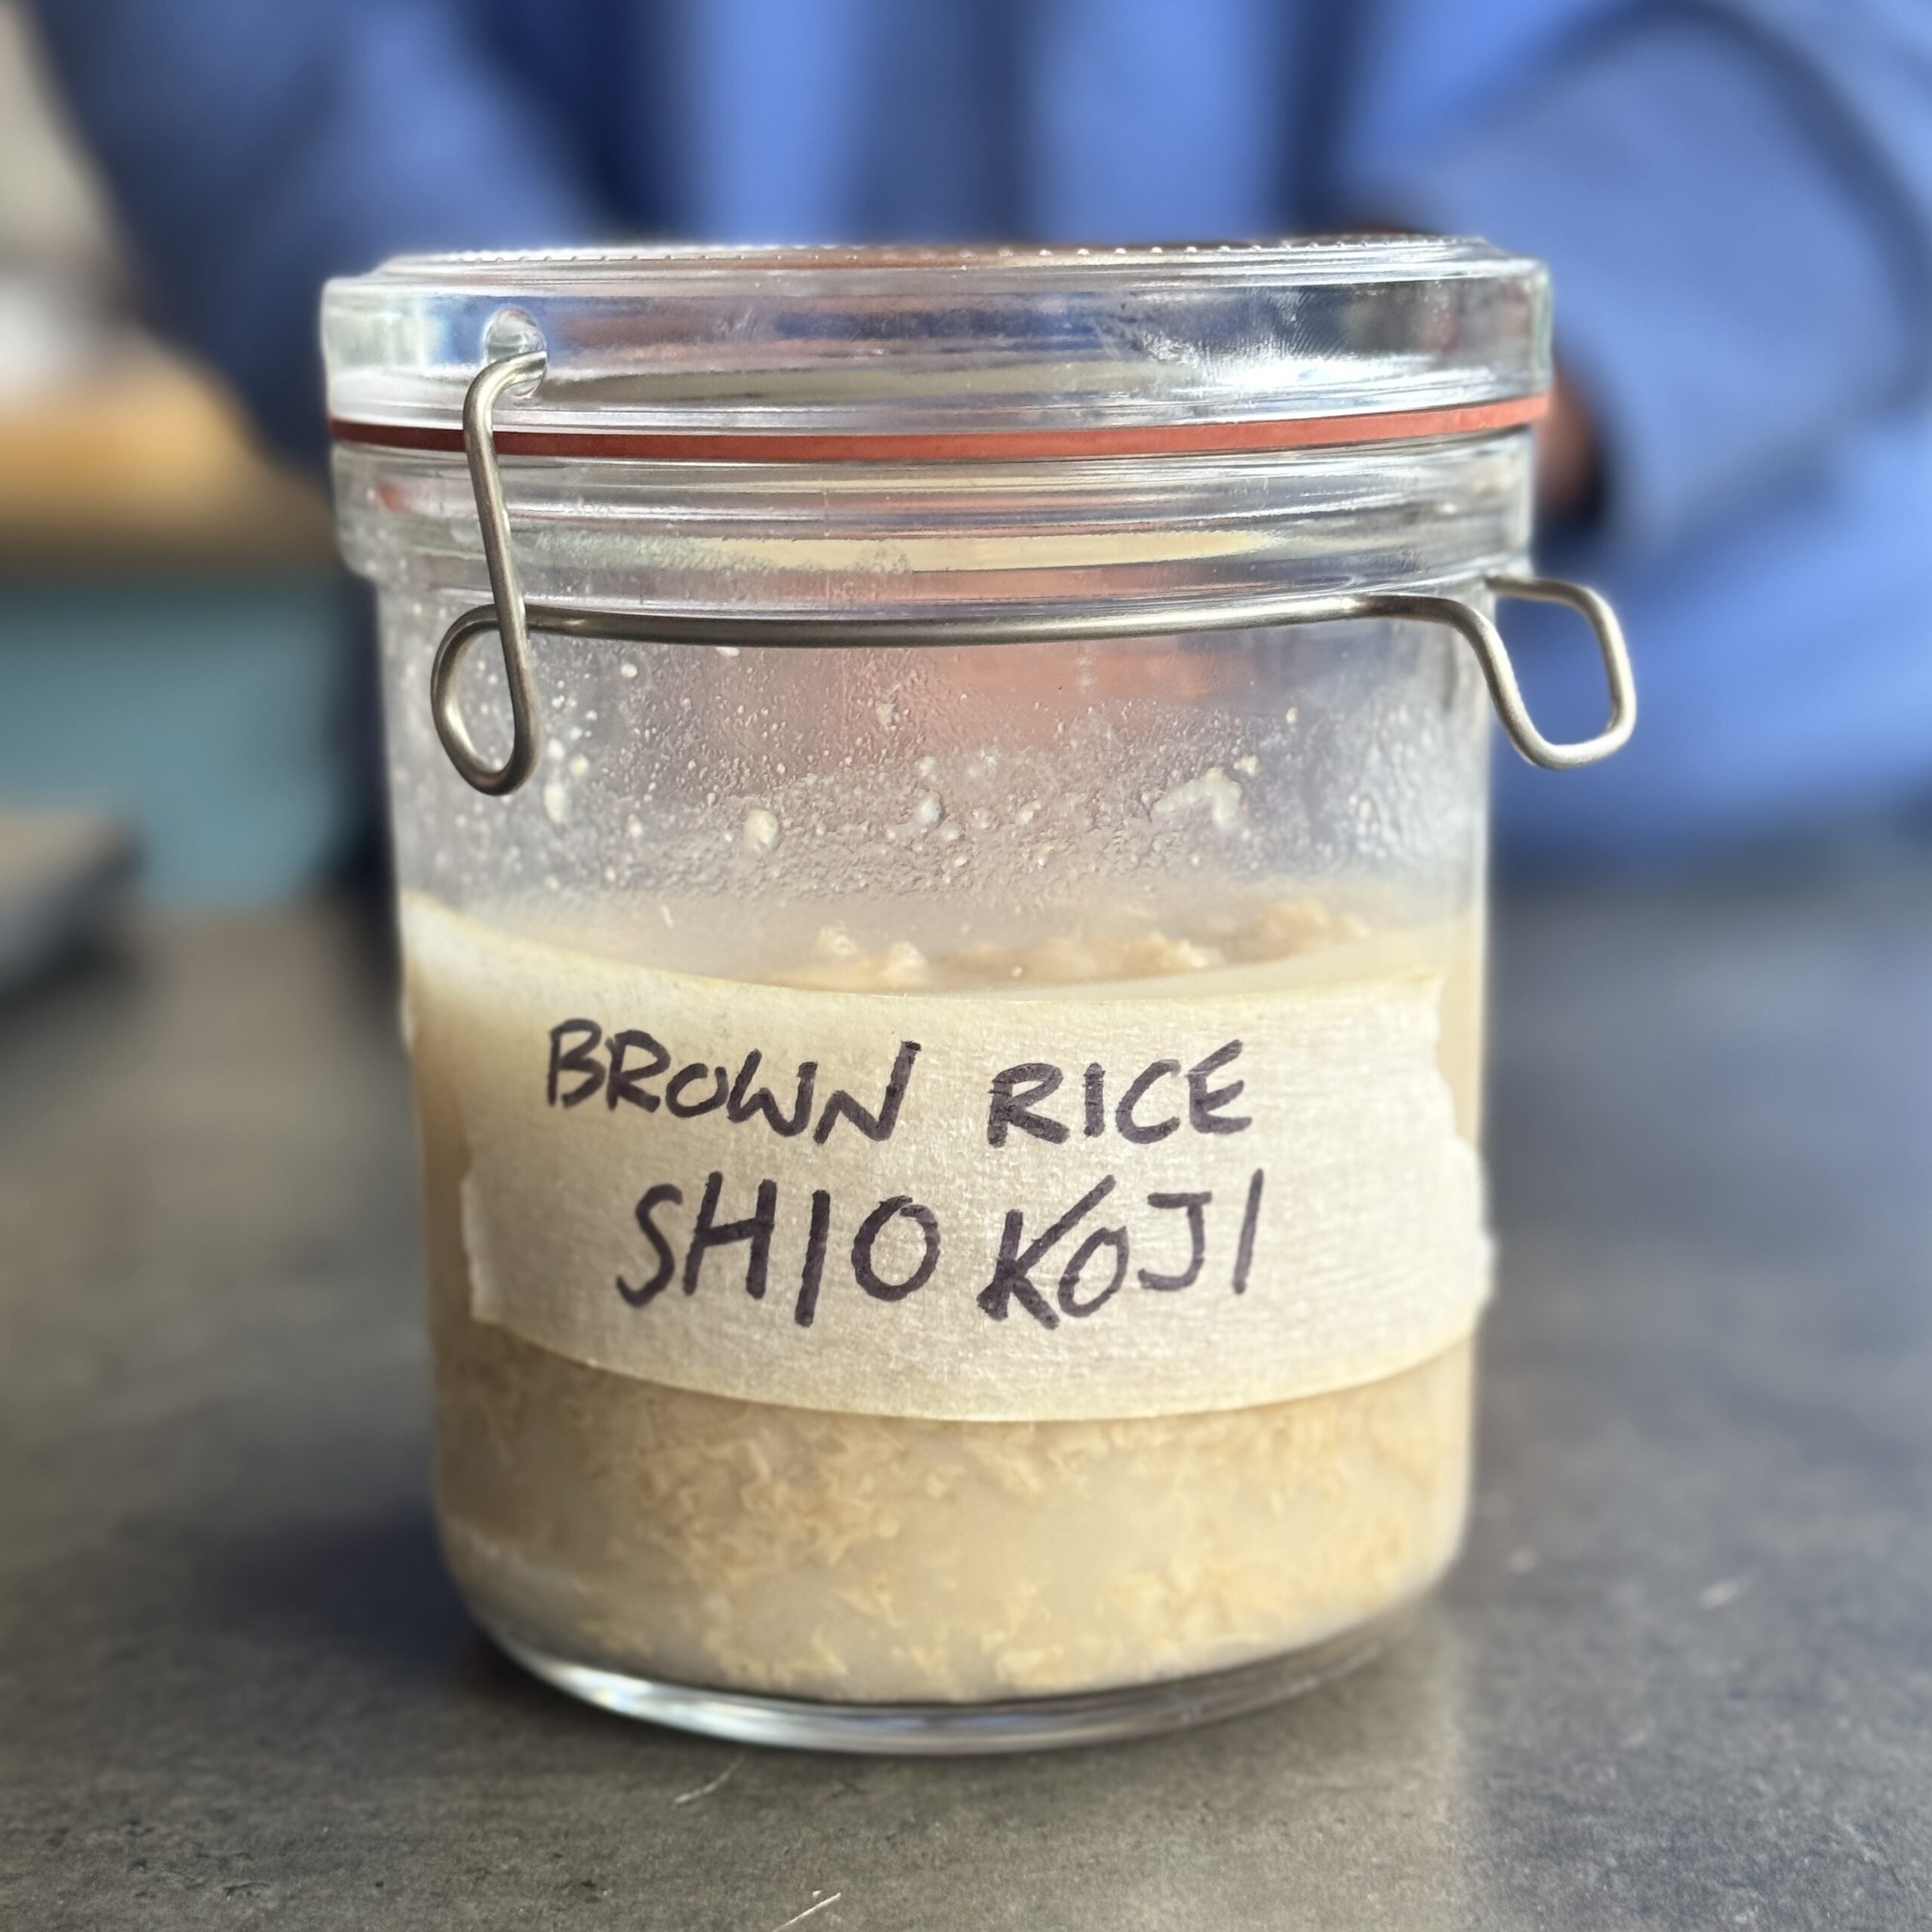
Shio Koji (White or Brown Rice Koji)
Takes 10 days 15 minutes
Serves 16
Ingredients
Use one of the following (same method for both):
Brown rice version:
- Brown rice koji – 250 g 1 ¼ cups
- Fine sea salt – 25 g 2 tbsp
- Water cooled, boiled – 250 ml (1 cup)
White rice version:
- White rice koji – 250 g 1 ¼ cups
- Fine sea salt – 25 g 2 tbsp
- Water cooled, boiled – 250 ml (1 cup)
Instructions
Sanitize your kit
- Scald a 1-litre (4 cup) jar and a spoon with boiling water, then let them air-dry. This reduces contamination before adding the ingredients.
Dissolve the salt
- In a jug, whisk 25 g (2 tbsp) fine sea salt into 250 ml (1 cup) cooled, boiled water until fully dissolved.
Combine and mix (chunky or smooth)
- Add 250 g (1 ¼ cups) rice koji (brown or white) to the jar and pour in the salted water.
Rustic texture: Stir thoroughly so all grains are wet.
- Ultra-smooth, no-grit marinades: Blend all ~525 g (2 ½ cups) contents briefly to a coarse paste, then return to the jar.
Set the right consistency
- Ensure the solids are just submerged (a thin 3–5 mm layer of liquid above the koji). If needed, add a splash of more cooled, boiled water to cover the grains.
Ferment at room temperature
- Cover the jar loosely (or use a clip-top that self-vents). Leave at 20–24°C (68–75°F) for 5–10 days, stirring once daily to re-submerge any floating grains and aerate lightly.
Taste for readiness
- From day 5, taste a little: you’re aiming for sweet–salty, fruity/chestnut aromas, and a mellow savory finish.
- White rice koji usually finishes in 5–7 days.
- Brown rice koji can take 7–10 days and tastes slightly nuttier.
Finish and store
- When the flavor is right, blend again (optional) for a silky texture. Transfer back to the jar, close the lid, and refrigerate. Your ~520 g (2 ½ cups) shio koji keeps 4–6 weeks chilled (often longer). Stir before use; separation is normal.
How to Use
- Marinades / pre-ferments:
- Use 6–10% of food weight (e.g., 60–100 g shio koji per 1 kg vegetables/beans/tofu). Rest 12–24 hours in the fridge, then cook.
- Seasoning:
- Whisk 1–2 tsp (5–10 g) into dressings, sauces, or vegan mayo.
- Glaze:
- Brush a thin layer on vegetables before roasting to enhance browning.
Notes
- The 10% salt here is by koji weight: 250 g koji → 25 g salt.
- Keep surfaces wet to discourage mold; discard if you see fuzzy colored growth or sour/off smells.
- Brown-rice shio koji tends to be sweeter and nuttier; white-rice shio koji is cleaner and slightly quicker.

Healthier Hazelnut Caramel Bites
Takes 1 hour 15 minutes
Serves 20
Ingredients
- 200 g dark chocolate approx. 1¼ cups, chopped
- 200 g hazelnuts approx. 1½ cups
- 2 tbsp coconut oil
- 100 g soft pitted dates approx. ½ cup, packed
- ½ tsp sea salt
Instructions
Roast the hazelnuts
- Preheat the oven to 180°C (fan 160°C) / 356°F. Spread the hazelnuts on a baking tray and roast for 8–10 minutes, until fragrant and golden. Allow to cool slightly. Rub the hazelnuts in a clean tea towel to remove most of the skins (optional).
Make the hazelnut butter
- Add all the roasted hazelnuts to a food processor and blend for 5–7 minutes, scraping down the sides as needed, until a smooth hazelnut butter forms.
Make the date caramel
- Add the soft pitted dates, coconut oil, all of the hazelnut butter (from step 2), sea salt, and 2–3 tbsp water to a food processor or blender. Blend until very smooth and creamy. If needed, add extra water 1 tsp at a time until spreadable.
Prepare the chocolate coating
- Chop the dark chocolate into small pieces and melt gently using a bain-marie or microwave in 30-second bursts. Stir until completely smooth.
Assemble the bites
- Spoon a small amount of melted chocolate into the base of each mould cavity (about one-third full). Place in the freezer for 10 minutes to partially set. Once set, spoon in the hazelnut-date caramel layer, filling another third of each mould. Finally, top with the remaining melted chocolate. (Optional: stir a few tablespoons of extra chopped roasted hazelnuts into the melted chocolate before spooning it over the top.) Smooth the surface with the back of a spoon if needed.
Set and enjoy
- Chill in the fridge or freezer for at least 30 minutes, or until fully set. Pop out of the moulds and store in an airtight container in the fridge.
Storage
- They keep for up to 2 weeks in the fridge. For the best texture, let sit at room temperature for 5 minutes before eating.
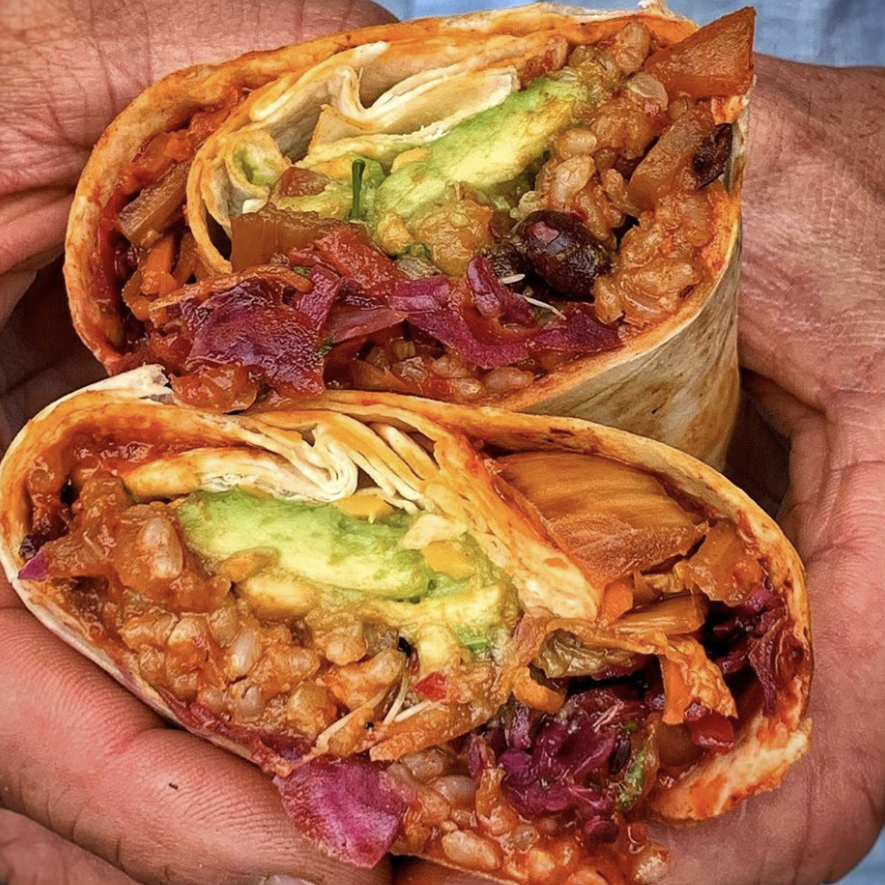
10-Minute Loaded Veg Burritos
Takes 10 minutes
Serves 2
Ingredients
Refried Beans
- 1 × 400g tin kidney beans drained and rinsed
- 1 tsp tamari or soy sauce
- Pinch black pepper
- Small pinch salt
- 50 ml water l
Fresh Tomato Salsa
- 3 –4 medium tomatoes roughly chopped
- ¼ small red onion
- ½ –1 fresh chilli to taste
- Juice of ½ lime
- Pinch salt
Quick Guacamole
- 2 ripe avocados
- Handful cherry tomatoes finely chopped
- Pinch salt & black pepper
- Juice of 1 lime or lemon juice
Quick Pickled Red Onion
- ½ red onion finely sliced
- 100 ml vinegar or lime juice
- 100 ml water
- Pinch salt
Cashew Cream
- 50 g cashews soaked 10 min in boiling water and drained
- 120 –150 ml oat milk
- ½ tsp garlic powder
- 1 –2 tsp lemon juice
- ¼ tsp salt
To Serve
- Large tortillas or wraps
Instructions
Pickle the onion
- Place the sliced red onion in a small bowl with the vinegar and water and salt. Scrunch briefly and set aside — it’ll soften and mellow while you prep everything else.
Make the refried beans
- Add the kidney beans to a pan over medium heat and heat for 2 minutes. Add the tamari, black pepper, salt and the water. Warm through, then mash roughly with a potato masher or back of a spoon. Keep chunky and creamy. Set aside.
Blend the salsa
- Add tomatoes, red onion, chilli, lime juice and salt to a blender. Pulse briefly — loose and spoonable, not smooth. Taste and adjust seasoning.
Make the guac
- Mash the avocados in a bowl, keeping some texture. Fold in chopped cherry tomatoes, salt, pepper and a squeeze of citrus.
Blend the cashew cream
- Blend all cashew cream ingredients until completely smooth and pourable. Add a splash more milk if needed.
Assemble
- Warm the tortillas. Spread refried beans down the centre, spoon over salsa, add guac, a little pickled onion and drizzle generously with cashew cream. Roll up and serve immediately.
Tips & Variations
- Extra heat: Add chilli flakes or hot sauce.
- Smoky twist: Stir ¼ tsp smoked paprika or cumin into the beans.
- Greens boost: Add shredded lettuce or baby spinach.
- Make it deluxe: Finish with coriander and a squeeze of lime.
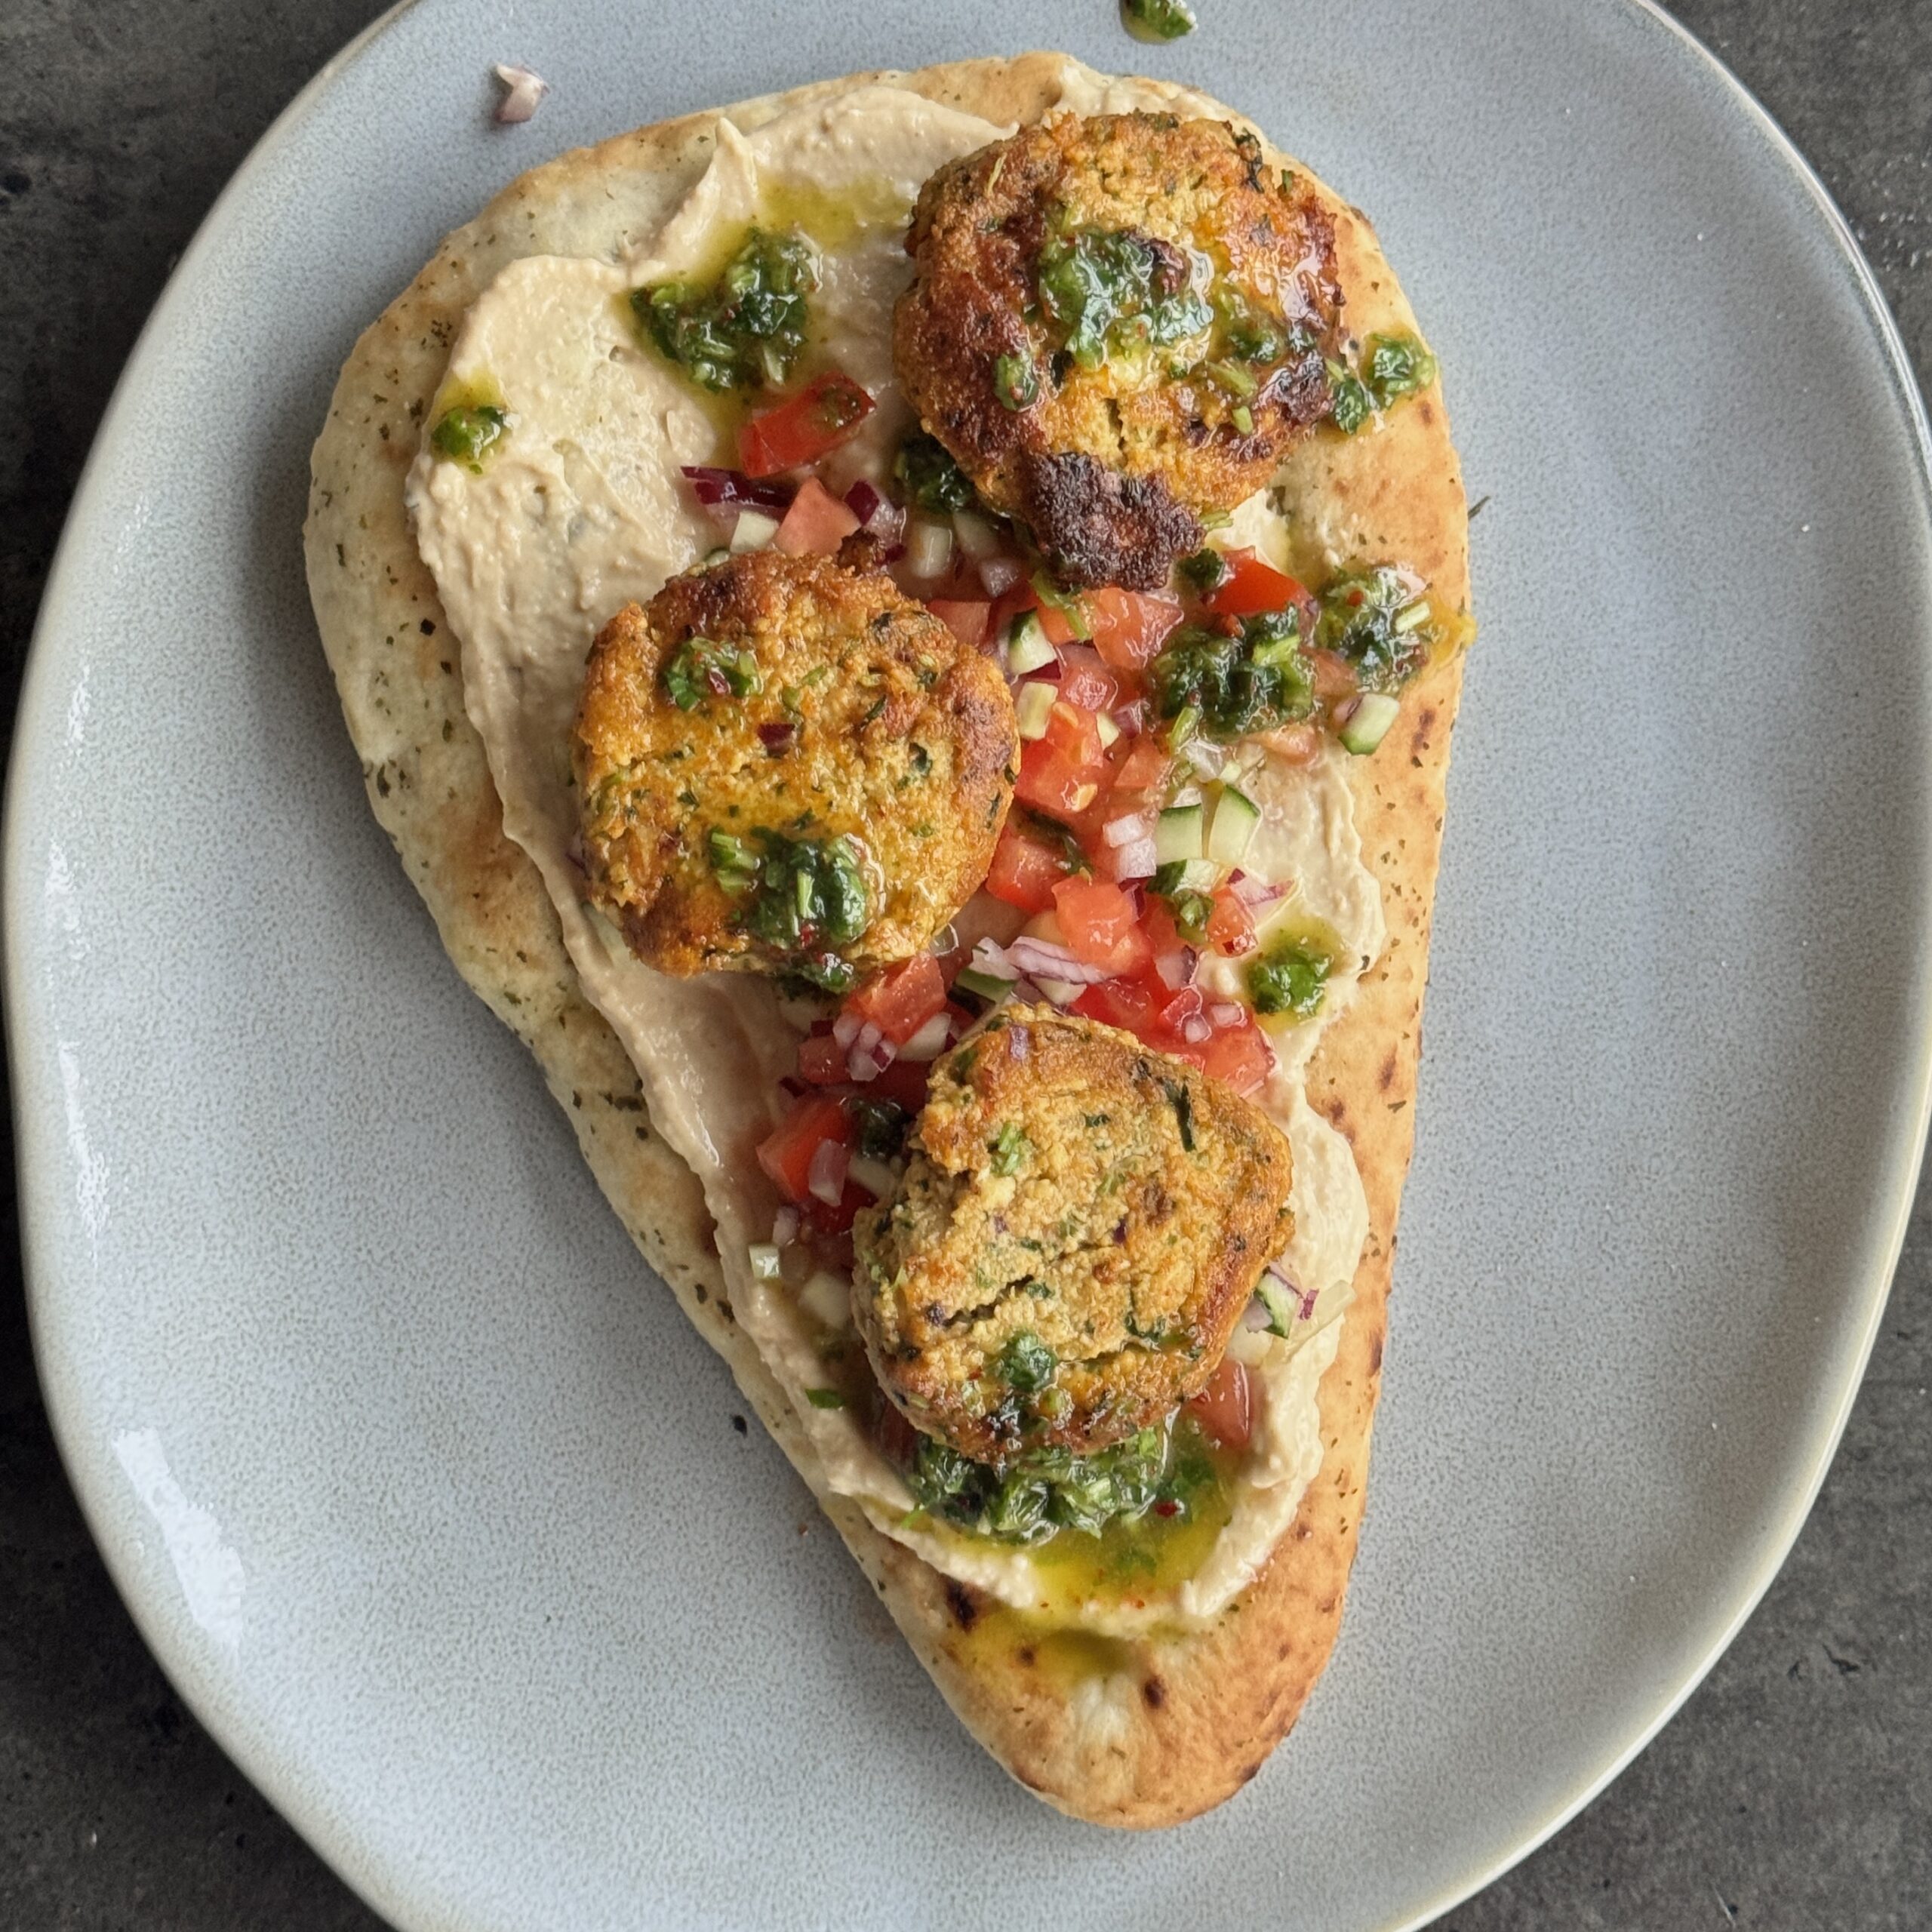
High-Protein Tofu Kebabs
Takes 30 minutes
Serves 4
Ingredients
For the koftas
- 60 g tomato purée 4 tbsp
- ½ red onion about 75g, very finely chopped
- 500 g firm tofu
- 12 g ground cumin 2 tbsp
- 6 g ground coriander 1 tbsp
- ½ tsp turmeric powder
- ½ tsp chilli powder
- 1 tsp smoked paprika
- 1 tsp cumin seeds
- Juice of ½ lemon or lime about 15ml / 1 tbsp
- ¾ tsp salt
- Pinch of black pepper
- 40 g chickpea flour 4 tbsp
- 25 g fresh coriander finely chopped (about 1 cup loosely packed)
- 30 ml tamari or soy sauce 2 tbsp
- 3 –4 tbsp olive oil for frying
For the herb oil
- 15 g fresh coriander about ½ cup loosely packed
- 45 ml olive oil 3 tbsp
- 30 ml rice vinegar 2 tbsp
- 15 ml maple syrup 1 tbsp
- 1 tsp chilli powder or chilli flakes
For the chopped salad
- 200 g ripe tomatoes about 1½ cups diced
- 150 g cucumber about 1 cup diced
- 15 g fresh parsley finely chopped (about ½ cup loosely packed)
- 15 ml olive oil 1 tbsp
- ¼ tsp salt
To serve
- 4 flatbreads
- 1 tub The Happy Pear Organic Hummus
Instructions
Make the kofta mixture:
- Crumble the tofu into a large bowl using your hands. Add the tomato purée, red onion, spices, cumin seeds, lemon or lime juice, salt, pepper, chickpea flour, fresh coriander and tamari or soy sauce. Mix very well until fully combined.
- If the mixture feels a little crumbly, pulse it briefly with an immersion blender to help it bind – you still want some texture, so don’t over-blend.
- Shape the mixture into 8-10 kofta-style logs or small patties with your hands.
Cook the koftas:
- Heat the olive oil in a large frying pan over medium heat. Shallow fry the koftas for 3–4 minutes on each side, turning carefully, until golden and crisp on the outside. Remove and drain on kitchen paper.
Make the herb oil:
- Finely chop the coriander and mix with the olive oil, rice vinegar, maple syrup and chilli. Stir well and set aside.
Prepare the chopped salad:
- In a bowl, combine the diced tomatoes, cucumber and parsley. Add the olive oil and salt, then mix well to combine.
Serve:
- Warm the flatbreads. Spread each with a generous spoonful of hummus, top with the golden koftas, add a handful of chopped salad and drizzle generously with the herb oil. Serve immediately.
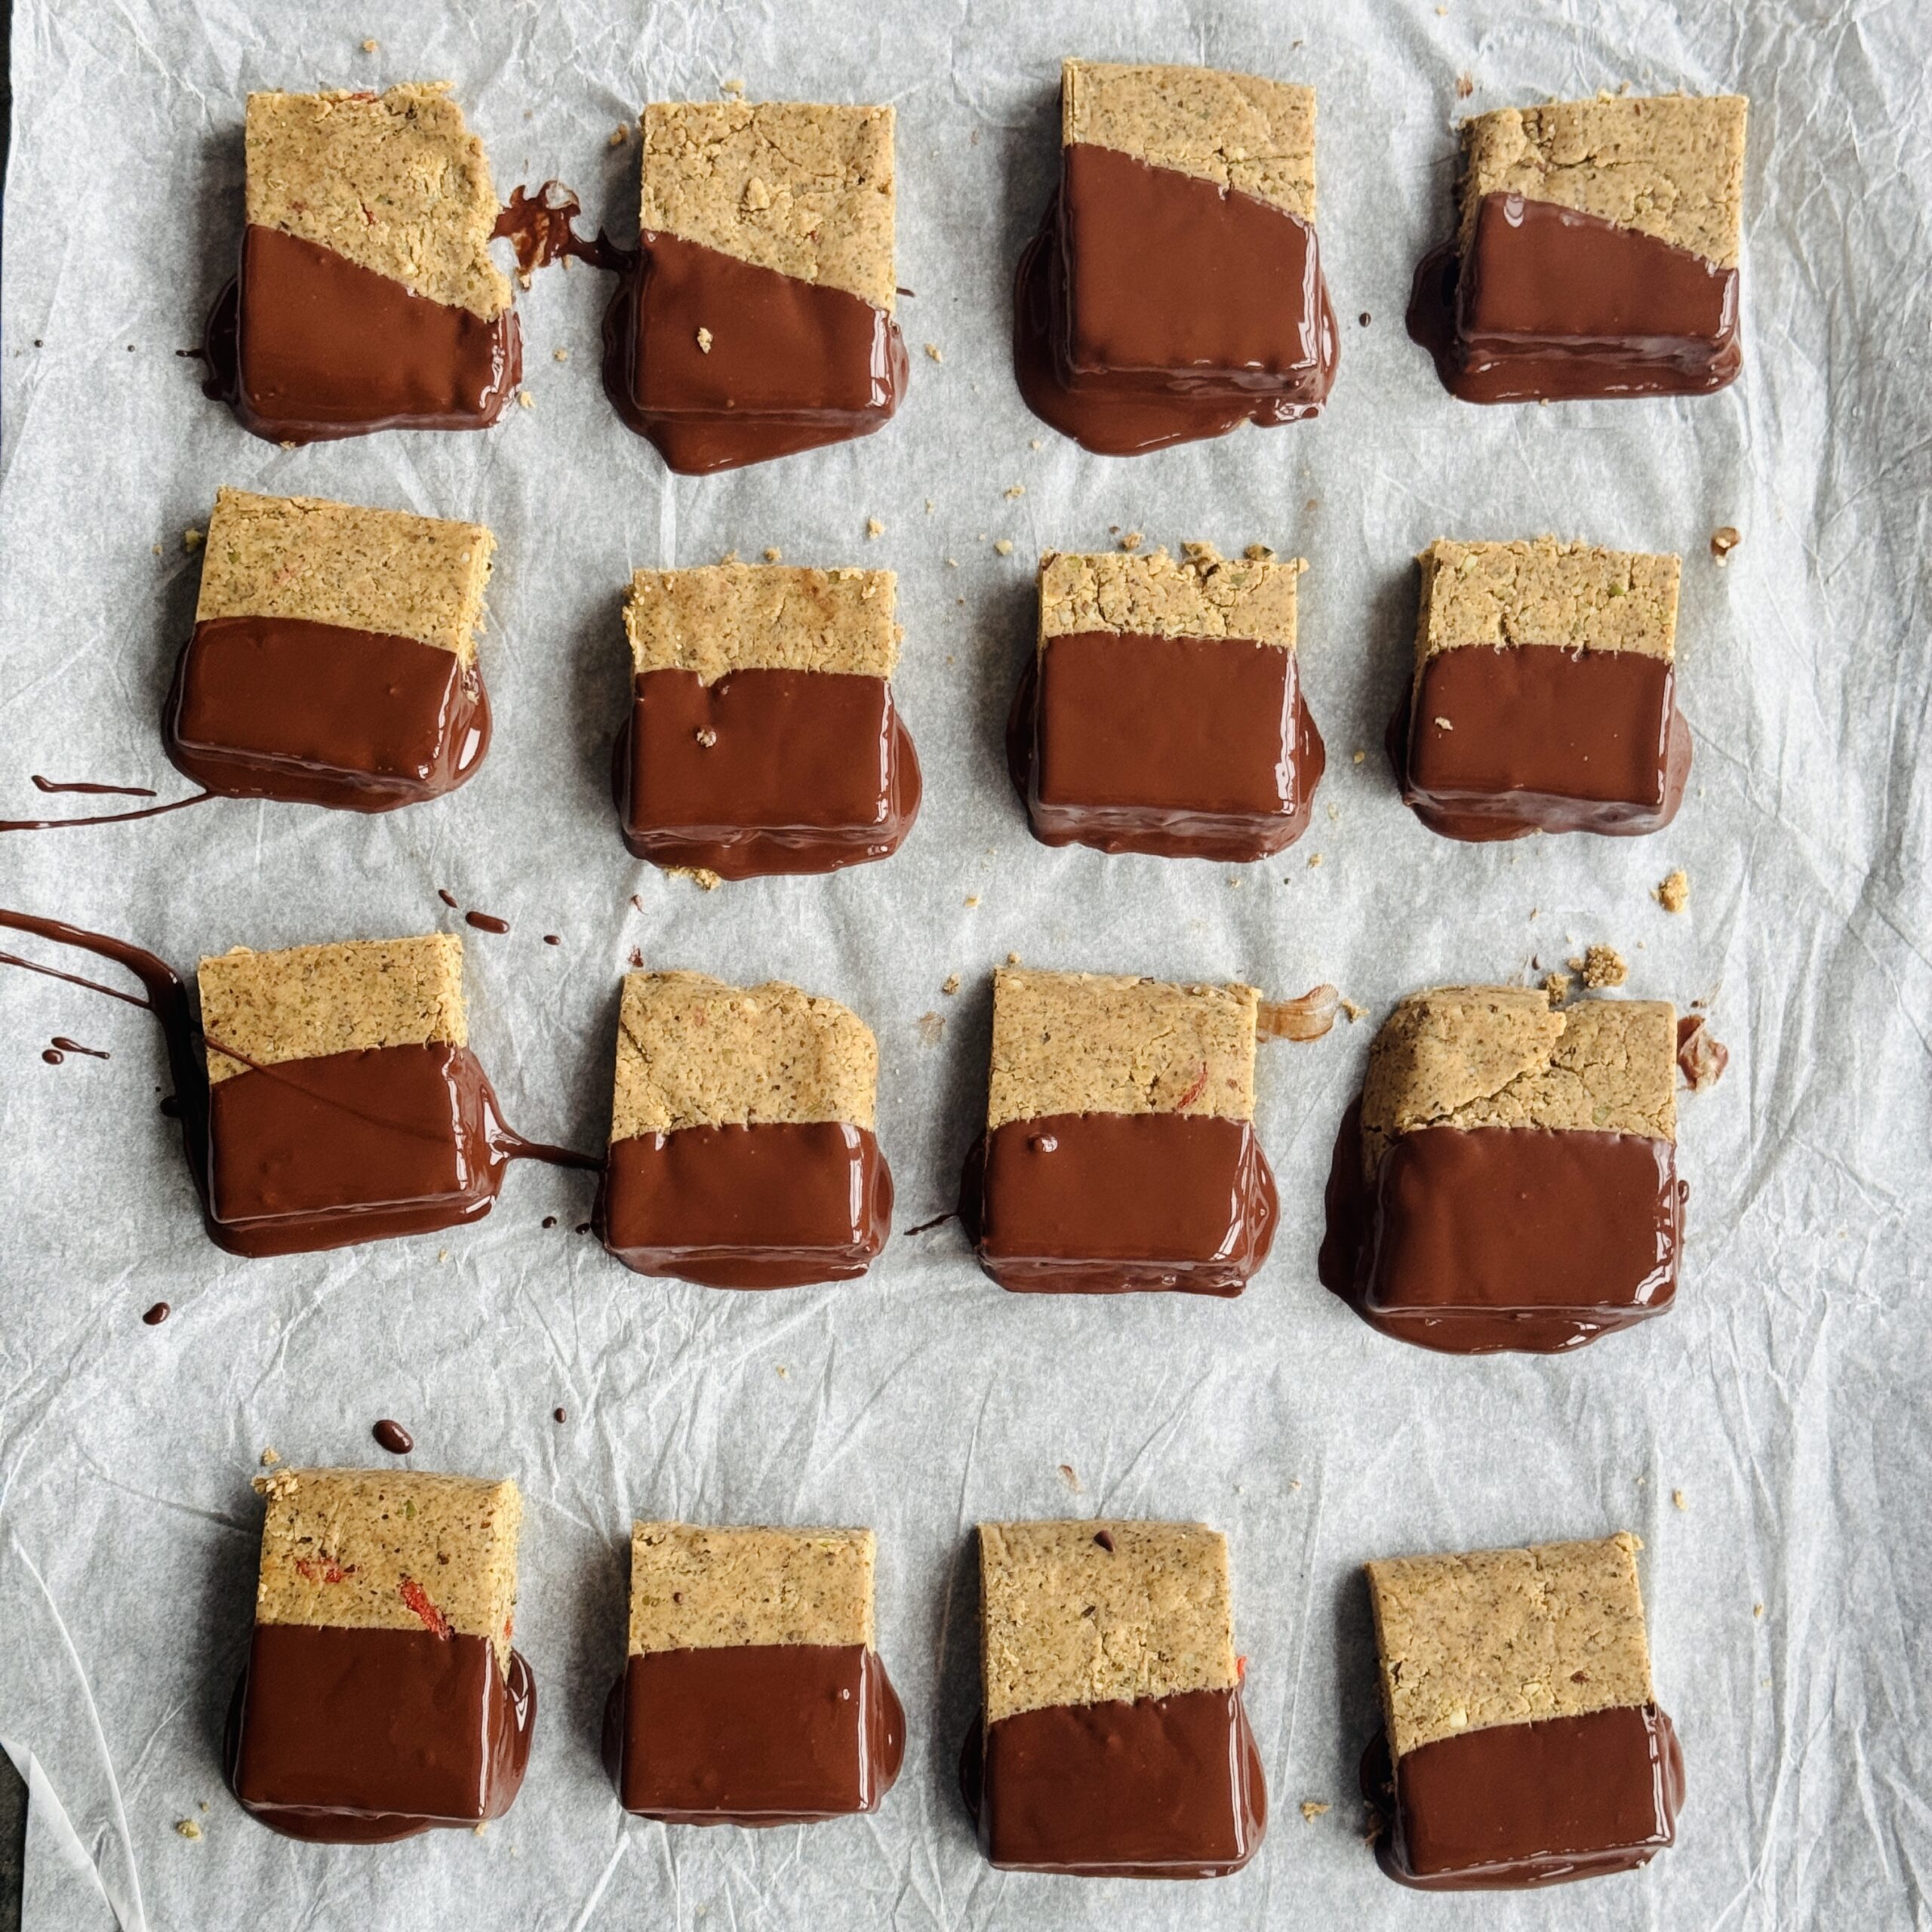
Plant-Based Peanut Protein Bars
Takes 45 minutes
Serves 10
Ingredients
Dry ingredients
- 120 g pumpkin seeds about 1 cup
- 50 g hemp seeds about ½ cup
- 140 g plant protein powder pea or brown rice (about 1⅓ cups, depending on brand)
- 40 g defatted peanut flour or extra protein powder (about ⅓ cup)
- 20 g goji berries optional, for colour (about 2 tbsp)
- Pinch of sea salt
Wet ingredients
- 120 g smooth peanut butter ½ cup
- 80 g maple syrup ¼ cup
- 3 tbsp coconut oil melted
- 1 tsp vanilla extract
- 3 –6 tbsp plant milk or water as needed
Optional chocolate coating
- 100 g dark chocolate
Instructions
Prepare the dry mix
- Add the pumpkin seeds, hemp seeds, protein powder, peanut flour, goji berries (if using) and a pinch of sea salt to a large mixing bowl. Stir well to evenly distribute the protein powder through the seeds.
Warm the wet ingredients
- Place the peanut butter, maple syrup, melted coconut oil and vanilla extract into a small saucepan. Warm gently over a low heat, stirring until smooth and pourable. Do not allow it to boil.
Combine and adjust texture
- Pour the warm wet mixture into the dry ingredients and mix thoroughly using a spatula. Gradually add 3–6 tablespoons of plant milk or water until the mixture comes together into a thick, cohesive dough that holds when pressed but isn’t dry or crumbly.
Press into a tin
- Line a small baking tin (approximately 20 × 20 cm) with parchment paper. Transfer the mixture into the tin and press down firmly using the back of a spoon or damp hands to create an even, compact layer.
Chill and slice
- Refrigerate for at least 30 minutes, or until firm. Remove from the tin and slice into 10 equal bars.
Optional chocolate coating
- Melt the dark chocolate gently, then dip or drizzle over the bars. Allow to set before serving.

High-Protein Savoury Crêpes
Takes 20 minutes
Serves 4
Ingredients
Crêpes Ingredients:
- 120 g chickpea flour 1 cup
- 220 ml water 1 cup
- ½ tsp maple syrup
- 1 tsp olive oil
- ½ tsp salt
Cashew Cream Ingredients:
- 30 g cashew nuts about ¼ cup
- Juice of ½ lemon
- Pinch of salt
- ½ tsp garlic powder
- 90 ml water about ⅓ cup + 1 tbsp
To Serve
- 100 g baby spinach about 4 cups loosely packed
- 25 g pickled red onions about 2 tbsp
Instructions
- Make the batter: Add all ingredients to a blender and blend until smooth.
- Cook the crepes: Heat a non-stick frying pan over medium heat and lightly oil if needed. Pour in enough batter to thinly coat the base of the pan. Cook for 2–3 minutes until set, then flip and cook for another 1–2 minutes.Repeat with the remaining batter.
- Make the Cashew Cream: Blend all ingredients until completely smooth and creamy. Add a splash more water if needed to loosen.
- Serve: Spread the cashew cream over each crêpe, add spinach and pickled red onions, then roll and serve.